ClioSport.net

This is a sample guest message. Register a free account today to become a member! Once signed in, you'll be able to participate on this site by adding your own topics and posts, as well as connect with other members through your own private inbox!

  • When you purchase through links on our site, we may earn an affiliate commission. Read more here.

Mk1 Clio RT with Throttle Bodies

Car  Clio RT
Yes, throttle bodies!

I figured it's about time I put a project thread on documenting the progress of my clio over the last few years at the hands of my other half.

It started a few years ago when the immobiliser did the usual renault trick of giving up :dead:, at that point I asked how to get around the immobiliser and the idea of throttle bodies and standalone management was jokingly thrown in. I reckon he wishes he hadn't now as thats what I said yes to :D

Before they start I'll head off the obvious questions, why not a valver engine? well a valver would have been cheaper and better, so why not a valver? I already had this one and most of the bits were in the garage for the conversion (another story!). Why not a 5GTT engine or 1.8 20vT, again these bits weren't lying around, plus this started before Flan found VAG engines :cry:. More importantly it was different, and t'other half fancied it as a challenge, bit of a learning curve too !

On with the project, it's mostly copied over from another Renault forum thats seems to have disappeared so should be over a shorter time span than the project has taken, last time it was out it went to FCS 2007 :cry: :cry:

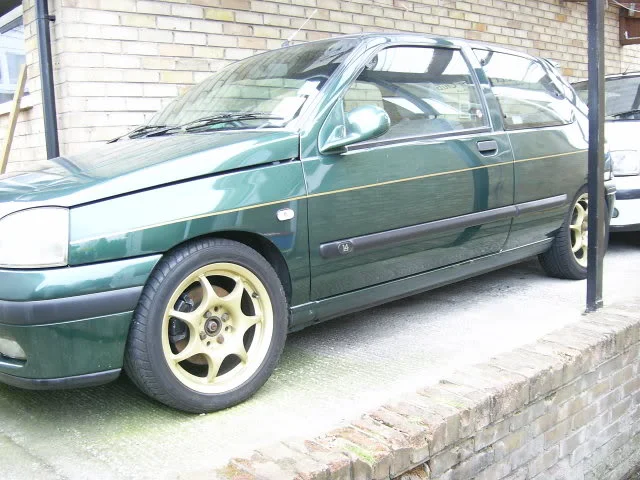
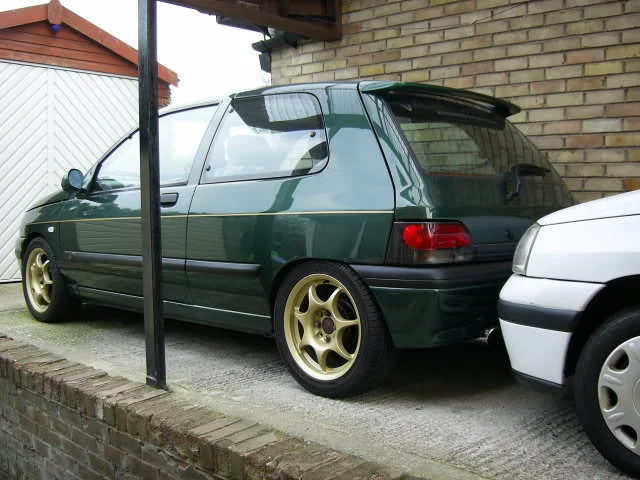
The car looks like this;

PIC_0023.webp


PIC_0025.webp


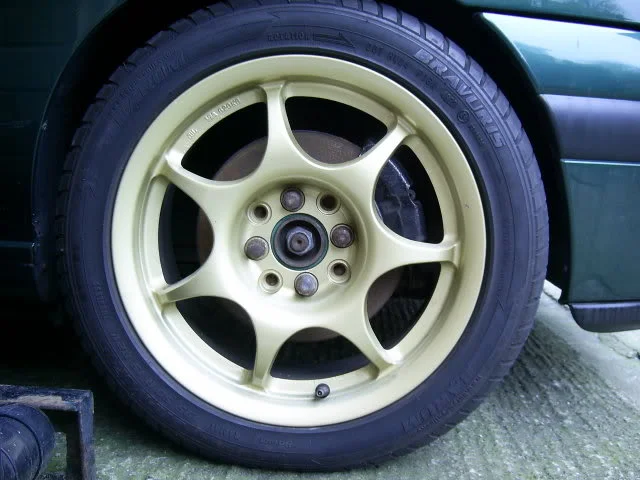
not too many external changes, its lowered on Spax springs, delocked, tailgate smoothed, spoiler and some forged lightweight wheels of unknown Japanese origin.

The first round of mods added the 16v front brakes;
PIC_0030.webp


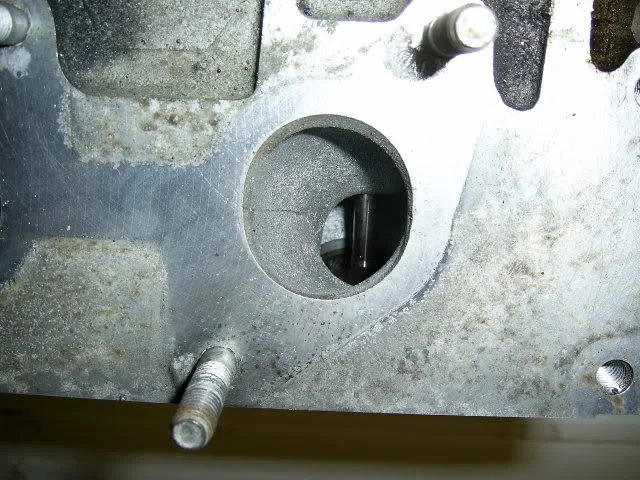
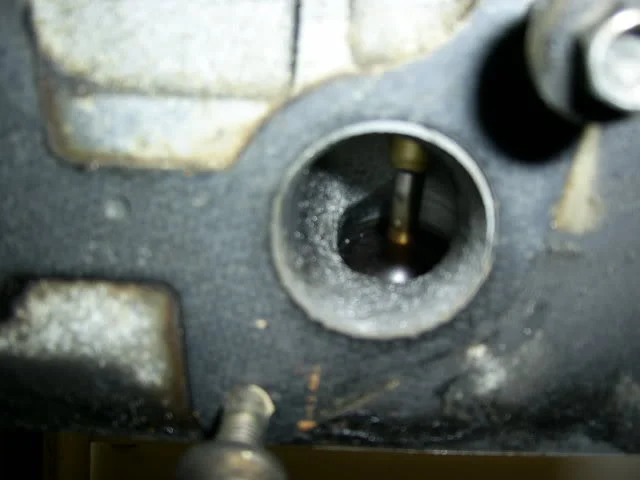
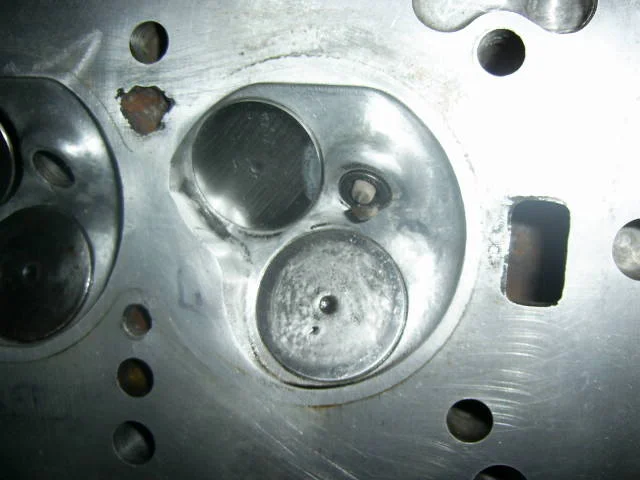
Shortly after it got a ported and polished early head for the renault energy engine. The earlier one is better than the later one as the ports are a much better design.

Early
PIC_0036.webp


Late
PIC_0040.webp


the ports got polished clean, the chambers tidied up and new inlet valves
carpics030.webp


carpics027.webp


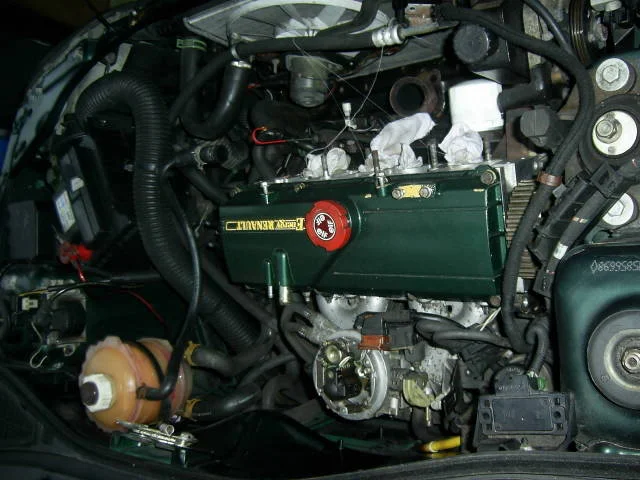
while all this was going in it got a colour coded rocker cover
carpics033.webp


Nic
 
A couple of months later a busted CV joint and a broke ball joint prompted a rebuild and upgrade of some of the suspension. I added 16v driveshafts and the front end was rebuilt with all new bushes and bolts

carpics017.webp


cleaned all in the arches and stuff

carpics015.webp


and polybushes for the wishbones

carpics016.webp
 
Then the immobiliser broke and the bits started arriving and being dug out from garage recesses...

Race tech oil pres/temp gauge
PIC_0044.webp


and a Forge alloy header tank
PIC_0042.webp


The tb's are controlled by a Megasquirt. The car originally had single point injection so going to multipoint on the tb's required the standalone management. Whilst we were at it we figured the dizzy might as well go make room for a Ford EDIS set up.

A few random tb pics,

head end of the home made stub manifold.
PIC_0055.webp


filter end, with the very sexy looking mini filters
PIC_0057.webp


and then a picture of the first trial fit
PIC_0012-1.webp
 
The trial fit highlighted a few issues, one of which being the brake lines in the bulkhead being in the way of the filters, no problem just make new ones...

The pipe was cut roughly to length after tracing out the path they were to take using hose pipe. Hose pipe was used to try and accurately simulate bend radii, it cross my mind to use it instead :cry: :cry:

Once cut to length the lines were all bent, didn't fancy buying a pipe bender so decided to bend them by hand. Well after using a 1" socket I reckon most of the bends have gone pretty well

Lines all bent to shape
ClioBrakeLine.webp


The 3 green brake lines running across the bulkhead are the ones to be replaced
Cliolines.webp


Mental note to self, and maybe helpful to others, just because you think you've emptied the brake fluid reservoir by syringeing all the fluid out doesnt actually mean its empty :dead: the next pic is of the master cylinder with reservoir removed but after cleaning quite a lot of spilt fluid.

ClioMAsterCylinder.webp
 
The replacement brake lines went in, they fit OK, not as good as I would have liked and maybe they'll get done again eventually, probably braided all the way through but they'll do for now.

Master cylinder end
ClioBrakeLine2.webp


General view, you can see where they get a bit untidy
ClioBrakeLine1.webp


A couple of manifold shots, this was the first attempt at the manifold, and at welding !
ClioManifold3.webp


Nice welding :cry:
ClioManifold2.webp


Started to remove ALL the renault ECU related wiring, loom from the ECU here broken out of all the protection to see what needed to stay and what could come out,
LoomOut.webp


Eventually got all this removed
LoomRemoved.webp


Next 2 pictures were all that was left in the engine bay, top one has all the lights and stuff in, bottom one is the starting/charging wires loomed together again.
LoomTidied.webp

LoomTidied1.webp


Throttle bodies back in with Injector and TPS wires loomed
LoomTidied2.webp


This one has old renault loom at the bottom, new loom at the top where the coolant temp sensor and Lambda wiring join
LoomTidied3.webp


And lastly for now the wires so far that need to go into the car for he megasquirt.
LoomNew.webp


At this point the coilpack still needed to find somewhere in the engine bay and wire it in, adding the EDIS wires to the loom into the car.
 
Next job was getting the EDIS set up in. The reason behind ditching the dizzy was that standalone could be set up to run wasted spark better and as megasquirt was the first foray into aftermarket management it seemed like a good idea to go with a set up that has plenty of support and knowledge from the MS forums.

The main bit of this was getting a trigger wheel stuck on somewhere, and mounting a crank sensor somewhere near it. The trigger wheel was easy enough once the crank pulley was turned down to ensure a true running trigger wheel, but the sensor bracket took a few goes :dead:

Got there in the end though, and it looks something like this.
cliotriggerwheel.webp


Also made a bracket and attached the EDIS module to the nearside turret
clioEDIS.webp
 
I think you will see a lot more gains getting a proper metal manifold without using silicon pipes and then using some trumpets. From what i've seen the airflow is ruined with the DIY method.
We do a supersprint manifold which will fit your car. If you want one for a good price we have a few we are trying to clear..

Kev
 
As above, a good base manifold and a decent set of trumpets on the port openings will make a significant difference.
 
I think you will see a lot more gains getting a proper metal manifold without using silicon pipes and then using some trumpets. From what i've seen the airflow is ruined with the DIY method.
We do a supersprint manifold which will fit your car. If you want one for a good price we have a few we are trying to clear..

Kev

That supersprint wont fit this car.

Unfortunately Midge is right, the manifold linked is for a valver, the energy engines have the engine 'the wrong way round' :cry:

thanks for the thought though!
 

Woah! bravo for something different and the best of luck!

I like this for pure "cos i can"

I'd have done a few things different, but overall, I think that's a really cool project :D


Cheers for the love :)

As it's a learning curve, a rather large learning curve!! there are a few things we would have done differently too, the inlet manifold in the first guise and the upcoming mk2 edition is a compromise of skill and resources, other half knows it could be better and plans for ongoing improvements. However it's all been done very cheaply, we reckon all in the budget is about £450 and that includes buying the megasquirt and the throttle bodies, all the raw materials plus a full overhaul of all nuts, bolts, gaskets, seals and a clutch!

more updates on their way :)

Nic x
 
More updates...

Loom went in;
Clioloomsin.webp


EDIS Plug made off
EDISplug.webp


Coil Pack Plug and one for a capacitor where it grounds. Found a blnking plate for the distributor on a megane in a scrapyard, it also donated it's coilpack bracket..
CoilPlugs.webp


Thermostat back in, I had to block one of the coolant lines off that went through the inlet manifold, stuck a temp sensor in there for now as it was the right size. Something to sort properly later, probably with a brazed in plug as the megane setup was too different to carry over;
cliothermostat.webp


Cobbled together a throttle cable bracket from a coil pack bracket off a megane
cliothrottlebracket.webp


another tb shot, the blue hose at the back is for the brake servo
cliotbs.webp


Drilled a hole through the bulkhead in the scuttle area for the loom to get into the car
cliobulkheadhole.webp


And progress with the loom in the car. The dash was mostly stripped out to route the loom behind it.
ClioDashOut.webp
 
Different...Labour of love i predict.

Aye, a LOT of hours have gone into it, some through mistakes, and some through love. When he finishes this I'll let him crack on with his own project;

DSC00656.webp


lol at the 2 'spare' clio heads in the background !
 
Coil pack bracket 'made' :D it was a ford bracket cut down to suit the clio then cleaned up and sprayed black like everything else.
cliocoilbracket.webp


Bracket in and coilpack bolted in and connected up, capacitor thingy on the side.
cliocoilin.webp


But then a problem, the ford leads believe it or not don't fit on a renault :cry:
clioshortleads.webp


Solution turned out to be DIY as usual! Decided to have a go at making my own leads, renault ends at one end and ford coilpack ends at the other.

I ordered all the bits from (free plug, hope this is allowed on here!);

http://www.autoelectricsupplies.co.uk/

Parcel arrived with these bits in
DSC01375.webp


Cut the ford ends off some spare plug leads
DSC01377.webp


trimmed back the insulation
DSC01380.webp


and got on with crimping the ends on.
DSC01381.webp


I've got to admit, it was a pig fcuker of a job, and not one I'm in a hurry to repeat. Getting the old ends off was difficult, and crimping the new ones on wasnt easy as the silicon insulator is quite slippery. Getting the spark plug boots on was even harder as they were a snug fit, plenty of vaseline used ;)

Got them finished in the end though and they look a bit like this once fitted
DSC01384.webp


Painfully having spent hours making these leads Magnecor phoned me back 3 weeks after having faxed through a request for some custom leads, they only wanted £40 plus delivery for a set made up so I bought them. DOH
 
The wheels are made by Enkei, by the way. Nice wheels. Yours are popular on MX5's etc.

Thanks ! we've wondered if they might be enkei's, they came off a CRX del sol that was imported from Japan, and are by far the lightest 15 inch wheels we've ever found.

Nic x
 
Soooo the new magnecor leads came through, they are pretty good, and somehow cheaper than an off the shelf kit ??

PIC_0139.webp


PIC_0141.webp


More wiring pictures, here everything had been all loomed through into the car, a fuse box had been fitted and a relay wired in that supplies power to the injectors and the megasquirt.

PIC_0148.webp


PIC_0147.webp


About this time the megasquirt build was 'finished'.... or so we thought :cry: turned out that there was some stormy times ahead with modifications to it to run wasted spark and general lack of knowledge of anything ECU related...

Nic
 
The car and engine had been sat for quite not moving or turning so we decided to crank it over a few times on the starter to at least ensure oil was moving about. Gave it a blast on the starter and no oil pressure :dead: Spun it over some more and still no oil pressure, so checked the sump, oil was present, checked the oil pressure gauge was plumbed in correctly, it was. Spun it over some more, still no pressure, s**t.

Decided with absolutely no testing that the oil pump was goosed and so removed the engine and box. Then did some research, and found that with a geared oil pump that if it drains dry it can't create enough vacuum to lift oil from the sump. A classic V8 build trick is to apparently pack the pump with vaseline as that wont shift if the engine is stored for a while. Either that or prime the pump by backfilling it from the oil filter. Having stripped the engine we priced a new one up from Renault, can't remember how much it was but it would in insurance terms have written the car off!! So moved on to checking the pump and found absolutely nothing at all wrong with it... DOH!!

Took the opportunity whilst the engine was out to baffle the sump and give everything a full freshen up with new gaskets seals etc

Couple of pics of the engine ready for re-installation

digpics052.webp


dscf0419-1.webp


Also decided at this point to freshen the engine bay and subframe up and liberally coat the underside in waxoyl;

digpics043.webp


digpics042.webp


some nugget making engine noises on his day out from the 'hospital' :cry: :cry:

digpics017.webp


digpics050.webp


Nic
 
Then we were lucky enough to find a listing on ebay for an exhaust manifold for the renault energy engine, these are as rare as the proverbial rocking horses poop so a last dying second sniping session was employed to ensure a winning bid.

From researching over the years I know that supersprint did make a manifold to fit the Energy engine, but only ever listed as for the 1.6 in a megane. When this manifold came it wasn't a supersprint one, blatantly a copy but didnt have a supersprint plate welded on and the part number egraved into it didnt match so no idea on it's source.

Got the manifold, fitted it and found the first problem, it fit the engine but sure as hell didn't fit the car :roll: nevermind, some more precision welding was employed along with a collection of bits of pipe and flanges from various sources to create this...

cliolinkpipe.webp


and fitted...

cliolinkpipefitted.webp


wrapped the manifold and fitted it

clioexhmanifold.webp


also rolled the car forward almost into the garage so at least we'd be a bit warmer when working on it. This was the first time it'd been back on it's wheels in a long time and I'd forgotten how much of a PITA or more correctly 'the back' working on lowered cars is :cry:

Clioigarage.webp


Nic x
 
No pictures with this updae, but more on those ECU woes mentioned earlier. The engine went back in fairly easily and everything was reconnected, plumbed in and bolted up and ready to go. So fresh start one morning, hot cup of coffee in hand battery fully charged and a spare one on standby we cranked it over, and nothing happened….. absolutely nothing. Quick check over and he'd not wired up the starter motor, phew, easy fix.

With that fixed it was time for another brew, and crank it again, it turned, it made oil pressure and then it backfired so loud the small child on next doors drive nearly cried! :cry: Definitely wasn’t trying to start though. Must be the timing we figured so made another brew and spent a while double checking the timing, making sure the trigger wheel was straight, making sure the crank sensor was in the right place and the wire was connected. Pulled the fuel pump wiring and tried to trigger light it, for some reason EDIS wasted spark coil packs don’t seem to work well with timing lights? Eventually after what seemed like hours of checking the car over it was decided it must be the ECU, gutted time to remove it and retire to the garage with a brew.

Cue several more nights in the garage going over the assembly instructions for the megasquirt, checking and rechecking connections and jumper wires and the mods done for EDIS to work, all checked out fine, and then checked out fine again. At this point the garage was put on suicide watch! Until after despairing for a few days he accidentally poked a wire, and realised it wasn’t even soldered to the board, hurrah issue found, time for a celebratory brew!!

With the wire now soldered, the ECU re-installed, and the fuel pump plugged in again and cranked it…… nothing…. nothing….. nothing…… BANG. Hmmm that didn’t fix it, brew time. Must still be an issue with the ECU, about this time Dave Walker was writing in his pages in PPC magazine something along the lines of 90% of reported ECU failures were nothing to do with the ECU, well obviously I was one of the 10% and the fact he was talking about professionally built Emerald units and I was looking at a DIY Megasquirt made it doubly sure it must be the ECU.

The car was definitely getting fuel, and definitely getting spark, just nowhere near each other or at the right time. So it could only be ECU related…… maybe. Anyway several more nights of brews, head scratching and posts on the MS forums didn’t resolve the ECU issues, internal wiring was all fine, the code checked out and even my settings were looking reasonable, maybe the ECU was OK.

So one last weekend of trying before admitting defeat and trailering it somewhere. Up early again, made a brew and went out to fit the ECU and battery to the car. Cranked it over a few times and got nothing but backfires, leaned the fuel out and it’d spit out the intake, richen it up and backfire out the exhaust. Everything said timing but having checked it AGAIN we knew that was spot on. Another brew and we were desperate to try anything so swapped the plug leads around, cranked it over and...................................................... it ran, it actually ran! Turns out when wiring the trigger wires for the coilpack they had been connected up the wrong way round 1+4 was on 2+3 and vice versa so the timing were seeing on the timing light was spot on but 360 degrees out of phase, essentially firing on the exhaust stroke, thus the horrendous backfires and spitting out the inlet for the cylinders on the inlet stroke were getting ignited!! Lucky we didn't have a serious fire in retrospect.

That wasn’t the end of the problems though, the backfires had done a good job of blowing the tb’s off the stubby inlet manifold, the silicon joiners not providing as much grip as hoped and now that it was dragging a lot of air in it wasn’t making very much vacuum on cylinder one causing it to run very lean whilst the other 3 cylinders ran very rich the ECU seeing no vacuum were fuelling for wide open throttle. The next few weeks were spent thinking up and designing a new manifold, other half dabbled with the idea of a composite one but having priced up a suitable epoxy resin that would tolerate heat and exposure to fuel that idea has been put on hold for a bit. We also looked at getting one made up by Bogg Bro’s or similar but again due to cost canned that idea and eventually settled on making a better effort than last time from mild steel. A couple of ebay purchases later the steel tube for a new one was delivered and some time spent with a brew, and a pencil came good with a new design, and more importantly some proper angles to cut at. A further few hours later, and more brews we had, sat on the bench, one kit form manifold. Just need to glue it together and attach some throttle bodies!

Nic
 
Next up it was time to do something about the inlet manifold and add some structural strength to it. As the silicon hoses had proven to be the weak link we figured removing as much of them as possible would be a good start, more ebay purchases later and more steel tube was in the garage.

Queue some mad scientist type maths to work out port spacings on the head, the bodies, the desired distance between them and the rquired angle of fandangle

clioinletmk2maths.webp


pah, who needs fancy catia packages, only a little ironic considering other halfs background in aerospace engineering :cry: :cry:

Some cutting later we have a kit form inlet manifold

clioinletmk2flatpack.webp


checked they would actually line up..

clioinletmk2test1.webp


clioinletmk2test.webp


cut the silicon joiners down to minimum length

clioinletmk2rubbers.webp


used the hot metal glue gun to stick it all together and gave it a coating of paint to hide some of the shame

clioinletmk2finished4.webp


clioinletmk2finished3.webp


clioinletmk2finished2.webp


clioinletmk2finished.webp


Lessons learned here were that the tubes should really have been chamfered prior to welding to get better penetration, would have saved the welds building up round the outside and left the final thing much prettier. However as has been mentioned it's all a learning game and the welds are at least strong if not pretty (I'm told !!)

Nic
 
Next everything started to go back together, somewhere in all this we decided that the coilpack that was bolted to the side of the head;

DSC01386.webp


was going to move. I found a strutbrace for a clio, he chopped the ford coilpack bracket up and got busy with the glue gun and the paint again.

cliostrutbrace.webp


cliostrutbracecoilpack.webp


Also found a suitable new home for the Innovate wideband controller as the sensor had now moved from near the head in the old manifold to in the link pipe with the new exhaust manifold.

cliowideband.webp


Nic
 
Top stuff.
I used to have a MK 1 1.4 RT, closest i got to modifying it was trying to buy a Laguna throttle body to fit lol.
Be interested to see how this goes mate.
Subscribed.
 
Back
Top