ClioSport.net

This is a sample guest message. Register a free account today to become a member! Once signed in, you'll be able to participate on this site by adding your own topics and posts, as well as connect with other members through your own private inbox!

  • When you purchase through links on our site, we may earn an affiliate commission. Read more here.

Acid yellow 182 project

Car  Clio 182
So I thought I would make a thread on my 182 and keep track of all the work that done or will be doing.

After owning the car for 4 yrs, Ive already done a bunch ranging from:

Full respray to clio v6 acid yellow
Low boost kit
Coilovers
Top end engine rebuild
Gearbox rebuilt with a blackline ATB
And a few more small bits

Theres a few bits and bobs Im looking to sort and Im hoping to turn this into a clean car that I can enjoy on track and take to shows

0bd44e18-c576-43de-9608-80710fad742c.jpeg


I have a bad habit of not taking enough pictures so hopefully this thread will help me with that😭

Currently, the car is on stands with the engine removed as the sump seems to be leaking so I thought id remove the engine, sort the leak and get round to painting the engine bay to match the rest of the car
IMG_0943.jpeg

After removing and wiring and boost pipes out the bay I gave it a decent clean as it was caked in dirt oil and grease
IMG_1009.jpeg


Fast forward to today, I wanted to spend some time on getting the engine bay prepped for some epoxy primer and I also wanted to see if i could do anything to my front jacking points…

Which led me to this…

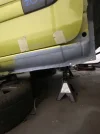
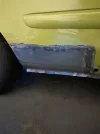
IMG_1042.jpeg

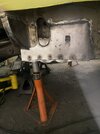
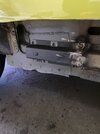
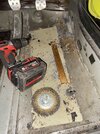
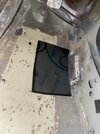
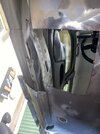
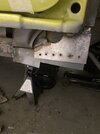
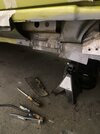
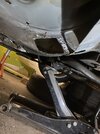
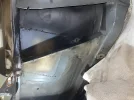
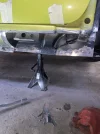
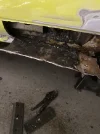
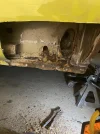
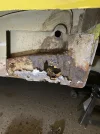
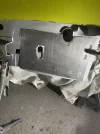
I knew they were bad and needed some attention but I had no idea what was hiding under the underseal… I decided to get stuck in and cut out any bad metal and make a plan on welding in some fresh metal
IMG_1044.jpeg
IMG_1046.jpeg
IMG_1048.jpeg
IMG_1050.jpeg
IMG_1054.jpeg

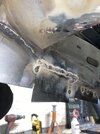
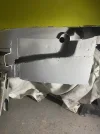
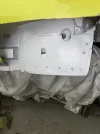
So this is where Im up to now, still need to do the N/S but I might concentrate on the O/S for now
 
This is beautiful! Do you have any better/more pictures to drool over? The colour suits it really well!
Good progress on the rust repairs too. Strange how these are so bad, I was sure they were galvanised from the factory!
 
This is beautiful! Do you have any better/more pictures to drool over? The colour suits it really well!
Good progress on the rust repairs too. Strange how these are so bad, I was sure they were galvanised from the factory!
Im so bad for taking pictures but Im sure i have some better ones

I think the factory underseal hides a lot of the horrors underneath, as soon as the rust sets in, its only a matter of time sadly, im glad Im sorting mine while it’s relatively minor

43c141cc-2aad-415c-9dde-e3723f28cbb3.jpeg
3e6fbd5c-0bd9-4d6a-acc4-b392a053b78e.jpeg
2771b28d-5e3c-4667-bc22-36fc9abfec2a.jpeg
db6b0c3e-02b4-406c-9bb4-effb2ff82d37.jpeg
874c20b0-0664-4f9f-8737-ffc068096cf5.jpeg
81cd39f8-d684-402d-821f-f3a5286a8d4a.jpeg
0fc9efff-175a-47b6-898b-ab869b6da813.jpeg
IMG_6930.jpeg
IMG_6973.jpeg
IMG_6989.jpeg
IMG_6992.jpeg
 
Those pictures really show off the colour. Suits it so well!! (I know it’s a Clio (v6) colour, but still!) I wonder why they didn’t offer it alongside liquid yellow and petrol blue.
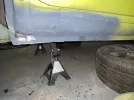
 
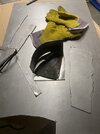
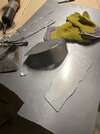
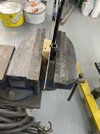
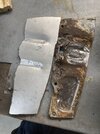
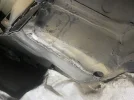
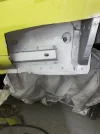
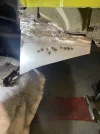
Got round to making some of the repair pieces. I don't have access to a bead roller so I decided to make something up and it worked out pretty well, its not 100% perfect but does the job.
 

Attachments

  • IMG_1094.jpeg
    IMG_1094.jpeg
    1.9 MB · Views: 148
  • IMG_1095.jpeg
    IMG_1095.jpeg
    1.6 MB · Views: 156
  • IMG_1096.jpeg
    IMG_1096.jpeg
    1.7 MB · Views: 152
  • IMG_1097.jpeg
    IMG_1097.jpeg
    2.3 MB · Views: 148
Looks great, take loads of pictures of the sill repairs as it's a job i need to after looking under it recently haha, good work!
 
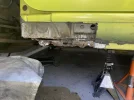
Made some decent progress on the O/S front. The rust seems to be never ending lol
 

Attachments

  • IMG_1305.jpeg
    IMG_1305.jpeg
    1.6 MB · Views: 117
  • IMG_1162.jpeg
    IMG_1162.jpeg
    2.1 MB · Views: 111
  • IMG_1260.jpeg
    IMG_1260.jpeg
    1.6 MB · Views: 122
  • IMG_1263.jpeg
    IMG_1263.jpeg
    1.3 MB · Views: 113
  • IMG_1277.jpeg
    IMG_1277.jpeg
    1.6 MB · Views: 107
  • IMG_1278.jpeg
    IMG_1278.jpeg
    1.7 MB · Views: 124
  • IMG_1283.jpeg
    IMG_1283.jpeg
    1.4 MB · Views: 111
  • IMG_1309.jpeg
    IMG_1309.jpeg
    1.9 MB · Views: 103
  • IMG_1310.jpeg
    IMG_1310.jpeg
    1.7 MB · Views: 111
  • IMG_1312.jpeg
    IMG_1312.jpeg
    1.7 MB · Views: 104
Made some decent progress on the O/S front. The rust seems to be never ending lol
I hear you on the rust. I have all that work ahead of me.
One thing about yours, it’s going to look absolutely unreal when it’s finished. It’s a brilliant colour. Nice skills to be able to do the work yourself, impressive.
 
I hear you on the rust. I have all that work ahead of me.
One thing about yours, it’s going to look absolutely unreal when it’s finished. It’s a brilliant colour. Nice skills to be able to do the work yourself, impressive.
Thanks mate, Im hoping to get it done before june/july but theres still loads to do. Best thing to do is get ripped in and learn along the way
 
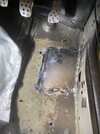
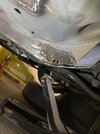
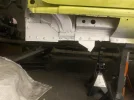
So I've got all 4 corners welded and theyre pretty much ready for some epoxy primer. I ended up having a crack at making the outer sills for the N/S. The front wasnt so bad as its a fairly simple shape and itll be covered by the wing and side skirts anyways. The rear was a bit more difficult to make with limited tools but itll need some work getting it looking right but ill show this when it comes to the filler work. For the O/S I opted for a aftermarket sill to save some time and it made it so much easier just to cut and weld these panels in.
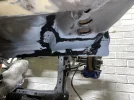
Ive started prepping the engine bay and front wheel arches which are pretty much ready for paint. Im debating whether to record the painting process and post it to youtube, let me know if anyone would be interested in seeing this.

Overall its been a long process getting to this point esp as I only have a limited amount of time in a week to get it done. I really just want to get it back on the road at this point but theres still plenty more work to be done
 

Attachments

  • IMG_1338.webp
    IMG_1338.webp
    1 MB · Views: 3
  • IMG_1342.webp
    IMG_1342.webp
    1.1 MB · Views: 3
  • IMG_1877.webp
    IMG_1877.webp
    876.1 KB · Views: 3
  • IMG_2047.webp
    IMG_2047.webp
    346.2 KB · Views: 4
  • IMG_2048.webp
    IMG_2048.webp
    299.7 KB · Views: 4
  • IMG_1496.webp
    IMG_1496.webp
    847.9 KB · Views: 4
  • IMG_1501.webp
    IMG_1501.webp
    1.3 MB · Views: 4
  • IMG_1503.webp
    IMG_1503.webp
    1.1 MB · Views: 4
  • IMG_1524.webp
    IMG_1524.webp
    1.3 MB · Views: 4
  • IMG_1525.webp
    IMG_1525.webp
    1.3 MB · Views: 4
  • IMG_1527.webp
    IMG_1527.webp
    1.1 MB · Views: 4
  • IMG_1536.webp
    IMG_1536.webp
    1,016.7 KB · Views: 4
  • IMG_1583.webp
    IMG_1583.webp
    868.1 KB · Views: 3
  • IMG_1586.webp
    IMG_1586.webp
    1.3 MB · Views: 3
  • IMG_1598.webp
    IMG_1598.webp
    1.1 MB · Views: 3
So I've got all 4 corners welded and theyre pretty much ready for some epoxy primer. I ended up having a crack at making the outer sills for the N/S. The front wasnt so bad as its a fairly simple shape and itll be covered by the wing and side skirts anyways. The rear was a bit more difficult to make with limited tools but itll need some work getting it looking right but ill show this when it comes to the filler work. For the O/S I opted for a aftermarket sill to save some time and it made it so much easier just to cut and weld these panels in.

Ive started prepping the engine bay and front wheel arches which are pretty much ready for paint. Im debating whether to record the painting process and post it to youtube, let me know if anyone would be interested in seeing this.

Overall its been a long process getting to this point esp as I only have a limited amount of time in a week to get it done. I really just want to get it back on the road at this point but theres still plenty more work to be done
 

Attachments

  • IMG_1626.webp
    IMG_1626.webp
    975.5 KB · Views: 3
  • IMG_2051.webp
    IMG_2051.webp
    589.7 KB · Views: 3
Back
Top