ClioSport.net

This is a sample guest message. Register a free account today to become a member! Once signed in, you'll be able to participate on this site by adding your own topics and posts, as well as connect with other members through your own private inbox!

  • When you purchase through links on our site, we may earn an affiliate commission. Read more here.

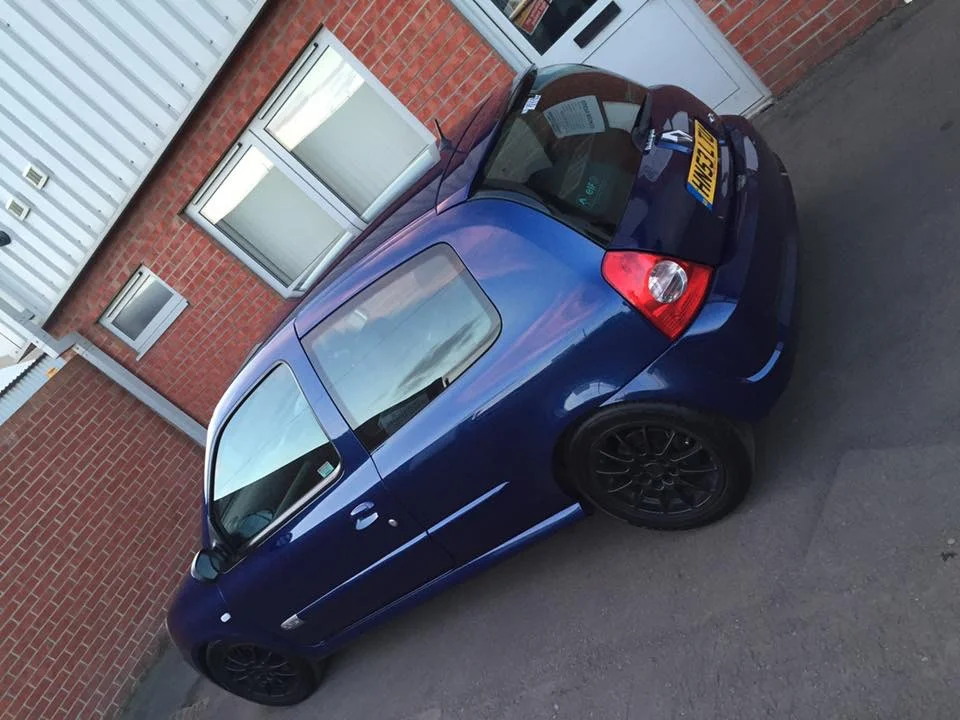
172 Monaco blue track car build

Stuiemc

ClioSport Club Member
Car  Audi RS3, Clio 172
This build started back in April 2016, a few of my mates got into buying and selling cliosports, I had just sold my last build and got talked into buying a Monaco blue from my mate.

When I first seen the car I knew I wanted it, it seemed all straight and well maintained, that was until I seen the interior . The previous owner must of used the car for dog runs to the beach, it stunk of wet dog and was covered in dog hair. This didn't really bother me as it would be a fully dedicated track car. The belts were done at RS tuning at 69k and the car currently stood at 89k so still plenty miles before they'll need re-done.

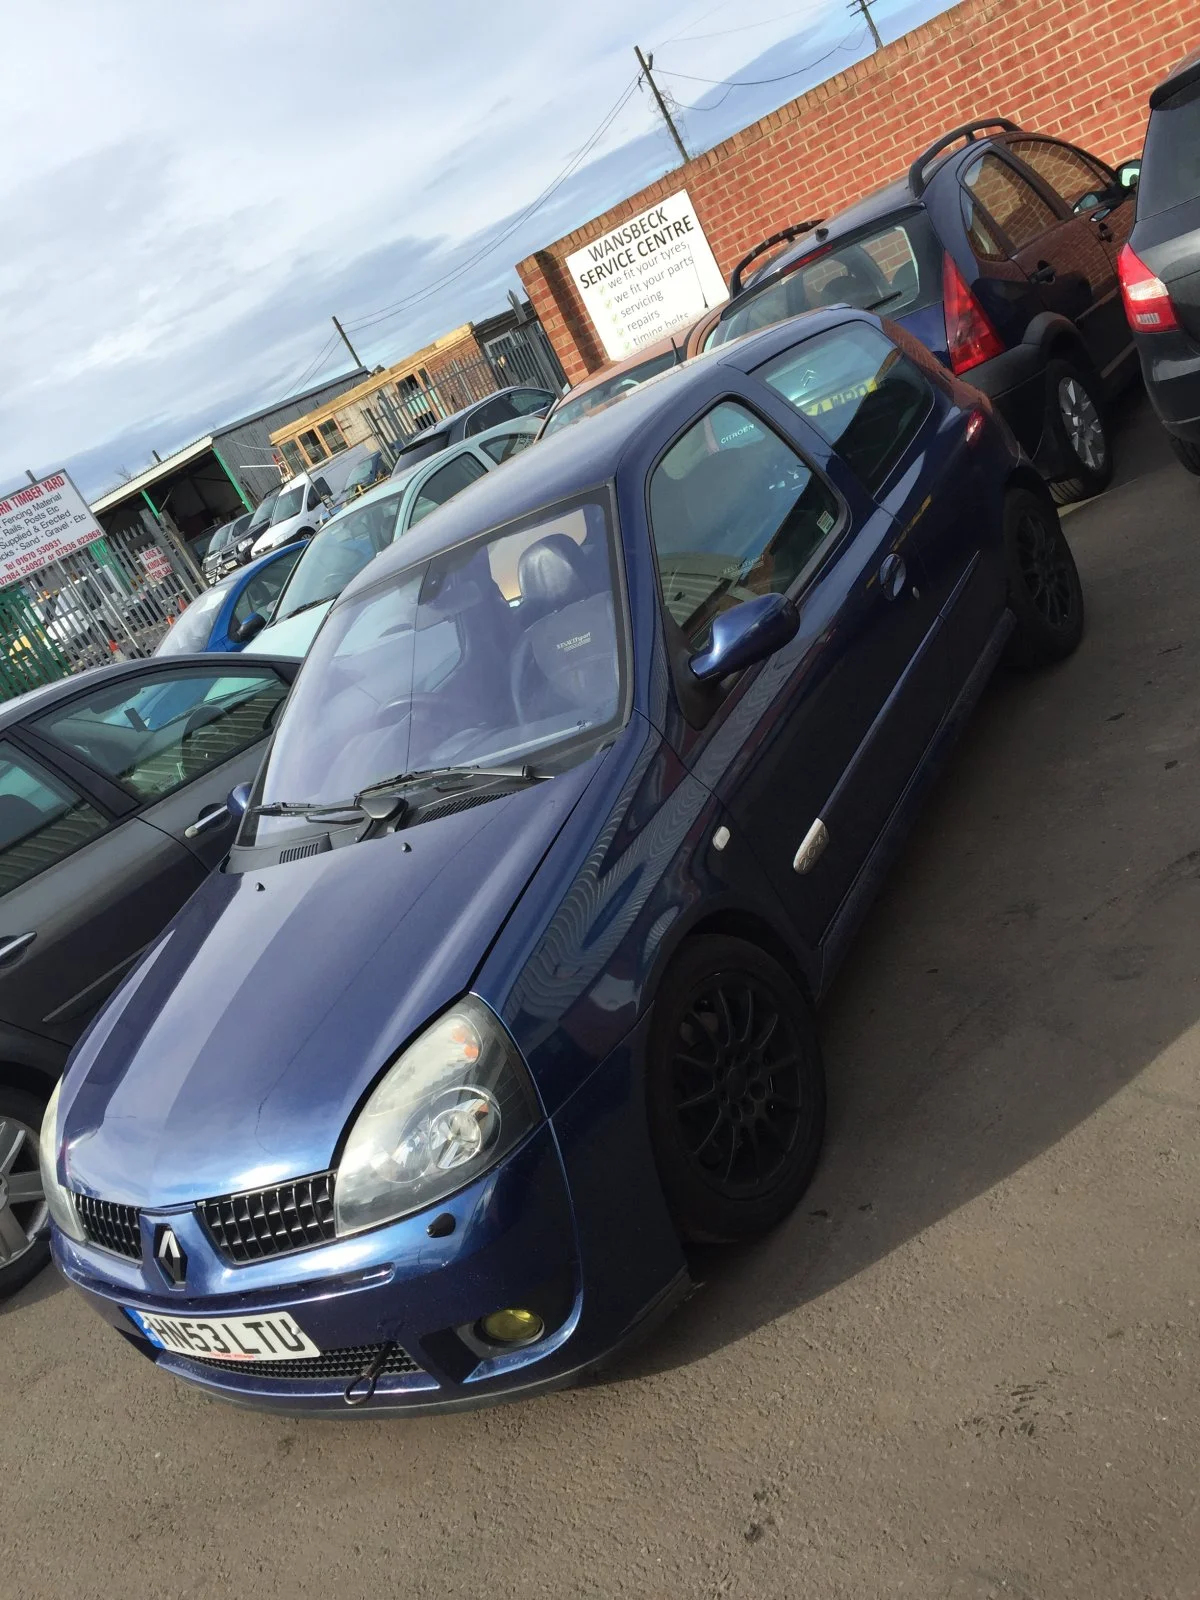
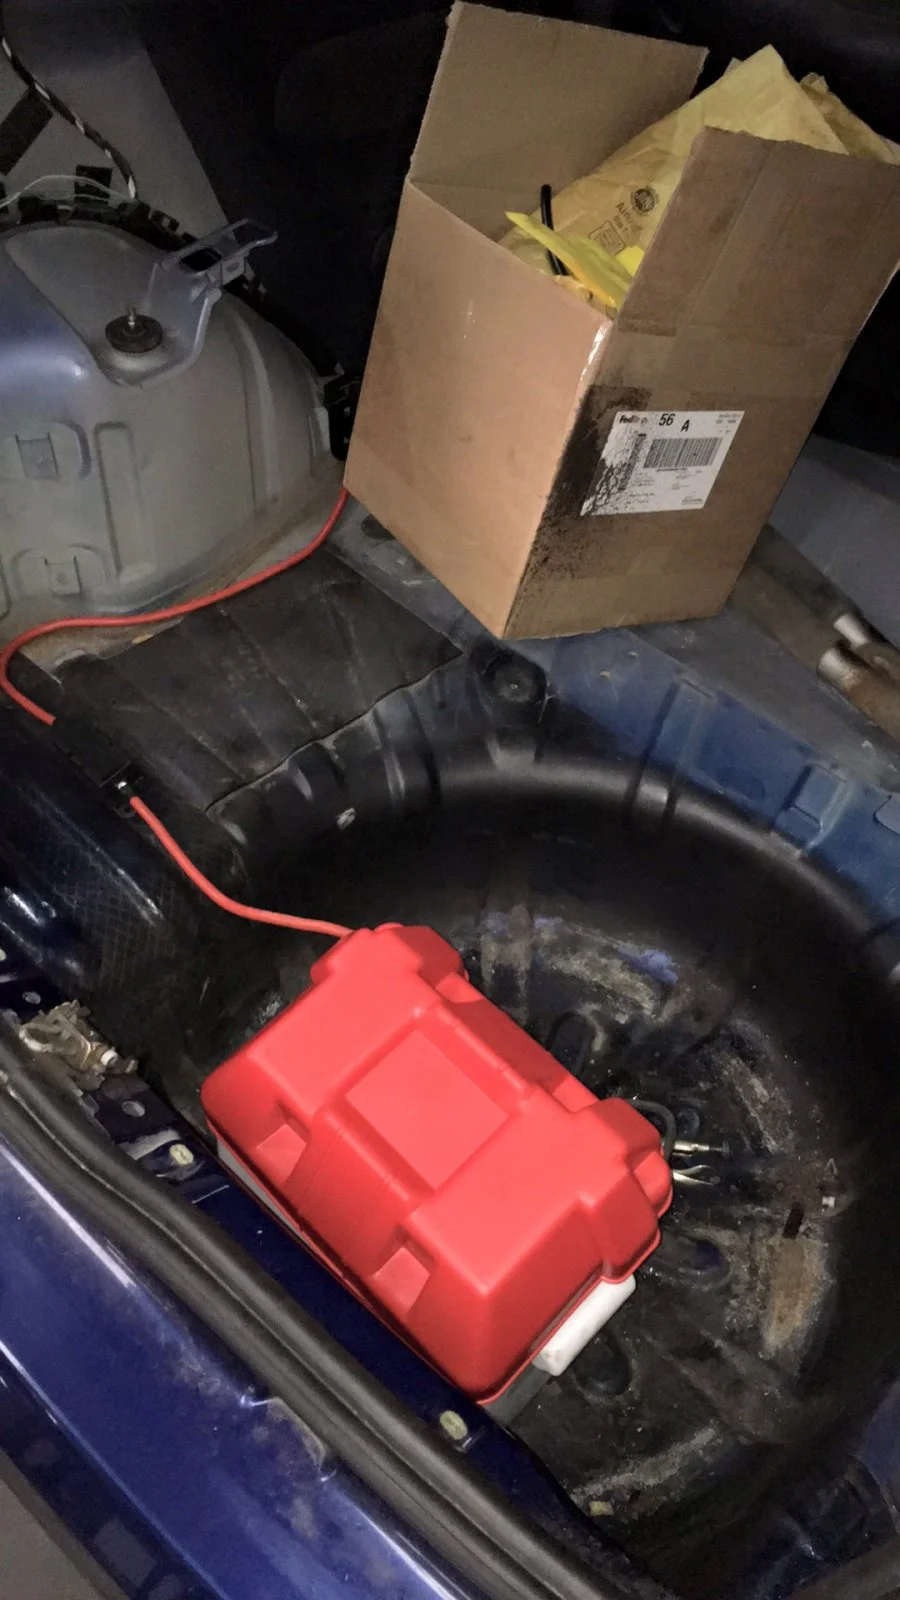
Forgive me for the lack of photos as I never really thought it would come as far as it has, for around 10 months I kept the car in a storage yard near my mates garage just doing little bits and pieces when I got time and picked up parts. I decided to bring the car home when I accidentally left my mates booster in the boot (battery relocated to the boot) after working on the car on a Saturday afternoon my mate checked the car Monday morning and someone had got in and took the booster and my battery.

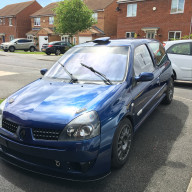
So this how it stood when I first bought it
IMG_0444.webp

IMG_0412.webp


Then on with the mods, first one being the battery relocated to the boot.
IMG_0526.webp


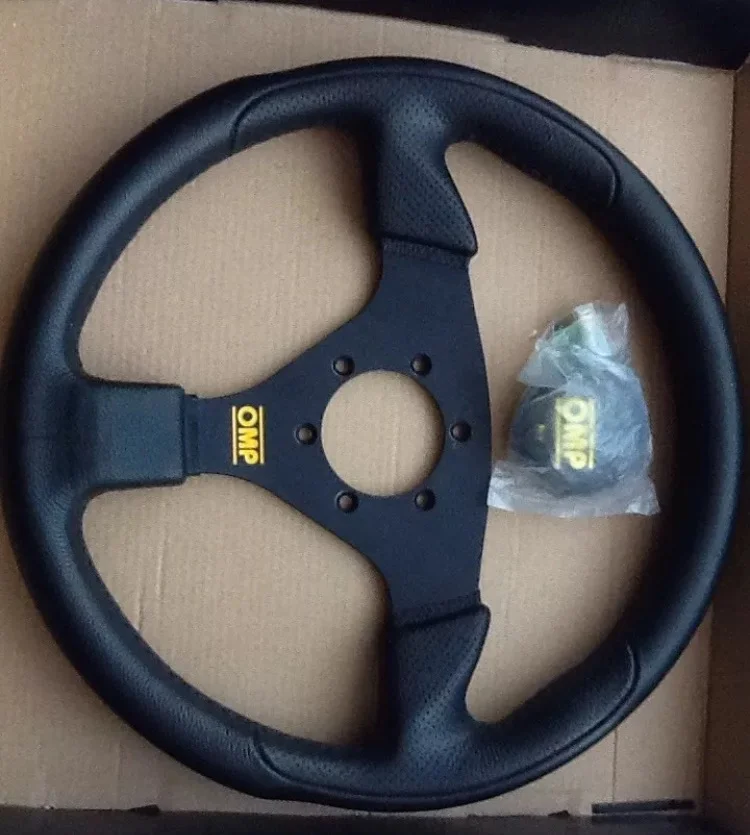
Picked up a momo boss and OMP wheel

IMG_1091.webp


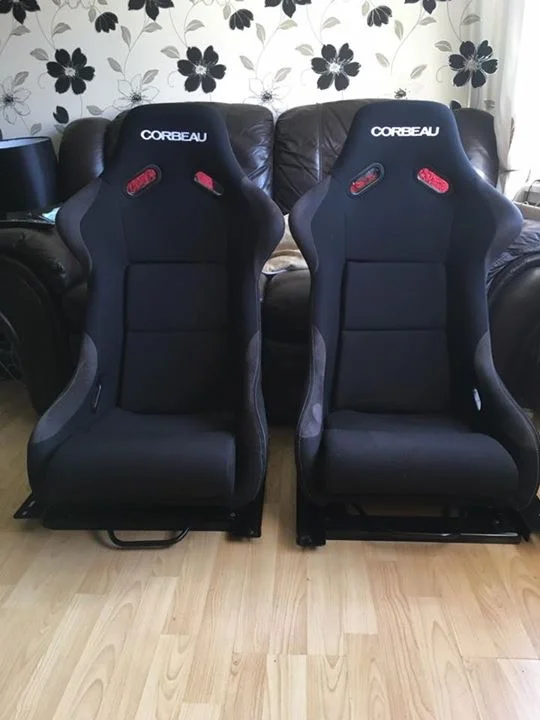
Jumped on a set of Jon foz low subframes and corbeau clubsports that came up for sale for £300
IMG_1430.webp


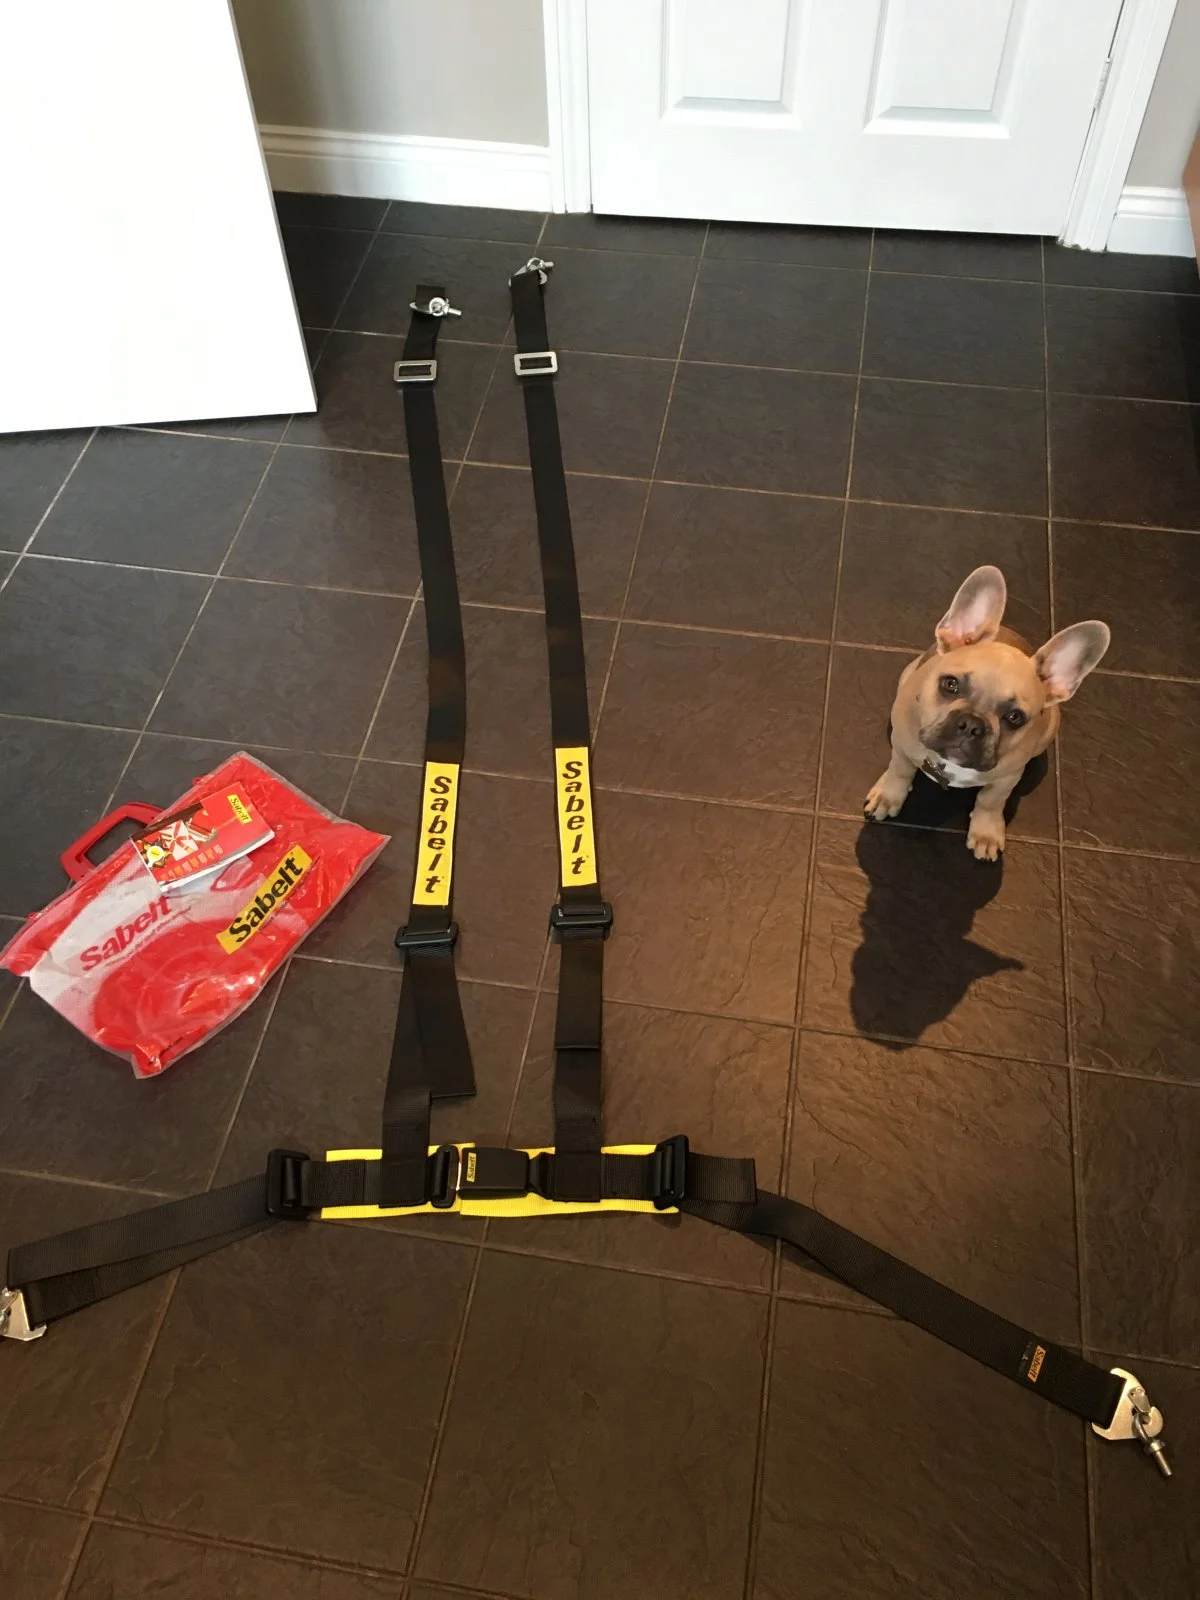
And a 4 point harness featuring our new arrival, I'll probably get rid of the 4 point for a set of 6 points but for £40 it means I can drive it between garages.
IMG_1495.webp


This is where I have a big gap of lack of photos, I'll write the current spec at the end so anything I've missed will be on there.

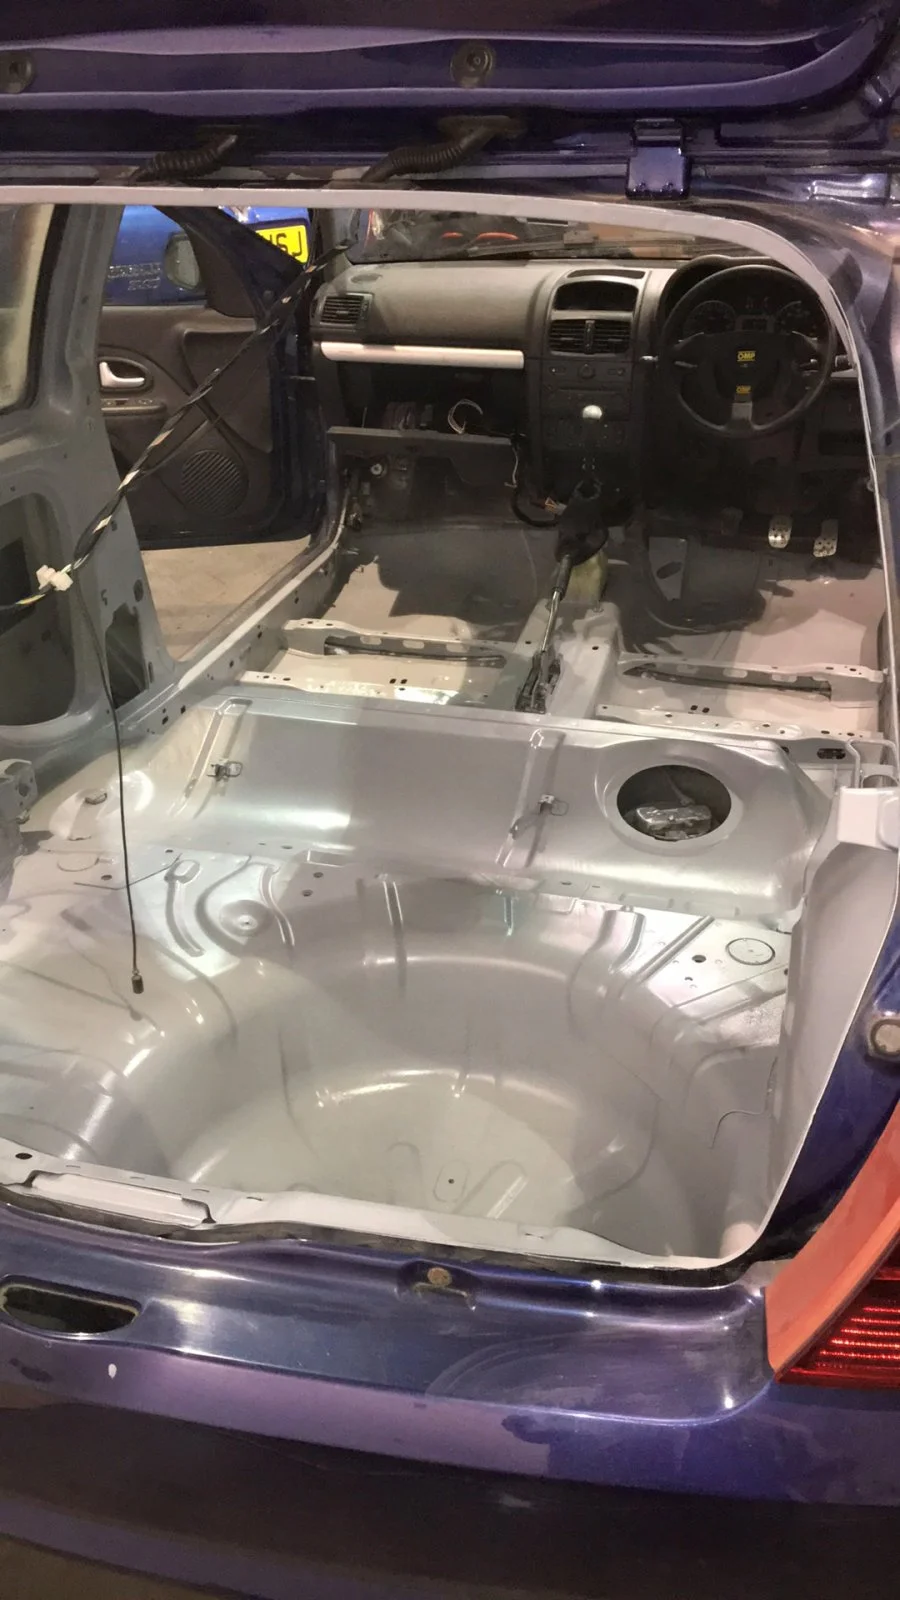
Originally I didn't want to go fully stripped as in past I've owned a car which was and it was awful to drive, felt like I just robbed something out the scrap yard. I put this down to the inside being a mess, half painted, clips everywhere, cables on shown and not having the key track car essentials such as a roll cage. So I took to painting the inside which ironically meant I stripped it out even more due to removing stuff for paint and deciding not to put it back in

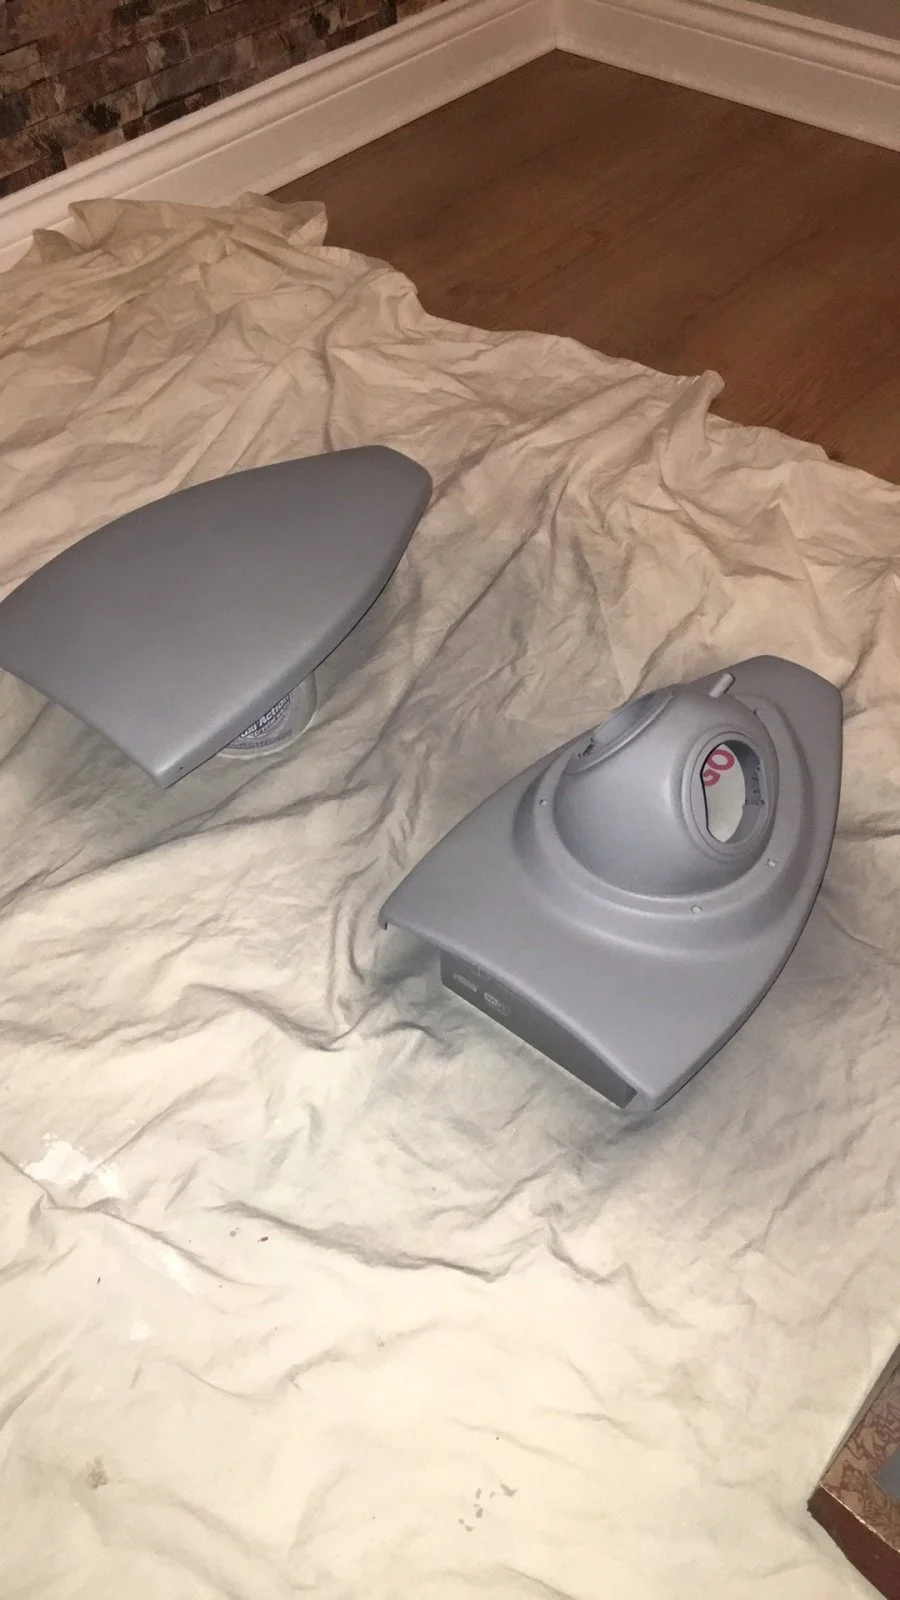
This is after painting the inside with 3 cans of rustoleum steel grey which came out with more of a blue tint but I'm still happy with it. I also ran the rear loom through the rear quarters to tidy things up.
IMG_0104.webp


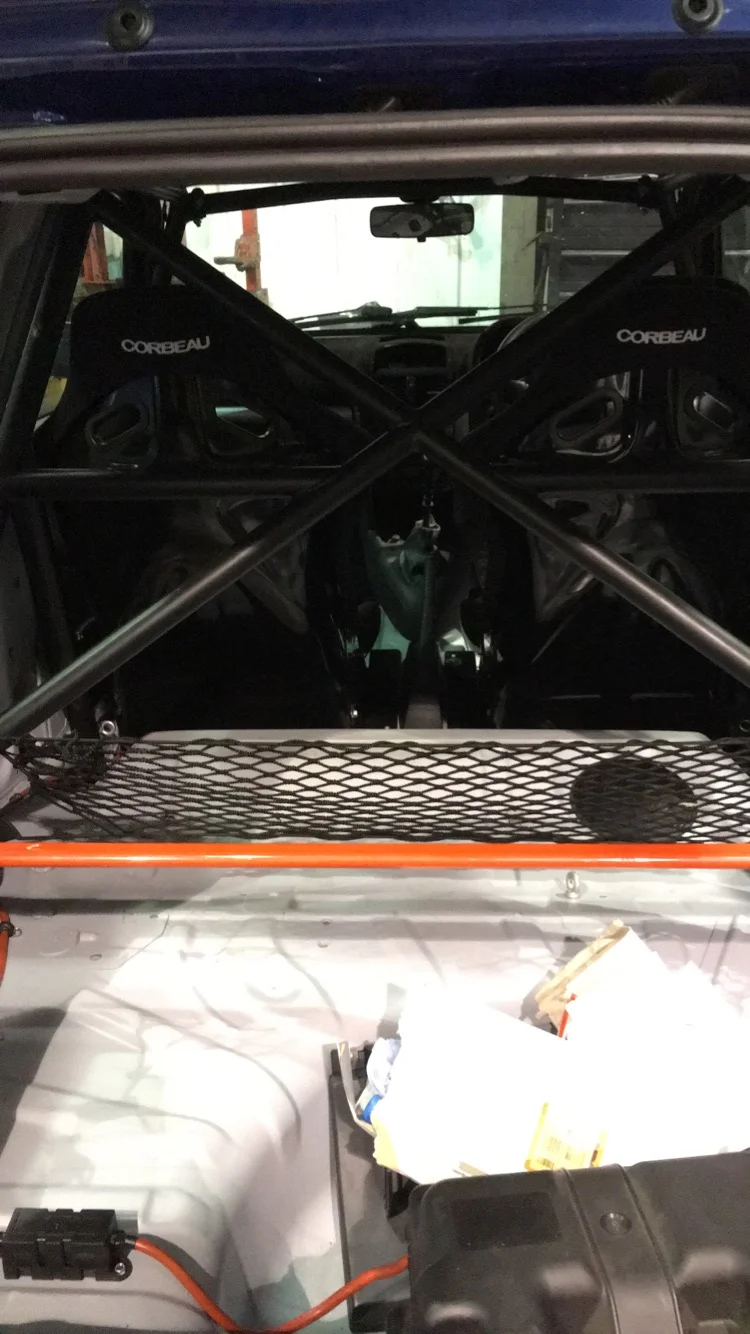
So we're up to Christmas now and I decided to treat myself to a full 6 point Safety device cage with a fixed cross on the rear. Not the greatest photo but you get the idea.
IMG_0238.webp


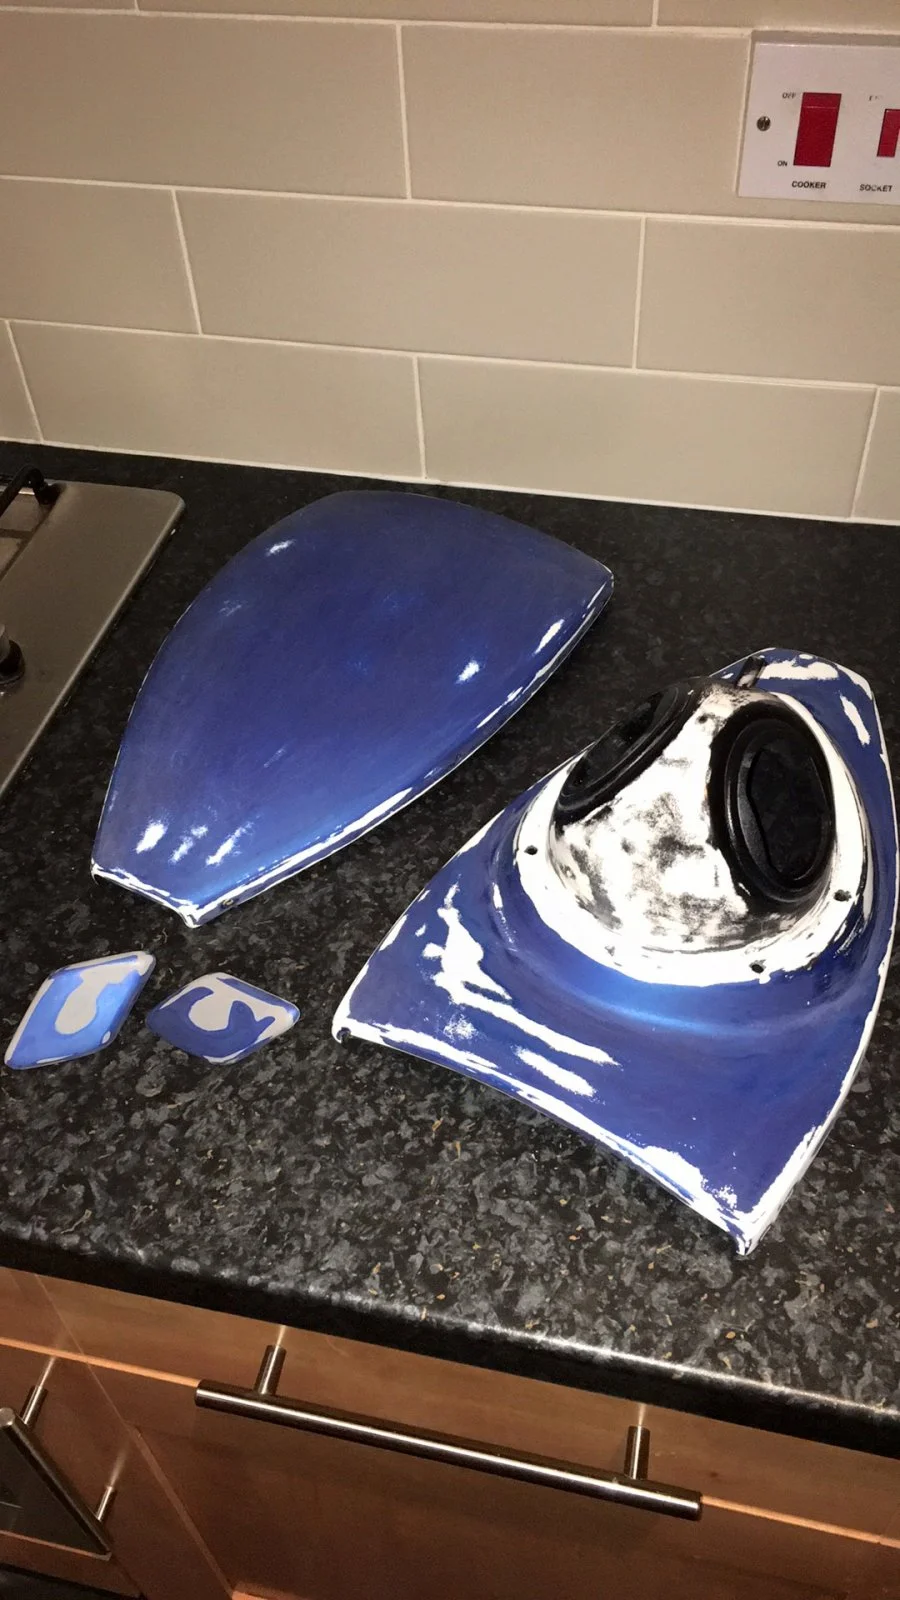
I bought what I originally thought was a clio cup style roof scoop as I was going down the poly window root. It turns out it's a scoop demontweeks sell which is very similar got some fitting photos.
IMG_0327.webp

IMG_0328.webp
 
Last edited:
Template I made to mark the hole out on the roof.

IMG_0547.webp

IMG_0551.webp

IMG_0552.webp


Finally fitted! Still needs a clear coat but I was expecting to mark it in process of trying it for size whilst cutting the hole.

IMG_0555.webp

IMG_0575.webp


Bought a new set of front poly windows with sliders and locks from AWC Motorsport plastics and a set of door cards, handle spacers to go with them from Chris at CM Composites. I've got door pulls to fit but just haven't got round to it yet.

IMG_0391.webp


Always liked the look of the cup racer brake ducts so managed to get hold of set through a mate who never fitted them. Wish I knew what a pain they were to fit before starting! There two completely different shapes the passenger side being the wrong shape. I finally got them in and did the best I could.
Notice the CM Composites splitter, I also have a set of washer blanks to fit.

IMG_0515.webp

IMG_0529.webp


With a RS2 inlet in mind I fitted some aerocatches

IMG_0540.webp
 
So at this point I decided I wanted to go FULLY stripped out as I like the clean look of track cars, so I took to removing the lower dash with the heater, radio and basically anything else that wouldn't be getting used. After removing the lower dash I had an idea to cut it so I can keep the steering cowling as I didn't want all the cables on show. I also cut the end off the lower dash to cover the fuse box and the trim with the spare fuses just to tidy things off.

Heater removed

IMG_0567.webp


How it looks with the lower dash cut

IMG_0570.webp

IMG_0571.webp

IMG_0572.webp


Ever since fitting the roll cage I wanted to re paint the inside as we couldn't avoid scratching the floor and with the dash being removed it revealed more unpainted bits so I decided to strip everything out and rebuild it from scratch.

Fully stripped

IMG_0595.webp


Re painted

51622221703__98E0FEEB-B159-4503-B515-4F24D267D13E.webp


Dash back in, cut some of the loom back the two cables you can see are the 12v plug and hazard switches which I plan on mounting where the vents used to be.

IMG_0711.webp


Made some alloy footplates to avoid the floor getting scratched and needing repainted. Really happy with the finish of the interior now, I hate the saying "it's a track car" I like to think putting in a little extra effort will help when selling the car and avoid breaking.

IMG_0712.webp


Seats and roll cage back in, and floor plates fixed down. I've bought a black nylon quaife style gear knob but was accidentally sent a stainless so waiting to get that sorted, a PMS shifter is on the list but a scenic one will do for now.

IMG_0727.webp


So that's how the car currently stands! 1 year later, 0 track days and around 20 miles driven but very close to getting it finished.

Current spec

Engine and exhaust

Toyo decat
Ktec stealth Cat back with a modified tail pipe
Fatty Induction kit
Flo flex dogbone mount
Powerflex yellow engine insert
Mocal oil cooler - Need to fit
Magnecor HT leads - Need to fit


Wheels and suspension

Anthracite Speedline 2118's
PMS stud and nut kit
PMS 10mm rear spacers
PMS front strut brace
PMS solid top mounts
OMP rear strut brace
16mm front spacers
Power flex camber bolts
Prima racing exhaust mount
Apex lowering springs (came on car)

Brakes

Front Brembo HC Discs
DS2500 Brake pads
Goodridge front and rear braided lines
Supergold fluid
Mintex rear brake discs and pads

Interior

OMP steering wheel
Momo boss
Corbeau clubsport seats - £200
Jon Foz X low Subframes
Sabelt 4 point harness
Modified Scenic shifter
Battery relocated to spare wheel well
CM Composites Front and rear door cards and spacers
Safety devices 6 point roll cage with fixed diagonal
Door pulls
Race rear brake light - Need to fit
FIA cut off switch and tunnel mount - Need to fit

Exterior

Cup spoiler
Cup racer tow eye
CM Composites splitter
AWC poly carb front windows with sliders and locks
Aero catches
Roof scoop

And parts I need to get...

Coilovers (B14 or BC see what comes up for sale)
AD08 tyres
6 point harnesses
3/4 number plate
Silicon coolant hose set
Alloy header tank
Oil catch can
Plumbed in fire extinguisher kit
Cup alternator setup
Roll cage padding
Heater

A lot to take in but that's where I'm at so far! I'll try and get some photos of how the car currently stands as I just have pictures of bits and pieces I've done.
 

Attachments

  • IMG_0731.webp
    IMG_0731.webp
    155.4 KB · Views: 266
Last edited:
Nice - looks great. Does the dash top fit without the bottom without any mods? Im planning to do similar to mine but need to work out where to put the UCH and fusebox as my cage legs are in the way.
 
Nice - looks great. Does the dash top fit without the bottom without any mods? Im planning to do similar to mine but need to work out where to put the UCH and fusebox as my cage legs are in the way.

Thank you! I believe so, as the dash can be secured down by the 3 screws underneath the windscreeen, not sure about the clocks though. I think most people also remove the metal dash support as well, surprising it's really light and it seemed like more hassle trying to find a new home for the fuse box and UCH than what's it's worth. By cutting the dash where I have I've kept the housing for the centre clock and speedo clocks.
 
Love your dog lol :smile:

Car plans look great.

Thank you he's came on a long way himself! Got him a friend to keep him company as well.

IMG_0664.webp


My mate owns a mega Trophy that was built on here can't remember the guys name, he's got it up for sale but if it doesn't sell within the next month he's going to break it so hopefully I can tick some of them parts off.
 
Got some spare time after work so made a start on my FIA cut off switch, one of the legs on the resistor was loose so I've ordered a new one unfortunately I can't finish it off until it comes. Planning on mounting it in front of the shifter where the airbag ecu used to be.

IMG_0723.webp

IMG_0749.webp

IMG_0750.webp

IMG_0751.webp
 
Been cracking on today got my cut off switch fitted just need a couple more p clips to finish it off, race style brake light, removed all the aircon pipes and radiator, fitted door pulls and in the process of painting my scoop.

IMG_0788.webp

51760088326__37A58AEF-24D7-4771-9612-846DEA626F13.webp

IMG_0784.webp

51760363273__37486127-B6C8-4D67-8EBB-6CB04CE2FE17.webp

IMG_0786.webp
 
Cheers! Just got little bits and pieces to keep me busy at the minute, need to get saving for some tyres and coilovers.
 
Probably AD08's since you can pick them up for £190 delivered and I'm thinking cup setup with cook sport springs until I get the money for BC's.

What's people's thoughts on the cup setup as I know it's popular but not sure why?
 
Just a nice compromise for road and occasional track.

Decent coilovers like bc's are a step up and something I would consider if

A. Did lots of track days
Or
B. Found some money behind the couch lol
 
Just a nice compromise for road and occasional track.

Decent coilovers like bc's are a step up and something I would consider if

A. Did lots of track days
Or
B. Found some money behind the couch lol

Sounds perfect for me then, I'll be doing a few ring trips so want something fast road or adjustable.
 
That looks really smart, inside and out.

I like the way it's all neat too.

Thank you, I hate mess can't wait to give it a full detail. I gave it a quick machine polish a couple month back but needs a full detail and sealed.
 
Made a start on a switch panel for my hazard and 12v plug, once I get my fan and heater fitted they'll be on there too.

51775940471__C491F8CF-6EAE-40CF-97D8-F87AF0A627C7.webp


I bought a 17amp rocker switch from Halfords for my hazards but can't get it to work, if someone could give me a link to some decent switches that would be great!
 
Rs components do nice switches, where did you get the kill switch mount? Looks great.
 
Finally got my switch working, pink is the supply and black the load. I think orange is for the illumination of the switch which isn't needed in my case.

IMG_0803.webp
 
Picked up some number plate fixings to hide the screws, also got a dual USB socket on its way which I'll mount on the opposite leaving me room to add switches.

IMG_0805.webp
 
So it's been a while since I last updated this but that doesn't mean it's been forgotten about, been sourcing and buying parts and finally made a start on fitting them.

First up was some 3" TRS 6 point harnesses, after reading the Schroth guide I went on to mount my anchor points for the crutch straps, initially they look quite far behind but the second cross member is bang on in the middle of the seat so mounting them a little behind that roughly gives me a 20 degree angle. I then went on to mount eyelets and speader plates for the exhaust tunnel side as my original setup was a 2" 7/16 UNC eyelet which acted as a seat bolt as well as a anchor point, made it annoying when taking the seats out and I wasn't really keen on the setup. I should of mounted them about 1/2-1" further back as the speader plate for the seat nuts are basically touching the eyelet bolt I still had enough thread and just mounted the speader plate on top.

IMG_0989.webp

52295729685__E0603F15-840C-42FA-B3DA-B797A1809C2E.webp


Next up was a PMS shifter which I wasnt looking forward to as I heard lining up the gears up was a pain, turns out it's pretty simple by just putting the gearbox in reverse and using @NorthloopCup's method of cable tying it over to the left. Biggest pain was getting the cir clip in that holds the white nylon bush in place. I used a deep 6mm socket and jack to compress the bush whist I tackled the clip with a set off hook tools, as I couldn't find my cir clip pliers.

IMG_1019.webp

Those with good eyes will notice the clip isn't fully seated in the image above, another go with a socket and jack and it jumped into place.

52283587153__500A332D-6113-44B8-A6C9-49635C603050.webp


And finally cracked on fitting my GAZ coilovers and powerflex purple rear bushes I bought a few weeks back. Everything went smoothly! Gave them a coat of metaflux which should prevent them from corroding in the future I've set the dampness to half way until I get it out on track and get a feel for what needs adjusted.

IMG_1023.webp

IMG_1026.webp


I've still got a Mocal oil cooler, Forge coolant hoses, AH Fabrications header tank, Magnecor leads and the parts to delete the carbon canister to go on so hopefully I'll have a update by the end of the week.
 
Last edited:
So it's been a while since I last updated this but that doesn't mean it's been forgotten about, been sourcing and buying parts and finally made a start on fitting them.

First up was some 3" TRS 6 point harnesses, after reading the Schroth guide I went on to mount my anchor points for the crutch straps, initially they look quite far behind but the second cross member is bang on in the middle of the seat so mounting them a little behind that roughly gives me a 20 degree angle. I then went on to mount eyelets and speader plates for the exhaust tunnel side as my original setup was a 2" 7/16 UNC eyelet which acted as a seat bolt as well as a anchor point, made it annoying when taking the seats out and I wasn't really keen on the setup. I should of mounted them about 1/2-1" further back as the speader plate for the seat nuts are basically touching the eyelet bolt I still had enough thread and just mounted the speader plate on top.

View attachment 403918
View attachment 403984

Next up was a PMS shifter which I wasnt looking forward to as I heard lining up the gears up was a pain, turns out it's pretty simple by just putting the gearbox in reverse and using @NorthloopCup's method of cable tying it over to the left. Biggest pain was getting the cir clip in that holds the white nylon bush in place. I used a deep 6mm socket and jack to compress the bush whist I tackled the clip with a set off hook tools, as I couldn't find my cir clip pliers.

View attachment 404709
Those with good eyes will notice the clip isn't fully seated in the image above, another go with a socket and jack and it jumped into place.

View attachment 405129

And finally cracked on fitting my GAZ coilovers and powerflex purple rear bushes I bought a few weeks back. Everything went smoothly! Gave them a coat of metaflux which should prevent them from corroding in the future I've set the dampness to half way until I get it out on track and get a feel for what needs adjusted.

View attachment 405703
View attachment 405759

I've still got a Mocal oil cooler, Forge coolant hoses, AH Fabrications header tank, Magnecor leads and the parts to delete the carbon canister to go on so hopefully I'll have a update by the end of the week.

When drilling the crotch holes was there any pipes, hoses, etc to avoid or was it clear?

Thanks

Tom
 
When drilling the crotch holes was there any pipes, hoses, etc to avoid or was it clear?

Thanks

Tom

Drivers side was fine, but there's brake pipes next to the inner passenger side. I just moved them out the way and put them back in the clip once finished. I drilled them about 1" back from the cross member and 6" apart using the hole in the photo as a C/L.

IMG_0989.webp
 
Drivers side was fine, but there's brake pipes next to the inner passenger side. I just moved them out the way and put them back in the clip once finished. I drilled them about 1" back from the cross member and 6" apart using the hole in the photo as a C/L.

View attachment 419807

Perfect.

Thanks, I'm hoping to fit mine tomorrow so will copy.

Did you use fix the spreader plates to the bottom of the vehicle with silicone, etc or just let bolt hold it up?

Finally, What plates did you you use to attach the lap mounts? Same as the crotch belt?
 
Perfect.

Thanks, I'm hoping to fit mine tomorrow so will copy.

Did you use fix the spreader plates to the bottom of the vehicle with silicone, etc or just let bolt hold it up?

Finally, What plates did you you use to attach the lap mounts? Same as the crotch belt?

I put a bead of silicon on the face on the plate to keep it water tight just some water resistant stuff which is suitable for external use. Then gave it a coat of underseal, this stuff http://www.screwfix.com/p/hammerite-vehicle-underbody-aerosol-seal-black-600ml/6221h

Yeah the same plates but I had to cut them to make them fit basically just chop a corner off so they end up like a triangle. Just make sure you mount them further back than what I did to avoid the speader plate that's there for the seats.
 
Started removing my carbon canister when I got in from work the other morning and it has turned into a full engine overhaul Removed the intake to get them cleaned up and made a start on cleaning the cam cover ready to paint. When I get a full day I'll get the engine mount off, clean and paint that up and re fit everything along with my Forge hoses and AH Fabrications header tank. Unfortunately I never took before photos so you can't really tell how well it's cleaned up.

IMG_1071.webp
IMG_1083.webp
IMG_1084.webp
IMG_1085.webp
IMG_1086.webp
IMG_1087.webp


Pretty happy with the finish used a wire brush and red scotchbrite to remove most of the dirt then scrubbed them with brake and clutch cleaner to remove any oil and grease. Used VHT paint from ECP which I cant recommend enough, goes on so well and I picked up 2 cans for under £10 so can't humble at that! Going to paint the cam cover black as it's always going to get dirty and isnt the easiest part to get to.
 
Got the engine bay sorted yesterday, very happy with the outcome, still need a few little bits and pieces to finish it off but it's still a massive improvement! Ordered some new intlet bolts as a couple of mine were missing, some new rad nuts as mine are rusty, want a matching Forge elbow to replace my standard one and fit a oil catch can.

IMG_1097.JPG
IMG_1098.JPG
IMG_1102.JPG
IMG_1103.JPG
IMG_1100.JPG
 
Few little updates, replaced the inlet bolts with some stainless steel bolts and managed to get hold of a Forge intake pipe. Very happy with the engine bay now, on the look out for some ktec engine and gearbox mounts.

52423237789__AE243B7D-D28B-423D-A2ED-2F9A54811C60.JPG


IMG_1143.JPG


Finally got round to fitting the cup washer bottle I bought but for some reason the rubber seal was missing so need to pick one up.

52423517331__C24E24DF-2C9D-4C37-A388-21FDD0617753.JPG


Not looking to fit a T7 heater just yet so I'm waiting for a couple hoses to bypass the heater matrix and bought a couple bungs for where the hoses would run into the cabin.

52423067750__0A2C6131-E721-40DD-83C4-45CF49EBAF8D.JPG


Bought a 13 row oil cooler and set about getting that mounted before work tonight. Deciced to mount it with the inlet/outlets upright rather than downwards this also reduced the length of hose.

IMG_1162.JPG


IMG_1163.JPG
 
Back
Top