ClioSport.net

This is a sample guest message. Register a free account today to become a member! Once signed in, you'll be able to participate on this site by adding your own topics and posts, as well as connect with other members through your own private inbox!

  • When you purchase through links on our site, we may earn an affiliate commission. Read more here.

Clio 182 - Tidy Up & Track Project

Car  Clio 182, EvoX FQ360
Hi all,

I bought a FF Clio 182 around 4 weeks ago and thought I'd pop a thread up to track my progress with the car. The thread will be majorly picture heavy as I do like to take a photo or 10!

I've bought the car to learn some basic mechanics and practice touching up body work as well as getting out on track eventually (apologies to the people who like the cars for road cars, there's an awful lot heading to the track!).

Please go easy on me as it'll be the first time I've done any of these things really, if you spot anything obvious that I've done wrong or could do better next time please let me know. :)

I bought the car with roughly 97k miles on the clock with the depahser and belts changed at 81k miles. The car has a Scorpion cat-back exhaust as well as a K&N filter, although I don't think the positioning is the best for heat soak. The car has the cup suspension and spoiler packs too.

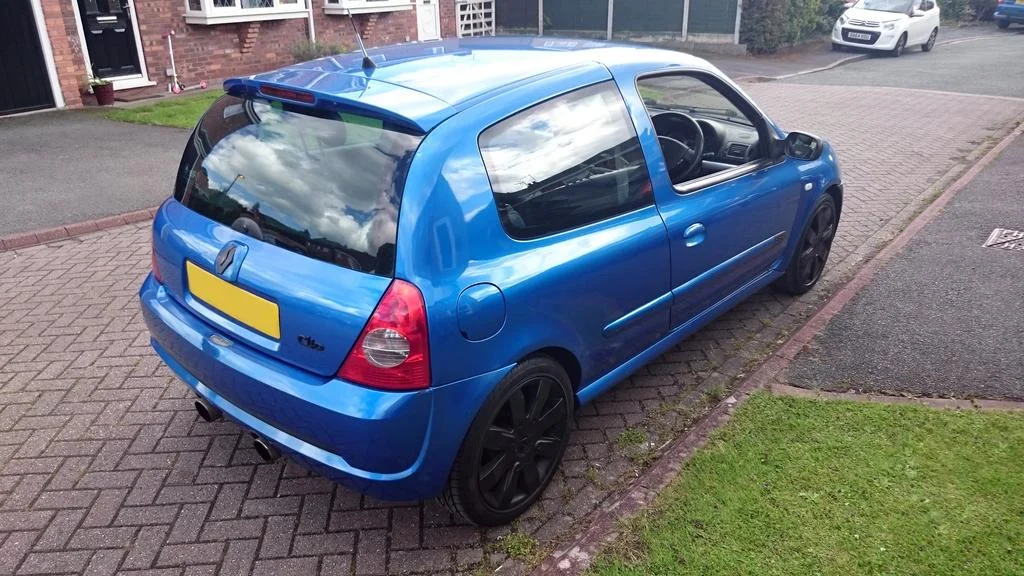
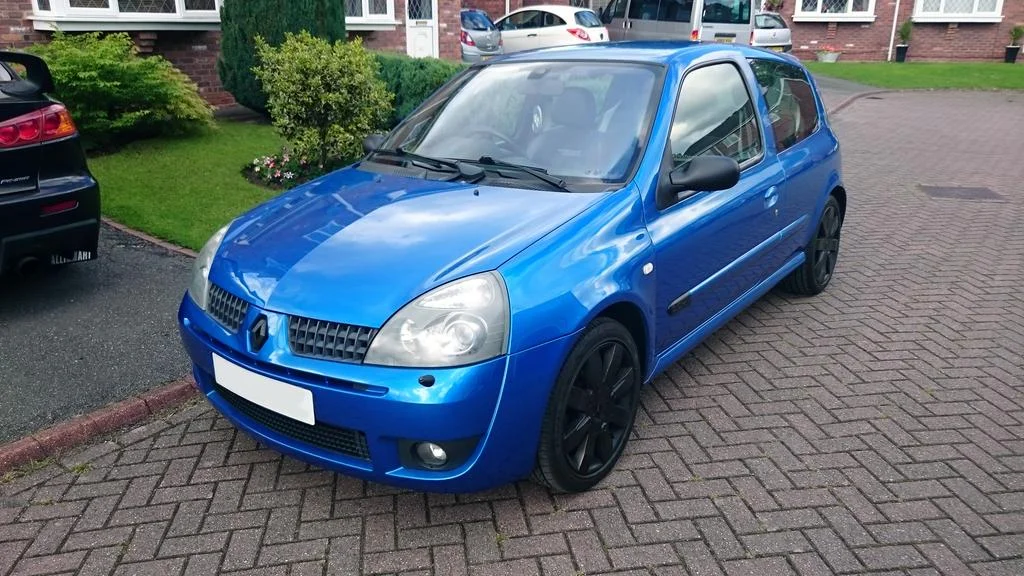
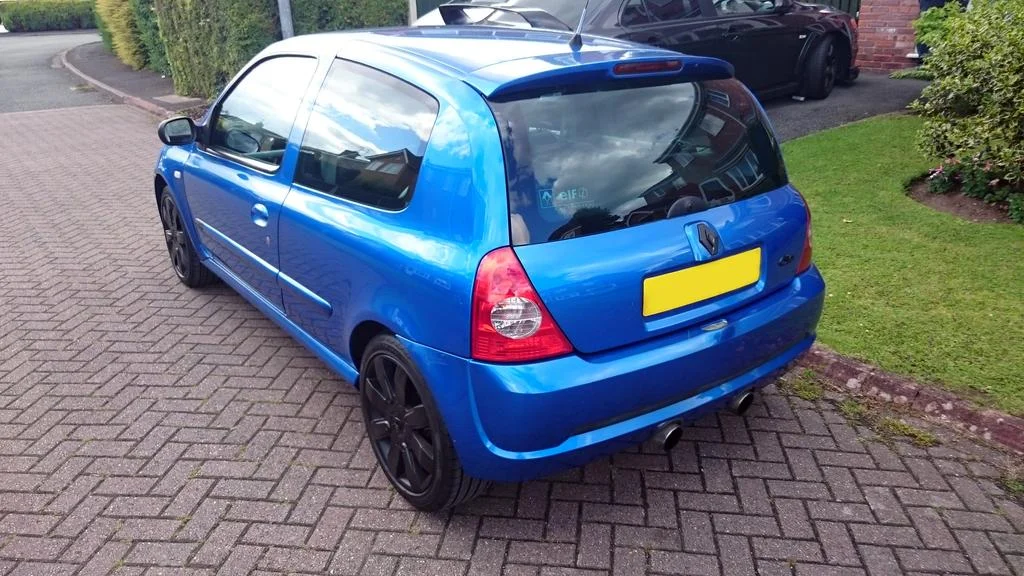
These are a few pictures of the car on the day that I bought it:
mJ8CZzI.webp

1rzI7pp.webp

Q9HX01o.webp
 
The first job was to give it a bit a wash over. The interior was pretty dirty so that had a good clean out and looks much better. I also added a Forge decal - just because you've got to add something to make it yours :smile:

bXwf7j4.webp

nKnCiRd.webp

VXrPilL.webp

FRA2wYL.webp

Y2eY9hT.webp

vHGIpDa.webp

RFPQBE5.webp

HeJCdeO.webp

SxxC4ph.webp

P9IzlJO.webp

lckm9qa.webp
 
I didn't like the car being debadged of it's Renault Sport badges so I ordered some replacements. They look much better being on, although they're not lined up to OEM:

7lyF0HN.webp

kd03y2w.webp

G3KqOiY.webp

b3ohvfC.webp


The previous owner had plasti-dipped the Clio badge, Renault badges, bullets and mirrors (as well as the wheels but they're staying for now). I didn't like it so set about removing it all. It all came of surprisingly well, although was a real PITA in some of the tight edges.

L3gLL6B.webp

DiYbWck.webp


ZxR3Gh8.webp

K32mnht.webp


xLAqZjO.webp

38Br6x2.webp


MyyNsQA.webp

cWT1h4A.webp


It was then onto using some Autosol on the exhaust tips as they should have been a lot cleaner!

AeS367i.webp

Tcc6FMA.webp


My Cliosport membership pack also arrived so I added the decal to the rear window as well as the chunky keyring! :D

3J527YP.webp

jkfUfST.webp
 
I damaged the rear Renault logo boot badge by trying to shortcut the plasti-dip and blast it off with a pressure washer. That was a mistake! I ordered a new badge as I didn't want to leave it with the badge flaking.

Mm7H03b.webp

dNMCnWh.webp


One of the washer jets was missing when I bought the car, so I thought I'd just fill the hole with a rubber grommet for now. After speaking to another member on here I'll probably stick with them to be honest.

4Yjeofv.webp

XK2FQkQ.webp
 
  • Like
Reactions: Gus
That's the chores done so I can carry on with the posting. After removing all of the plastidip I started to polish up the headlights as they could have been a lot better. They're not the worst I've seen by a long way but still...

OIa7EUD.webp

xai9T9T.webp

atDhn7O.webp

DlgCDEn.webp

CtSRnbd.webp

DJRvUr0.webp

KtrVJl8.webp

Xwc0BUB.webp

X7XRzL4.webp

qKavAgQ.webp


They still need some work really so I'll revisit them in a few weeks when I've got a better compound polish to hand.
 
Then it was onto cleaning some of the engine bay. For some reason there was a lot of oil seemingly all over the engine bay. The oil was very clean though so I assume that it's been overfilled or that there has been a spillage of some kind. Hopefully the pictures show what I mean a little better. Should I be worried?

q8UUNdT.webp

dCpuiJP.webp

ejhbrMQ.webp

JL58Le6.webp

8RWcyPQ.webp

QVtVS74.webp

teyDz4F.webp

DX8c3xX.webp

PsnpD1X.webp

PDwsaZE.webp


We'd bought some replacement clips to get rid of the cable ties that have been used throughout the car (by the looks of it! Why? they're so cheap!!)

rMRAM0B.webp

HxQCMBJ.webp
 
The weekend after I tried to tidy up a few other bits and pieces. There was something that looked like a burn mark and a scrape along the rear right bumper. It's nothing too drastic (especially as it's going to be a track car) but we wanted to have a little go at filling it to make it look better.

B8hIXJY.webp

IXI1duk.webp

IC2mS8Y.webp


One of the sidelights wasn't working either (driver side), so I swapped the bulbs out some some that we had left over from an old car. They look blue but do shine white when on.

KKJcKP2.webp

DD3fFOw.webp


I'd also bought some replacement bolts for the engine cover as one of them was missing, just a stainless steel jobby from eBay.

XpjUZ9J.webp

KWUVWEk.webp

tso6rmv.webp

iKECuEi.webp

4yNy849.webp
 
We'd then sourced a replacement boot lock and badge mechanism to replace the one that I messed up when removing the plastidip. The old button had a lot of movement in it anyway so it was probably a good idea to have swapped it out.

1aKH7tt.webp

boGHPpo.webp


You guessed it, a missing nut!
NxqspNP.webp

SZY03UY.webp


wk1U636.webp

EagNea8.webp

NYYkHid.webp


Missing nut replaced!
1njrURd.webp


The finished product
6dzX4iT.webp

LAOEr5q.webp
 
Then it was time for a further engine clean to try and get rid of some more oil. There was no fresh oil that I could see and certainly nothing lower on the level of the dipstick. Hopefully it's nothing!!

gIBIK24.webp

NNpneb0.webp

8Z73Ayv.webp

R36YGdk.webp

RgvZ7tZ.webp

RUl4iXF.webp

8NHKlCn.webp


Then this is the finished engine bay for now. It looks a million miles better than it did although I am still slightly worried about all of the oil. Nothing does seem fresh in there now though.

Does anyone thing the location of the K&N will cause problems with heat soak?

NNfRL0U.webp

mYd0Pxd.webp

usEJTk6.webp

MIkUWgt.webp
 
I had a quick look underneath and everything looks in order other than one exhaust hanger. Naturally I took a few snaps!! :D

5EkmUlY.webp

8ntMlBI.webp


Then the hanger, a replacement has been ordered (and just arrived).
I0OHvKV.webp
 
Another little thing that was bugging me was the crappy metal aerial, I just thought it looked awful so that was replaced with a cheap carbon replica stubby aerial.

QJbOZ2M.webp

7qRoJN5.webp

8kJeb8M.webp
 
Onto a repair of the front bumper then as there was a big crack in it along with a missing front splitter. The crack can be seen in the first picture.

soErzs1.webp


It's the first time I've ever put a car on axle stands so I was a little nervous :) All was good though. It was also the first time I'd ever removed a bumper. It looked like a 15 minute job from videos that I'd seen at Youtube but took me 5 hours!!! Shocking. Nearly every bolt was seized, odd sizes or just a real PITA. It all started with the front drivers wheel nuts being overtightened, they took over 20 minutes of hitting with a mallet to loosen off.

Some photos on the stands...

d4jSO4s.webp

sLTq1PQ.webp

izOeukK.webp


I cleaned out behind the arch liners too, there was a fair old amount of mud and sand!

6N9ycMk.webp

Rp2ytDP.webp


A few more of the original crack...

soErzs1.webp

rXgTHRM.webp


Now don't forget that we've never done anything like this before (and it's a track car), so it's bound to look a little rough for a first attempt ;)

First off was to sand the area down with some fine wet and dry. The crack had pretty much bonded together during this process.

hNbmNno.webp

aYeBwLx.webp

YYOOeK2.webp


Then we mixed up some 'Big Boy Plastic Flexi Filler' and gave it a good layer before leaving to dry and then sanding it back.

uW3iWTn.webp

KPraeYk.webp

eoBwsrW.webp

KncOCfT.webp

dMjWo3r.webp


We really should have sanded and smoothed it back a little more but I was impatient and getting a little too excited. Oh well, onto the primer and first layer of paint.

x8Q8SOd.webp

jGfWXL7.webp

erafFyx.webp


After several layers of paint and then lacquer it looked like this... massive errors! :D

VxquEUy.webp

nz3drAK.webp


Instead of masking off a bigger area and feathering I'd just sprayed up to the tape. You live and learn I supposed. After looking in disbelief for a while we decided to rub it down as we'd have liked a better finish from the filler anyway. That job could wait until the next weekend though. :(
 
Nice work so far mate.

Like you, I take loads of pics!

Subscribed!

Thanks mate, I do love a photograph haha! It's the best way of looking back over the coming months and seeing where all of the time went!

Great start, Clios are so simple and so much fun to mess with, I'm running out of jobs to do on mine, usually dream up something daft to do though :smile:

Thanks Mark, I've never really done anything to the Evo's as I've always been scared and parts cost a fortune (as I'm sure you well know :D). There's always something to find and do! :D
 
While the bumper was off (I think I did this before the first attempt at a repair) I got rid of the other washer jet that was left and removed all of the other 'plumbing', up to the passenger wing anyway. I know grommets won't be to everyone's taste, but they'll do the job for me for the time being.

gPeCPCu.webp

RdwqqY1.webp

i3gTfvO.webp

YQLbXZO.webp

3MOvVos.webp
 
I'd also treated myself to a new toolbox to help keep everything together :D

rYCCcWF.webp


You've got to love a few decals!

QshvGy2.webp

1pLprWh.webp
 
Right, back to attempting to repair the crack in the bumper again. This was more successful... to a point!

Everything was rubbed down to as good as we could get it really (again, think track car ;)).
J1vf24m.webp

uZraddt.webp


Then on with the primer (again). It came up a little bubbly for some reason so I gave it a very light rub over when it was dry.
yAYvDjj.webp


I kept then expanding the spraying area to help the feathering process with a bit more success.

UBoOyYh.webp

ZRG5oJc.webp

pejsyJy.webp

sZfx3BA.webp

2irqipm.webp


It's by no means perfect, but it's a lot better than a big crack. I'm also happy as it's only our first (well, second) attempt!

0QUqsQM.webp
 
I'd also bought a cold air feed that I'd intended to cut out of the front lower grille to help get some cold air to the K&N. After painting it all up I realised that it probably won't fit in easily or be blocked by the radiator. I'll revisit this one again, but it's painted and ready to go!

ZO4Hz01.webp

HbqerTc.webp

AhHsdPZ.webp

ovy7vcu.webp

86tNXtX.webp

JfUSohB.webp

OyStQUk.webp
 
We then fitted the missing splitter, or the common Skoda version of it. It all went swimmingly until I pressed on a little too hard and the crack started to come through again! After much swearing I touched it in a bit and will leave it at that!! Maybe I should have put something in to strengthen it at the back?

F8WjOhi.webp

dqDFYLc.webp

g1WZx0A.webp

MtOAoZP.webp

PytTmYl.webp
 
I then added a few more decals to help distract from the crack! ;)

I like the French flag that people have added so went for that to help break the grille up.
tVIFE5y.webp

GulhkNc.webp


I also added the tow decal as I'm waiting for the tow eye as a birthday present. :)
I36n4RW.webp

wBOCsYj.webp

Nn4V9xr.webp


I bought a shed load of new clips for the arch liners as well as I broke a fair few when removing the originals. All went together very well though with all of the bolts being replaced and greased ready for quick access next time!
QQCQ2BA.webp


This is how the car stands at the moment. I'm waiting for the DVLA to send the paperwork back for my new plates! :D

1Gm8LJ9.webp

YVdzB8O.webp

erszOd3.webp

vEKA9X8.webp

S4KnBJO.webp

6k8PfHE.webp

XFBznMJ.webp
 
I've got a few bits and pieces to fit now before going onto some of the main 'track based' stuff. It's going to be a long project as funds and time dictate what I can do really, but I've been enjoying it so far!

To fit I've got:
Sunstrip (not to everyone's taste I know)
l08XYsq.webp

Yellow Calliper Paint
LMdPHrb.webp

Engine Mount Powerflex
ilL0Il6.webp

IAJ9uZJ.webp

Exhaust Mount
JXHHOAv.webp

New Plates
McxAosB.webp

OMP Steering Wheel With Momo Boss
vhRTvQh.webp

MgdoycY.webp

0t1VZTV.webp

Ja9S8i6.webp
 
Thank you to everyone that's read the thread so far, there were quite a few pictures! :smiley: I didn't realise how big they'd come out so I hope they do load ok for everyone.

If anyone has any helpful tips or advise please let me know.

Is there anything to be worried about with so much oil being in the engine bay? I don't think the cars loosing any oil from what I can see, and everything is clean so I just think it's been spilt. What do you all think?
 
Is there anything to be worried about with so much oil being in the engine bay? I don't think the cars loosing any oil from what I can see, and everything is clean so I just think it's been spilt. What do you all think?


Just keep an eye on it, it does look quite clean so you're probably right on the spillage.
Regarding the air filter, it's right behind the rad, the best place on a clio seems to be right in behind the passenger side headlamp, if you search 'fattys induction kit' you'll find a cheap way of doing it!
I've had a few attempts, but relocated my battery and set the filter here and works extremely well....
AE6CA9DA-C366-4C13-9D58-FC0A7BA179CC_zps0hwytxe5.webp
 
The crack so much better the 2nd time! Well until late the splitter tinkered with it!

As for the cold air feed you'd be better off changing the filter to behind the headlights as it gets cold air there. Where it is now is getting a fair bit of heat soak. Plus if you change the filter setup you'll have better noise too!

How about removing the fog lights and making some ducts to cool the brakes?
 
Just keep an eye on it, it does look quite clean so you're probably right on the spillage.
Regarding the air filter, it's right behind the rad, the best place on a clio seems to be right in behind the passenger side headlamp, if you search 'fattys induction kit' you'll find a cheap way of doing it!
I've had a few attempts, but relocated my battery and set the filter here and works extremely well....

Spot on Mark thanks. I'm relieved you think I could be along the right lines with oil spillage. I'll definitely be keeping my fingers crossed that it is that!

The battery re-location looks great on yours. I guess you relocated it to the boot? Does mine have a bigger battery than standard as I looked at relocating the filter to there but there doesn't appear to be a lot of room unlike a lot of people's photos.

The crack so much better the 2nd time! Well until late the splitter tinkered with it!

As for the cold air feed you'd be better off changing the filter to behind the headlights as it gets cold air there. Where it is now is getting a fair bit of heat soak. Plus if you change the filter setup you'll have better noise too!

How about removing the fog lights and making some ducts to cool the brakes?

Thank you kindly mate, I was absolutely gutted with the crack coming back with the splitter fitting. I can laugh now but I didn't at the time! haha

I did wonder why there was no real noise from the filter to be honest. Do you think it's just down to the location?

I'm well up for some brake cooling by removing the fog lights. Are there any proper kits out there to buy? I think K-Tech mat do one off the top of my head so I'll have to have a look. :)
 
I've resized all of the photos too as they were taking forever to load, it was like the old days of a dial up modem. Hopefully everything should load better from now on. :)
 
Spot on Mark thanks. I'm relieved you think I could be along the right lines with oil spillage. I'll definitely be keeping my fingers crossed that it is that!

The battery re-location looks great on yours. I guess you relocated it to the boot? Does mine have a bigger battery than standard as I looked at relocating the filter to there but there doesn't appear to be a lot of room unlike a lot of people's photos.

Your battery is certainly bigger than the one that was my in mine, but I since fitted an odyssey race battery behind the passenger seat :)
 
Cool, I might have to go down that route in future. I'll have a look at the threads you suggested to see if I can find a temporary cheap quick fix. :up:
 
A few more parts have come recently but progress has been slow with a few bits and pieces going on at home. I've had front and rear OMP strut braces (I know people say they don't do a lot, but I think they look ace) and a full set of mats.

g136ZW2.webp

C17lGVx.webp

ysQVpxW.webp

qxxLlJA.webp


I did get to have a good drive out this morning as I needed to open up early for GCSE results. :D

sXjqF08.webp
 
Back
Top