I will. :smile::up: I have a set of Sparco's waiting in my parents attic. But first I want to fabricate the cage which will have a harness bar, so that I can mount the harnesses in a proper way and not crush my spline in an accident.
ClioSport.net
-
When you purchase through links on our site, we may earn an affiliate commission. Read more here.
You are using an out of date browser. It may not display this or other websites correctly.
You should upgrade or use an alternative browser.
You should upgrade or use an alternative browser.
Project Lightweight, Trackday Clio 172
- Thread starter scullyg40
- Start date
are you going EPAS or just full non assisted steering?
cant wait to see this with some seats and a cage
cant wait to see this with some seats and a cage
I can't wait either.:tongueout: But at the moment I can't start a project this big due to my studies besides work having a priority obviously.
At first I will try full non assisted. I can't imagine it being as bad as some people say. My old Polo G40 never had any assistance, and I never missed it. If it doesn't work out, I will look into the EPAS route.
At first I will try full non assisted. I can't imagine it being as bad as some people say. My old Polo G40 never had any assistance, and I never missed it. If it doesn't work out, I will look into the EPAS route.
that's my thinking currently, I cant see it being unbearably bad not having PAS/EPAS id have thought it would have been the best "driver focused" option
Got the 182 manifold where it's supposed to be.


Lambda is connected up.
Also received the 2,5" tube I've ordered to make up the link pipe.

But this will have to wait untill I have the subframe back in it's place, and the dogbone (which isn't really a dogbone on a ph1) bolted back up, so that is engine is back in it's normal position.
I also freshened up the DCI steering rack with new inner and outer track rods. I had some play in the steering, I hope the solid mounts of the steering rack, and the new track rods solve this.

And to mount the inner track rods, you need a wrench 32. Luckily I had one in my 'odd size' toolbox (I have all my normal tools on the wall), but it was to wide, so I had to narrow it a bit.
Action shot. :smilingimp:

And a picture of my organized :kissing: tool wall. The workbench is not so empty at the moment. :smile:

And while on the subject, for those interested, a picture of the entire garage. I am quite happy with it.

Lambda is connected up.
Also received the 2,5" tube I've ordered to make up the link pipe.
But this will have to wait untill I have the subframe back in it's place, and the dogbone (which isn't really a dogbone on a ph1) bolted back up, so that is engine is back in it's normal position.
I also freshened up the DCI steering rack with new inner and outer track rods. I had some play in the steering, I hope the solid mounts of the steering rack, and the new track rods solve this.
And to mount the inner track rods, you need a wrench 32. Luckily I had one in my 'odd size' toolbox (I have all my normal tools on the wall), but it was to wide, so I had to narrow it a bit.
Action shot. :smilingimp:
And a picture of my organized :kissing: tool wall. The workbench is not so empty at the moment. :smile:
And while on the subject, for those interested, a picture of the entire garage. I am quite happy with it.
Managed to get the subframe into position.

Still need to raise the subframe, but I will do that after I have received the stabilizer bushings.
I was able to use the bolts and nuts that came of the hydraulic one. Had to modify one nut a bit to get it to fit.

And I took out an hydraulic line, and a piece of metal that will be obsolete after the PMS kit is fitted, which saves me another 868 grams. :grinning: Total weight saving so far: 186 kg's.
Still need to raise the subframe, but I will do that after I have received the stabilizer bushings.
I was able to use the bolts and nuts that came of the hydraulic one. Had to modify one nut a bit to get it to fit.
And I took out an hydraulic line, and a piece of metal that will be obsolete after the PMS kit is fitted, which saves me another 868 grams. :grinning: Total weight saving so far: 186 kg's.
In the above post I mean steering rack instead of subframe in the first line.
Today I thought I would prep the engine bay for the PMS AC delete kit as much as I could. The AC delete kit is on backorder, and not earlier available than januari. As I have a test again early februari, it is best for me to do as much as I can do while in between tests.
Got most of it out pretty easily. Once I got to the PAS pump, I got into some brilliant french engineering.

So I had to take of the pulley to get the pump of. Out with the headlight blank, and my airhammer made it an easy job.

This is all the junk that came out.

Good for 14 kg's in total. I have to add the AC delete kit later, but total weight savings so far are: 200 kg's to be precise. :smile::tongueout: :tongueclosed::astonished::tonguewink::up::up::up:
This is how empty the front of the engine bay looks right now.

All that will be added is the alternator. Besides the weight advantage, I am also keen on getting it as simple as possible. Deleting the AC system, and the PAS system makes the engine bay a lot easier to look at, and work in. And what isn't there, can't break down either.
Now I'm pretty much waiting for parts to arrive. Once the Powerflex stabilizer bushings arrive, I can proceed with the exhaust, and obviously the PMS kit has to arrive to being able to mount it.
Today I thought I would prep the engine bay for the PMS AC delete kit as much as I could. The AC delete kit is on backorder, and not earlier available than januari. As I have a test again early februari, it is best for me to do as much as I can do while in between tests.
Got most of it out pretty easily. Once I got to the PAS pump, I got into some brilliant french engineering.
So I had to take of the pulley to get the pump of. Out with the headlight blank, and my airhammer made it an easy job.
This is all the junk that came out.
Good for 14 kg's in total. I have to add the AC delete kit later, but total weight savings so far are: 200 kg's to be precise. :smile::tongueout:
This is how empty the front of the engine bay looks right now.
All that will be added is the alternator. Besides the weight advantage, I am also keen on getting it as simple as possible. Deleting the AC system, and the PAS system makes the engine bay a lot easier to look at, and work in. And what isn't there, can't break down either.
Now I'm pretty much waiting for parts to arrive. Once the Powerflex stabilizer bushings arrive, I can proceed with the exhaust, and obviously the PMS kit has to arrive to being able to mount it.
Looks like Santa didn't miss my house this year. :smile:
Bunch of expensive Renault parts, these include the track rods mentioned in a previous post, so not entirely chronological, but who cares. :tongueclosed:

And Brembo HC discs, Carbone Lorraine brake pads, Powerflex Black inner and outer ARB bushings, and Powerflex camber bolts.

I also found some Volvo 340 brackets as a good and much cheaper alternative than the PMS AC delete kit. In hindsight, lucky for me that they were on backorder, otherwise I would have ordered the kit from PMS.
Top bracket fitted.

And it al lines up really nicely.

Still need to fit the lower tensioning bracket, and measure up belt length.
With my received ARB bushings, I was able to crack on with the subframe.
Old vs new.

The Powerflex black bushings gave up a good fight to get into position, but eventually I came out on top.


Bunch of expensive Renault parts, these include the track rods mentioned in a previous post, so not entirely chronological, but who cares. :tongueclosed:
And Brembo HC discs, Carbone Lorraine brake pads, Powerflex Black inner and outer ARB bushings, and Powerflex camber bolts.
I also found some Volvo 340 brackets as a good and much cheaper alternative than the PMS AC delete kit. In hindsight, lucky for me that they were on backorder, otherwise I would have ordered the kit from PMS.
Top bracket fitted.
And it al lines up really nicely.
Still need to fit the lower tensioning bracket, and measure up belt length.
With my received ARB bushings, I was able to crack on with the subframe.
Old vs new.
The Powerflex black bushings gave up a good fight to get into position, but eventually I came out on top.
I was able to do quite a bit today.
I started with mounting the alternator belt tensioning bracket. Once fitted, I found out that it doesn't line up.

I was able to sort this pretty easy with a thinner bolt in the top hole, so that it tilts a bit, and I needed to file the top hole a bit. Much better.

Next I used my old belt to measure the length I need to order, which is somewhere between 841 and 857.

Than I bolted up the subframe, and managed to get the steering column connected to the steering rack. I don't have any pictures of this, but it was quite a time consuming job to do.
I then changed my brake discs and pads, which went pretty ease, untill I got to the disk retaining bolts. There were 4 of them, and they all had to be drilled out. :rage:


I made good use of my threads taps.

And old vs new. The pads were definately finished. The discs had been on the car for a long time as well.


And when you're halfway through, this is what your garage looks like. :hushed:

And done. :tongueout: (Need to take the calipers of again, as I forgot to add copper grease)

What's left to be done is the following:
I started with mounting the alternator belt tensioning bracket. Once fitted, I found out that it doesn't line up.
I was able to sort this pretty easy with a thinner bolt in the top hole, so that it tilts a bit, and I needed to file the top hole a bit. Much better.
Next I used my old belt to measure the length I need to order, which is somewhere between 841 and 857.
Than I bolted up the subframe, and managed to get the steering column connected to the steering rack. I don't have any pictures of this, but it was quite a time consuming job to do.
I then changed my brake discs and pads, which went pretty ease, untill I got to the disk retaining bolts. There were 4 of them, and they all had to be drilled out. :rage:
I made good use of my threads taps.
And old vs new. The pads were definately finished. The discs had been on the car for a long time as well.
And when you're halfway through, this is what your garage looks like. :hushed:
And done. :tongueout: (Need to take the calipers of again, as I forgot to add copper grease)
What's left to be done is the following:
- Order/fit alternator belt and hook up alternator wires
- Fit camberbolts
- Fabricate the link pipe
- Allignment
dann2707
ClioSport Club Member
Nice progress mate
Wouldn't bother with the copper grease tbh. On track it can get so hot it melts and gets where you don't want it. Just keep it all clean and free moving and lube the sliders with high temp grease (not copper)
Thanks for the positive feedback guys. :up::wink: And @Djw John, thanks for the tip, I will just leave it then. I did lube the sliders though with some industrial bearing grease.
This morning I made the link pipe.
I started with a standard 172 catalyst.

10 mins later it looked like this.

As I was interested in the state of the catalyst, I cut it up a bit more than needed. The engine has run 200000 km's, but the catalyst looked very good. When you hold it against the light, you can see through it. I can't imagine it being much of a restriction, which is a shame, as my decat/link pipe will give less gain.

But more importantly, I got my two needed flanges.

Bolted them up so that I could take measurements.

And I made sure that the exhaust tip is in the right position.

Tag welding the flanges to the pipe. I made a lot of tag welds, so that I didn't have any deformation. I also did the welds in sections because of this.

And the finished product in it's position.

I forgot to weigh the link pipe, so I have to estimate the added weight to 2 kg's, along with the alternator brackets, my weight saving is reduced to 197,4 kg's.
I am curious about the noise it now produces, but as my alternator is not hooked up yet, I cannot start it. I wanted to download a decibel meter app before I started this, but I forgot offcourse, so now I will have to make the comparison with my ears only.
The other thing I am curious about, is if I will notice the difference of the 182 manifold with the decat on track. :stig:
This morning I made the link pipe.
I started with a standard 172 catalyst.
10 mins later it looked like this.
As I was interested in the state of the catalyst, I cut it up a bit more than needed. The engine has run 200000 km's, but the catalyst looked very good. When you hold it against the light, you can see through it. I can't imagine it being much of a restriction, which is a shame, as my decat/link pipe will give less gain.
But more importantly, I got my two needed flanges.
Bolted them up so that I could take measurements.
And I made sure that the exhaust tip is in the right position.
Tag welding the flanges to the pipe. I made a lot of tag welds, so that I didn't have any deformation. I also did the welds in sections because of this.
And the finished product in it's position.
I forgot to weigh the link pipe, so I have to estimate the added weight to 2 kg's, along with the alternator brackets, my weight saving is reduced to 197,4 kg's.
I am curious about the noise it now produces, but as my alternator is not hooked up yet, I cannot start it. I wanted to download a decibel meter app before I started this, but I forgot offcourse, so now I will have to make the comparison with my ears only.
The other thing I am curious about, is if I will notice the difference of the 182 manifold with the decat on track. :stig:
Tonight I fitted the camber bolts. I tried to fit them with the washers, but somehow I couldn't adjust them anymore that way, so I did it without the washers. Torqued it up to 120 Nm's.
I figured out a way to take some measurements, although they may not be that accurate, at least it gives me an idea, and if I do it the same way on the other side, I should have both sides pretty much the same.
I set both sides at maximum camber, and held a water level along the brake disc. With a caliper, I can measure the distance between the water level and the top of the brake disc. Combined with the height of the brake disc where I had my water level, I can calculate the angle.


I calculated -2,56 degrees on the left side (tan-1(1,05/23,4)), and -2,34 degrees on the other side. The difference seems acceptable to me. When I have the car on the ground I will measure again, to see if it makes any difference, and do some finetuning if neccesary.
While I still have the car on axle stands, I thought I would try out a tip that my buddy @sjaakmeister gave me. I took out the spacers underneath the seatrails to lower the seats.

Only problem I had was that my 13 mm ratchet cap didn't have enough recess to get the nut on the thread, when the seat was lowered. So I had to make myself a tool.
Rookie mistake (gas turned off)

Finished

The difference is significant.


I figured out a way to take some measurements, although they may not be that accurate, at least it gives me an idea, and if I do it the same way on the other side, I should have both sides pretty much the same.
I set both sides at maximum camber, and held a water level along the brake disc. With a caliper, I can measure the distance between the water level and the top of the brake disc. Combined with the height of the brake disc where I had my water level, I can calculate the angle.
I calculated -2,56 degrees on the left side (tan-1(1,05/23,4)), and -2,34 degrees on the other side. The difference seems acceptable to me. When I have the car on the ground I will measure again, to see if it makes any difference, and do some finetuning if neccesary.
While I still have the car on axle stands, I thought I would try out a tip that my buddy @sjaakmeister gave me. I took out the spacers underneath the seatrails to lower the seats.
Only problem I had was that my 13 mm ratchet cap didn't have enough recess to get the nut on the thread, when the seat was lowered. So I had to make myself a tool.
Rookie mistake (gas turned off)
Finished
The difference is significant.
I don't think I will need them for that, as the seat mount will probably be custom, but I will keep them anyway.
In one of the above posts, I measured the belt length needed to be somewhere between 841 and 857. So I ordered a 5pk848.

I got it in place pretty easy, and found out why immediately. It was way too long. 🙈

Remeasured, and got to the same length, so I don't understand why it is too long, but I needed a shorter belt. So I gambled for a 5pk830. Which fits luckily.
Here you can also see why you need a 5pk belt with this setup.


One issue I am having, is that when undoing the alternator, I snapped the O-clip at the battery cable. I put on a new one, but I cannot get the nut on full thread. As long as it's charging, I don't really care, but in my memory, the cable and nut were a lot further up the thread. Can anyone confirm?

Lastly, I put the car back on it's wheels.
The extra camber is clearly visible.

So is the allignment being way off.

I only drove the car back and forth, out and back in the garage, and I could feel that the steering was heavier, but at first I didn't think about it, and thought it was because of the bad allignment. Further testing will have to tell how different the steering is now.
Also the car sounded a bit louder, but it's hard to tell the difference if it hasn't been started over several weeks. As long as I don't get sent of the track, it's fine by me. :stig:
In one of the above posts, I measured the belt length needed to be somewhere between 841 and 857. So I ordered a 5pk848.
I got it in place pretty easy, and found out why immediately. It was way too long. 🙈
Remeasured, and got to the same length, so I don't understand why it is too long, but I needed a shorter belt. So I gambled for a 5pk830. Which fits luckily.
Here you can also see why you need a 5pk belt with this setup.
One issue I am having, is that when undoing the alternator, I snapped the O-clip at the battery cable. I put on a new one, but I cannot get the nut on full thread. As long as it's charging, I don't really care, but in my memory, the cable and nut were a lot further up the thread. Can anyone confirm?
Lastly, I put the car back on it's wheels.
The extra camber is clearly visible.
So is the allignment being way off.
I only drove the car back and forth, out and back in the garage, and I could feel that the steering was heavier, but at first I didn't think about it, and thought it was because of the bad allignment. Further testing will have to tell how different the steering is now.
Also the car sounded a bit louder, but it's hard to tell the difference if it hasn't been started over several weeks. As long as I don't get sent of the track, it's fine by me. :stig:
With the wheels on the ground, I wanted to see how much camber I actually got, so I figured out a way to measure. At first I thought of a piece of wood the size of the wheel diameter to which I could clamp the water level, and then calculate the angle out of measurements. But while standing under the shower, I thought of a much easier way, making use of gravity, and being able to see the angle immediately.
This is what I came up with:

I can hold the piece of wood against the outer ridges of the rim. On the piece of wood, I have drawn angles up to 5 degrees, and in the center point, there is a nail. On the nail, I have a string, with a bit of weight, so that is it hanging straight down. This way I can very easily and quickly see the camber angle.
I think this is pretty accurate, except for the rim not being perfectly round because of curve marks, and not being able to measure 7,8 mm's etc, but as said before, the number is less important to me, I can make both sides equal very easy this way.
Another advantage is, that I can bring this tool to the track, and check my camber when I want to. :tongueout:
Left wheel going passed -3,5 degrees, which seemed a bit much to me.

Right wheel, exactly -3 degrees, which is what I have on the other wheel now as well.

And two shots of the stance right now, which is pretty aggresive if you ask me.


This is what I came up with:
I can hold the piece of wood against the outer ridges of the rim. On the piece of wood, I have drawn angles up to 5 degrees, and in the center point, there is a nail. On the nail, I have a string, with a bit of weight, so that is it hanging straight down. This way I can very easily and quickly see the camber angle.
I think this is pretty accurate, except for the rim not being perfectly round because of curve marks, and not being able to measure 7,8 mm's etc, but as said before, the number is less important to me, I can make both sides equal very easy this way.
Another advantage is, that I can bring this tool to the track, and check my camber when I want to. :tongueout:
Left wheel going passed -3,5 degrees, which seemed a bit much to me.
Right wheel, exactly -3 degrees, which is what I have on the other wheel now as well.
And two shots of the stance right now, which is pretty aggresive if you ask me.
http://allegro.pl/przyrzad-do-ustawiania-kata-pochylenia-kol-asta-i7047225643.html i buy somethkng like that for 18 pounds... and it work nicely
I'm aware of it, but all the parts needed for this winter project quickly added up, so I was reluctant to spend 45 Euro's (which is what they cost here) on one. Same goes for the alignment.
To save some money, and to increase my skills 🙈, I wanted to have a go at doing my own alignment using the known string method.
I bought some fishing line, and 2 pieces 2 metre electrical tubing.
First I needed to get the car a little bit higher, so that I could reach the steering arms. I put the wheels on a couple of paving stones so that the wheels are not in the air, and the car is still in horizontal position.
I first put up the tubing and strings roughly to get an idea where they need to be.

Once I had that sorted, I layed the tubes beside eachother, took the widest size (front was wider than the rear), and made a cut in the tube with a square and a Stanley knife, so that the strings would be parallel to each other, and stay in that position.
It's probably not visible in the photo, but you get the idea.


Now I had to walk around the car a coupe of times, making sure the distance to the wheels was the same left and right. Because I already made the strings parallel to each other, this was pretty easy. After this, it was time for the alignment. I managed to get it pretty precise using a caliper, so I could read tenth's of millimetres.
My toe now is:
Front left: -0,075 degrees
Front right: -0,06 degrees
I also measured the rear, and had some interesting results.
Left rear: 0,15 degrees
Right rear: -0,19 degrees
So I have some toe in on the left, and toe out on the right. This is something I need to adress in the future, might be that the rear axle thrust angle is slightly off.
So my winterproject is pretty much finished now. 2 more smaller things I need to do, which are fixing the rear exhaust rubber, and mounting some quick release buttons on the front bumper.
To save some money, and to increase my skills 🙈, I wanted to have a go at doing my own alignment using the known string method.
I bought some fishing line, and 2 pieces 2 metre electrical tubing.
First I needed to get the car a little bit higher, so that I could reach the steering arms. I put the wheels on a couple of paving stones so that the wheels are not in the air, and the car is still in horizontal position.
I first put up the tubing and strings roughly to get an idea where they need to be.
Once I had that sorted, I layed the tubes beside eachother, took the widest size (front was wider than the rear), and made a cut in the tube with a square and a Stanley knife, so that the strings would be parallel to each other, and stay in that position.
It's probably not visible in the photo, but you get the idea.
Now I had to walk around the car a coupe of times, making sure the distance to the wheels was the same left and right. Because I already made the strings parallel to each other, this was pretty easy. After this, it was time for the alignment. I managed to get it pretty precise using a caliper, so I could read tenth's of millimetres.
My toe now is:
Front left: -0,075 degrees
Front right: -0,06 degrees
I also measured the rear, and had some interesting results.
Left rear: 0,15 degrees
Right rear: -0,19 degrees
So I have some toe in on the left, and toe out on the right. This is something I need to adress in the future, might be that the rear axle thrust angle is slightly off.
So my winterproject is pretty much finished now. 2 more smaller things I need to do, which are fixing the rear exhaust rubber, and mounting some quick release buttons on the front bumper.
Last edited:
imprezaworks
ClioSport Club Member
Mk5 Golf GTI :)
NorthloopCup
ClioSport Moderator
Yeah all the time mate, amongst many other cars!
imprezaworks
ClioSport Club Member
Mk5 Golf GTI :)
I’ve seen it done, very cool.
I really like the BMW, I think mostly because it really is a nice allrounder. I use it as a sportscar when I want to, or just go from A to B, or I use it as a tow car. What I also like about the car is that the complete package is just how it should be. I have the M-package inside and out, so it looks like it goes and vice versa. Nothing is over the top, it sounds really good, but not too loud, etc, really pleased with it.
Downsides are that it does like to drink gasoline quite happily, and if you want to go fast, you have to rev it, despite being a 3 litre, it could use a turbo for low down grunt.
@NorthloopCup if you have any pointers or corrections regarding the way I did my alignment, they are more than welcome. :wink:
NorthloopCup
ClioSport Moderator
Only advice I can offer is work in minutes so I don't need to translate your readings from degrees to minutes! Lol!!I really like the BMW, I think mostly because it really is a nice allrounder. I use it as a sportscar when I want to, or just go from A to B, or I use it as a tow car. What I also like about the car is that the complete package is just how it should be. I have the M-package inside and out, so it looks like it goes and vice versa. Nothing is over the top, it sounds really good, but not too loud, etc, really pleased with it.
Downsides are that it does like to drink gasoline quite happily, and if you want to go fast, you have to rev it, despite being a 3 litre, it could use a turbo for low down grunt.
@NorthloopCup if you have any pointers or corrections regarding the way I did my alignment, they are more than welcome. :wink:
Also, not sure if you did or not, make sure the string is in the centre of the wheel. You can use the centre cap then to set the distances up easier.
Regards the thrust angle, that's there to keep your car straight on cambered roads basically. Steering wheel will always be straight, but the car is actually driving slightly on the piss is the simplest way I can think to explain it!
I did a recheck on my alignment, just to make sure. I did get some different numbers this time, being:
Front left: -0,136 degrees, or 8,2 mins toe out.
Front right: -0,212 degrees, or 12,7 mins toe out.
I guess the difference is from inaccuracy, after all, I am measuring tenths of a millimetre with a caliper. Or it could be from having moved the car, and the suspension has settled a bit.
My question is, is this acceptable for a track setup? Am I accurate enough, or am I better of taking the car to an alignment centre?
Not really worth an update, but I disconnected the speed sensor, so that I am not looking at my speed on track anymore, just the revs.
NorthloopCup
ClioSport Moderator
The only place I'd take a car to be aligned at is a motorsport company who know what they're doing. The likes of ats etc, don't really have a clue about the equipment as they don't get trained on it properly!I did a recheck on my alignment, just to make sure. I did get some different numbers this time, being:
Front left: -0,136 degrees, or 8,2 mins toe out.
Front right: -0,212 degrees, or 12,7 mins toe out.
I guess the difference is from inaccuracy, after all, I am measuring tenths of a millimetre with a caliper. Or it could be from having moved the car, and the suspension has settled a bit.
My question is, is this acceptable for a track setup? Am I accurate enough, or am I better of taking the car to an alignment centre?
You've got 20minutes toe out there, which for some is too much. I personally liked it on my cup, but on the road it was a pain. Track only - it'll be reet mate.
I guess I will have to find out how I like it then. :smile: Although, I haven't got a clue what
The thing that's bugging me, is that I got 20 mins of total toe this afternoon, but at my previous measurements I got 8,1 mins of total toe. All I did was drive the car back and forth a couple of times. Does this fall within tolerances? (I guess not) Are my measurements not correct enough? I don't know. I will leave it like this for now, and see how it will perform on track. Just have to have a couple of months patience. :down:😂
means, but I guess it's good right? :tongueclosed:it'll be reet mate.
The thing that's bugging me, is that I got 20 mins of total toe this afternoon, but at my previous measurements I got 8,1 mins of total toe. All I did was drive the car back and forth a couple of times. Does this fall within tolerances? (I guess not) Are my measurements not correct enough? I don't know. I will leave it like this for now, and see how it will perform on track. Just have to have a couple of months patience. :down:😂
You did tighten everything up properly?I guess I will have to find out how I like it then. :smile: Although, I haven't got a clue what means, but I guess it's good right? :tongueclosed:
The thing that's bugging me, is that I got 20 mins of total toe this afternoon, but at my previous measurements I got 8,1 mins of total toe. All I did was drive the car back and forth a couple of times. Does this fall within tolerances? (I guess not) Are my measurements not correct enough? I don't know. I will leave it like this for now, and see how it will perform on track. Just have to have a couple of months patience. :down:😂
NorthloopCup
ClioSport Moderator
Yeah you need to roll the car forward and backward to settle everything unless you have turnplates mate. The tyres create friction and stop everything giving you the correct reading until you release it.I guess I will have to find out how I like it then. :smile: Although, I haven't got a clue what means, but I guess it's good right? :tongueclosed:
The thing that's bugging me, is that I got 20 mins of total toe this afternoon, but at my previous measurements I got 8,1 mins of total toe. All I did was drive the car back and forth a couple of times. Does this fall within tolerances? (I guess not) Are my measurements not correct enough? I don't know. I will leave it like this for now, and see how it will perform on track. Just have to have a couple of months patience. :down:😂
imprezaworks
ClioSport Club Member
Mk5 Golf GTI :)
Not really worth an update, but I disconnected the speed sensor, so that I am not looking at my speed on track anymore, just the revs.
And the miles don’t go up on the car, win win
After the decat, the exhaust was rattling against the body somewhere quite badly. Didn't take long to find out where though. I'm not sure if it popped out because of me moving the exhaust with fabricating the link pipe, or that is has always rested on the piece of rubber that a previous owner added.

I also noticed that the exhaust mount was pretty much toast. Turned out, it was only hanging on one bolt.

Underneath it needed a bit of sanding down, and a new lick of paint. You can also notice that I only have two holes to mount the new mount at this point. In true Renault style, I needed to drill out a bolt, and retap the thread, again. :triumph:

I did copy the modification made by a previous owner, because it seems like a good and free alternative to buying a powerflex insert, and it will prevent the exhaust from hanging down.


With the mount mounted, the exhaust didn't even come near the hole, if I wanted to centre the exhaust in it's bumper recess.

So I had to make a modification to the exhaust.

In progress.

All done.


And the position is good.

With this sorted, I could finally take the car for a very little test drive around the block (like 200 metres) to check if everything stays in it's place, and I don't have any weird noises. The steering was okay, not to heavy as far as I could tell on this little drive, so that's a positive. Guess it will only be easier to steer when I'm driving at track speeds, instead of 20 km/h.
What I did notice though, was that the car was pulling to the left quite badly. Not to happy about that, considering the time I put in the alignment. At the moment I am not sure if I will have another go at it, or that I will throw in the towel, and take it to an alignment centre. I guess the later is the better option, so I will probably go for that.
I also noticed that the exhaust mount was pretty much toast. Turned out, it was only hanging on one bolt.
Underneath it needed a bit of sanding down, and a new lick of paint. You can also notice that I only have two holes to mount the new mount at this point. In true Renault style, I needed to drill out a bolt, and retap the thread, again. :triumph:
I did copy the modification made by a previous owner, because it seems like a good and free alternative to buying a powerflex insert, and it will prevent the exhaust from hanging down.
With the mount mounted, the exhaust didn't even come near the hole, if I wanted to centre the exhaust in it's bumper recess.
So I had to make a modification to the exhaust.
In progress.
All done.
And the position is good.
With this sorted, I could finally take the car for a very little test drive around the block (like 200 metres) to check if everything stays in it's place, and I don't have any weird noises. The steering was okay, not to heavy as far as I could tell on this little drive, so that's a positive. Guess it will only be easier to steer when I'm driving at track speeds, instead of 20 km/h.
What I did notice though, was that the car was pulling to the left quite badly. Not to happy about that, considering the time I put in the alignment. At the moment I am not sure if I will have another go at it, or that I will throw in the towel, and take it to an alignment centre. I guess the later is the better option, so I will probably go for that.
Could take it for alignment and as soon as you get home remeasure it all using your technique and then you've got your baseline.
That's what I am thinking, I can also compare to my previous measurements.
After all the work I've done to the exhaust, I'm still not really happy with it, mainly with how close it is to the rear axle.


The exhaust needs to move forward a bit. This means I have to shorten the decat pipe, which means I can start all over again. For now I will see how it goes. If there is no contact between the exhaust and the rear axle, I will leave it like this for the time being.
Secondly, I was going to order a coilover set for the Clio this week, but the BMW prevented that with a staggering bill of 979 Euro's for a failing master brake cilinder and brake caliper. The big bill, and having missed the BMW for almost 3 weeks, made me want to get the BMW back up to standard again.
I had a interior piece that was a bit loose because of broken pins on the back. I glued it back in, hopefully, this will keep it in place, otherwise I have to replace this.


And I got excited enough to make a restart at sanding the AC Schnitzers again.


The exhaust needs to move forward a bit. This means I have to shorten the decat pipe, which means I can start all over again. For now I will see how it goes. If there is no contact between the exhaust and the rear axle, I will leave it like this for the time being.
Secondly, I was going to order a coilover set for the Clio this week, but the BMW prevented that with a staggering bill of 979 Euro's for a failing master brake cilinder and brake caliper. The big bill, and having missed the BMW for almost 3 weeks, made me want to get the BMW back up to standard again.
I had a interior piece that was a bit loose because of broken pins on the back. I glued it back in, hopefully, this will keep it in place, otherwise I have to replace this.
And I got excited enough to make a restart at sanding the AC Schnitzers again.
Will you be driving on Assen next week? @scullyg40
Unfortunately not. Short after I had the BMW back from the garage, it decided to have another fault. This time it was the DSC system. I booked it in to the garage, to have the module rebuild/revisioned, since a new one is 2100 Euro's apparantly. It should be ready it time, but yesterday I got the call that he can't connect his computer to the module. The rebuild company couldn't help him online, so the module had to be sent back again, meaning I do not have a tow car in time. I could ask my parents to use their car, but I need it 3 times, to pick up the trailer, to allign the Clio, and to go to the trackday, so it's a bit much to ask, as they only have 1 car.
So I've decided to skip this one. Which is a shame, because I am really interested in how the modifications done over winter have worked out.
I am now set on Zandvoort the 10th of March, which I am pretty excited about. Never been there before, let alone ever driven the track. Now I'm spending my time watching onboard video's, and trying to figure out how not to demolish my car at Scheivlak. :astonished::tongueclosed:
The BMW drama is still ongoing. The DSC module has been sent back to the garage the day before yesterday, so I expect a phone call from the garage today, hopefully with good news, as the company who did the rebuild work wasn't to sure. They said that the module had to be tested on the car.
I haven't had the BMW at home for the most part of 2018. In between both faults, I had a little bit of damage because of the storm. Luckily the insurance covered it.
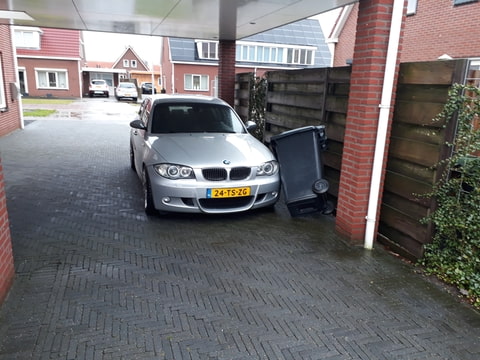
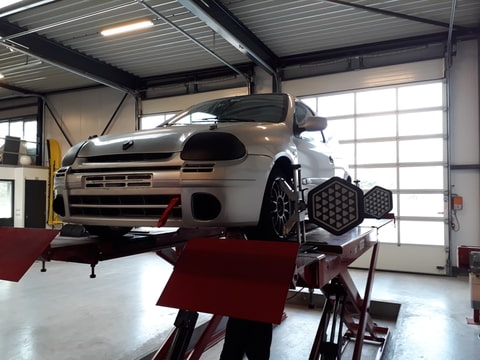
I borrowed my parent's car to pick up the trailer, and to get the Clio alligned.
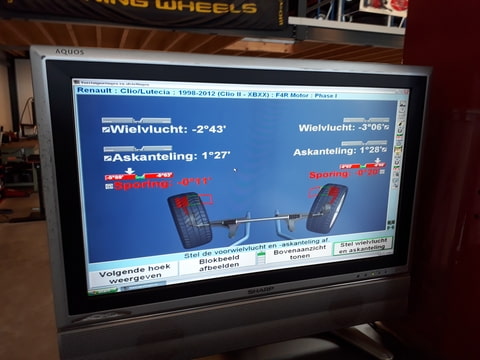
Here are the before measurements.
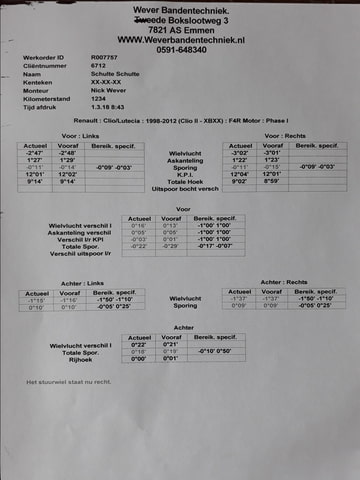
And the result after allignment.
I haven't had the BMW at home for the most part of 2018. In between both faults, I had a little bit of damage because of the storm. Luckily the insurance covered it.

I borrowed my parent's car to pick up the trailer, and to get the Clio alligned.

Here are the before measurements.

And the result after allignment.

Today it was time to finally go to Zandvoort after the long winter break. It was my first time ever to this track, and was very excited about it. I was really curious how the car would perform with the mods done over the winter period.
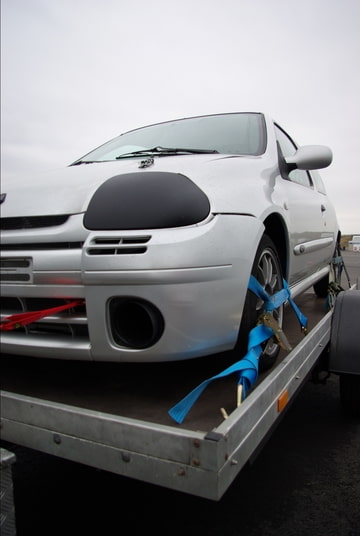
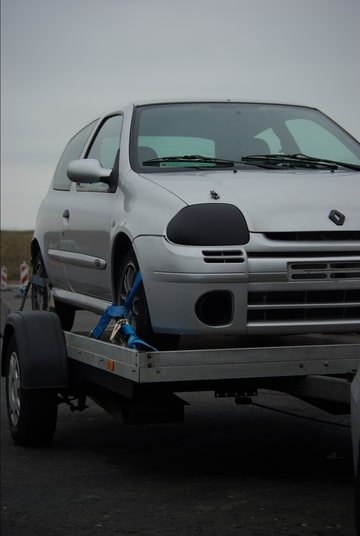
First loaded the car on the trailer, and packed the usual things.
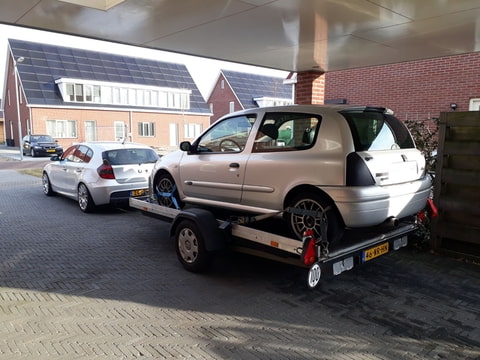
Then it was time to take the 2,5 hour drive over to Zandvoort Circuit. I brought a neighbour of mine, who brought a very big camera, and it looked like he took some nice detail pictures etc, so there should be some nice pictures coming up.
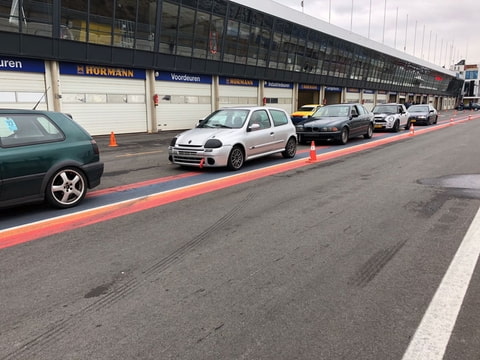
Lining up in pitlane.
And enjoying myself at the track.
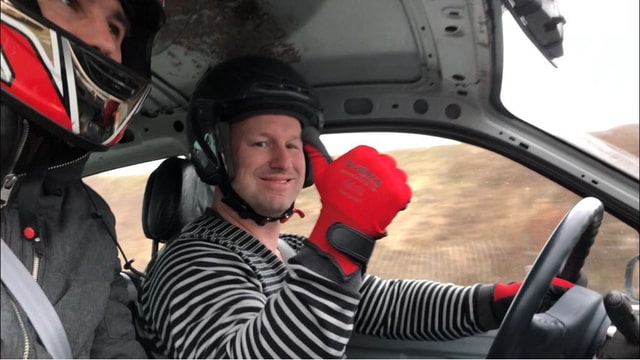
As it was my first time to this track, and I had new brakes, new alignment, new steering rack etc, the first session was all about getting a bit of feel with the car and the track. The brakes were not good the entire day due to not being bedded in yet, but they were terrible in the very first session. At the end of the day, they felt better, but still not were they need to be.
There was a very nice learning curve according to the laptimer.
Fastest lap session 1: 2.29
Fastest lap session 2: 2.28
Fastest lap session 3: 2.24
Fastest lap session 4: 2.20
The times are showing big improvements after each session, and I have to say, Zandvoort is a very different track compared with Assen. Assen is very flat, and the corners are quite easy to get right. Zandvoort is in the dunes, and the corners are very technical, and difficult to get right.
Here's a video with quite a bit of traffic
And one of a very very serious looking driver. 🙈:laughing:
In the first session I could very clearly feel that the car felt faster, due to the 182 exhaust manifold, decat and PAS/AC delete. I could also feel that the extra camber and allignment made the car faster in the corners.
Limitations were most definately the new brake pads, which didn't boost my confidence with the car, and made me brake really early, and keep distance from other cars. This did improve during the day, and I now they will be great once bedded in.
Other limitations are the tyres, this became very obvious at this track, in contrast to Assen. For this track I would definately like to have a decent set of tyres, where at Assen, I can cope pretty good with a slightly less grippy tyre.
All in all I had a really good day, the car behaved like it should, and never had any issue.
First loaded the car on the trailer, and packed the usual things.

Then it was time to take the 2,5 hour drive over to Zandvoort Circuit. I brought a neighbour of mine, who brought a very big camera, and it looked like he took some nice detail pictures etc, so there should be some nice pictures coming up.
Lining up in pitlane.

And enjoying myself at the track.

As it was my first time to this track, and I had new brakes, new alignment, new steering rack etc, the first session was all about getting a bit of feel with the car and the track. The brakes were not good the entire day due to not being bedded in yet, but they were terrible in the very first session. At the end of the day, they felt better, but still not were they need to be.
There was a very nice learning curve according to the laptimer.
Fastest lap session 1: 2.29
Fastest lap session 2: 2.28
Fastest lap session 3: 2.24
Fastest lap session 4: 2.20
The times are showing big improvements after each session, and I have to say, Zandvoort is a very different track compared with Assen. Assen is very flat, and the corners are quite easy to get right. Zandvoort is in the dunes, and the corners are very technical, and difficult to get right.
Here's a video with quite a bit of traffic
And one of a very very serious looking driver. 🙈:laughing:
In the first session I could very clearly feel that the car felt faster, due to the 182 exhaust manifold, decat and PAS/AC delete. I could also feel that the extra camber and allignment made the car faster in the corners.
Limitations were most definately the new brake pads, which didn't boost my confidence with the car, and made me brake really early, and keep distance from other cars. This did improve during the day, and I now they will be great once bedded in.
Other limitations are the tyres, this became very obvious at this track, in contrast to Assen. For this track I would definately like to have a decent set of tyres, where at Assen, I can cope pretty good with a slightly less grippy tyre.
All in all I had a really good day, the car behaved like it should, and never had any issue.
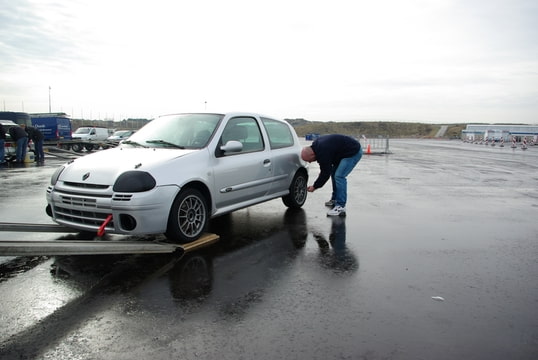
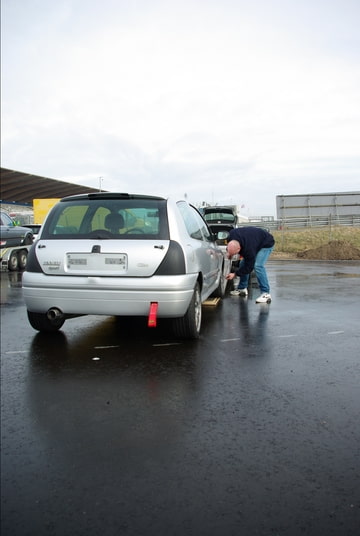
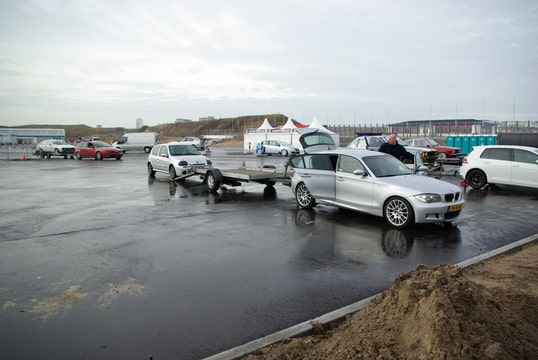
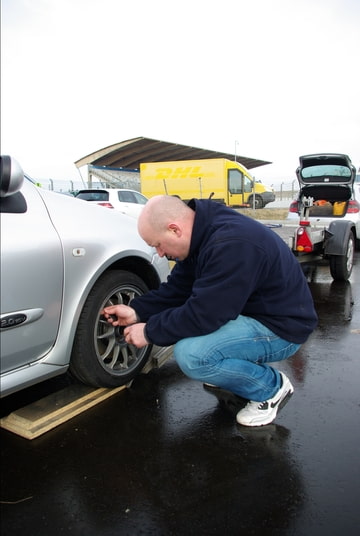
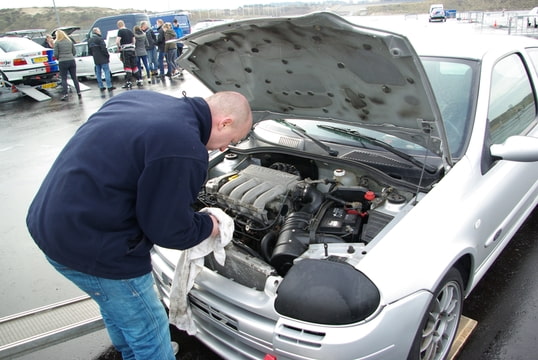
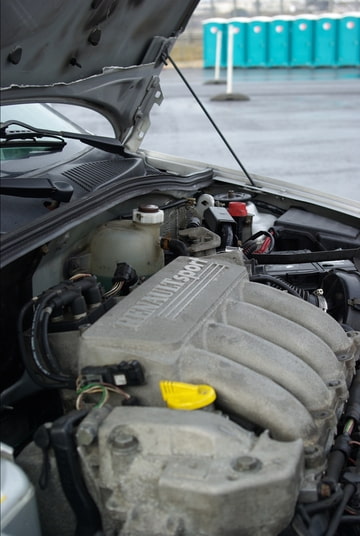
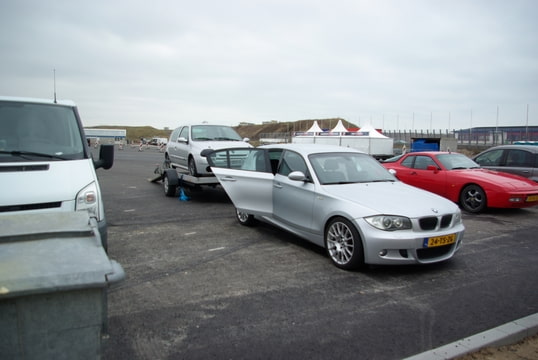
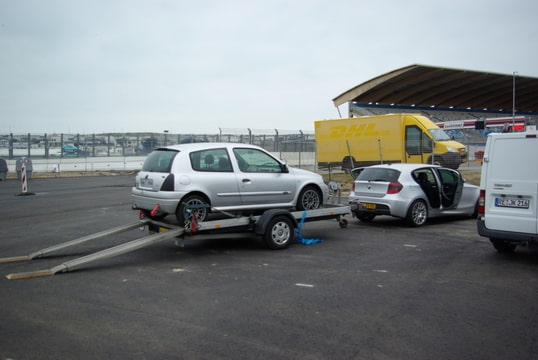
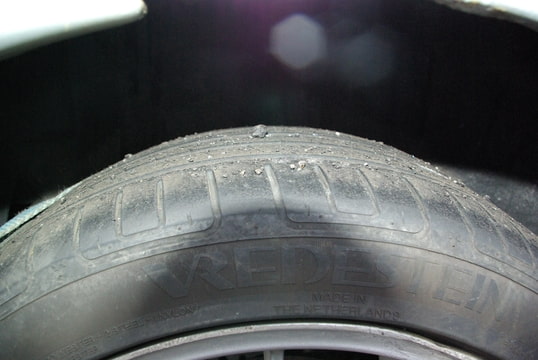
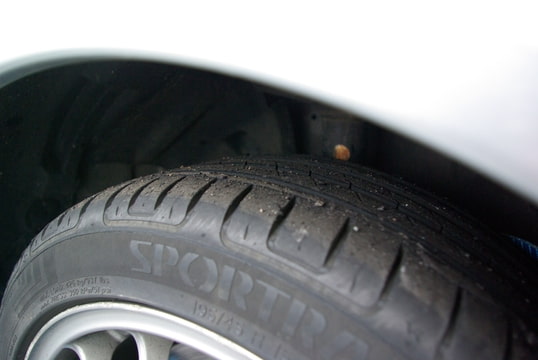
Below some of the pictures that my neighbour took. They mostly tell what's going on when the car is not on track, torqueing up the wheels, checking tyre pressure, checking oil level etc. I quite like them.


Similar threads
- Replies
- 16
- Views
- 957
- Replies
- 6
- Views
- 450
- Replies
- 2
- Views
- 304

