ClioSport.net

This is a sample guest message. Register a free account today to become a member! Once signed in, you'll be able to participate on this site by adding your own topics and posts, as well as connect with other members through your own private inbox!

  • When you purchase through links on our site, we may earn an affiliate commission. Read more here.

Robs 172 Flamer Project

Rob_Willow

ClioSport Club Member
Car  Meg Cup, Tesla, 182
Hi all!

I’ve been on this forum since 2004 and have been through more Clio sports than I can remember!
I think 2 mk2 172 full fat (now this is 3) 172 cup, titanium 182, racing blue 182, iceburg Clio phase 1, white 197 and a nimbus 200 which I sold 2 months ago for a Mercedes.

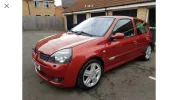
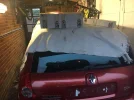
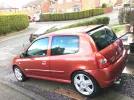
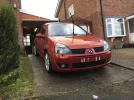
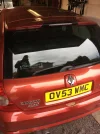
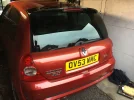
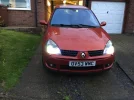
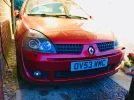
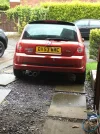
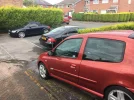
Well I have just bought this as a garage project off eBay!
It has a forum sticker and looks like it was looked after for a good period of time.

If anyone recognises the cars previous owner(s) then please get in touch!

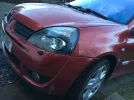
It’s failed MOT on various bits, the main one being down to having a decat fitted and worn out brakes.

A deep clean will be the first port of call, before I start anything mechanical. It drives very nicely up and down the private road, but for now will be kept sorn so I can give it a good going over.

Rob ?
 

Attachments

  • 31CBF612-EE92-4224-AE3C-A55A2B8173B5.webp
    31CBF612-EE92-4224-AE3C-A55A2B8173B5.webp
    383.5 KB · Views: 512
  • 2E62B53E-3A78-494C-A315-9970F73051EB.webp
    2E62B53E-3A78-494C-A315-9970F73051EB.webp
    160.5 KB · Views: 484
  • A99CBC9C-C710-451D-A158-B25E8FA663C4.webp
    A99CBC9C-C710-451D-A158-B25E8FA663C4.webp
    197.6 KB · Views: 496
  • Like
Reactions: Gus
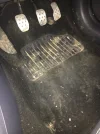
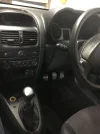
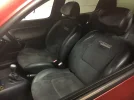
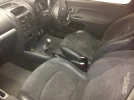
Found an hour this evening so gave the interior a Hoover and a wipe down with Polish and leather wipes on the seats.

No front mats yet so pinched the rear ones for now.

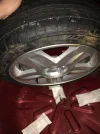
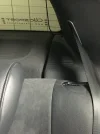
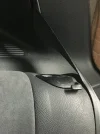
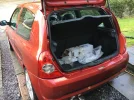
Also noticed the spare wheel and tyre is brand new and never been on the road ? A rear clip has snapped off the seat which I found in the door card, so glued that back on.
 

Attachments

  • 309E3B84-1340-4ED4-91C1-5754D1A5AED0.webp
    309E3B84-1340-4ED4-91C1-5754D1A5AED0.webp
    431.3 KB · Views: 422
  • A72B7D10-73AD-4244-A6EA-1AF3D9DA1606.webp
    A72B7D10-73AD-4244-A6EA-1AF3D9DA1606.webp
    197.4 KB · Views: 389
  • 4425C7E7-081B-49A5-BBDE-06DB5FA44C05.webp
    4425C7E7-081B-49A5-BBDE-06DB5FA44C05.webp
    386.3 KB · Views: 410
  • A36AD756-3368-45FD-96C9-ACB257453822.webp
    A36AD756-3368-45FD-96C9-ACB257453822.webp
    462.5 KB · Views: 402
  • C34AFE65-B84B-4FFF-96EB-CDCC3B51603A.webp
    C34AFE65-B84B-4FFF-96EB-CDCC3B51603A.webp
    236.5 KB · Views: 403
  • 86A70F14-AB88-4A78-B264-C1DFFC7A33E7.webp
    86A70F14-AB88-4A78-B264-C1DFFC7A33E7.webp
    244.9 KB · Views: 376
  • BD253E12-6006-4B17-9A3F-2D29107B9D7B.webp
    BD253E12-6006-4B17-9A3F-2D29107B9D7B.webp
    314.5 KB · Views: 343
  • Like
Reactions: Gus
Snap mate! I'm also doing a flamer project. I've
always loved the colour and it harks back to my Naples Red 1.8 16v, my first ever car. This is my 4th Renaultsport, 5th clio and 6th Renault.

I think yours sounds like it's in a better state than mine was, it's a whole lot tidier and running better than when I first got it though.
 
Snap mate! I'm also doing a flamer project. I've
always loved the colour and it harks back to my Naples Red 1.8 16v, my first ever car. This is my 4th Renaultsport, 5th clio and 6th Renault.

I think yours sounds like it's in a better state than mine was, it's a whole lot tidier and running better than when I first got it though.
Love a good Clio valver! My first car was Naples too, all be in a 1.2 RL Prima ?
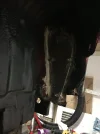
 
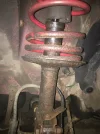
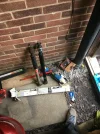
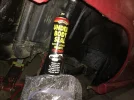
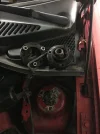
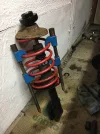
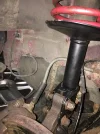
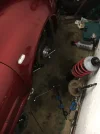
Parts arrived from Renault Parts Direct to fix the MOT failed shocks. Also got new read pads and fixings kit.
Job for the weekend once my new impact sockets arrive, this car breaks my cheaper sockets as bolts are so rusted and tight!
 

Attachments

  • 10043ED5-7518-4DBF-9B24-19D3F3A582EB.webp
    10043ED5-7518-4DBF-9B24-19D3F3A582EB.webp
    437 KB · Views: 384
  • 14ECE4D3-A42D-43C6-805D-33DFF5E37C93.webp
    14ECE4D3-A42D-43C6-805D-33DFF5E37C93.webp
    375.2 KB · Views: 413
Started to clean up a rear arch today, and got the wax oil on to prevent rust build up. There is a slight bubbling coming through but hoping this will prevent anything further.

New rear pads too. I Need to repeat this on the drivers side possibly tomorrow.

Also gave it its first clean, no polish just soap bucket and a sponge for now!
 

Attachments

  • 5B18A841-3552-442D-8416-D54222630D91.webp
    5B18A841-3552-442D-8416-D54222630D91.webp
    341.8 KB · Views: 424
  • 50F759D0-2D2C-4C60-BB7D-1E774856ABC7.webp
    50F759D0-2D2C-4C60-BB7D-1E774856ABC7.webp
    648.1 KB · Views: 427
  • 139D1126-9F21-4346-B1CC-6A3972C8B77A.webp
    139D1126-9F21-4346-B1CC-6A3972C8B77A.webp
    494.1 KB · Views: 458
  • 087523A7-B18E-457A-82B1-230B8273A7BB.webp
    087523A7-B18E-457A-82B1-230B8273A7BB.webp
    756.4 KB · Views: 418
  • 896D7D2E-5C49-4B64-8B98-594844F43BBE.webp
    896D7D2E-5C49-4B64-8B98-594844F43BBE.webp
    997.3 KB · Views: 445
  • Like
Reactions: Gus
If anyone is looking to change their exhaust for an aftermarket one, I am looking for a standard set up that I will happily swap. Not sure what I have on it but will check tomorrow.
Also need a standard cat the current system has a decat on.
 
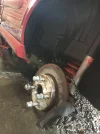
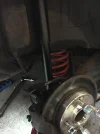
Attacked the drivers side rear Caliper brakes yesterday, and fitted a new genuine shock.
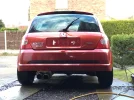
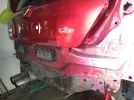
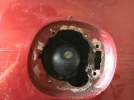
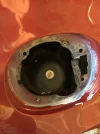
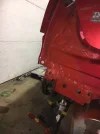
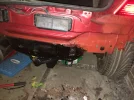
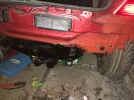
I took the rear bumper and petrol cap off to clean up all the arches and remove and treat the usual rust areas to stop future problems. You
Just need to order and apply some flame red paint and lawyer over the filler cap to finish that off.
 

Attachments

  • 4BFAA096-68A5-4FB9-AA5F-48474250C6FD.webp
    4BFAA096-68A5-4FB9-AA5F-48474250C6FD.webp
    452.5 KB · Views: 393
  • 0A37619D-EF1B-4354-8192-949D1D202C6A.webp
    0A37619D-EF1B-4354-8192-949D1D202C6A.webp
    346.8 KB · Views: 427
  • 47AA63FB-D1AB-4EEE-849F-4028067C06F5.webp
    47AA63FB-D1AB-4EEE-849F-4028067C06F5.webp
    532.2 KB · Views: 406
  • 2D925615-AB24-47AF-9275-3789C021763A.webp
    2D925615-AB24-47AF-9275-3789C021763A.webp
    643.2 KB · Views: 447
  • 891EB0BD-3D06-4CF3-8906-64B91F58DCE1.webp
    891EB0BD-3D06-4CF3-8906-64B91F58DCE1.webp
    228.8 KB · Views: 427
  • 52E21B22-6E55-4C99-972F-D790862F51AA.webp
    52E21B22-6E55-4C99-972F-D790862F51AA.webp
    428.7 KB · Views: 459
  • 8D54ECD5-90DE-46E0-AF4A-AFB208DAF51E.webp
    8D54ECD5-90DE-46E0-AF4A-AFB208DAF51E.webp
    185.8 KB · Views: 416
More pics
 

Attachments

  • 09F864F5-5BEB-4988-95AA-7B14F096BCFD.webp
    09F864F5-5BEB-4988-95AA-7B14F096BCFD.webp
    262.8 KB · Views: 406
  • F6B67A33-1333-4A3F-8E2B-784DACCC5973.webp
    F6B67A33-1333-4A3F-8E2B-784DACCC5973.webp
    110.9 KB · Views: 382
  • A7B45FB7-213D-4A1F-992B-5F5ABF708769.webp
    A7B45FB7-213D-4A1F-992B-5F5ABF708769.webp
    217.9 KB · Views: 423
  • A940EF2E-EB75-4376-A18C-A98F3554E6EE.webp
    A940EF2E-EB75-4376-A18C-A98F3554E6EE.webp
    339.5 KB · Views: 405
Not updated this for a while.

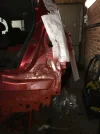
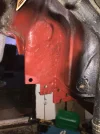
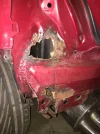
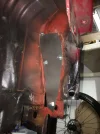
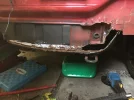
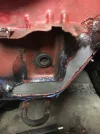
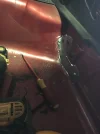
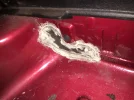
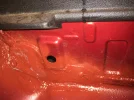
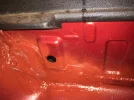
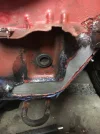
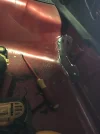
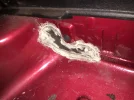
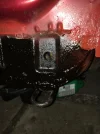
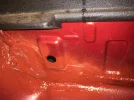
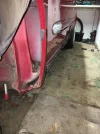
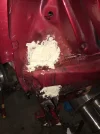
Whilst stripping down the rear, I noticed two rust holes, one behind the NSR wheel arch/ behind light cluster, and on the edge of the spare wheel well.
Having watched countless Ed China episodes and the fact I bought a grinder not long back, decided to have a go myself.

It’s hidden from sight being behind Panels, so didn’t warrant the cost of a professional garage to weld in new plates, went for the cut out and bolt new metal over option.

I cut out all loose rust, and got the paint back to reveal solid metal.
Fabricated some patches from 1.0 mild steel sheet, and M6 bolted them to solid material behind. Body work mesh, filler, primer and paint, I’m a lot happier with the result and rust eradicated. The wheel well was rust treated, and wax oiled over.

Of course welding in new plates would be better, but I haven’t got a welder and I’m trying to keep the cost down. The area isn’t on show.
Polished up the bumper and the rear end is now built back up ?
 

Attachments

  • 2EA780A1-D965-4C3C-810F-B14C9145B145.webp
    2EA780A1-D965-4C3C-810F-B14C9145B145.webp
    295.9 KB · Views: 435
  • 542200F7-1D27-46C8-B636-0CCC582F4729.webp
    542200F7-1D27-46C8-B636-0CCC582F4729.webp
    573 KB · Views: 404
  • CC350D18-D476-4ECF-B511-2451847CCAD0.webp
    CC350D18-D476-4ECF-B511-2451847CCAD0.webp
    552 KB · Views: 443
  • 40753A82-864C-4261-BCF0-2B5B9B82A029.webp
    40753A82-864C-4261-BCF0-2B5B9B82A029.webp
    170.7 KB · Views: 415
  • 188C3B74-E61F-4696-8BC2-E8FF55817485.webp
    188C3B74-E61F-4696-8BC2-E8FF55817485.webp
    371.4 KB · Views: 437
  • 1766A4AB-5467-4EB5-AB98-6F9C5F2523CA.webp
    1766A4AB-5467-4EB5-AB98-6F9C5F2523CA.webp
    190.9 KB · Views: 404
  • 1405E2DF-A854-4FC5-AEB5-8B93375CF821.webp
    1405E2DF-A854-4FC5-AEB5-8B93375CF821.webp
    215.5 KB · Views: 427
  • F22E2D13-5E0D-4CA6-A825-96B6E7321222.webp
    F22E2D13-5E0D-4CA6-A825-96B6E7321222.webp
    130.7 KB · Views: 411
  • BE5E1A50-F529-4CF2-BEA3-1F65ED28CED7.webp
    BE5E1A50-F529-4CF2-BEA3-1F65ED28CED7.webp
    196.8 KB · Views: 421
Spare Wheel well
 

Attachments

  • 573FE7B7-8CDD-4A9F-A72E-70AFD128E57B.webp
    573FE7B7-8CDD-4A9F-A72E-70AFD128E57B.webp
    472.8 KB · Views: 439
  • BB5CC272-037F-415F-B272-8199C44FDDBC.webp
    BB5CC272-037F-415F-B272-8199C44FDDBC.webp
    294.4 KB · Views: 379
  • D0F5E3C5-DB07-4845-9B04-83D956B22AEF.webp
    D0F5E3C5-DB07-4845-9B04-83D956B22AEF.webp
    334.8 KB · Views: 396
  • 0608BC1F-22C1-46AB-861C-66CA04CABA7A.webp
    0608BC1F-22C1-46AB-861C-66CA04CABA7A.webp
    349.2 KB · Views: 393
  • 5F83A79A-C90C-40CA-9E54-A8F484CB4861.webp
    5F83A79A-C90C-40CA-9E54-A8F484CB4861.webp
    376.4 KB · Views: 396
  • 3FBFDA70-A0C7-47E6-8246-8287EA5CB484.webp
    3FBFDA70-A0C7-47E6-8246-8287EA5CB484.webp
    257.8 KB · Views: 378
  • D353EA91-301D-4ABE-81DC-BD18E3DA6D39.webp
    D353EA91-301D-4ABE-81DC-BD18E3DA6D39.webp
    726 KB · Views: 430
You changed the rear shocks in pairs right?
I Want to get the MOT passed and then will add the remaining pair.
 

Attachments

  • E0B4A0AF-8FE6-43AB-8B1E-DA34B4D3BDF3.webp
    E0B4A0AF-8FE6-43AB-8B1E-DA34B4D3BDF3.webp
    593.9 KB · Views: 411
  • E2211F58-B7E2-4F59-B974-E4E456E06466.webp
    E2211F58-B7E2-4F59-B974-E4E456E06466.webp
    726 KB · Views: 376
  • 49519CD6-3392-4EFE-AD45-034451803247.webp
    49519CD6-3392-4EFE-AD45-034451803247.webp
    294.4 KB · Views: 367
  • D1647F35-490E-4001-8169-D38DFEA0D988.webp
    D1647F35-490E-4001-8169-D38DFEA0D988.webp
    334.8 KB · Views: 404
  • D29D2E10-22DC-4330-B8C6-EBA32F8FD27E.webp
    D29D2E10-22DC-4330-B8C6-EBA32F8FD27E.webp
    349.2 KB · Views: 374
  • 483A06BE-4AC2-40AD-8FE2-8D35722C364A.webp
    483A06BE-4AC2-40AD-8FE2-8D35722C364A.webp
    376.4 KB · Views: 407
  • 3981A81F-857A-449F-B140-7E10983A1906.webp
    3981A81F-857A-449F-B140-7E10983A1906.webp
    593.9 KB · Views: 423
  • 3A27CA2C-78A4-4347-8609-B0478BD33D7D.webp
    3A27CA2C-78A4-4347-8609-B0478BD33D7D.webp
    257.8 KB · Views: 398
  • 4DED6016-CCE0-45C8-8082-A2013A8AEAD4.webp
    4DED6016-CCE0-45C8-8082-A2013A8AEAD4.webp
    726 KB · Views: 398
New shock on. Will replace all once I’ve got it through an MOT.
 

Attachments

  • 3CD3BDCF-6886-4BFD-83D5-F234884874D0.webp
    3CD3BDCF-6886-4BFD-83D5-F234884874D0.webp
    204 KB · Views: 412
  • 1C1B57FA-2AF1-4B31-A653-3921270B89FF.webp
    1C1B57FA-2AF1-4B31-A653-3921270B89FF.webp
    446 KB · Views: 423
  • 7CC54876-62EA-4A18-9969-A2ABAE72511D.webp
    7CC54876-62EA-4A18-9969-A2ABAE72511D.webp
    426.8 KB · Views: 405
I've got to do that to my filler cap area on my Flamer too. Checked behind the interior rear panels to see what state my sills are in which i was dreading doing, very clean which was a relief!
 
They are all starting to rust now, rivetted on skirts dont help as most have never been off! Mine was going under the seam sealer in the arches.
 
Currently away on holiday, but here’s some updated photos from the past few weeks of work.

Basically removed the arch and skirts and removed a bucket load of soil, this has happened on every MK2 I’ve bought over the years.
Also picked up a Black gold Cup spoiler.
Will be painted at some point, or may just leave black. Thoughts?
The horn not working was another MOT failure. A replacement double horn off eBay for £11 sorted that out.

The car failed badly on emissions.
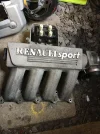
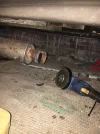
Upon removing the Cat it appears to have a 182 manifold set up.
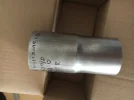
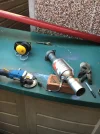
I sold the Cat which looked knackered, and bought a new BM one, along with a front genuine Lambda Sensor. Will install this when back home.
 

Attachments

  • 132FA7D0-5D1F-4C4A-B33C-6D8633E78F18.webp
    132FA7D0-5D1F-4C4A-B33C-6D8633E78F18.webp
    220.3 KB · Views: 436
  • C988A41D-F6BD-451E-A071-401960E5CA50.webp
    C988A41D-F6BD-451E-A071-401960E5CA50.webp
    166.8 KB · Views: 381
  • BCCC61F1-D79C-4E59-A2B3-8E42F83E7DB7.webp
    BCCC61F1-D79C-4E59-A2B3-8E42F83E7DB7.webp
    155.4 KB · Views: 407
  • C275B0E9-BAD7-4C3D-97D8-20B17B426306.webp
    C275B0E9-BAD7-4C3D-97D8-20B17B426306.webp
    174.3 KB · Views: 387
  • 7233F201-5F37-45EC-96BD-70C092FEFB6E.MOV
    19.6 MB
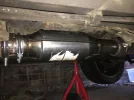
New Cat installed with made to fit reducer.
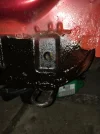
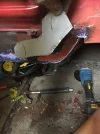
Drivers side skirt removed and paint bubbling sorted
Drivers arch cleaned up
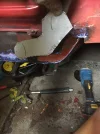
Bent jacking point repaired
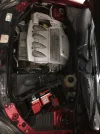
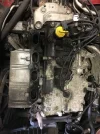
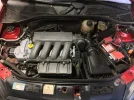
Engine painted
 

Attachments

  • 963F6303-DA11-4CD7-9F36-39513211226F.webp
    963F6303-DA11-4CD7-9F36-39513211226F.webp
    262.9 KB · Views: 524
  • F95F29AB-D3E0-4B2B-B4BD-AFF669242E99.webp
    F95F29AB-D3E0-4B2B-B4BD-AFF669242E99.webp
    278.2 KB · Views: 514
  • FF6BA116-EF6D-4162-BB2E-DC5A187B87DA.webp
    FF6BA116-EF6D-4162-BB2E-DC5A187B87DA.webp
    265 KB · Views: 506
  • 989DC8FC-8C55-4F4C-89AC-7CC5FD5B8672.webp
    989DC8FC-8C55-4F4C-89AC-7CC5FD5B8672.webp
    287.2 KB · Views: 519
  • 929E775E-D1F7-4D20-AC24-23EB7E847A29.webp
    929E775E-D1F7-4D20-AC24-23EB7E847A29.webp
    373.9 KB · Views: 498
  • 40D55EA7-EA10-4898-B160-32192B763F23.webp
    40D55EA7-EA10-4898-B160-32192B763F23.webp
    243.8 KB · Views: 505
  • A4A5A64F-C588-4CF6-ABE6-ECAFF6E1AFE0.webp
    A4A5A64F-C588-4CF6-ABE6-ECAFF6E1AFE0.webp
    66 KB · Views: 520
  • 7AF67D63-D959-4578-9B7F-5A27991AB20E.webp
    7AF67D63-D959-4578-9B7F-5A27991AB20E.webp
    232.1 KB · Views: 524
  • 63EFF091-4621-4A67-84CC-4B0FDFC4852E.webp
    63EFF091-4621-4A67-84CC-4B0FDFC4852E.webp
    203.5 KB · Views: 413
  • 535BC4E4-7F84-4131-9903-6A986667D820.webp
    535BC4E4-7F84-4131-9903-6A986667D820.webp
    114.1 KB · Views: 519
+
 

Attachments

  • 4A6B10B2-77B3-478C-85D1-E082405E6CB4.webp
    4A6B10B2-77B3-478C-85D1-E082405E6CB4.webp
    217.9 KB · Views: 513
  • 6AB991C1-20EF-4E98-88FE-037369CD937F.webp
    6AB991C1-20EF-4E98-88FE-037369CD937F.webp
    147.8 KB · Views: 469
Rob your flamer project is much like mine even down to the black gold cup spoiler. I need to see to behind my fuel cap as well then onto the bent jacking points - all four?

Is that built hamber you've used to neutralise the remaining rust?
 
Rob your flamer project is much like mine even down to the black gold cup spoiler. I need to see to behind my fuel cap as well then onto the bent jacking points - all four?

Is that built hamber you've used to neutralise the remaining rust?

Only the drivers front jacking point was bent/curled around. Bent it back with a small bar and some mole grips, sanded down surface rust and used rust converter. Let it dry and go at it with red primer, and use Wax oil on the inner sides.
 
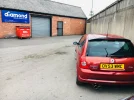
Clio is all done ready for a trip to Mick @ Diamond in two weeks time.

New shocks all round,
New Catalytic Converter
Lots of cleaning underneath
New Horn
Brake pads
Cup splitter
Cup spoiler

Can’t wait to finally drive it!
 

Attachments

  • F2E4BC33-7BD4-4F52-8716-82CF1A6D1ABE.webp
    F2E4BC33-7BD4-4F52-8716-82CF1A6D1ABE.webp
    246 KB · Views: 388
  • 3E62B1F0-E6D2-4959-A70E-5DFE2DD66AF7.webp
    3E62B1F0-E6D2-4959-A70E-5DFE2DD66AF7.webp
    241.8 KB · Views: 378
  • E6B8EAAC-1B3C-49E0-B898-BA3DF6D2E4D0.webp
    E6B8EAAC-1B3C-49E0-B898-BA3DF6D2E4D0.webp
    223.8 KB · Views: 400
  • 34E477FB-2F55-4437-87C3-1327AB2B5876.webp
    34E477FB-2F55-4437-87C3-1327AB2B5876.webp
    100.2 KB · Views: 388
  • 7FF0B421-ACAD-4F90-B69F-B3A22F3317DF.webp
    7FF0B421-ACAD-4F90-B69F-B3A22F3317DF.webp
    436.8 KB · Views: 394
Not updated this for a while!

The car was sent to Diamond for an MOT, and to sort a problem with the rear brakes and lose gear linkage.
A new rod donated from a 182 fixed this, it was on back to front!
New handbrake cables and she flew through the MOT
 

Attachments

  • 6E8C6917-ECC0-414A-BBB5-B3D4CEAA3708.webp
    6E8C6917-ECC0-414A-BBB5-B3D4CEAA3708.webp
    299.9 KB · Views: 352
I really didn’t like the Magnex Exhaust, so removed it for a cheap and cheerful backbox for now. Looking much better.
CD0B36F7-9D7B-4673-8743-27FF428922BD.webp
F9A15AD6-7879-4420-AC28-CBC71B0A52A0.webp
 
Today I got bored, so decided to strip out the Clio, see what all the fuss is about!
De wiper, and basically everything from the behind the front seats back.
1464FF43-22F6-4225-A82F-E146697D6A5B.webp
B65247B7-25E9-4418-B187-825DB2F89BFF.webp
9444E9F9-1AF0-45D6-B26E-7F502ED9063F.webp
 
Are you making it a track car then?
I wasn’t planning on doing..
I think I will put the door cards and boot trims back, to give some sound proofing. It’s very noisy in this state ?
It’s also on gumtree for sale. So really unsure what direction I’m going in now it’s fixed! ?
 
Love it with the 182 wheels. They seem to suit flame red and Monaco so well. You’ve made some nice progress on this, looks very nice.
Wish I could have another 172/182, miss the feel of driving one. Sadly stuck with my Fabia vrs for a bit though.
 
Back
Top