ClioSport.net

Register a free account today to become a member!
Once signed in, you'll be able to participate on this site by adding your own topics and posts, as well as connect with other members through your own private inbox!

  • When you purchase through links on our site, we may earn an affiliate commission. Read more here.

Matty's One-Seven-Two PH2 - Track Car Build


Hi everyone! :smile: I'm pretty new to the Clio world, about 3 weeks new, and also new to the track car world. I picked up this Clio 172 PH2 from a mate at work for £500, a bargain, with the agreement that if I ever came to sell it I'd give him a good deal back on it since he gave me one. I bought the car about 3 weeks ago, it was stripped of pretty much everything apart from the dashboard. He had bucket seats in at the time which originally I was going to buy without, but ended up paying an extra £200 and got the bucket seats, side mounts, and the custom seat mounts. Car had no MOT, tax and was SORNed, so I got it transported from his house to mine for £30, though it ran great, just needed a jumpstart. (Also has a Cliosport.net sticker in the back window, so it used to be somebody's on here!). I don't really plan on doing any engine upgrades so it'll mostly be interior and track prep stuff.

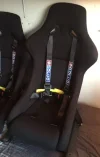
I was saying above that he gave me a pretty good deal, here's what the car already came with for £500;
  • Momo Steering Wheel and Boss
  • Coilovers (Not sure what brand, haven't had a chance to take off the wheels yet)
  • K&N Air Filter
  • Full Stainless De-cat Exhaust
  • Renault Turbine Alloys
Plans for the future near future:
  • Full 6-point roll cage (Custom made by a friend)
  • Rear De-wiper
  • Remove aerial
  • Various gauges
  • Modify dashboard and flock it (will need to fit around the cage once installed)
  • Bonnet and boot pins
  • Polycarb windows (maybe, still on the fence about this one)
  • Custom door cards
  • Headlight air intake
  • Brake ducts
  • Fancy engine bay detailing
  • Track stuff a bit later on; New pads, discs, braided brake lines (maybe), harnesses.
FullSizeRender (8).jpg

FullSizeRender (9).jpg
 
Here's how the interior looked when I received the car. It also had climate controls and radio but I took them all out for now. Radio will stay gone, climate controls hidden away somewhere else.

IMG_3756.JPG


First port of call was to start getting rid of any more unnecessary things. I'm not confident in cutting out huge looms right now so I set about simply hiding most of the wiring behind and inside the door panels. I began with the looms that went to the rear tail light because they were the easiest to get out the way. The drivers side loom was easy, but I ended up cutting all the wires on the passenger side, passing them through a conduit and resoldering, as I didn't want to pull the loom out from the spoiler.

IMG_3764.JPG


I set about removing the entire dashboard, as I'm going to need to modify it anyway once the cage gets nearer to completion. I had to remove the steering wheel to get the lower dash off too. I'm going to be making a custom dashboard on the centre console, so I am in the process of removing and blanking off the vents in the middle, to make a plate for various switches.
IMG_3843.JPG

IMG_3884.JPG


IMG_3887.JPG
 
Here's the gauges I got. Autometer oil pressure gauge and analog clock. Also bought a T-piece to fit the oil pressure sender, £10.99 from Matt Lewis Racing. Also just spent the last hour getting these damn centre vents out of the lower dash. They're moulded in and it was a b*tch getting them out. Ended up drilling a load of holes and got in there with my side cutters and sliding in my hacksaw. Happy they're out though, just need to blank the tubes that lead to the vents.
IMG_3813.JPG


IMG_3828.JPG


IMG_3916 (2).JPG


FullSizeRender (14).jpg
 
Did a bit more work on the dash today. Made the curved insert out of two aluminium L-bars I had lying around. Hacksawed a bunch of lines down one edge, which allowed me to curve the bar to my cardboard template which matches the contour of the dash. Put a bit of cardboard in the vent hole to give a better idea of what it'll look like. The actual panel is just a hardboard sheet, held on with temporary bolts. This panel will be flocked when I do the main dash and I will get new black bolts for it. Test fitted my gauges too.

IMG_3932.JPG
IMG_3934.JPG

IMG_3935.JPG
IMG_3938.JPG

IMG_3939.JPG
IMG_3940.JPG

IMG_3946.JPG
IMG_3950.JPG
 
Spent the day attacking the dashboard with the angle grinder and sorting out and tidying up some wiring. Got rid of the glove box and the blower pipes to either side vent as they will be blocked by the cage once its installed anyway. Since the passenger airbag has been removed, I cut out the airbag flap from the dashboard and will be hinging it to create a hidden compartment for the fuse box and climate controls. Need to keep the climate controls accessible to demist the windscreen but don't have any room on the custom dash I made. The airbag comparment looks pretty rough around the top edge because it was attached by a tough piece of plastic that I had to break to remove but it should be cleaned up a bit once the dash gets flocked.

Also removed some unnecessary wiring and added conduit to some wires near the boot to make it look nicer.

Before
IMG_3958.JPG

After
IMG_3961.JPG


IMG_3967.JPG

This is how to fuse box and climate controls will be positioned. Haven't made any brackets to connect them to the bar yet though.
IMG_3971.JPG


You can see the conduit leading from the side panel to the top of the boot, and one leading to the bottom. Held in position by p-clips to pre-existing bolt holes.
IMG_3956.JPG
 
Got a few things done this week. For the past few weeks I've been slowly getting a custom 6-point cage made by a guy who works with my dad. The steel its made from has surface rust from being left outside but it'll be off to be sandblasted and primed next week. At the moment only the main bars have been made (B hoop, front and rear struts) and all other supports will be made when it all gets welded in, as I'm not 100% sure of all the lengths and angles. The interesting thing about this cage is that he made all the parts without actually seeing the car; I simply measured (many times) and created models and engineering drawings in Autodesk Inventor Professional 2016 to which I gave to him and he made the cage piece by piece, and miraculously, it all fit pretty damn well! Currently held in with straps and zipties just for a test fit, though sorry for the crappy pictures but I just took them using a site light so theres some very harsh shadows which make the joints look pretty terrible, but they are actually almost spot on.

IMG_3993.JPG

IMG_3994.JPG


Also made a mini paint booth in the corner of the garage and painted the dash trim and speedo dial red to match the rollcage once its painted.

FullSizeRender (15).jpg
IMG_3982.JPG

FullSizeRender (16).jpg

IMG_3990.JPG

FullSizeRender (18).jpg
 
Not much been going on recently, still waiting to get my rollcage sandblasted and painted so can't do much interior work until that's ready. Bought a PVR22 Clubsport battery which should arrive this week, and will be relocated either behind the passenger seat or at the rear of the car somewhere. That'll also allow me to have loads more room for the air intake which will go through the headlight. Got it up on axle stands and took the wheels off yesterday to have a proper look at the brakes (Not looking great) and gave the wheels a good powerwash. I was originally going to sell these turbines as I'm not too sure about the airflow to the brakes, but for now I'm going to keep them because they look great, anyone know how well they'd fare on track?

IMG_4270 (1).JPG

IMG_4265 (1).JPG


Also fitted a T-piece for my oil pressure gauge sender, but going to need to add a hose and run the sender from somewhere else as there's not enough room to fit it in.

IMG_4277 (1).JPG


The ECU bracket had also broken off, which I believe is a pretty common problems Clio's have, so I made a little bracket for that out of a piece of aluminium.

IMG_4278 (1).JPG
IMG_4280 (1).JPG

IMG_4279 (1).JPG


Should hopefully have some more interesting stuff to talk about once my cage gets welded in. I have polycarb front windows on the list of things to do next, just have to free up some funds, and door card material is arriving next week too so should be able to start making them.
 
Bought all the stuff I'd need to relocate my battery. Still deciding whether to mount it on the tunnel in the passenger footwell or behind passenger seat. Battyer is a PVR22 Clubsport battery, and I also bought some 4AWG cable, junction box and heavy duty crimp terminals.

IMG_4301.JPG

IMG_4299.JPG

FullSizeRender (10).jpg


Bought some 4-point Sparco harnesses too and trial fit them onto my bucket seats. Sat in them and buckled up and felt great. One seat is higher as its sat on a custom mount made by the previous owner. Other seat has a custom mount welded onto the factory slider so its adjustable.

FullSizeRender (11).jpg


On a bit of an unrelated note, bought a new toolbox! Love Teng Tools and can't stop buying them even though I usually already have the tools I buy.

FullSizeRender (20).jpg
 

Attachments

  • FullSizeRender (19).jpg
    FullSizeRender (19).jpg
    66.7 KB · Views: 277
Thanks. Actually planning on redo-ing that panel as I want to move the gauges into the bit where the vents were and put the switches on the curved panel. They feel too low when they're down there.
Yep, that's a good plan - keeps the guages out the way doesnt it. where do you put the temp sensor on the sump? or does the T pieced pressure senderr do that aswell? I'm going to redesign mine soon, I can only just access my kill switch harnessed in, which isn't too goood, and move my brake bias to thinking of that, as I completely can't reach it ooops
 
Yep, that's a good plan - keeps the guages out the way doesnt it. where do you put the temp sensor on the sump? or does the T pieced pressure senderr do that aswell? I'm going to redesign mine soon, I can only just access my kill switch harnessed in, which isn't too goood, and move my brake bias to thinking of that, as I completely can't reach it ooops

Don't have an oil temp gauge just a pressure gauge. If I was going to get a temp sensor as well I'd probably just use a sandwich plate on the oil filter and run a braided hose if it was necessary to fit both the pressure and temp sensor to it. If I was going to do it again I wouldn't use a t-piece in that area as it was an absolute b*tch to fit the t-piece and the sender in that tiny area. Would've been easier if I removed stuff but didn't want to be dismantling too much, just removed the fuel rail cover to get better access.
 
Bought some new shoes for the Clio yesterday off @damianscup and drove to pick them up this morning. Not sure what brand of alloy they are (Previous owner thought BBS, can anyone clarify?) but they're wrapped in Yokohama A048 soft compound tyres all with about 5-6mm tread left. As you can see in the last picture, they stick out way further than my previous wheels, and I was going to get spacers anyway, but I guess now I dont have to! Wasn't a massive fan of the alloys when I first saw them but after putting them on the car, I'm liking them a lot more!

Cheers @damianscup

IMG_4364.JPG

IMG_4365.JPG

IMG_4367.JPG

IMG_4379.JPG

FullSizeRender.jpg

IMG_4389.PNG
 
Are they Clio wheels? That's an aggressive offset to say the least!

Don't really know to be honest. Previous owner said they were taken off a PH1 172, is the offset on a PH1 different to PH2? But I can tell that theyre quite wide alloys because I had to use a deep socket to fully tighten the wheel bolts. Would like to find out what they are, can't seem to see anything on them at the moment.

Edit: Just found these http://vi.raptor.ebaydesc.com/ws/eB...100&category=179684&pm=1&ds=0&t=1458567673001

The PCD is different though.
 
Small update. Bought some material for my door cards from Cutplasticsheeting.co.uk. Its 3mm Foamex Board, used this because its pretty light, easy to cut, and has a nice matte finish. Was pretty cheap too, only cost about £20 for the two front door cards. I have also decided on getting polycarbonate/lexan windows so will be removing all the motor and wiring from the doors at a later date. Made the door cards by first taping a clear plastic sheet over the door and tracing the door card profile, before transferring that onto some cardboard, did a test fit and then finally cut out the final door card on the Foamex. I'm pretty happy with how it looks (theres a protective film over the top which is why it looks like it has a crappy finish) and have yet to cut the slot of the door pulls which can be seen in the first picture.

IMG_4482.JPG

FullSizeRender (21).jpg

IMG_4495.JPG


Also decided to mount my battery under the passenger seat (Look how much crap there is to remove before I can paint the interior!). I will be having a passenger seat for when I get some track tuition and for taking out some mates with me.

IMG_4488.JPG
 
Been almost 2 months since I've posted anything on this thread but that doesn't mean I haven't been busy. A lot of the stuff I've done I won't bother showing until it's finished as I've been slowly working my way through a few big jobs at once.

Did a few aero mods to the front bumper. A lot of it is probably not that effective, but I think it looks awesome so who the hell cares? Its a track car! Didn't take any in-progress pics so heres a few almost-finished ones. Cut the speed holes in the bumper, but still need to make them in the crash bar behind them. Splitter is currently made from 5mm ply screwed to the bumper, but it is only a template and will be later making it from ~10mm marine ply with big brackets holding it to the car's frame. Also painted the front diamond red to stick with the red and black theme of the car.

I also have some brake ducts in progress for the fog light areas and some headlight washers blanks.

FullSizeRender_2.jpg

FullSizeRender_3.jpg

IMG_5534.JPG

Canards bought from CMComposites.
FullSizeRender_1.jpg

Test fit on the car. Headlights have been off the car for nearly 3 months now as I'm doing a few things with those, too.:
IMG_5546.JPG
 
Small update. Finally had a go at sorting out the wiring loom in the car. I'm not competent enough to go snipping out wires everywhere so I had to make do with leaving almost the entire loom in, but just hiding it all out of the way. Before and after pics. Used a shitload of electrical tape (is this the part where I forgot I needed to trace a wire running through the loom?) to cover the entire thing and held up with zipties. Will be attached to the rollcage bar that runs under the dash in the future.

IMG_5596.JPG

IMG_5614.JPG
 
  MK7 Golf R, Clio 182
that front end looks awesome! ive been reluctant to do it to mine as didn't know what it would look like on the black but it looks great!
 
that front end looks awesome! ive been reluctant to do it to mine as didn't know what it would look like on the black but it looks great!

Thanks, just had a look at your too and really like how it looks! Yellow and black was my second option if I didn't like how the red turned out, was thinking of doing that and whacking a whopping big batman logo on it, haha. I'm currently in the process of making some brake ducts that are red too. I don't want to go over the top with the red, just a few subtle hints here and there; badges, brake ducts, callipers, and roll cage. Everything else black.
 
  MK7 Golf R, Clio 182
Thanks, just had a look at your too and really like how it looks! Yellow and black was my second option if I didn't like how the red turned out, was thinking of doing that and whacking a whopping big batman logo on it, haha. I'm currently in the process of making some brake ducts that are red too. I don't want to go over the top with the red, just a few subtle hints here and there; badges, brake ducts, callipers, and roll cage. Everything else black.

Batman 😂 why didnt i think of that
 
Began prep for some interior painting this week. Plan is to go matt black throughout. Just got to finish sanding the interior then can get ready to paint, just need to wait for a warm-ish day.

FullSizeRender.jpg

IMG_5660.JPG


Also bought a few things. Got a front brake upgrade; Brembo HC discs and DS2500 pads from @NorthloopCup and some Goodridge braided lines. Rears will just stay standard and will buy the rear discs and pads nearer to the completion of the car. Also bought a second dashboard from @.J.a.m.e.s. as I fcked up my first one, but I can now use my old one to experiment on when it comes time to cutting around the roll cage.

FullSizeRender.jpg

IMG_5644.JPG

IMG_5646.JPG
 
  Yozza'd Titanium 182
Began prep for some interior painting this week. Plan is to go matt black throughout. Just got to finish sanding the interior then can get ready to paint, just need to wait for a warm-ish day.

View attachment 162611
View attachment 162612

Also bought a few things. Got a front brake upgrade; Brembo HC discs and DS2500 pads from @NorthloopCup and some Goodridge braided lines. Rears will just stay standard and will buy the rear discs and pads nearer to the completion of the car. Also bought a second dashboard from @.J.a.m.e.s. as I fcked up my first one, but I can now use my old one to experiment on when it comes time to cutting around the roll cage.

View attachment 162613
View attachment 162614
View attachment 162615
haha! nice
 
Looking good, presume you've not had it on track yet?

Thanks! Nope not yet, unfortunately. Hell I only started driving just over a year ago and have only been into cars for about the same amount of time. Once the interior is sorted I'll take it out and give it a test run, it might handle like a bag of s**t but I won't know until I try haha.
 
Was gonna say just take it out and see how it feels before ploughing more money and time into it. You should get it ready for Aintree on the 1st of October as its a great day for beginners as there's a novice group.
 
Was gonna say just take it out and see how it feels before ploughing more money and time into it. You should get it ready for Aintree on the 1st of October as its a great day for beginners as there's a novice group.

Definitely agree. To be honest most of the things I am doing are to learn new things, so I don't mind paying for things that can help me learn.

Though trackdays will not be a super common occurence for me at the moment as I'm only 18 so absolutely cannot get insured on a clio modified this much, so for a trackday I will also have to rent a transporter since I dont have a car that can tow. Also I'm on apprentice wage so trackdays will be a pretty big expense for the time being.

Was trying to possibly look for somewhere local, like a big bit of private land or road where I could give it a bit of a blast before paying and taking it to a track only to find something was up with it, but no luck finding anywhere yet.
 
  Focus RS
Been almost 2 months since I've posted anything on this thread but that doesn't mean I haven't been busy. A lot of the stuff I've done I won't bother showing until it's finished as I've been slowly working my way through a few big jobs at once.

Did a few aero mods to the front bumper. A lot of it is probably not that effective, but I think it looks awesome so who the hell cares? Its a track car! Didn't take any in-progress pics so heres a few almost-finished ones. Cut the speed holes in the bumper, but still need to make them in the crash bar behind them. Splitter is currently made from 5mm ply screwed to the bumper, but it is only a template and will be later making it from ~10mm marine ply with big brackets holding it to the car's frame. Also painted the front diamond red to stick with the red and black theme of the car.

I also have some brake ducts in progress for the fog light areas and some headlight washers blanks.

View attachment 161660
View attachment 161661
View attachment 161665
Canards bought from CMComposites.
View attachment 161659
Test fit on the car. Headlights have been off the car for nearly 3 months now as I'm doing a few things with those, too.:
View attachment 161666

Looking good mate.
 
Clio has been moved over to my mate's garage so that it can be inside for painting and other stuff where it may take more than 1 day. Bought a bunch of primer and matt black spray paint for the interior and for various other parts that need to be sprayed.

IMG_5741 - Copy.JPG

IMG_5856 - Copy.JPG


Decided to freshen up some of the exterior plastics, including the engine cover, using plastic plastic primer and matt black spray paint. Made the whole front end look new now that the plastic didn't look old and faded. Also painted the bullets black and the front and rear badges red. Overall just made the car look much nicer.

FullSizeRender_1 - Copy.jpg

IMG_5922.JPG

IMG_5895 - Copy.JPG

IMG_5900.JPG


Still need to cut out the area on the crash bar behind the speed holes and paint all of the crash bar black to hide it a little bit. Splitter and brake ducts are still under construction. Headlights are also under construction.
 
  Clio 220 PH2
Hey up mate your car is looking amazing really like that front splitter that puts mine to shame haha :)
Are you keeping this road legal once you are finished ? Just curious where you are going to put your number plate. I fancy the go faster holes as well but not sure where to put the plate ?
 
Hey up mate your car is looking amazing really like that front splitter that puts mine to shame haha :smile:
Are you keeping this road legal once you are finished ? Just curious where you are going to put your number plate. I fancy the go faster holes as well but not sure where to put the plate ?

Thanks a lot! The plan is to trailer/transport it to the track, not plan at the moment to get it road legal though I dont think it'd be difficult to get it set up for the road. If i were using it for the road I'd either mount the plate over the holes then remove the plate once Im at the trakc, or just put the plate to the side, similar to this: (just a random picture I found, unsure who's it is)

image.jpeg
 
  Clio 220 PH2
Thanks a lot! The plan is to trailer/transport it to the track, not plan at the moment to get it road legal though I dont think it'd be difficult to get it set up for the road. If i were using it for the road I'd either mount the plate over the holes then remove the plate once Im at the trakc, or just put the plate to the side, similar to this: (just a random picture I found, unsure who's it is)

View attachment 166313
Fair play I would say that's the best set up trailering it to the track
That's not a bad idea however I do like the side mounted number plate and the aero catch for the front bumper. I don't know about you but most jobs on that car involve taking the front bumper off. I have to take mine off to change the oil lol
Thank you for the help mate your cars coming along nicely :)


Top