ClioSport.net

This is a sample guest message. Register a free account today to become a member! Once signed in, you'll be able to participate on this site by adding your own topics and posts, as well as connect with other members through your own private inbox!

  • When you purchase through links on our site, we may earn an affiliate commission. Read more here.

Clio 172 Clubsport

Great project this.

I also went down the “clubsport” route with mine.

Power wise, tbh those are good results. I wouldn’t mess about too much as I’m not sure the benefit is worth the cost unless you go into the charging route.

I know what you mean about power. I’m thinking of a few simple things and see where that goes. I don’t want massive power as I’ll spend more money on handling and stopping.

Still think I’ll look at the following first:

Matched inlets
Enlarged throttle body
Upgraded leads
RS Map

I know that give me that much, but if I can get close to 180 I’ll be chuffed.
 
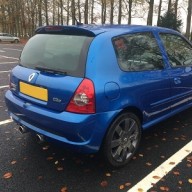
Great looking car mate, look so good in black! Seems that there’s quite a few good examples in and Basingstoke
 
There are loads of us in the 'stoke! Blimey.

Car looks great bud, I'll keep an eye out for it. Whereabouts are you?
 
I’m slowing collecting parts for when it’s warm enough to start on the car again. Plan on doing a ring trip in May. Hopefully I’ll get time to finish the brake cooling and get the rear ARB. Also going to start removing heavy items that are not needed!

Few little items ready to go on...

C8361D9C-F33C-4C92-BA10-CC0AB217AEA4.webp
62B09755-159E-4E0B-9B88-0E0159F82ED5.webp

292B6054-AAD1-43E0-BA72-3B67473DBA7D.webp
 
Not a massive update, but work has started... I'm off to the ring in May, so i have a few jobs that i want to get done.

  • Spacers front and rear
  • Camber on front
  • AC Delete
  • Shifter upgrade
I'm aiming to get this done in the next 2 to 3 weeks.

So far i've just manage to take things apart and do a little cleaning... I'm still currently a fan on the original airbox, so for now i've ditched the old airfeed completely and added a larger feed from lower in the bumper. The plan is still to do a little more engine work, but not until the summer.

IMG_2103.webp
IMG_2104.webp


IMG_2165.webp

Still one of the best looking wheels for a clio...

IMG_2202.webp
 
When in May you over there? I’m over first week literally counting the days
 
Front camber bolts are now fitted, just need final setup. I’ve purchased a camber tool, so will attempt this at the weekend. I’ve also fitted front spacer. Happy with the look, which is a bonus.

FBA490A5-A27C-4B52-BF2F-FC8AAA8E3EB6.webp


564CFF08-245F-4DB9-B1A3-782512F838CC.webp


Rear hub spacers on next.

217DC72B-A4BA-43E6-86BA-4AD12B1EA276.webp
 
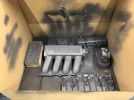
Managed to spend some time this afternoon getting a few things done. Picked up a ported inlet from @JKING3008 so thought it would be a good idea to paint that along with all the other engine parts. Happy with the result as I wanted a nice matte finish.

Made my own paint booth
5EC2BBB9-2F7D-4EDC-9639-E27129ABFB37.webp

Painted parts:

8BC8DCDB-BD6A-4592-BAAD-D4F58FF2119E.webp

Also managed to fit one side of the hub spacers.

A8D824A7-AD3D-4257-97AB-BF6FE8EC8078.webp

Happy with how they sit, which is an added bonus

48F201DE-2D49-4689-9BAA-A97653E5EB5B.webp
 

Attachments

  • 6FB1C0F9-9864-4D98-A5F8-824863CE2AEF.webp
    6FB1C0F9-9864-4D98-A5F8-824863CE2AEF.webp
    373.9 KB · Views: 557
  • 1610A877-4FDA-4456-978F-9CA0FB2DE39C.webp
    1610A877-4FDA-4456-978F-9CA0FB2DE39C.webp
    725.2 KB · Views: 538
Managed to get some more done tonight. Half of the AC is now out without breaking anything.

54003739-FE5F-4B2C-83B4-5D9B17434714.webp


F86BCB28-AD76-4220-8080-D47F84407FFF.webp

As I don’t have the AC delete kit yet and I don’t want to start removing the compressor until it’s here, I made a start on removing the inlet. It’s pretty easy except for the side bolt and how tight it is against the pig iron brackets. I guess I’ll need to file down that a little to get the ptfe gaskets in.

F1877F27-D117-4FB5-8E1C-6956C9E0B367.webp


526E26EC-C7C2-4FBC-A007-42869354EA58.webp

Next up is making the call on removing he compressor before my trip. Slowly running out of working hours.
 
Don’t have enough time to take the AC part out that is under the scuttle panel, it looks a nightmare! So I decided to change the filter and hoover out a lot of dust and s**t. I’ve still got two pipes poking out, but I guess I’ll just cap them off.

Couple of things I’m still considering on removing. The Carbon canister and the weight under the engine mount. What is this for?!

Off topic, I found this today, so thinking I’ll restore it for fun.

DA412AAF-2EF9-4041-8217-1DFA4964B2CC.webp
 
Don’t have enough time to take the AC part out that is under the scuttle panel, it looks a nightmare! So I decided to change the filter and hoover out a lot of dust and s**t. I’ve still got two pipes poking out, but I guess I’ll just cap them off.

Couple of things I’m still considering on removing. The Carbon canister and the weight under the engine mount. What is this for?!

Off topic, I found this today, so thinking I’ll restore it for fun.

View attachment 1365139

I'm not 100% sure but I read the weight was to help reduce vibration. I just removed mine.

Finally, removing the AC stuff from the scuttle is a nightmare. I really struggled with mine and in the end had to smash it out!
 
It turned out to be an extremely long day, had to remove a lot more of the car than I thought to get the FF power steering alongside the cup AC delete kit. I think I’m nearly there with it and have it routed nicely. Just need to start putting things back now.

The strip down of old parts starts ok..

E696C66B-E695-40BA-B344-F3A9B23DA9BC.webp


New alternator brackets went in easy, but then I noticed that I couldn’t get the pump in without disconnecting the pipes.
F0EC9FD3-9D79-40D7-9B88-4D126D90DF35.webp


After a few more hours and removing the radiator I’d come up with a nice route for the pipe to take. Took a fair bit of gentle bending, but now is ok. Just hopefully now leaks!

BAF2F9A2-D709-4560-9B11-25E923D3F159.webp


Top pipe reconnected and alternator in. Just need to make sure none of the pipes rub.
2E9709E0-18D1-4C77-A9DC-92559714797D.webp


Hopefully now I can start getting parts back on.
 
Found a little bit of time this evening although not much as I’m writing this at 21:00! ?

FIrst up I’ve fitted the aux belt and connected the alternator up.

EC62646A-528B-4F21-8884-7E3B2AA6020C.webp

Picked up these lovely PTFE gaskets from KTec. Hopefully they’ll make some difference.

FAE45FCB-691C-4417-8F0A-6F1F6E4AD079.webp


Lower and upper inlet manifolds refitted.

65DA0BD1-5938-4B41-8E31-9328A4F183C5.webp


50B88F8B-5265-4EF5-9CDD-7C4E975EB20A.webp


Hopefully I’ll get more time tomorrow to get more booted back on.
 
Bolted some more bits back on. Mainly the engine mount, had some fun as one of the bolts (the one that goes through the inlet) decided to thread at the very bottom. I’ve marked where it fucked up. I’m going to run a tap through it, but for now I’ve put a slightly shorter bolt in.

248FCBF8-2782-4BA3-8815-C0A8B57C6A7E.webp


B3F68A02-51D1-4E4C-AEEB-228C27F11DEB.webp


Fuel lines back in and connected.

9CC24510-1530-4CA9-BA64-A51F56DFCC69.webp


Also removed the engine balance weight and added to the collection of bits I’ve removed.

645594C0-7B46-40DB-AC7F-A6F057016691.webp


More tomorrow.
 
It’s never easy!!

So it turns out my pipe work wasn’t as good as I thought and when I put the radiator back in it was all too tight. The lower pipe is fine, but the one with the ali pipe work is just awkward so I’ve ordered some new pipe work to remake that. Also now I’ve ordered a slimline fan. Hopefully this will make it all fit nicely.

You can see what it’s like with no fan, with the fan it’s just too tight.

742BF97D-9B77-42AC-A045-E8B376979CA4.webp


120w 12v fan. Hopefully this will do the job nicely.

39AC5C9B-74D0-4D0D-A87C-8E036BD2F0A6.webp


Im going to have a few days off now... hopefully all the bits will be here for Monday.
 
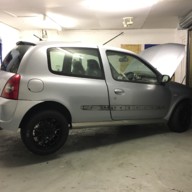
Managed to get out and fit the new cooling fan. It’s pretty easy, although feels strange poking the brackets through the rad. Anyhow, much better and frees up so much room

B7429C27-082A-4FEC-BB5F-98338786B13D.webp


295B6061-A63E-4059-A662-A17758497C8D.webp


CA9AEA41-BCDF-4241-AB3F-60F6583F156B.webp


Hopefully new pipe work will arrive tomorrow for power steering and then I’ll be able to put the rest back and get it running.
 
It’s running!

Managed to get loads done tonight, started off by finally getting the car running. This was important as it was stuck in the garage and I could only work on one side ?.

New pipe arrived and I’ve now got a new power steering return feed sorted. Also wired and tested the fan. Works a well, however I’m going to swap for two smaller fans.

FB495E13-9DFD-4793-8EB0-D99F54AEAAF6.webp


Camber Setup, I’ve never done this before so will be interesting to see the results.

B82A659D-CC07-4A52-B295-9AD3ACCA2B94.webp

C8EE2684-09D0-4F3B-87D1-926F3A3727FE.webp


Once that was done I’ve put most things back on. Will be using the car tomorrow for the first time in 6 months.

CFF65030-678C-428A-AC86-ADF6DB984044.webp

5F1AA9B3-C5C7-45FC-B42E-9EA7394923B0.webp


1458BD5E-42C9-4A0F-BED2-F4FA83C7926C.webp


Service next.
 
The suspension is at full droop too, surely the camber will read differently at actual ride height?

So you can set the camber to zero on the gauge from any position. I did this before adjusting the bolts. So what ever it was from standard, I added 1.5 degrees. Well, that’s what I think I did ??

Taking it for full laser setup today.
 
I've tried these, they are ok as a guide, but no replacement for a laser alignment. Its also worth moving it to the hub face as the disc face doesnt always wear evenly.

Cheers bud, any recommendations near us? Merit tyres?
 
Cheers bud, any recommendations near us? Merit tyres?
Speak to Rob at autocentres @RMDavis - not sure what branch he's managing at the moment but he's always happy to help a fellow clio Owner.
The suspension is at full droop too, surely the camber will read differently at actual ride height?
True, but you can take it off stands and use a trolley jack to lift on the wishbone which would appy a similar load and set from there. But whenever Ive used them its not been to accurately set the camber, but just to ensure I was getting it even on both sides.
 
A spirit level strategically placed on the centre of the roof is required to confirm that the car is level left to right, in order to have any valid readings.
Make adjustments to achieve this with an axle stand on one side, and a jack on the other.
 
Full alignment done, the guy knew what he was doing, which was great. One guy I called said they didn’t have a ramp, so could only do tracking wtf.

My go at doing the camber wasn’t too bad. One side was worse than the other. The tracking wasn’t great either, although I didn’t touch this.

3CECB1ED-3E44-4DF0-8FC2-BBEA28F4F338.webp


The toe is a little out on the rear, not sure how bad this is and if I should correct it?

Cheeky little shot through the window.

5F03147B-AF67-43DB-B3DD-46C17B69793E.webp


Needs a good clean now.
 
Need some help, i've used resistors to clear the airbag lights, which works. But sometimes after a while the service light and airbag light come on again. i'm using the 3.8ohms resistors and also have tried the 3.3. Both do the same, not sure what to check as it works... (sometimes)... Any ideas?

Ta
 
Back
Top