ClioSport.net

Register a free account today to become a member!
Once signed in, you'll be able to participate on this site by adding your own topics and posts, as well as connect with other members through your own private inbox!

  • When you purchase through links on our site, we may earn an affiliate commission. Read more here.

Jason473's Titanium 182


  Clio 182 FF
Gave the boot floor a good scrubbing and jet washed the boot carpet. Picked a great time to do this as the weather over the last couple of days has been mint so they are now dry.
1617097228392.png


Refitted the front seats. Looks and smells so much better than before!
1617097358242.png


Still need to refit the rear plastics and seats but waiting for some more Waxoyl to arrive for the sills. The seatbelts are still super grubby, I'm thinking I'll leave them to soak in vanish overnight and see how they come up. Does anyone have any tips?

After this I need fix the boot lock and remove the upper dash so I can swap out the radio display, then that's the interior sorted (apart from cleaning the glass).

I have a few MOT jobs to do on my daily which meant I needed to swap the cars around. Couldn't resist getting a pic of the 182. Won't be looking like this for long as I've got some new wheels coming for it :D
1617097523163.png
 
  Clio 182 FF
Few more jobs ticked off, loving the lighter evenings now!

Got a good thick coat of Waxoyl everywhere I could access in the inner sills. Hopefully this will keep them good and solid for a long time yet
1617265836451.png


Refitted the rest of the interior apart from the rear door cards. The seatbelts were looking pretty manky so I gave them a good cleaning. Started off scrubbing by hand which was too much like hard work.

So I removed the shoulder hook on the b pillar, extended the seatbelt fully and trapped in the door. Gave each belt a good soaking in a bucket full of hot water and vanish.
1617266095987.png


Stretched out fully and anchored on an old set of wheels
1617266119400.png


Then the jetwasher came out to play.
1617266155485.png


Basically came up like new, really pleased with the result. I left them hung up over night to dry.
1617266183457.png


I've now taken them down and thrown them in the car. I'll leave them fully extended inside the car for a couple of days to make sure they are completely dry before getting coiled back up. I don't want to run the risk of them going mouldy!

Next jobs are boot lock diagnosis and fix and radio display.
 
  Clio 182 FF
Got a few more bits done over the long weekend. Made the most of the sun on Friday and gave the rear seatbelts the same treatment as the front ones.
1617647787759.png

1617647812953.png


Gave the rear seats a good scrubbing
1617647849350.png


And refitted to the car a couple of days later. Wish I'd taken some before interior pics, really pleased with how well its all come up.
1617647926077.png


Boot not locking was a failed actuator. One of the previous owners had just unplugged it and left it in the unlocked position. Replacement ordered and fitted next day from Amazon Prime because I'm impatient
1617648033491.png


Remember to stick a can of tyre weld in the boot
1617648092336.png


Removed the upper dash - initially to access the radio display which wasn't working.
1617648152426.png


Said dead display - replacement is on its way via eBay.
1617648186999.png


Then I got carried away and removed all of the sticky plastics. I guess I'll be spending my evenings cleaning these up!
1617648266668.png


Read a thread a while back about changing the power steering fluid by shoving a pipe over the return in the tank with the engine running and letting the pump do all the work. Thought I'd give it a go. Flushed 2l of fluid through until it ran clear. Can't have done any harm and strangely satisfying knowing its full of fresh stuff now!

Link to thread: https://cliosport.net/threads/the-easy-way-to-change-your-power-steering-fluid.552071/
1617648436806.png
 
  Clio 182 FF
Battery positive terminal cover was missing which has always annoyed me so I splashed out on a new one from RPD
1617648688536.png


Bay is starting to look a lot more respectable now:
1617648737292.png


So now it's time to turn my attention to the rear end. Part of me liked the yellow calipers however I made the decision a while back that silver is the way forwards.
1617648948206.png


Wire wheel time
1617649070416.png


Clean
1617649095119.png


Silver
1617649122846.png


Then jetwashed inside both rear arches
1617649201214.png

1617649223126.png


Fuel flap showing signs of corrosion which will need sorting:
1617649269043.png


So immediate plans are:

-Clean sticky interior plastics and refit along with new display. This should finish off the interior (for now - It needs the steering wheel retrimming but isn't as bad as some I've seen so can wait).
-Refit caliper carriers (fit new stainless bleed nipples whilst I'm at it).
-Fuel filler flap clean up and protect.
-Inspect rear arches, clean up rust, convert, protect etc

I'll probably remove the exhaust and heatshield and sort a few bits of surface rust ive spotted then underseal whilst its jacked up.
 
  Clio 182 FF
Spent some time on the sticky dash plastics, ideal job for a cold evening! I raided the mysterious cupboard under the sink and found some kitchen cleaner and green scourer sponge. Sprayed the cleaner liberally onto the parts and then scourered away whilst running under hot water.

You can see the effect on the part below. Its important not to get carried away as you end up removing metallic paint beneath the sticky horrible sh!te.

1617821748786.png


Another mid clean shot
1617821953640.png


Gave everything a coating of back to black before wiping off excess
1617821998802.png


For best results you definitely need to strip everything apart
1617822055209.png


Look pretty good built back up!
1617822089544.png


Not bad for about an hours worth of cleaning, cant wait to refit them to the car. This will improve the appearance of the interior no end!
 
  Clio 182 FF
Spent Friday evening cleaning up the sticky trim on the upper dash, came up pretty well, just the door pulls to go now!
1618164515009.png


New dash display arrived so fitted that along with the clean upper dash and a 'new' Sony head unit (Had it lying around for ages, and is better than the one that came with the car). Will probably get the steering wheel retrimmed at some point but this has actually cleaned up pretty well so no urgency there.
1618165829315.png


Reassembled the pads into the carriers, cleaned up the callipers themselves and fitted new stainless nipples.
1618164585247.png


Looking pretty good from this angle...
1618164643780.png


But not so much this angle... Rusty rear beam letting the side down:
1618164678577.png


So off it came:
1618164712318.png


Dropped the fuel tank whilst I was at it seeing as its only held in with 4 bolts
1618164776595.png


Undersides actually not looking too bad with surface rust in a few places as expected but nothing terrible. Looks as though the arches have been undersealed at some point in the past. Gave it another jet washing to remove the last traces of dirt:
1618164845840.png

1618165993775.png


Rusty filler flap, didn't even bother trying to undo the bolts, they were pretty gone so went straight to drilling out.
1618164874188.png


So the plan is to grind back convert and protect the rusty spots then underseal the whole rear end. All in all I'm pleasantly surprised by the lack of rust on this one.

I'll strip down the beam this week and get it off to the powdercoaters and get the following bits on order:
-Braided hoses https://www.ebay.co.uk/itm/Clio-172-182-Rear-Axle-Braided-Brake-Hoses/254598651731
-10mm Stub axle spacers https://www.pure-motorsport.co.uk/clio-172-182-stub-axle-spacer-kit.html
-New bushes - Not sure what to go for yet, any recommendations?
 
  Clio 182 FF
Make sure you get right into the top corner of the arch near the filler flap mate. It’s normally hidden under layers of crap and underseal but is quite a nasty rotspot on these
Will do mate, its not looking bad at all inside the arch but probably masked by the underseal. I'll go digging!
 

Flob

ClioSport Club Member
Oh dear, I know the feeling of just taking another part off to clean too well, its a slippery slope! Great work.

My seatbelts a grim so I will be doing something similar when it warms up a bit!
 

Flob

ClioSport Club Member
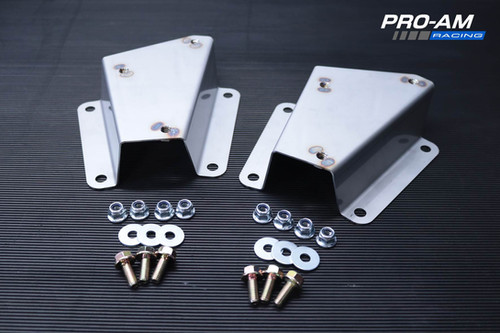
Also - I spend ages cleaning and repairing the rear exhaust mounts - someone pointed out that I was a moron because new stainless steel ones are available at reasonable money in case you didn't know. If you haven't found them already and need some I'll dig out the link.
 

Flob

ClioSport Club Member
It’s proam racing Rob:


I will be ordering once I get my garage back
Thanks Russ, I knew it was a member from here's shop just couldn't remember which without searching!

For the record I acid dipped mine, then spend 3 hours with a grinding wheel, then another 2 hours welding a crack and epoxy coating them. They ended up looking ok but certainly not new! So thats 5 hours in total and probably £20 in materials.... even if I stacked shelves in Tesco's buying the proam ones would still have saved me money while also being all round better. :ROFLMAO:

Plus he is charging reasonable money, I can see he is making a profit which is great while not taking the piss unlike some of the other laser cut brackets being sold on here.
 
  Clio 182 FF
Oh dear, I know the feeling of just taking another part off to clean too well, its a slippery slope! Great work.

My seatbelts a grim so I will be doing something similar when it warms up a bit!

Certainly is! Thanks mate, if my car ends up half as good as yours I'll be a very happy man! The whole seatbelt thing has got me thinking about just how minging standard black seatbelts must get - its never crossed my mind before now!

Also - I spend ages cleaning and repairing the rear exhaust mounts - someone pointed out that I was a moron because new stainless steel ones are available at reasonable money in case you didn't know. If you haven't found them already and need some I'll dig out the link.

Haven't removed them yet but hoping I can salvage them with not too much effort. Thanks for the heads up on these parts guys!

One thing that has surprised me with related to the exhaust mounting is just how flexible the boot floor is. I guess this was an unintended consequence of deleting spare wheel well which must add some rigidity to the boot floor.

I've been concentrating on getting the beam stripped down over the last few evenings and it now at the coaters.

Old bushes
1618387894788.png


They are no more
1618387917605.png


Bare beam innit
1618387940043.png


Been collecting bits for what is hopefully going to be the last major job once I've finished the rear end! Just timing tools to source now, along with a new alternator.

The car did have an issue with the Stop and Battery light coming on at high RPM, I was planning on getting the car back on the road and investigating further but after thinking about I cant see what else would cause this other than alternator. I wasn't initially planning on doing all of the belts and dephaser just yet, but decided that as parts aren't expensive, coupled with all of the other work I've done on the car it would be silly not too for peace of mind.

From reading around and as this guide suggests: https://cliosport.net/threads/cambelt-auxbelt-dephaser-pulley-guide.437872/
Only the Camshaft Alignment tool MOT-1496 actually needs to be genuine Renault as this is stronger than the Laser one which appears to bend - which obviously effects the timing. From a quick search this tool seems to be available from a few places for not too much money. It sounds as though the Laser tools are suitable for locking the crank and sprockets.

1618387979788.png
 
Last edited:
  Clio 182 FF
Thanks for the offer Rob, much appreciated! I'm in Bristol so not exactly local, I'll fire you a PM anyway.
 
  Clio 182 FF
Spent more time than I would have liked under the rear of the car with the wire wheel inches from my face - so relieved that jobs done! Used a mixture of a wire wheel on the angle grinder and various drill attachments to remove all of the surface rust I could find.

Glad that I removed the tank as there was quite a bit of rust on the front face of the beam that the rear of the tank bolts to. This is completely hidden when the tank is fitted. The whole area where the tank sits looks to have been left in bare primer by Renault so glad to be getting some protection on there!

Luckily everything i found was surface only and managed to get most of it back to clean metal.

Passenger side tank area looking back
1618770547866.png

Drivers side tank area looking back
1618770578582.png


Spring seats ground back completely as well as cleaned out the enclosed section that sits in front of them as best as I could. This is a proper crap trap. I gave it a half arsed attempt a few weeks ago but decided to re do it as now I have the access. Its impossible to get to this area properly with the beam fitted.
1618770685602.png


Mid way through cleaning up the inner filler flap. Ended up doing the final bit by had with wire wool.
1618770792009.png

Outside was obviously much easier
1618770856631.png


Treated all of the exposed metal with Kurust
1618770945610.png


1618770970622.png


1618771000272.png


Let it all go off for a few hours. and turned my attention to the exhaust mounts. These got some wire wheel action:
1618771189523.png

1618771205100.png
 
Last edited:
  Clio 182 FF
Last post continued...

1618771373622.png


Gave them the Kurust treatment:
1618771402797.png


Red oxide:
1618771444628.png


And a couple of hours later, silver:
1618771488961.png


In the meantime I Red Oxide'd the bits of the underside that i treated with Kurust
1618771564109.png

1618771600780.png

1618771626387.png

1618771655923.png


So over the course of the week I'll give the Red Oxide bits a coating of Satin Black and then give the underside and arches a coat of underseal. I still need to clean up a few more bits and get them painted for when the beams back from the powdercoaters - stub axle brackets and load compensator bracket from memory. Also need get some new nuts and bolts on order to attach everything back to the car with!
 
  Clio 182 FF
Gave the red oxide areas a going over with satin black yesterday - forgot to get pics but not really missing anything exciting!

Nothing like some VOC's at 7am before work!
1618913730810.png


Gave the topsides of the Exhaust mounts a coating of clear Waxoyl, will hopefully give a bit of added protection!
1618913805277.png


Applied the first coat of Underseal to the boot floor/ tank area
1618913844999.png

1618913867316.png


I'm going to be in trouble with the Mrs... Although hoping to use the ruined driveway as further justification for a garage extension!
1618913908028.png


Probably give a second coat this evening. Then back onto cleaning up the ancillaries for the beam.
 
  Clio 182 FF
Not much progress over the last couple of weeks whilst the beam was at the powder coaters apart from cleaning up the stub axle mounts and giving them the usual rust conversion and paint treatment.
1620161207516.png

1620161297352.png


After a couple of weeks waiting, I picked my beam up from the powder coaters today. The first job was to remove the old bushing shells, taking care not to cut all the way through to the beam. I did this at the top and bottom using a hacksaw - you can feel the blade go tight when almost the whole way through.
1620161620899.png


Bashed out pretty easily with just a ball pein hammer
1620161656703.png


Pressed in the new Whiteline bushes
1620160711183.png


Annoyingly they didn't mask off the stub axle mounting faces like I asked, not really a big deal, easily cleaned up with a wire wheel
1620160796081.png


Like so
1620160829248.png


Should be ready to bolt on the stub axles with PMS 10mm spacers tomorrow evening. I'll check everything first for flatness as @Touring_Rob mentions in his blog. Hoping to get the car rolling by the end of the week.
1620160925303.png
 
Last edited:
  Clio 182 FF
No been able to spend as much time as i would have liked on the 182 so progress has been a bit slow, but the car is now in a state where I could drop it onto its wheels if I so wished!

Assembled the stub axles onto the beam with the 10mm PMS spacers. Checked everything for flatness prior to assembly using a fresh Stanley blade with everything looking ok.
1620722262405.png


mmmmm tasty
1620722296430.png

1620722280964.png


Refitted the beam onto the car. Wasn't looking forward to this job but in practice this was actually really easy. Hung it off the dampers first then lifted it up into the front brackets.
1620722342185.png


Refitted the tank along with the exhaust mounts, starting to look pretty good under there!
1620722414469.png


Clean filler flap! The filler neck itself is attached with nut and through bolts. For the door I used M6 Rivnuts and low profile cap heads. Silicone grease on the hinge mechanism, feels like new!
1620722451574.png


Hoping to get the following done by the end of the week so i can spin the car around and attack the belts:
-Fit callipers, braided lines and bleed brakes
-Refit heatshields and exhaust
-Refit bumper
 
  Clio 182 FF
Love the attention to detail, can't believe I've missed this thread!
Cheers buddy, kinda got carried away with things, not as nice as some on here but a lot better than when I first got hold of it!

Top work mate, I’m still staring at my rear beam all freshly coated in the garage! Not long now until I have the space back to attack the job!

Cheers Russ, that's one way of guaranteeing it stays fresh haha! We'll have to do a trip up to C&M once they're both back on the road
 

RustyMojo

Bon Jovi Officianado
ClioSport Club Member
B
Cheers buddy, kinda got carried away with things, not as nice as some on here but a lot better than when I first got hold of it!


Cheers Russ, that's one way of guaranteeing it stays fresh haha! We'll have to do a trip up to C&M once they're both back on the road
Bang up for that fella, let’s see if we can get a few of us together over there!
 

RustyMojo

Bon Jovi Officianado
ClioSport Club Member
Tomorrow rather than at the weekend?.it can be a bit hit & miss but still worth the crack even for just the drive up i say if a few of you @RustyMojo
Yeah Wednesday evenings they do themed events tomorrow is their FWD evening, which is primarily things like hot hatches. Thought we would give it a crack, but I’m well up for sorting something one weekend
 
  Clio 182 FF
Exhaust heat shields back on. Used new bolts and exhaust clips along with some penny washers to spread the load. Properly secure now so hopefully no more annoying rattles!

1621149089207.png


BRT Motorsport braided lines on and brakes bled with the help of the Mrs
1621149156102.png

1621149176532.png

1621149122500.png


Refitted bumper and arch liners then stuck the Scorpion RS192 exhaust back on.
1621149270924.png


Then realised I'd forgotten to polish the ends of the silencers, so remedied that and took a crap photo!
1621149247792.png


May tweak the hangers a bit more as I think its sitting a bit low but happy with the fit for now
1621149399249.png


Couldn't resist fitting the Turinis, pleased with how its looking
1621149428369.png
 
  Clio 182 FF
So as the car was once again back in one piece and drivable, I put it back on stands and whipped off the front to give access to the belts.

Discovered an interesting access hole for the tensioner, clearly someone has been here before... However the tensioner was properly seized and definitely hasn't been changed for a while. I wonder why this access hole wasn't put in from the factory?

Chopped off the aux belt due to said seized tensioner issue.
1621149881740.png


Good job I'm changing this!
1621149904624.png


So over the next whenever, I'm going to tackle this and the timing belt. I'm also getting oil pooling in the lower inlet manifold. It looks like its weeping from under the rocker cover bolt heads. Possibly the dephaser solenoid seal too (which I will be changing).

1621150078156.png

1621150055529.png


Also potentially the join between the head and rocker/ cam cover?
1621150153298.png


I've bought the correct Renault sealant so think I may as well whip the rocker cover off and reseal it all whilst all the belts are off. Does anyone have any tips on potential gotchas?
 

MrBlonde

ClioSport Club Member
I dont think you can just whip off the rocker cover off mate without causing problems i think,i maybe wrong tho so someone will correct me.The way i will do my rocker bolts is to remove one at a time then add a drop of sealant to each bolt before i re do them up & torque them correctly.Other wise nice work mate.
 

jameswrx

ClioSport Club Member
As above, do not whip the rocker cover off as you’ll have a Jack-in-the-box surprise of cams.

The cover is the upper cam caps too, all in one.

If you’ve got oil on top it’ll be the bolt holes or the solenoid o ring.

Technically it is possible (as I’ve done it on another non sport Clio) to do but it’s proper ghetto and it could all go wrong.
 

Krarl

ClioSport Club Member
He said he's doing belts, so he can take the cambelt off, the pulleys and then take the rocker cover off to clean and reseal

Does help to read before autistically screeching at your keyboard 😂
 
  Clio 182 FF
That's what I was hoping to do, although now I have everything off and can see the seal between the head and rocker cover I'm not convinced it is actually leaking there. There's a lot of fresh oil pooling on top of the lower inlet mani at the timing end. There is evidence of weeping around the dephaser solenoid seal and under the bolt heads at that end of the engine.

Continued the strip down this afternoon.

Cam caps removed:
1621199892286.png


Upper engine mount off (Unbolted the dogbone mount too and dropped it out of the way so i can raise and lower the engine)
1621199955439.png


Upper cam cover removed and bolts removed from plastic lower cover although I need to remove the pulley before that will come off.
1621200142667.png


Removed aux belt idler and water pump pulley at various stages whilst jacking the engine up and down to access the various cam cover bolts
1621200219345.png


Also removed the lower inlet mani as i thought it would give better access to the crank locking pin hole next to the dipstick and also allow me to take a better look at the seal between rocker cover and head
1621200318116.png


Seal between the head and rocker cover is a bit grotty but not as bad as i was expecting given the amount of oil that had leaked.
1621200480338.png


Boot full of bits i've removed
1621200514143.png


Work bench full of new genuine Renault bits to go back on (and timing tools generously lent to me by @Touring_Rob )
1621200570491.png


I think I will reseal the rocker cover seeing as I've stripped it down this far. It doesn't look too bad a job, I wont be removing the cams, literally just taking of the rocker cover, cleaning and resealing. I think ill just need to back it the crank off off 1/4 turn from TDC before I start and ensure that the cams are oriented correctly before reassembly.

1621201333527.png


1621201521476.png
 

Krarl

ClioSport Club Member
When you take that female torx out for the locking pin location please replace it with a new bolt, they're a proper c**t to get out when some shaved chimp rounds them off

f79d077c6a21eefaf3b5be732ce97f09.jpg


You can just about see the bolt I used in this pic


Top