Hi, all i thought i would make a giude. if any one wants to do it themselves
1 firstly remove the 4 torx screws on the lock and bumper cover
http://i2.photobucket.com/albums/y43/ben_p/edit1.jpg
2 The cover is clipped in at each end, these clip will pull out with some persuasion
http://i2.photobucket.com/albums/y43/ben_p/edit2.jpg
3 Then there are 3 torx screws on the lights, remove these....The lights should then pull out again with some persuasion, unclip and remove all bulbs.
http://i2.photobucket.com/albums/y43/ben_p/edit3.jpg
4 Once the lights have been removed take a stanly blade, and a wide flat head screwdriver, start to prise and cut the gum when SLOWLY seperating the perspecs screen.
5 Then mask the main beam and the indicator sections, i only did the back of the indicator and also masked up t the corrigated part on the full beam (u will understand when you open them up) NOTE DO NOT SURPRESS THE MASKING TAPE DOWN AS WHEN U REMOVE IT, IT MAY PEAL THE CHROME PLATE! then cover the projector bulb with tape,
http://i2.photobucket.com/albums/y43/ben_p/edit4.jpg
6 Then take the sand paper and remove the chrome plating around the tape, then clean the paint off with a moist wet cloth,
http://i2.photobucket.com/albums/y43/ben_p/edit5.jpg
7 Now apply plasticoat matt black, 2 or 3 times over the lights and alow to dry for 30 mins
8 remove the tape revealing this.............
http://i2.photobucket.com/albums/y43/ben_p/pic2.jpg
9 Then clean the inside of perspects cover with window cleaner, apply the sealant and slowly join the two together, the old gum will still be sticky once lined up, apply a lot of pressure on the cover to get a good seal.
http://i2.photobucket.com/albums/y43/ben_p/edit6.jpg
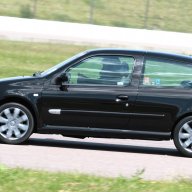
10 then re fit the lights to the car, clean the covers and .................
http://i2.photobucket.com/albums/y43/ben_p/DSCN2695.jpg