ClioSport.net

Register a free account today to become a member!
Once signed in, you'll be able to participate on this site by adding your own topics and posts, as well as connect with other members through your own private inbox!

  • When you purchase through links on our site, we may earn an affiliate commission. Read more here.

Iceberg Silver 172 - First Track Car Build


Hi All and welcome to my Clio Mk2 172 build.

To give a brief background, ive had a few cars now which ive built/modified mainly for 'stance' and 'show' purposes, ranging from Civics, e36's to my most recent being an R34 Skyline. As ive gotten a little older and bored of the show scene, ive had an itch to get into some track driving. This is one area i have no experience in but have seen a large shift of people moving from the typical 'show' builds to building track cars and having an absolute ball at track events. I wanted to see what i was missing out on!

The key for this project was 'Cheap Thrills'. I didnt want to spend a fortune on building a track car, i wanted something i could have some fun in and not worry to much about breaking/damaging the car.

Looked at a few options, mainly the likes of civics/ EP3's. However they were a slight price bracket above what id consider entry level track fun. I then started looking into Clios as i was aware there was a large following of these little cars esecially in regards to how cpabile they were on track.

So with a few weeks of looking around online, i found a nice clean base located not too far from home. Long story short, the car was everything i wanted. Struck a deal and £900 later, i was the proud owner of a Clio 172.

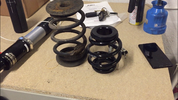
What did i get for my money? Lets take a look....

1423655


1423656


The car itself is a an Iceberg Silver Ph2 172. It has 99k on the clock and not long ago had its belts and dephaser done. The car is currently on a set of 15's but did come with the full set of RS 16's in the boot. Which i have now sold for £100. So all in, the car currently owes me £800.

Looking forward to getting started o nthis project. Any advice is welcomed as to what mods i should look to do before getting her on track. Will post updates as and when!
 

imprezaworks

ClioSport Club Member
  Mk5 Golf GTI :)
How different does that look on none sport wheels. Awful lol.


Hope the plans go well.
 
  Ph2 172, 106 Rallye
Please, don't cut the rear bumper. If you want to go all 'track style' and cut it, I'll swap you my one with cash.

The struggle to find an uncut iceberg silver 172 rear bumper is real.

As for mods:
Powerflex engine mount insert, dog bone insert, exhaust mount. (Or PMS if you're feeling flush)
Good tyres.
Eibach or Gram lowering springs.
Check your shocks, if they're scrap get some new cup shocks from RenaultPartsDirect
Service it.

These are pretty hard to get power out of without spending a decent chunk of money. Concentrate on handling and making it lighter.
 

Darren61

ClioSport Club Member
Someone will be along in a moment to tell you to do nothing but take it out on track as it is, get some experience and then work out what improvements you want to make...

But there’s a few standard things to do to make a 1*2 more capable for track work and that’s -

Upgraded Discs/Pads
Sticky Tyres (R888r or other)
Rear ARB
Coilovers (or at the minimum so lowering springs)

Then -

Half cage
Buckets
Harnesses
Shifter
 
*Quick update*

Started gutting the interior today. After reading about these cars online, it can be really pricey chasing power so ive decided to go heavily down the lightweighr route as its generally free. Removed all the rear interior, seats and roof liner. Figured if im going to go lightweight, may aswell do it properly. Out came the heat gun and scraper. Removed all the sound deadening and weighed it all at the end, was suprised to find that the sound deadening alone was 10kg in weight.

Started today like this....

1423663


And ended like this... (I have since put the front seats back in until i buy some Corbeau Clubsport bucket seats)

1423664


WHilst removing items, i came across this within the roof light modul, if anyone has any idea what it is? Doesnt have a bulb inside....

1423665


I also have a load of fresh oil and oil filter to go on the car soon. Along with the Pure Motorsports stud converstion kit and Bonnet Aero Catches.
 
How different does that look on none sport wheels. Awful lol.


Hope the plans go well.

Dont worry, new wheels are on the agenda!

Please, don't cut the rear bumper. If you want to go all 'track style' and cut it, I'll swap you my one with cash.

The struggle to find an uncut iceberg silver 172 rear bumper is real.

As for mods:
Powerflex engine mount insert, dog bone insert, exhaust mount. (Or PMS if you're feeling flush)
Good tyres.
Eibach or Gram lowering springs.
Check your shocks, if they're scrap get some new cup shocks from RenaultPartsDirect
Service it.

These are pretty hard to get power out of without spending a decent chunk of money. Concentrate on handling and making it lighter.

Not planning on cutting the rear bumper. I prefer the neater look to be honest. Ive made note of the parts youve advised, most of them were on my 'to-do' list anyway. Thanks for your input!
 
Nice find! These cars are amazing value for money and perfect as a cheap track car or every day commuter. Mine is the latter but I'm taking it on track soon.

Will you be fitting a bucket seat and aftermarket steering wheel?

ps the module you found next to the map reading light is a sort of temperature gauge for the climate control system. It has a little fan in it which makes an annoying buzzing sound

Yes i'll be putting in a bucket.... Good timing, see the next post infact. As for a steering wheel. Im waiting for the postman to deliver an OMP Boss and then i'll be putting my Nardi steering wheel in with NRG Snap Off Hub. (These are parts ive transferred through my different cars).

Thanks for letting me know whta tthat module was. I can remove it now knowing it wasnt anything too important.
 
* Update *

Postman has been. I now have some general service parts along with the below:

- Stud conversion kit from Pure Motorsport
- Lockable Bonnet Aero Catches

And the main present to myself, the Coreau Clubsport. After reading a few feviews on this seat, i figured it would be a good choice. Im currently waitng for the OMP subframe mount to come from Kam Racing. Hoping that will be here tomorrow.

1424039


Hoping to spend a few more hours on the car this coming weekend (weather is looking promising). Need to scrub the inside of the car to get rid of any left over residue from removing the sound deadening, and hopefully get the seat and steering wheel fitted.
 
*Update*

Spent a little time on the Clio last week. Started by getting some white spirit and scrubbing the left over residue that the sound deadening left behind.... started with this..

1425638


And ended up like this... I did this with the whole car including the roof.

1425639


Just requires a quick wipe over with a wet cloth now to get rid of the mucky brown tint its left behind.

And finally, i spent some time mounting my new seat & rails to the omp mounts. Those who have done this will know what an annoying fiddly job this is. Chucked it in the car. Also found a new Sparco harness that never made it into a previous car of mine so whacked that in with it. Bolted it to all the origjnal seat belt points for now until i get a rear cage to mount it to.

Really happy with the outcome so far.

1425640
 
Making good progress :) Have you got any track days planned?

I havent booked onto a track day as of yet. Closest track to me really is Oulton Park, but its also quite an expensive track to drive at. I think it will be August before i end up on a track day. Realistically, i want to tick off the below list before getting it on a track day to try and minimalise any issues on the day.

- change to high temp brake fluid
- install steering wheel
- new wheels and tyres (or at least just new sticky tyres, Ad08R or similar)
- full oil and filter change
 

Hxrry

so-wax.com
ClioSport Trader
I havent booked onto a track day as of yet. Closest track to me really is Oulton Park, but its also quite an expensive track to drive at. I think it will be August before i end up on a track day. Realistically, i want to tick off the below list before getting it on a track day to try and minimalise any issues on the day.

- change to high temp brake fluid
- install steering wheel
- new wheels and tyres (or at least just new sticky tyres, Ad08R or similar)
- full oil and filter change

Yeah always do the maintenance jobs first! I'm hoping to get something booked up as soon as possible too.
 
*Update*

Stud conversion, new wheels and tyres.

Potentially looking at doing a track day mid August and still have a long check list to get through.

1427493


The stud conversion really is an easy straight forward job. These studs are also long enough for me to run a spacer should i want to in the future.

Then came the wheels. I looked around for a good few weeks at different options. After reading a lot of builds, it seems everyone goes for the same sort of wheels. Team Dynamics, Speedline 2118's or the OZ F1's. These are all nice wheels but i wanted something slightly different. I came across an old set of Clio Williams wheels. From what i can gather, these are relatively hard to come by so i snatched them up. Theyre currently wrapped in a set of AD08R's with plenty of life left.

The wheels themselves are rough and do need a refurb, but the plan is to put them on for now. Do a track day with them, then eventually send them off to be properly refurbed in white.

1427494


1427495


Really happy with the wheels. However it has highlighted the need for coilovers. I think once its sat lower, with the wheels refurbed in white. It should look really smart.
 

Hxrry

so-wax.com
ClioSport Trader
*Update*

Stud conversion, new wheels and tyres.

Potentially looking at doing a track day mid August and still have a long check list to get through.

View attachment 1427493

The stud conversion really is an easy straight forward job. These studs are also long enough for me to run a spacer should i want to in the future.

Then came the wheels. I looked around for a good few weeks at different options. After reading a lot of builds, it seems everyone goes for the same sort of wheels. Team Dynamics, Speedline 2118's or the OZ F1's. These are all nice wheels but i wanted something slightly different. I came across an old set of Clio Williams wheels. From what i can gather, these are relatively hard to come by so i snatched them up. Theyre currently wrapped in a set of AD08R's with plenty of life left.

The wheels themselves are rough and do need a refurb, but the plan is to put them on for now. Do a track day with them, then eventually send them off to be properly refurbed in white.

View attachment 1427494

View attachment 1427495

Really happy with the wheels. However it has highlighted the need for coilovers. I think once its sat lower, with the wheels refurbed in white. It should look really smart.

Those wheels would look spot on in white.

Where is the stud conversion kit from?
 
*Update*

Took a day off work last Friday to make more progress. Used a friends lift and gave the car a bit of a service. Jobs included:

- New engine oil
- New Oil Filter
- Draining the brake fluid and filling with Motul RBF 660, then bleeding the brakes
- New coolant

All of which im hoping will keep the engine and brakes happier when im on track.

1429075


I then set about changing the horrible melting stock steering wheel.

Before:

1429076


After:

1429077


The set up is an OMP Boss attached to an NRG Quick Release, which is then attached to a Nardi Deep Corn 330mm wheel.

Its a set up ive ran in a few projects in the past and works well. Main reason for the snap off, is just so its easier to get in and out of the car now that i have the bucket seat in.

1429078


Sits much closer to the driver

1429079


And the last little update. All of this work is ahead of a taster session im doing at Oulton Park on the 17th of August. Figured id go full racer and add a nuber and name to the car.

1429080


Future plans include:

- Coilovers
- Wheels refurb in White
- Removal of stock doorcards and replaced with a sheet of light plastic
- Maybe some aero parts of some sort
 
*Update*

After the last update, the plan was to attend Oulton Park for a track day on the Saturday 17th August.

However, 2 days before, disaster struck. I notice whilst doing a bit of testing, that the car was leaking coolant. Upon further investigation that radiator had completely had it. Up against time, i grabbed a deal on Euro Parts and collected a new radiator the next day.

Started stripping the front end and noticed the old radiator and the A/C radiator was completed rusted out. Im suprised it was still on the car, the smallest of pushes saw the whole thing fall out. Im glad i caught this before it happened on the road. Figured while the front of the car was off, may aswell remove all the piping for the A/C.

No Radiator.JPG


Radiators and piping removed...

Removed Raditors.jpg


Quickly dropped the new radiator in.. and at 11pm the night before the track day, it was all bled, tested and back together. Happy days!

Back together.JPG


Also added a helmet net which id be meaning to put in the car. Really handy for carrying luggage/helmets etc to the track when you have a stripped interior.

Helmet Net.JPG
 
*Update*

After my track day at Oulton Park, I had a few issues that concerned me. First of which was the bonnet catch being quite sticky. It seemed to have a mind of its own, sometimes the bonnet would pop up on the catch, others it would take some persuading. I didn't trust it so I decided it was time to add something a little more robust a fail proof.

Went about fitting some Aero Catches. I drew up a stencil on paper then measured it up on the bonnet and set about cutting it. I personally used a dremel with a disk to cut the initial shape. Then using a sanding wheel on the dremel, I then smoothed out the hole until it was smooth. Now of course there are two layers of metal on the bonnets. And the layer underneath must be slightly larger to allow you to slide in the backing plate for the catches. See below:

IMG_0789.JPG

IMG_0791.jpg


Once id cut the underside of the bonnet. It had sharp edges and didn't look tidy enough for my liking. I smoothed it back and added some thing plastic edging. Tidies the whole job up and removes the risk of maybe cutting your hand on exposed metal when lifting the bonnet.

IMG_0792.JPG


Once id cut this to size and added the catch, it looked like this

IMG_0795.JPG


once id completed both sides and adjusted the height of the pins, they were fully secured and working. My only advice to anyone wanting to put these on their cars. Make sure you spend extra time and care measuring it so it lines up perfectly with the pin underneath.

IMG_0721.JPG


IMG_0908.JPG


Next up will be removing the fog lights and building some air ducts to feed air to the brakes. To help keep the brake temps down so I can last longer on track without brake fade.
 
*Update*

Been a while since i did any more work on the Clio. Still keen for a lot of track time this year. Lots of parts waiting to be fitted but waiting for the weather t obrighten up. I don't have the bonus of a garage, so waiting for dry weather is key.

Decided to day to build something indoors, decided to make an air feed out of a spare headlight.

Started with said headlight...

IMG_2496.JPG


Gutted this insides, cut everything out bar the plastic tabs which are needed to fit it to the car.

IMG_2549.jpg


Started cutting a hole to make way for an air duct piece on found on ebay... dropped it in..

IMG_2557.jpg


The to finish up, i wrapped the headlight in Black Vinyl and riveted the duct to the light.

IMG_2564.JPG


The wrapping part was a lot harder than i thought, in hindsight i think paint would have been better. Not the tidiest job but it will do the job!!
 
*Update*

A few more smaller modifications. All to help with keeping temperatures down and making the car lighter.

First up, i removed the bumper, removed the fog lights and fitted some tubing. Seen a few people do this, makes sense to me feeding air straight to the brakes. I've also removed the arch liners so the air flow can go straight to the brakes.

Also added the Skoda Fabia front lip and trimmed it to fit.

IMG_0979.JPG


Next up was the doorcards, relatively straight forward fit. Takes a lot of weight out of the doors.

IMG_1355.JPG


And finally, with all these bits done, i booked on at Oulton Park. Car performed well. Still need to address the suspension & brakes. Both could do with an upgrade. This will be done soon along with a roll cage.

81671DDC-5C4C-4845-8A4B-5F2A9AAF8F86.JPG
 
*Update*

Decided the weather was dry enough to start fitting my cage this weekend.

Will get more pics in when the seats and harnesses are back in! Looking to get the wheels refurbed in white to match the cage.


IMG_2723.JPG
 
*Update*

Currently been furloughed by my place of work like many people in this difficult time. But im sure there are people much worse off.

Made a real start with removing wiring and any unnecessary modules. But will show progress of that later.

During this process, i got rid of the radio and figured id make something to replace it.

Started with a head unit blank plate and few random bits and bobs id gathered off ebay.

IMG_3146.JPG


Carefully cut and drilled out a few holes and that gave me something looking like this...

Features a button for the Horn, a voltmeter, a USB socket and then a normal cig lighter style power outlet. Should be useful for charging my phone when out and about in the car. Looks better than a hole in the dash anyway!

IMG_3156.JPG


IMG_3159.JPG


Just waiting on some red and black wiring i the post so i can make a little wiring harness to power it all. Will be using the original wires for the stock cigarette lighter to power it.
 
*Update*

Going to split this update into two posts to try and keep some sort of timeline here.

Since the last update, i finished installing the cage, added another seat and installed OMP 6 point harnesses. Then went to Oulton Park! Car drove well but still highlighted the need for better brakes.

Picture1.png


Picture3.jpg
 
*Update*

Currently renovating an old edwardian semi which is taking all of my time up. The downside is that i currently have very little time to spend on the Clio. The upside is i now have a proper garage to work on the clio no matter the weather.

Tucked up in its new home. This garage was a great selling point to me with the house. So much room for activities!

IMG_4257.JPG


Playing catch up here, but within the last few months ive finished a few more bits on the car. New Ferodo DS1.11 pads and Brembo HC discs on the front from @George@RTR_Parts . Great price and service, would highly recommend him. Ive since used this combo on track and im yet to experience brake fade which is just what i was looking for.

The below mods have also taken place recently:
- I also removed a lot more unnecessary wiring from inside the cockpit.
- Refitted the doorcards with more robust M6 well nuts and bolts.
- Added another seat.
- Added a pair of 6 point harnesses and all eyebolts/mounting parts.

Few photos of the recent work. Can see the replacement headunit piece i made with the voltmeter all working here.

IMG_5133.JPG

IMG_5128.JPG


Can also catch a glimpse of the cage,seats and harnesses here...

2391E562-7B63-4946-BBD6-E2694DFEB76B-A70AD818-2017-43B9-8388-D0A07614AB43.JPG


I think that brings me up to the recent seat time at Three Sisters.... The night before all back together and ready to roll..

FF130E97-C72E-42F1-BFDB-E5E3C4817A6D-E00E09A7-0CE0-4225-8B1B-D28269BC7264.JPG


It was an evening event, only a small track but for £50 i couldnt say no.

Car ran perfectly all evening, brakes felt great and given it was wet, the AD08R's actually provided a lot of grip.

118a3b79-4d4e-42b3-a999-490ba37e5009.JPG


9b20aafa-db64-4d92-9b4d-20e10b9aecf7.JPG


D9715F06-C5D2-40F9-B816-CA5F83F24631-3B8B89A9-1B9A-477D-8965-297A189925A5.JPG


That was until the last session of the night..... the car had to be towed home. Turns out the bracket holding the alternator snapped clean off. Meaning there was no tension on the aux belt and more importantly, no water pump running. Which ended the night there. Hoping there's no further damage to the engine after the big overheat on track. But it looks like i may need to tear down the front end and install something more robust to prevent it happening again.

Ive seen Pure Motorsport do an A/C delete kit which comes with a new design to the Alternator bracket so i think that will be the upgrade route to go. Any advice would be welcome. If anyone else has heard of this part breaking before and has found a resolution/tougher part?

Thanks!
 
*Update*

Finally got round to doing my 'winter strip down'.... towards March.

Following on from the last post, the arm on the alternator broke clean off. Upon further inspection it would seem one of the bolts holding it on started to bemcome loose causing it to rattle and eventually snap off. Currently on the hunt for a new Alternator.

IMG_6693.JPG


Since this work needs to be done, i decided to invest some money into storage and and a work bench in the garage, so its all ready to tear the car down.

IMG_6003.JPG


IMG_6059.JPG


The tear down began...

IMG_6757.JPG


The plans are to send off the inlet, throttle body and other parts off to MS Engineering to be gasflowed and portmatched. This will also be powdercoated. Also going to be completely removing the A/C, and installing the Pure Motorsport A/C Delete kit. Hence why the spring tensioner and a/c compressor have been removed. I'll then be added a new blue hose kit and big clean up. Chuck it back together then take it somewhere to be mapped. See if we can squeeze any more HP's out.

You may have gathered from pics that theres a big box of BC racing goodness. These are are the DS series, so a bit more track focussed. I went with 10kg fronts and 8kg rears. So should feel really planted going forward. These also came with new solid top mounts.

Ive installed the rears for now. Sits perfect and will allow me to move up to 205 tyre on the rear. I will install the fronts once the engine is back together.

Spring comparison for reference.

IMG_6406.PNG


IMG_6648.JPG


Hopefully the next update will see a lot of the engine back together and one step closer to being driveable again. Looks like track days will be back open soon so there will be a real push to get this finished.
 

Attachments

  • IMG_6406.PNG
    IMG_6406.PNG
    2.1 MB · Views: 111
*Update*

Found a few hours this bank holiday weekend so got cracking.

The work done is as follows:

- Removed the a/c compressor
- Removed all brackets and spring tensioner
- Install the Pure Motorsport A/C delete bracket
- Replacement Alternator
- New shorter Aux belt
- Installed an MTC Hose Kit
- New Coolant Bottle
- Installed all the M.S Engineered parts. Gasflowed and Portmatched Upper inlet, lower inlet and throttle body. Also the fuel rail protector. All powdercoated.

engine bay.jpg


I chucked the radiator on and fired it up. Seems to be a misfire which i traced down to one of the wires running to the injectors has split. Ive already bought a spare loom to replace this part of the wiring from.

Will provide another update once the front coilovers are on and its running sweet.

New Wheels should also be here soon.
 
*Update*

Front end all back together. Runs sweet. Just a few things to tidy up. Going to slowly go through the bay resprayed any faded/rusty parts. Also got a nice aluminium battery cover coming.

engine bay 2.jpg


Also finished fitting the coilovers. Went with BC racing DS series with custom spring rates. 10kg fronts and 8kg rears. Also fitted the BC racing top mounts. These also provide some camber adjustment which will be handy when dialing it in at track. I thought this set up would be too harsh on the road but with the coilovers being fully adjustable, the softer settings on the coilovers provide an almost stock soft ride feel. Which is great. But on full stiffness, its solid. Really excited to see what these are like on track.

front pic.jpg


The 'to-do' list is getting shorter. Still waiting on the new wheels. Should be here in June. The exterior will be getting a refresh at some point. Fresh decals etc.
 
*Update*

Quite a while since i updated. I'll update in blocks. With the car all back together, i took the car down to Chris at EFI to work his magic and get the car making the most of the recent mods.

Final figures of the day was 189.6bhp and 165 ft-lb torque. Increased the mid range power and raised the rev limit. Pretty happy with those results. Chris said the engine is healthy and that if i was to upgrade to the 197 cams, injectors and 182 manifold, it should see over 200bhp which would be great.

efi.jpg
 
*Update*

After this i took the car to a Javelin Sprint event. The weather was horrific and to top it off, the car decided to give me some issues. The £15 replacement alternator i fitted a month before turned out to be crap. So with no power going to the battery, my day was cut short. Remind me to always get a refurbed/new one and not cheap out on important parts.

Photos were good though.

Three sisters 1.jpg

Three sisters 2.jpg

Three sisters 3.jpg
 
*Update*

The car then sat for a while. It did receive some new wheels. Ive also gone for a staggered tyre set up this time round. 205's on the front and 195's on the rear. Hoping the extra rubber up front will provide better grip. Ive also opted for Nankang AR-1's as ive heard great reviews.

172 new wheels.jpg


And a picture next to one of my mates track projects. 325ti compact.

172 garage.jpg


Then comes another project that i built towards the end of 2021. Bought an E39 525i Manual. Didnt really need it but ive always loved the look of them.

e39.jpg


After a month or so it looked like this...

e39 2.jpg


e39 3.jpg


Got more parts and overall stuff happening to the clio early this year in time for track days so stay tuned.


Top