ClioSport.net

Register a free account today to become a member!
Once signed in, you'll be able to participate on this site by adding your own topics and posts, as well as connect with other members through your own private inbox!

  • When you purchase through links on our site, we may earn an affiliate commission. Read more here.

Inferno track car build


So the daily wheels ended up with a puncture but to be fair they have lasted ages so now was the time to fit the newly painted team dynamics 😍!

Heres a photo of them fitted at a car meet i attended the other weekend.

20210724_215034.jpg


And a close up with the HiSpec calipers 👌

20210801_111315_HDR_(1)~2.jpg


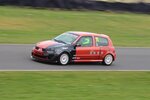
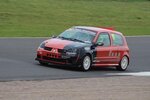
I also had another tracknight on thursday just past. Have to say the car performed extremely well again and I seem to be finding faster routes round Knockhill!

This had also given me a chance to try out my new led lights on my headlight blanks. Had a few good comments on them already!

Ill let the pictures do the talking.

FB_IMG_1628370817669.jpg

FB_IMG_1628370828201.jpg

FB_IMG_1628370870673.jpg

FB_IMG_1628370765346.jpg

FB_IMG_1628370800771.jpg

FB_IMG_1628370725785.jpg
FB_IMG_1628370737948.jpg
 
So been a while since i have updated this!

Car has been off the road since September just due to not wanting to use it during the winter months. Been beneficial though as its postponed my mot to a better time rather than the week before Xmas. So last weekend it passed its mot with one advisory, Rear wheel bearing starting to show slight play. So fairly happy with that!

To save hassle x2 rear discs have been ordered and awaiting delivery. Along with this i decided to purchase some track time up Knockhill racing circuit. So the car will be seeing the track again in 2 weeks time.

Preperation! Incoming.

Before the upcoming track day i have decided to service the car as its not been done since last year, the car hasnt seen a lot of miles since its last service but going to do so for piece of mind.

Ordered are as follows.

Oil
Oil filter
Sump washer
Gear oil
Ht leads
Spark plugs
BMC Air filter cleaner and regenerator kit
Rear discs and pads
And also a couple other goodies for the car

Most of which have been delivered

20220403_191743_HDR.jpg

20220402_153911_HDR.jpg


Still waiting on a few things coming but over the weekend I decided to set about tackling the airfilter. Now this fikter was off another car a mate had bought a few year back and the filter looked pretty old then and iv had it for 4 years and hasnt been cleaned once. So safe to say was pretty intrigued as to how the kit works and how the filter will clean up.

20220402_154123_HDR.jpg


First of all removed the filter from the car and brought it in the house to pull apart.

Straight away i spotted an issue as the screws were all rusty so to my delight 2 of which rounded. Pliers got them out and the filter was soon in 3 parts.

20220402_155105_HDR.jpg


Following the instructions with the kit i tapped out some debris from the filter was actually shocked how much came out 😳then applied the cleaning solution down all the cores in the filter, i decided to use the kitchen sink to do this so you can only imagine the mrs face when she witnessed the aftermath 😂😂

20220402_161135_HDR.jpg
i then applied more cleaning solution and rinsed with water to flush it thoroughly 🙊

IMG-20220402-WA0003.jpeg


Yes absolutely caked in dirt, debris and deposits. I then left the filter for 24hrs to completely dry out. Now to recoating with the regenerator oil in the kit. Bit if a fiddle messy job as this needs to be applied from the inside so once again a fine coating down every single core and let it all haze up so the whole filter element was a red colour and let it all dry in this took about an hour or so before it was completely dry.

20220403_185445.jpg


Now for reassembly. Instead of faffing around with the old screws I headed out to the shed/workshop and looked out some new self tappers the same size

20220403_185718.jpg


Then it was a case of screw all parts back together and voila! Job done. Pity the carbon fibre is all dull and faded and also the original sticker has seen better days but atleast internally its like new again!

20220403_191354_HDR.jpg


Thats about it until the next update. Hopefully some more things shall arrive in the post and set about getting stuff fitted before the track day 🏁
 

Attachments

  • 20220403_185516.jpg
    20220403_185516.jpg
    4.7 MB · Views: 65
Kept looking at the above photo of the bumper being off and couldn't help but think the front crash bar looks a little scruffy!

Nothing some underseal cant sort!
20220410_154144_HDR~2.jpg


Much better!

Speaking of sorting things though.... An issue has appeared 🤦 Took the car for a drive to see how everything feels. Cars driving fine but Speedo isn't working and the stop light and handbrake light are constantly on 🤷

Anyone got any ideas?
 
Looks like i found my issue. Front driverside abs sensor has been rubbing away and now all buffed through and damaged.

20220411_142949.jpg


New one was picked up today and now onto a job im really not looking forward to doing.
Have a feeling removing the old sensor from the hub will be a ballache
 
So the abs sensor was of course a pain!

1st of all the old one was totally siezed into the hub 🤦 Decided to get barbaric and cut the top off and then the bottom at either sides of the hub and chap the magnet through carefully without hitting the abs ring thankfully this went to plan 👌 what didnt go to plan was the fact the sensor that renault had given me was for the rear and not the front (i should have checked i know🙈)

So that was job over for the night, Next day I phone about and finally come accross a local factors that have one! Had too wait a day for delivery so this took me upto Friday 🙄 Cutting it very fine for the trackday on the Sunday. Friday afternoon came and I collected the sensor... Voila! The correct one, out to the car i go and its an extremely tight fit. Eventually with some minor purseusion the sensor slots in and bolts back into place.

Job done!.... So i thought 🤦 Got the wheel back on and the car back on the ground its getting dark by this point and unfortunatly theres very little light where the car is 🙄 So I go to take the car for a test drive and still no Speedo 🤦 It was looking like this trackday was either not going to be a go ahead or corner entry speeds were going to be a bit iffy 😂 .

Saturday! Starting to get stressed about it and finally came to the realisation... I didnt clear the code 😂 went out and checked the codes and it was still there, so cleared and finally! A working speedo!! Also noticed that a rear abs sensor had flagged up. Which was actually not to much of an issue due to the one renault gave me being a rear... The rear i need!

So Saturday afternoon done final once over on the car and a final bolt check. Loaded the boot with spares etc and all ready for the Sunday!

6am start on Sunday for my 1hr trip to knockhill. Quick pit stop to get some vpower and the Clio finally made it to its 1st track time of the year!!

20220417_162524_HDR.jpg


The car was performing brilliantly all day in every session, no major issues but an upgrade in tyre is definitely needed as im gaining far too much pressure to quickly!

Quick cool down for the lunch time interval to watch some drifting and let the wee man roll his egg down Duffus dip (knockhill 1st corner)

FB_IMG_1650222446820.jpg


Back out for the rest of the day and the paddock was starting to empty out a bit so the sessions were being mixed which meant more track time 👌

All in it was a brilliant day and cant wait to get back at it! My mate had is 1st passenger experience of knockhill and of a Clio sport. 1st time being in my car and loved it! Thunk hes now up for track days! 😂

Here some images from throughout the day to conclude

IMG_20220418_175923_643.jpg

IMG_20220418_175920_891.jpg

IMG_20220418_175914_820.jpg

IMG_20220418_175904_825.jpg
IMG_20220418_175907_195.jpg

IMG_20220418_175858_809.jpg
 

Attachments

  • IMG_20220418_175918_254.jpg
    IMG_20220418_175918_254.jpg
    37 KB · Views: 64
  • IMG_20220418_175910_312.jpg
    IMG_20220418_175910_312.jpg
    42.3 KB · Views: 60
So another little job to add to the list.

My towing eyelet decided to go awol 🙄

So bought some of the MSA Wire tow hooks. At first was wondering how the hell they were going to fit but noticed a hole in the front chassis legs that could be useable.

M10 8.8 Tensile bolts, Nyloc nuts and some big washers and that done the trick. Had to do a quick modify of the lower grill but nothing mental.

So heres the finished outcome.

received_520222429590709.jpeg
received_466746435220791.jpeg
20220503_132240_HDR.jpg
20220503_132230_HDR.jpg
20220503_134109_HDR.jpg
20220503_134116_HDR.jpg
 
Another little update.

Started a wire tuck on the rear passenger side interior and removed some un-needed wires and washer hose. Ill need to get a pic or that now its finished.


But on another note...


Theyre were some bits of the wrap on the car that were bugging me. Imperfections etc.

The front bumper was starting to tear a bit and the rear driver quarter had always annoyed me as the line wasnt straight (my fault for doing it free hand) 🤦

20220519_141108_HDR.jpg


So removed the bits that needed redone and whilst the wrap was off the more and more i thought to my self. "Its been on for 2 years now, how a bout a change 🤔"

So the car is now a blank canvas 👀

20220521_151029_HDR.jpg


I do have a new design in my head so watch this space 👀
 

Attachments

  • 20220521_151020_HDR.jpg
    20220521_151020_HDR.jpg
    7.6 MB · Views: 64
Well well well it looks like i have neglected this thread once again. Yes my bad 🤦.

So much for "watch this space" in my previous update 🙄 Alot has happened since my last post but not for the best unfortunatly 🤦😢


So following on from my previous update, Yes the inferno was once again a blank canvas so it was back out with the vinyl wrap, i wanted to try something more technical and improve my skills sort of thing. Now i always had a soft spot for kanjo style civics (like the ones in the high speed youtube videos on Tokyo expressways etc) anyway a week off work and the Clio soon looked like this

FB_IMG_1658172413767.jpg

20220703_172625_HDR~2.jpg


I wont fill this with bit my bit wrap progression as the following images will do the talking.

Now the car seen a couple of track days like this and pnce again i had a right blast round knockhill seem to be getting fast and finding better and quicker lines through the circuit.
Confidence is definitely growing out on track!
Screenshot_20220828-212923_(2).png

Screenshot_20220828-210414_(1).png


So after my final trackday of the year it was time for clio to sit back at the house and basically not move again till the better weather comes in.


So.... M.o.t time is coming round as it does every year and with rules getting stricter and stricter its becoming extremely difficult to get this car through one.

Option 1. was get it trailered but trailers cost a bomb and i dont have a suitable tow car

Option 2. Is tone down the car so i can get it m.o.t worthy

Option 3 . Break the Clio for spares and essentially end my fun and hard work with it.
 
After a long hard think i was still undecided on what to do. So after a bad family related end to last year things to do with the car got really neglected. New year came and I decided to go out to the car, Alternator seems to have a siezed pulley, heaters have stopped working and the dash was like an xmas tree.

Honestly felt like calling it a day with the inferno.

Until i thought to my self. These cars are becoming rare and quite hard to come by now. You dont see them often at all and that got me thinking. Letting this go would be a waste as it still drives and handles brilliantly.

Just like that option 4 popped into my head!

LETS RESTORE THE CLIO 😃!!

Had a week off work this week so was time to make a start. First things first, lets get all this wrap off and asess the paintwork and damage underneath... Now i knew the rear arches were not going to be great as they have been bad for the past couple of year due to me fitting silly wide wheels and slamming the car. I should have sorted this before doing this wrap but I just covered the flakey paint and surface rust.

20230209_143340.jpg

20230209_143250.jpg


So this how the car currently sits. As you can see the rear arch isnt looking good in the slightest but that will be getting seen too.

The bonnet has also been getting eaten away by rust too but thats no hassle as thats easy replaced.

Screenshot_20230209-193755.png

The fuel filler can be a bit of an issue but I have seen worse! But this will be getting attention when I get round too it.

Screenshot_20230209-193811.png

Screenshot_20230209-193819.png


So driver side arch 😣


Onto the passenger side arch and driver side sill! Yeah looks hellish 🤦


Attachments

  • 20230209_143250.jpg
    20230209_143250.jpg
    17.3 MB · Views: 51
  • 20230209_143340.jpg
    20230209_143340.jpg
    8.6 MB · Views: 52
After a few messages to a good friend @Stu. at renomotive he soon gave me the advice to get into the rear quarters to check the inner sills as that way i would find out if this project is even worth continuing.

So i did.... Then i remembered someone who previously owned this car....for some reason had filled the rear arches with expanding foam. I got the majority of it out when i replaced the rear door cards but there was still loads in there!

20230208_162918.jpg


Passenger side inner was completely fine. What a relief!!

20230208_163031.jpg


Driver side inner sill unfortunately has rust forming 🙈

20230208_163201.jpg


But thankfully it is nowhere near as bad as i thought it was going to be.

No1 on the list lets sort this issue before.it gets any worse!
 
Set about the driver side inner sill with some wire brush drill bits. And got it cleaned up. Between this and removing the wrap on the other side or the car this took most of the day untill I had to quickly do the school run.

Inner sill is cleaning up nicely just need to get some rust treatment in there and then prime and paint to protect it.
20230209_115637.jpg

Now to add to the list of issues 🙄 the front passenger side wing... Now i noticed after the removal of my last wrap the paint was begining to come off in flakes. Well this time it decided to come off in chunks. 🤦 this was painful!!!

20230209_143355.jpg


So that will add to things that will need painted.

Upto now

1x un molested front bumper
2x wings
2x door handles (sun damaged. Faded)
1x replacement bonnet
2x rear arches

No doubt this list will get longer 🙄😂
 
Glad to see you're getting the car back up to scratch.

You've seen my sills , you don't want them going as bad as that.
Well thats just it mate. I have held off for too long so now its time to take the car off the road for a bit and set about getting everything done before anything gets worse. Will be a long process but will be worth it..... I hope 😂😂
 

Mr Underhill

ClioSport Club Member
Well thats just it mate. I have held off for too long so now its time to take the car off the road for a bit and set about getting everything done before anything gets worse. Will be a long process but will be worth it..... I hope 😂😂
Are you still keeping it track focused?
 
Well thats just it mate. I have held off for too long so now its time to take the car off the road for a bit and set about getting everything done before anything gets worse. Will be a long process but will be worth it..... I hope 😂😂
Are you still keeping it track focused?
It will be remaining somewhat track focussed but I'm going for more of a toned down cleaner look. Still capable on track but more sort of clubsport esque

Basically wanting it back to a previous state that it once was before it started getting butchered. 🤦

FB_IMG_1647097496278.jpg


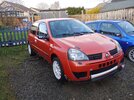
Back to looking like this but will all the good bits it has now swapped over.
 

Attachments

  • FB_IMG_1647097496278.jpg
    FB_IMG_1647097496278.jpg
    150.8 KB · Views: 49
  • FB_IMG_1647097496278.jpg
    FB_IMG_1647097496278.jpg
    150.8 KB · Views: 45
So got more of the inner sill back to bare metal this morning and added hammerite rust remover gel. Attacked again with the wire brush and dremel attatchments and then a good clean out and it was time for its 1st coat of anti rust primer.

20230211_132922.jpg

Will give another 2 coats throughout the day and then a final coat of inferno orange to cover it up.

Whilst i was waiting on that drying i set about free'ing up the alternator pulley. Managed to get it free. But...


Battery light is still on. Battery is charging at 11.35 🤦 but once off its at 12.22

Kept it on a bit longer and the voltage was dropping by the minute. Im guessing this alternator is gubbed 🤦

Not too sure on what the whining is either in the video. Plugged the obd reader in and its only coming up 2 faults im aware of.

02 sensor (currently melted )
Speed sensor (broken abs sensor wire)

So back to the drawing board! 🤦
 
Just a small little update.

Not been out at the car as much due to work and weather.

Got another couple of layers of anti rust gel and then more anti rust primer on the inner sill. Just needs a light sand and a coat of inferno on top of it to tidy it up. To be honest its hidden behind the door cards anyway 🤷

20230212_111520.jpg


And onto my most recent purchase... w
With absolute sheer luck i take a quick trip to renomotive and back i come with....

20230219_133051_HDR.jpg


Yes a passenger side inferno wing.

That saves me the hassle and cost of getting my one painted so that will be getting fitted soon too. So if an inferno front bumper comes up for sale too that will also be a god send 🤣


Top