So the abs sensor was of course a pain!
1st of all the old one was totally siezed into the hub

Decided to get barbaric and cut the top off and then the bottom at either sides of the hub and chap the magnet through carefully without hitting the abs ring thankfully this went to plan

what didnt go to plan was the fact the sensor that renault had given me was for the rear and not the front (i should have checked i know

)
So that was job over for the night, Next day I phone about and finally come accross a local factors that have one! Had too wait a day for delivery so this took me upto Friday

Cutting it very fine for the trackday on the Sunday. Friday afternoon came and I collected the sensor... Voila! The correct one, out to the car i go and its an extremely tight fit. Eventually with some minor purseusion the sensor slots in and bolts back into place.
Job done!.... So i thought
Got the wheel back on and the car back on the ground its getting dark by this point and unfortunatly theres very little light where the car is
So I go to take the car for a test drive and still no Speedo
It was looking like this trackday was either not going to be a go ahead or corner entry speeds were going to be a bit iffy

.
Saturday! Starting to get stressed about it and finally came to the realisation... I didnt clear the code
went out and checked the codes and it was still there, so cleared and finally! A working speedo!! Also noticed that a rear abs sensor had flagged up. Which was actually not to much of an issue due to the one renault gave me being a rear... The rear i need!
So Saturday afternoon done final once over on the car and a final bolt check. Loaded the boot with spares etc and all ready for the Sunday!
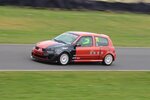
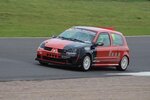
6am start on Sunday for my 1hr trip to knockhill. Quick pit stop to get some vpower and the Clio finally made it to its 1st track time of the year!!
The car was performing brilliantly all day in every session, no major issues but an upgrade in tyre is definitely needed as im gaining far too much pressure to quickly!
Quick cool down for the lunch time interval to watch some drifting and let the wee man roll his egg down Duffus dip (knockhill 1st corner)
Back out for the rest of the day and the paddock was starting to empty out a bit so the sessions were being mixed which meant more track time
All in it was a brilliant day and cant wait to get back at it! My mate had is 1st passenger experience of knockhill and of a Clio sport. 1st time being in my car and loved it! Thunk hes now up for track days!
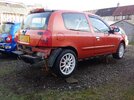
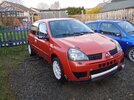
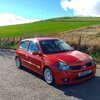
Here some images from throughout the day to conclude

 !
! 
~2.jpg")


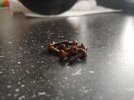
 then applied the cleaning solution down all the cores in the filter, i decided to use the kitchen sink to do this so you can only imagine the mrs face when she witnessed the aftermath


 "
" 


 !!
!!