
ClioSport.net
-
When you purchase through links on our site, we may earn an affiliate commission. Read more here.
You are using an out of date browser. It may not display this or other websites correctly.
You should upgrade or use an alternative browser.
You should upgrade or use an alternative browser.
Midlife crisis + understanding wife = New Toy
- Thread starter Cads
- Start date
Cads
ClioSport Club Member
Elise, Merc C180 Est
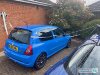
As the steering wheel has now been sent away I can’t do a great deal, and as it was raining today I decided to remove the rear window tints. They didn’t look to bad but on closer inspection the rears were badly scratched.

So out with the heat gun, luckily I started on the boot lid just as the rain begun.
As it looked before.

The heat gun made short work of the film and the boot lid seemingly came away without leaving much residue.

And after.

And the side windows before.

And after.

I’ll need to go over the side windows with some sticky stuff remover at the weekend.
I found another 2005 Renaultsport Brochure on eBay which I didn’t know featured a Racing Blue 182 inside. A nice touch. Especially as mine once wore the 2 white stripes.


So out with the heat gun, luckily I started on the boot lid just as the rain begun.
As it looked before.
The heat gun made short work of the film and the boot lid seemingly came away without leaving much residue.
And after.
And the side windows before.
And after.
I’ll need to go over the side windows with some sticky stuff remover at the weekend.
I found another 2005 Renaultsport Brochure on eBay which I didn’t know featured a Racing Blue 182 inside. A nice touch. Especially as mine once wore the 2 white stripes.
frayz
ClioSport Club Member
So much nicer without the tints ")
Jekyll
ClioSport Club Member
Agreed. Looks much better tintless.
Cads
ClioSport Club Member
Elise, Merc C180 Est
Small but satisfying progress.
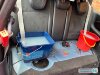
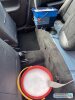
I hadn’t really appreciated how filthy the seatbelts were so with the weekend set to be warm and dry I set about soaking them in OxyAction stain remover.
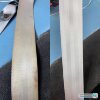
The difference is remarkable.


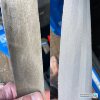
I did the fronts first as I didn’t expect the rears to be worth doing. Turns out I was wrong! Heavens only knows what filth this is/was.

Fronts soaking.

Then the rears.

This is about as useful as the Mazda’s been in the last 2 months!

Really worth doing.
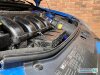
I’ve also replaced the missing bonnet seal.

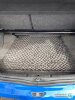
And added a boot net.

I hadn’t really appreciated how filthy the seatbelts were so with the weekend set to be warm and dry I set about soaking them in OxyAction stain remover.
The difference is remarkable.
I did the fronts first as I didn’t expect the rears to be worth doing. Turns out I was wrong! Heavens only knows what filth this is/was.
Fronts soaking.
Then the rears.
This is about as useful as the Mazda’s been in the last 2 months!
Really worth doing.
I’ve also replaced the missing bonnet seal.
And added a boot net.
Attachments
Last edited:
frayz
ClioSport Club Member
Small but satisfying progress.
I hadn’t really appreciated how filthy the seatbelts were so with the weekend set to be warm and dry I set about soaking them in OxyAction stain remover.
The difference is remarkable.
View attachment 1474773
View attachment 1474781
I did the fronts first as I didn’t expect the rears to be worth doing. Turns out I was wrong! Heavens only knows what filth this is/was.
View attachment 1474782
Fronts soaking.
View attachment 1474783
Then the rears.
View attachment 1474784
This is about as useful as the Mazda’s been in the last 2 months!
View attachment 1474785
Really worth doing.
I’ve also replaced the missing bonnet seal.
View attachment 1474786
And added a boot net.
View attachment 1474787
All so satisfying to see. Some great jobs mate that really elevate the finish of the car.
The belts have come out really well.


Cads
ClioSport Club Member
Elise, Merc C180 Est
Finally got around to getting the Clio up in the air. I had a go yesterday but my trolley jack wouldn’t go under the sill so I sacked it.
I then realised I had a scissor jack kicking about and this morning used that to get the sill high enough to get the trolley under. Supported on axle stands for good measure.

I had a new gear selector bush to fit in the hope the gear change would be a little sharper.
 |https://thumbsnap.com/xVN6YnJB[/URL]
As I expected it was a pig to remove and I was all set to give up when it basically just fell out.
Old one in situ.

The new one went in ok and the circlip was pushed home. It looks to be seated correctly as these apparently have a habit of falling out if not done properly.

While there I fitted the drip guard. Nice fit.

While disconnecting the battery to remove the steering wheel the other week I noticed the battery wasn’t clamped down, so a few quid off eBay and I had a clamp.

I sprayed this black then obviously forgot to take a piccy before fitting.
Finally, my steering wheel is done and should be back with me on Tuesday. It looks amazing, I get the centre line won’t be to everyone’s taste. And I did um and ah over it, but I like it.

I then realised I had a scissor jack kicking about and this morning used that to get the sill high enough to get the trolley under. Supported on axle stands for good measure.
I had a new gear selector bush to fit in the hope the gear change would be a little sharper.
As I expected it was a pig to remove and I was all set to give up when it basically just fell out.
Old one in situ.
The new one went in ok and the circlip was pushed home. It looks to be seated correctly as these apparently have a habit of falling out if not done properly.
While there I fitted the drip guard. Nice fit.
While disconnecting the battery to remove the steering wheel the other week I noticed the battery wasn’t clamped down, so a few quid off eBay and I had a clamp.
I sprayed this black then obviously forgot to take a piccy before fitting.
Finally, my steering wheel is done and should be back with me on Tuesday. It looks amazing, I get the centre line won’t be to everyone’s taste. And I did um and ah over it, but I like it.
Jekyll
ClioSport Club Member
All good stuff mate. The seat belts have come out great. A nice cheap, but rewarding result.
The tray is a nice touch and fits really well too.
As for the steering wheel, it looks amazing. Snappys works is fantastic
The tray is a nice touch and fits really well too.
As for the steering wheel, it looks amazing. Snappys works is fantastic
Cads
ClioSport Club Member
Elise, Merc C180 Est
So this week I’ve put the newly re-trimmed wheel back on. Unfortunately I now have the 3 warning lights illuminated. ABS, TC and SERV.
I’ve had it off and on plenty of times. Someone suggested removing the cowling, something I’d not done and ensuring the yellow dot is visible through the viewing window, it wasn’t.
So it now is and I’ve put it all back together again. The lights remain, I’ve even driven it in the hope they clear but not so far.
An issue to come back too!
While playing with the battery I noticed the battery cover should have been bolted down, not just sitting on the frame.
The issues being this seized bolt which was already rounded off.

It wasn’t budging, so it was cut, drilled and eventually came out with mole grips.
The end result is much better.

I’ve been assembling gear stick related items which began when I decided to stick with the standard shifter and just change the knob, so bought a bargain £12 satin ball Richbrook knob from eBay.
I then saw a standard shifter, with Yanno shift, brass bush and Motomec knob for sale and bought this as well.
And then saw a lad selling Alcantara gaiters with coloured stitching on FB so picked one of these up too.
Hopefully all will be here by Thursday when I’ve a day off.
I’ve had it off and on plenty of times. Someone suggested removing the cowling, something I’d not done and ensuring the yellow dot is visible through the viewing window, it wasn’t.
So it now is and I’ve put it all back together again. The lights remain, I’ve even driven it in the hope they clear but not so far.
An issue to come back too!
While playing with the battery I noticed the battery cover should have been bolted down, not just sitting on the frame.
The issues being this seized bolt which was already rounded off.
It wasn’t budging, so it was cut, drilled and eventually came out with mole grips.
The end result is much better.
I’ve been assembling gear stick related items which began when I decided to stick with the standard shifter and just change the knob, so bought a bargain £12 satin ball Richbrook knob from eBay.
I then saw a standard shifter, with Yanno shift, brass bush and Motomec knob for sale and bought this as well.
And then saw a lad selling Alcantara gaiters with coloured stitching on FB so picked one of these up too.
Hopefully all will be here by Thursday when I’ve a day off.
Cads
ClioSport Club Member
Elise, Merc C180 Est
A little progress today, but not as intended.
The shifter I’d recently brought from a member has now officially been lost by Hermes, through no fault of the member I might add and hopefully he’ll be able to claim my money back.
So I decided to go ahead and fit the universal gear knob and custom made gaiter I’d assembled.
I’m pretty sure the gear knob I was removing was an eBay special, it certainly was more rubber than leather and didn’t put up much of a fight.


As the gear knob wasn’t supposed to be for lift to reverse shafts, I made a plastic sleeve from some spare cycle parts I had and wrapped that in electrical tape until the knob was a tight fit and the lift collar still had room to rise as intended.
The gaiter was an easy job, I simply unpicked the old staples on the old one, then using fuse wire effectively stitched the new one to the plastic collar and fitted to the shaft with a new cable tie. I got this from @Teaspoon and I can 100% recommend them as an improvement over the standard.

All in a tidy job. And I’m really happy with how it’s come out.
In better news I’ve finally sourced a decent front bumper from @Inferno182 in the correct colour and two better front seats from @Tonyclio These will involve a trip north to collect, but will be well worth it. So my thanks to these members for being great to deal with.
And carbon skins messaged me Friday to say they’d finished some bits and should be with me early next week.
The shifter I’d recently brought from a member has now officially been lost by Hermes, through no fault of the member I might add and hopefully he’ll be able to claim my money back.
So I decided to go ahead and fit the universal gear knob and custom made gaiter I’d assembled.
I’m pretty sure the gear knob I was removing was an eBay special, it certainly was more rubber than leather and didn’t put up much of a fight.
As the gear knob wasn’t supposed to be for lift to reverse shafts, I made a plastic sleeve from some spare cycle parts I had and wrapped that in electrical tape until the knob was a tight fit and the lift collar still had room to rise as intended.
The gaiter was an easy job, I simply unpicked the old staples on the old one, then using fuse wire effectively stitched the new one to the plastic collar and fitted to the shaft with a new cable tie. I got this from @Teaspoon and I can 100% recommend them as an improvement over the standard.
All in a tidy job. And I’m really happy with how it’s come out.
In better news I’ve finally sourced a decent front bumper from @Inferno182 in the correct colour and two better front seats from @Tonyclio These will involve a trip north to collect, but will be well worth it. So my thanks to these members for being great to deal with.
And carbon skins messaged me Friday to say they’d finished some bits and should be with me early next week.
Inferno182
ClioSport Trader
172 Track M3RS Track
So this week I’ve put the newly re-trimmed wheel back on. Unfortunately I now have the 3 warning lights illuminated. ABS, TC and SERV.
I’ve had it off and on plenty of times. Someone suggested removing the cowling, something I’d not done and ensuring the yellow dot is visible through the viewing window, it wasn’t.
So it now is and I’ve put it all back together again. The lights remain, I’ve even driven it in the hope they clear but not so far.
An issue to come back too!.
This can sometimes be due to the steering sensor being turned 1 rev out,
I have one in my personal collection that’s got a similar issue and when I took the wheel off I forgot to tape the squib into position!
Getting it plugged into Clip will be your best bet for diagnosis though, I’d be more than happy to plug mine in for you was closer!
I’ve also sent you a DM about delivery on the Bumper [emoji1362]
Very good read on the project aswell mate!
Fancy working on my inferno [emoji23]
Sent from my iPhone using Tapatalk
Cads
ClioSport Club Member
Elise, Merc C180 Est
So another completely unnecessary lockdown purchase arrived today courtesy of Carbon skins.
And these....

Have been replaced with these.

I’m a sucker for carbon fibre.

And the shifter that Hermes ‘lost’ arrived today as well, so after fitting my new knob, I now have a new shifter to fit and a choice of knobs to finish it off.
The shifter I’ve bought comes with a quaife style gear knob in white or the satin ball which looks very Ph1 esq.
And these....
Have been replaced with these.
I’m a sucker for carbon fibre.
And the shifter that Hermes ‘lost’ arrived today as well, so after fitting my new knob, I now have a new shifter to fit and a choice of knobs to finish it off.
The shifter I’ve bought comes with a quaife style gear knob in white or the satin ball which looks very Ph1 esq.
Cads
ClioSport Club Member
Elise, Merc C180 Est
Had an hour to get under the car again this morning and fit the shifter I bought recently with quickshift and the brass bush.
It was as straight forward as I’d been led to believe.
Access is tight but without the cat to move the shifter dropped out with ease.

I think the best bit about the whole job was the number of tools required.

That’s it. Just the one!
The heat shields were as ropey as I expected but went back ok.
Now I just need to decide which knob I prefer, the white nylon one that came with the shifter.

Or the PH1 style I recently purchased. Having used the ball, it does feel nice. I think I’ll use the nylon one and see how that feels.
Not driven with the new shifter yet, but it certainly feels tighter and has removed more of the play i had with the standard shifter.
I realised I’d not posted an image of the re-trimmed wheel in situ.

I also pulled the boot lid trim off and replaced all the clips with new. A previous owner had clearly bodged some with glue by the looks of it. For a few quid it’s certainly a worthy job if it stops the trim falling off every time the boots shut.

Tomorrow I’m heading north to collect 2 front seats which look better than mine and the new front bumper.
It was as straight forward as I’d been led to believe.
Access is tight but without the cat to move the shifter dropped out with ease.
I think the best bit about the whole job was the number of tools required.
That’s it. Just the one!
The heat shields were as ropey as I expected but went back ok.
Now I just need to decide which knob I prefer, the white nylon one that came with the shifter.
Or the PH1 style I recently purchased. Having used the ball, it does feel nice. I think I’ll use the nylon one and see how that feels.
Not driven with the new shifter yet, but it certainly feels tighter and has removed more of the play i had with the standard shifter.
I realised I’d not posted an image of the re-trimmed wheel in situ.
I also pulled the boot lid trim off and replaced all the clips with new. A previous owner had clearly bodged some with glue by the looks of it. For a few quid it’s certainly a worthy job if it stops the trim falling off every time the boots shut.
Tomorrow I’m heading north to collect 2 front seats which look better than mine and the new front bumper.
DomP182
ClioSport Club Member
ph1 172, Arctic182
Definitely go with the satin ball over the nylon thing!Had an hour to get under the car again this morning and fit the shifter I bought recently with quickshift and the brass bush.
It was as straight forward as I’d been led to believe.
Access is tight but without the cat to move the shifter dropped out with ease.
View attachment 1480244
I think the best bit about the whole job was the number of tools required.
View attachment 1480245
That’s it. Just the one!
The heat shields were as ropey as I expected but went back ok.
Now I just need to decide which knob I prefer, the white nylon one that came with the shifter.
View attachment 1480246
Or the PH1 style I recently purchased. Having used the ball, it does feel nice. I think I’ll use the nylon one and see how that feels.
Not driven with the new shifter yet, but it certainly feels tighter and has removed more of the play i had with the standard shifter.
I realised I’d not posted an image of the re-trimmed wheel in situ.
View attachment 1480247
I also pulled the boot lid trim off and replaced all the clips with new. A previous owner had clearly bodged some with glue by the looks of it. For a few quid it’s certainly a worthy job if it stops the trim falling off every time the boots shut.
View attachment 1480248
Tomorrow I’m heading north to collect 2 front seats which look better than mine and the new front bumper.
Cads
ClioSport Club Member
Elise, Merc C180 Est
Definitely go with the satin ball over the nylon thing!
Having now driven it, yes I agree and will be swapping knobs. Again.
Cads
ClioSport Club Member
Elise, Merc C180 Est
So I spent the day driving to Yorkshire to collect parts purchased from members on here.
A decent days driving made easier by leaving home at 0500hrs!
The bumper is better than I expected, huge thanks to @Inferno182 for delivering it to Leeds. Can I give BTT Motorsport a plug?
And @Tonyclio kept the seats for me until I could come up. Top man! They are way better than the ones I currently have.
Looking forward to having some free time to get the front end looking as I want.
I’ll have 2 fronts seats for sale and a RB front bumper which is probably only suitable for a track slag.
Tonyclio
ClioSport Club Member
Clio 182
Great to meet you Chris, glad you got home safe and sound!So I spent the day driving to Yorkshire to collect parts purchased from members on here.
A decent days driving made easier by leaving home at 0500hrs!
The bumper is better than I expected, huge thanks to @Inferno182 for delivering it to Leeds. Can I give BTT Motorsport a plug?
And @Tonyclio kept the seats for me until I could come up. Top man! They are way better than the ones I currently have.
Looking forward to having some free time to get the front end looking as I want.
I’ll have 2 fronts seats for sale and a RB front bumper which is probably only suitable for a track slag.
View attachment 1480546
Inferno182
ClioSport Trader
172 Track M3RS Track
So I spent the day driving to Yorkshire to collect parts purchased from members on here.
A decent days driving made easier by leaving home at 0500hrs!
The bumper is better than I expected, huge thanks to @Inferno182 for delivering it to Leeds. Can I give BTT Motorsport a plug? [emoji106]
And @Tonyclio kept the seats for me until I could come up. Top man! They are way better than the ones I currently have.
Looking forward to having some free time to get the front end looking as I want.
I’ll have 2 fronts seats for sale and a RB front bumper which is probably only suitable for a track slag.
View attachment 1480546
No problem at all!
Glad your happy with it! I’m
Just glad I didn’t have to post it to you!
Thanks for the plug too [emoji8]
Just keep stumbling across my eBay [emoji6][emoji2957][emoji23]
Sent from my iPhone using Tapatalk
Cads
ClioSport Club Member
Elise, Merc C180 Est
After last weekends road trip I wanted to get the better seats in and after removing the heat shield and working around the centre silencer I got the drivers seat free.
That’s where it went downhill. My existing seats both have a black and a grey block connectors which plug into the cars loom.
The replacement drivers seat has had the grey connector snipped off. A blue and brown wire are visible. And the replacement passenger seat doesn’t seem to even have wiring for another connector.

So more research required on this to work out what they do and what will happen if only the black plugs are connected.
So I thought I‘d tackle the front bumper. This is how it looked. Complete with tow strap, bass port just pushed into the grill not connected to any ducting and headlight washers which didn’t work.

And the reason for changing was this ropey paint. At some point it’s had a bad spray job and wasn’t worth prepping and painting. (Bumper now for sale BTW)

The bumper fought me all the way, one of the bolts under the wing was not connected to the bumper and the bracket had been bent right up into the wing out the way.
Two of the fog light bolts needed drilling out. And the Renault badge was superglued in rather than held by screws.
The undertray was missing and so not held onto the chassis here.
But eventually with the bracket bent back and all the old hardware removed, new bolts found and the badge freed and screwed back into the new bumper, this is how it looked. Complete with a new Fabia splitter and Mega Carbon washer blanks.


Months ago I ordered a new front plate for this very occasion. But clearly the 3/4 plate I thought I needed was a little small.
Original, actual plate I wanted and the 3/4 size.

Much better. It’s not a perfect bumper and has a little road rash consummate with its age. But it’s a massive improvement!
I wish I had time to properly clean the area behind the bumper and strip the bumper of its black plastics and clean, protect etc, but at least I now know the bumper will come off in minutes not the hours it took today.
That’s where it went downhill. My existing seats both have a black and a grey block connectors which plug into the cars loom.
The replacement drivers seat has had the grey connector snipped off. A blue and brown wire are visible. And the replacement passenger seat doesn’t seem to even have wiring for another connector.
So more research required on this to work out what they do and what will happen if only the black plugs are connected.
So I thought I‘d tackle the front bumper. This is how it looked. Complete with tow strap, bass port just pushed into the grill not connected to any ducting and headlight washers which didn’t work.
And the reason for changing was this ropey paint. At some point it’s had a bad spray job and wasn’t worth prepping and painting. (Bumper now for sale BTW)
The bumper fought me all the way, one of the bolts under the wing was not connected to the bumper and the bracket had been bent right up into the wing out the way.
Two of the fog light bolts needed drilling out. And the Renault badge was superglued in rather than held by screws.
The undertray was missing and so not held onto the chassis here.
But eventually with the bracket bent back and all the old hardware removed, new bolts found and the badge freed and screwed back into the new bumper, this is how it looked. Complete with a new Fabia splitter and Mega Carbon washer blanks.
Months ago I ordered a new front plate for this very occasion. But clearly the 3/4 plate I thought I needed was a little small.
Original, actual plate I wanted and the 3/4 size.
Much better. It’s not a perfect bumper and has a little road rash consummate with its age. But it’s a massive improvement!
I wish I had time to properly clean the area behind the bumper and strip the bumper of its black plastics and clean, protect etc, but at least I now know the bumper will come off in minutes not the hours it took today.
Cads
ClioSport Club Member
Elise, Merc C180 Est
So yesterday I went back to the seats. After a little research it was clear that without the grey connector from the seats connected to the loom I’d have a dash full of warning lights.
But thankfully it was simple.
The seat belt buckle simply unbolted from my existing seats and onto the better seats.

The replacement drivers seat was missing the grey connector as it had been snipped off. The fix is a little bandit, but will do until I can get some heat shrink connectors.

As is standard I broke the air bag clip while removing the old seats.

But managed to put the broken bit in the clip and ease it together.
Getting the seats in was a doddle with the threads cleaned and lubed. One of the 4 bolts next to the tunnel was a tight squeeze with the silencer in the way.

All this effort was simply down to this rip in the passenger seat, and a small fag burn.

This is the new seats back in. With the seats out it was a good opportunity to give that hard to reach area a decent Hoover too.

I left it there yesterday and didn’t dare turn the ignition on.
But this morning I needed to nip out so took the opportunity to give it a spin. Happily I have no new warning lights! I’ll revisit the chocolate block and make that fix neater and clip the wiring away neatly.
Took a little photo of the new front end with it off the axel stands.


I’m getting close to the end of jobs I wanted to do now.
I’ve a OEM stereo coming to replace the garish Sony item and hopefully I can get the rear speakers to work the the same time.
I noticed while under it last weekend the ARB bushes looked shocking and a day later I saw a set of Powerflex bushes advertised so snapped them up, but I think I’ll get a mechanic to do that next time it’s in.
Bodywork next, then it’ll be Aux belt and engine health check.
But thankfully it was simple.
The seat belt buckle simply unbolted from my existing seats and onto the better seats.
The replacement drivers seat was missing the grey connector as it had been snipped off. The fix is a little bandit, but will do until I can get some heat shrink connectors.
As is standard I broke the air bag clip while removing the old seats.
But managed to put the broken bit in the clip and ease it together.
Getting the seats in was a doddle with the threads cleaned and lubed. One of the 4 bolts next to the tunnel was a tight squeeze with the silencer in the way.
All this effort was simply down to this rip in the passenger seat, and a small fag burn.
This is the new seats back in. With the seats out it was a good opportunity to give that hard to reach area a decent Hoover too.
I left it there yesterday and didn’t dare turn the ignition on.
But this morning I needed to nip out so took the opportunity to give it a spin. Happily I have no new warning lights! I’ll revisit the chocolate block and make that fix neater and clip the wiring away neatly.
Took a little photo of the new front end with it off the axel stands.
I’m getting close to the end of jobs I wanted to do now.
I’ve a OEM stereo coming to replace the garish Sony item and hopefully I can get the rear speakers to work the the same time.
I noticed while under it last weekend the ARB bushes looked shocking and a day later I saw a set of Powerflex bushes advertised so snapped them up, but I think I’ll get a mechanic to do that next time it’s in.
Bodywork next, then it’ll be Aux belt and engine health check.
Cads
ClioSport Club Member
Elise, Merc C180 Est
So I decided to piss about with the stereo. The aftermarket Sony isn’t very good and I quite liked the idea of being able to use the column controls and top display.

So I saw this advertised on here and snapped it up.

It was even sticky, so matched the rest of the dash!
I should add the rear speakers have never worked and it didn’t take too long to see why.
I’d seen the extra speaker cables under the back seat On a previous mission, but the speakers were still attached to the original wires and the extras vanished into the trim.
So some bright spark has snipped the rear wires behind the stereo and in true bandit style used the well known twist and tape method of splicing in their own.

So I got myself some crimp connectors and even splashed out on a crimping tool rather than making do with whatever I had to hand.

All done and much better too.

Unfortunately this is where it went downhill. The OEM stereo went in a treat and spat out a bonus Queen CD. Greatest Hits III, not their best album. But otherwise failed to display the CODE on the display and refused to do anything else.
Thanks to a post on here and the help of some of you I learnt that in 05 Renault updated the head unit and the 2 varieties are not playing cricket.
So the standard went back in, for now. I’m still on hunt for the ‘Update List’ version.
I then had a look at the stalk controls for the stereo and pulled it out, only to discover it was a held in with mastic!

I’ve just received a decent one (from BTT Motorsport, cheers again @Inferno182), but for some reason it doesn’t seem to click into the hole in the column, it was raining and I should have been bathing the kids, I need to have a better look at this.
While I had the crimping tool out I changed the chocolate block under the drivers seat for a proper crimp connector. And cable tied the cables back under the seat.
So two steps forward and one back. But at least all four speakers now work.
So I saw this advertised on here and snapped it up.
It was even sticky, so matched the rest of the dash!
I should add the rear speakers have never worked and it didn’t take too long to see why.
I’d seen the extra speaker cables under the back seat On a previous mission, but the speakers were still attached to the original wires and the extras vanished into the trim.
So some bright spark has snipped the rear wires behind the stereo and in true bandit style used the well known twist and tape method of splicing in their own.
So I got myself some crimp connectors and even splashed out on a crimping tool rather than making do with whatever I had to hand.
All done and much better too.
Unfortunately this is where it went downhill. The OEM stereo went in a treat and spat out a bonus Queen CD. Greatest Hits III, not their best album. But otherwise failed to display the CODE on the display and refused to do anything else.
Thanks to a post on here and the help of some of you I learnt that in 05 Renault updated the head unit and the 2 varieties are not playing cricket.
So the standard went back in, for now. I’m still on hunt for the ‘Update List’ version.
I then had a look at the stalk controls for the stereo and pulled it out, only to discover it was a held in with mastic!
I’ve just received a decent one (from BTT Motorsport, cheers again @Inferno182), but for some reason it doesn’t seem to click into the hole in the column, it was raining and I should have been bathing the kids, I need to have a better look at this.
While I had the crimping tool out I changed the chocolate block under the drivers seat for a proper crimp connector. And cable tied the cables back under the seat.
So two steps forward and one back. But at least all four speakers now work.
Inferno182
ClioSport Trader
172 Track M3RS Track
So I decided to piss about with the stereo. The aftermarket Sony isn’t very good and I quite liked the idea of being able to use the column controls and top display.
View attachment 1483993
So I saw this advertised on here and snapped it up.
View attachment 1483994
It was even sticky, so matched the rest of the dash!
I should add the rear speakers have never worked and it didn’t take too long to see why.
I’d seen the extra speaker cables under the back seat On a previous mission, but the speakers were still attached to the original wires and the extras vanished into the trim.
So some bright spark has snipped the rear wires behind the stereo and in true bandit style used the well known twist and tape method of splicing in their own.
View attachment 1483995
So I got myself some crimp connectors and even splashed out on a crimping tool rather than making do with whatever I had to hand.
View attachment 1483996
All done and much better too.
View attachment 1483997
Unfortunately this is where it went downhill. The OEM stereo went in a treat and spat out a bonus Queen CD. Greatest Hits III, not their best album. But otherwise failed to display the CODE on the display and refused to do anything else.
Thanks to a post on here and the help of some of you I learnt that in 05 Renault updated the head unit and the 2 varieties are not playing cricket.
So the standard went back in, for now. I’m still on hunt for the ‘Update List’ version.
I then had a look at the stalk controls for the stereo and pulled it out, only to discover it was a held in with mastic!
View attachment 1483998
I’ve just received a decent one (from BTT Motorsport, cheers again @Inferno182), but for some reason it doesn’t seem to click into the hole in the column, it was raining and I should have been bathing the kids, I need to have a better look at this.
While I had the crimping tool out I changed the chocolate block under the drivers seat for a proper crimp connector. And cable tied the cables back under the seat.
So two steps forward and one back. But at least all four speakers now work.
They are murder for snapping the clips,
I made sure the one I sent you was the best I had in stock!
That design is terrible from Renault!
Sent from my iPhone using Tapatalk
Cads
ClioSport Club Member
Elise, Merc C180 Est
They are murder for snapping the clips,
I made sure the one I sent you was the best I had in stock!
That design is terrible from Renault!
Sent from my iPhone using Tapatalk
There’s a theme with Renault and design!! I’m thinking there must be some damage in the socket within the column. But I’ll have the cowlings off tomorrow and get a better look. No issue with the new stalk mate.
Inferno182
ClioSport Trader
172 Track M3RS Track
There’s a theme with Renault and design!! I’m thinking there must be some damage in the socket within the column. But I’ll have the cowlings off tomorrow and get a better look. No issue with the new stalk mate.
Good stuff mate!
Hope you get sorted! [emoji1360]
Sent from my iPhone using Tapatalk
Cads
ClioSport Club Member
Elise, Merc C180 Est
More stereo saga’s recently.
Last weekend I took a 2hr drive to buy a brand new boxed Clio stereo (#2) off the Facebook, only to get home and assume it didn’t fit. I was looking for a yellow socket as I’d seen a few which I assumed took the yellow plug.
So I sold it on For what I paid and left the car without a stereo.
I then found this picture while searching for stereo #3.

It clearly showed me that stereo number #2 was correct and I was a proper t
 t.
t.
So I bought another used stereo off eBay and while I was at it bought a decent climate control panel to replaces the worn one in the dash.
Midweek I went use the Clio to run an errand, it unlocked on the key but when the ignition was engaged the needles went nuts and the dash lights flickered but that was about as close as it got to starting. It wouldn’t even lock again.
As it was raining I took the other car and ignored it until today.
Luckily it jump started fine and after a few short drives seems fine. Strange. The battery had shown no signs of fading prior.
Anyway, so while the stereo was out I took the climate control panel out. As fiddly as I’d read but no real issues.

Anyone know what the purple plug does? It wasn’t and still isn't connected.

So stereo #3 went in and after entering the wrong code after misreading a Q as an O, second time, it powered up.
Unfortunately most of the buttons don’t work. On entering the code I noticed 3 and 4 weren’t working, so I used the stalk.
In fact other than the power button and 1 and 2 I don’t think the rest work.
But as the stalk works, it’ll do while sort it out. It came with a 6 month warranty, so all good.
Overall I’m happy with the dash now. Obviously it needs a decent clean.

The replacement stalk won’t click into the steering column, it doesn’t appear to have any clips missing, but it must. A dab of decent glue and that be sorted.
The battery dying did make me realise that while the car had two keys, neither unlocks the passenger door via the lock. So in the event the key battery packs up or the car battery fails to the point the central locking won’t function, I need to be able to get in the car, which I currently couldn’t.
One key does the filler cap and the other opens the central locking and fits the ignition.
Need to look into this me thinks.
Last weekend I took a 2hr drive to buy a brand new boxed Clio stereo (#2) off the Facebook, only to get home and assume it didn’t fit. I was looking for a yellow socket as I’d seen a few which I assumed took the yellow plug.
So I sold it on For what I paid and left the car without a stereo.
I then found this picture while searching for stereo #3.
It clearly showed me that stereo number #2 was correct and I was a proper t
So I bought another used stereo off eBay and while I was at it bought a decent climate control panel to replaces the worn one in the dash.
Midweek I went use the Clio to run an errand, it unlocked on the key but when the ignition was engaged the needles went nuts and the dash lights flickered but that was about as close as it got to starting. It wouldn’t even lock again.
As it was raining I took the other car and ignored it until today.
Luckily it jump started fine and after a few short drives seems fine. Strange. The battery had shown no signs of fading prior.
Anyway, so while the stereo was out I took the climate control panel out. As fiddly as I’d read but no real issues.
Anyone know what the purple plug does? It wasn’t and still isn't connected.
So stereo #3 went in and after entering the wrong code after misreading a Q as an O, second time, it powered up.
Unfortunately most of the buttons don’t work. On entering the code I noticed 3 and 4 weren’t working, so I used the stalk.
In fact other than the power button and 1 and 2 I don’t think the rest work.
But as the stalk works, it’ll do while sort it out. It came with a 6 month warranty, so all good.
Overall I’m happy with the dash now. Obviously it needs a decent clean.
The replacement stalk won’t click into the steering column, it doesn’t appear to have any clips missing, but it must. A dab of decent glue and that be sorted.
The battery dying did make me realise that while the car had two keys, neither unlocks the passenger door via the lock. So in the event the key battery packs up or the car battery fails to the point the central locking won’t function, I need to be able to get in the car, which I currently couldn’t.
One key does the filler cap and the other opens the central locking and fits the ignition.
Need to look into this me thinks.
Jekyll
ClioSport Club Member
Not the most successful post that you've posted!
Cads
ClioSport Club Member
Elise, Merc C180 Est
Granted I’ve had better days, but went into Renault ownership with my eyes wide open and have been expecting a non starting day for a while. I’m so far relieved it appears to be the battery on the way out.
It gets a little worse because now I need to remove the OEM head unit and can’t find my old skool pullers.
It gets a little worse because now I need to remove the OEM head unit and can’t find my old skool pullers.
Inferno182
ClioSport Trader
172 Track M3RS Track
Granted I’ve had better days, but went into Renault ownership with my eyes wide open and have been expecting a non starting day for a while. I’m so far relieved it appears to be the battery on the way out.
It gets a little worse because now I need to remove the OEM head unit and can’t find my old skool pullers. [emoji30]
Two small screwdrivers should do the trick mate!
Sent from my iPhone using Tapatalk
Jekyll
ClioSport Club Member
I'm only joking mate!
Just seemed like it was 1 step forward, 3 back!
Just seemed like it was 1 step forward, 3 back!
Jekyll
ClioSport Club Member
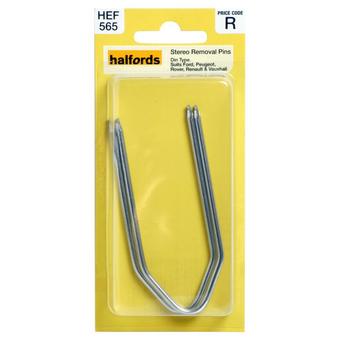
Halfords sell the pullers btw. Only £4 or so i think. I keep a set spare.
Jekyll
ClioSport Club Member
Halfords Stereo Removal Pins Din Type | Halfords UK
Shop the latest Halfords Stereo Removal Pins Din Type makes removing stereos from vehicles easy peasy. at Halfords UK
 www.halfords.com
Cads
ClioSport Club Member
Elise, Merc C180 Est
Halfords Stereo Removal Pins Din Type | Halfords UK
Shop the latest Halfords Stereo Removal Pins Din Type makes removing stereos from vehicles easy peasy. at Halfords UK
Cheers pal. I’ve a set somewhere but they’ve gone awol for now. I’ll try a pair of thin screwdrivers before I face Halfrauds.
Good to know they have them though.
Cads
ClioSport Club Member
Elise, Merc C180 Est
So lockdown easing has coincided with me finishing the little jobs I’m capable of myself.
The irritating thing being that the car essentially looks the same from 10ft away as it did when I bought it. I’ve been keeping a log of all these jobs I’ve done in my ownership. More to aid my memory than anything else and remind myself of the journey.
List as below.
- Repaired rear washer
- Replaced broken rear exhaust rubber
- Adjusted gear linkage to improve sloppiness
- MOT’d with one advisory. (Front tyres worn)
- Replaced gel boot badge
- Replaced broken scuttle panel
- Made new alarm siren cover
- Re-Painted door bullets
- Replaced rear number plate
- Replaced worn wiper blades all round
- Polished headlights
- Replaced missing scuttle panel clips
- Replaced black interior trims with OEM silver items
- Replaced rear number plate lamp
- Replaced cabin filter
- Replaced broken glovebox lid
- Removed window tints
- Cleaned seatbelts
- Replaced missing slam panel rubber
- Added rear strut brace (currently removed)
- Added boot net
- Replaced worn gear linkage bush
- Added drip tray
- Replaced missing battery clamp
- Re-trimmed steering wheel
- Replaced worn interior mats
- Bolted down battery cover after drilling out seized bolt.
- Replaced worn Gearknob
- Fitted custom gear stick gaiter.
- Replaced door bullets with carbon fibre items
- Changed shifter for one with quick-shift and brass bush.
- Replaced plastic clips on boot trim.
- Replaced front bumper with better one
- Fitted carbon fibre washer blanks
- New 3/4 front number plate
- Fitted New Fabia splitter
- Replaced both front seats with better ones
- Replaced stereo with OEM one
- Replaced broken stereo stalk
- Got rear speakers working.
This is where things get interesting. I have an opportunity in the coming months, to upgrade the midlife crisis and I have always hankered after a Lotus when the time was right. Which leaves me with a decision. I can barely justify 2 cars, let alone 3. So something has to give. Options as I see them right now.
1. Keep the 182. Spend what it needs to make it reliable and rust free. Sort the sills, arches and filler neck. Do all the belts and maybe upgrade a little while the engine is out. Refresh suspension and brakes and keep for the long haul as daily and kids taxi.
Sell/scrap the Mazda shed and buy the dream.
2. Sell the 182 as is. Keep the Mazda shed for tip and general family duties and buy the dream.
Option 1 leaves me without a practical family hack although the wife has a Gashqui which fills this job. But 2 toys seems a little excessive.
Option 2 is probably the most sensible option but i don’t feel I’ve really got close to enjoying the 182 yet and to sell up now would mean I wouldn’t.
Interesting problem to have.
Inferno182
ClioSport Trader
172 Track M3RS Track
So lockdown easing has coincided with me finishing the little jobs I’m capable of myself.
The irritating thing being that the car essentially looks the same from 10ft away as it did when I bought it. I’ve been keeping a log of all these jobs I’ve done in my ownership. More to aid my memory than anything else and remind myself of the journey.
List as below.
- Repaired rear washer
- Replaced broken rear exhaust rubber
- Adjusted gear linkage to improve sloppiness
- MOT’d with one advisory. (Front tyres worn)
- Replaced gel boot badge
- Replaced broken scuttle panel
- Made new alarm siren cover
- Re-Painted door bullets
- Replaced rear number plate
- Replaced worn wiper blades all round
- Polished headlights
- Replaced missing scuttle panel clips
- Replaced black interior trims with OEM silver items
- Replaced rear number plate lamp
- Replaced cabin filter
- Replaced broken glovebox lid
- Removed window tints
- Cleaned seatbelts
- Replaced missing slam panel rubber
- Added rear strut brace (currently removed)
- Added boot net
- Replaced worn gear linkage bush
- Added drip tray
- Replaced missing battery clamp
- Re-trimmed steering wheel
- Replaced worn interior mats
- Bolted down battery cover after drilling out seized bolt.
- Replaced worn Gearknob
- Fitted custom gear stick gaiter.
- Replaced door bullets with carbon fibre items
- Changed shifter for one with quick-shift and brass bush.
- Replaced plastic clips on boot trim.
- Replaced front bumper with better one
- Fitted carbon fibre washer blanks
- New 3/4 front number plate
- Fitted New Fabia splitter
- Replaced both front seats with better ones
- Replaced stereo with OEM one
- Replaced broken stereo stalk
- Got rear speakers working.
This is where things get interesting. I have an opportunity in the coming months, to upgrade the midlife crisis and I have always hankered after a Lotus when the time was right. Which leaves me with a decision. I can barely justify 2 cars, let alone 3. So something has to give. Options as I see them right now.
1. Keep the 182. Spend what it needs to make it reliable and rust free. Sort the sills, arches and filler neck. Do all the belts and maybe upgrade a little while the engine is out. Refresh suspension and brakes and keep for the long haul as daily and kids taxi.
Sell/scrap the Mazda shed and buy the dream.
2. Sell the 182 as is. Keep the Mazda shed for tip and general family duties and buy the dream.
Option 1 leaves me without a practical family hack although the wife has a Gashqui which fills this job. But 2 toys seems a little excessive.
Option 2 is probably the most sensible option but i don’t feel I’ve really got close to enjoying the 182 yet and to sell up now would mean I wouldn’t.
Interesting problem to have.
You’ll only regret shifting the 182. And it’s a RB.
Il never sell the Inferno [emoji85]
Sent from my iPhone using Tapatalk
Similar threads
- Replies
- 11
- Views
- 3K
- Replies
- 28
- Views
- 7K