ClioSport.net

Register a free account today to become a member!
Once signed in, you'll be able to participate on this site by adding your own topics and posts, as well as connect with other members through your own private inbox!

  • When you purchase through links on our site, we may earn an affiliate commission. Read more here.

Project Nicole - 182 Track Toy Build


Well been lurking around here for a few weeks now so thought I should get round to starting a project thread for "Nicole".
This is a joint venture between me and my long time car Buddy Dave. We used to race competitively but gave that up some years back and now just tat around doing trackdays and finding imaginative ways to spend money on cars!
The latest foray saw Dave buy a Peugeot 206 Gti 180 and myself an Alfa 147 2.0 TS. Both cars have seen good and reliable service on numerous trackdays but the Alfa is a bit lardy and I have poured enough (read way too much!) money into it and gone as far as I want to without getting stupid! Dave Peugeot has also been good but tuning and suspension upgrades get expensive.
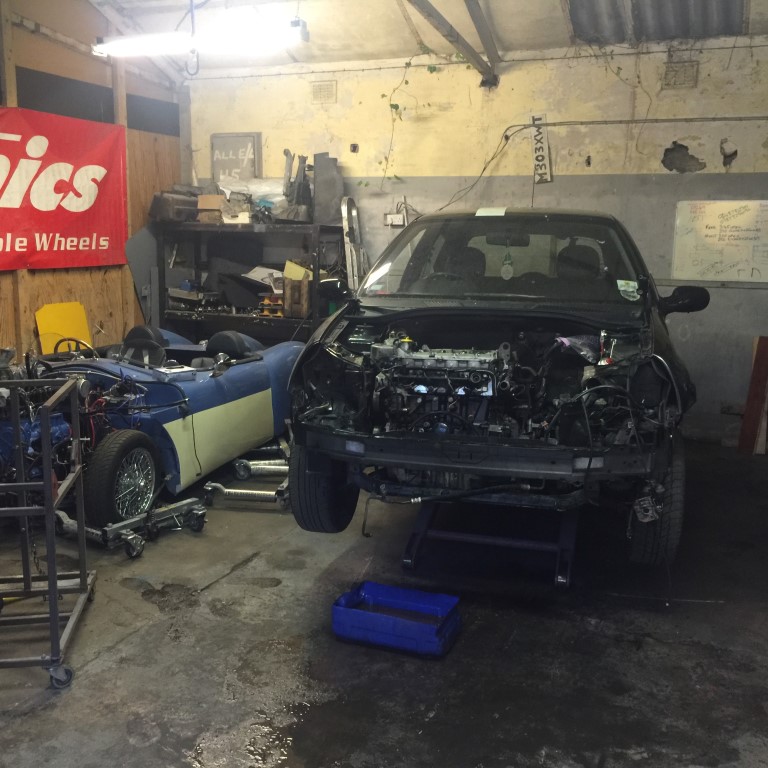
We decided to move both cars on and pool our resources when this little beauty came up locally, approx. 1/2 mile away.
IMG_4686.png


Tracked by the previous owner a couple of times, he then ran out of money and enthusiasm. Came complete with a couple of extra sets of wheels and a few disclosed issues.....more of that later!
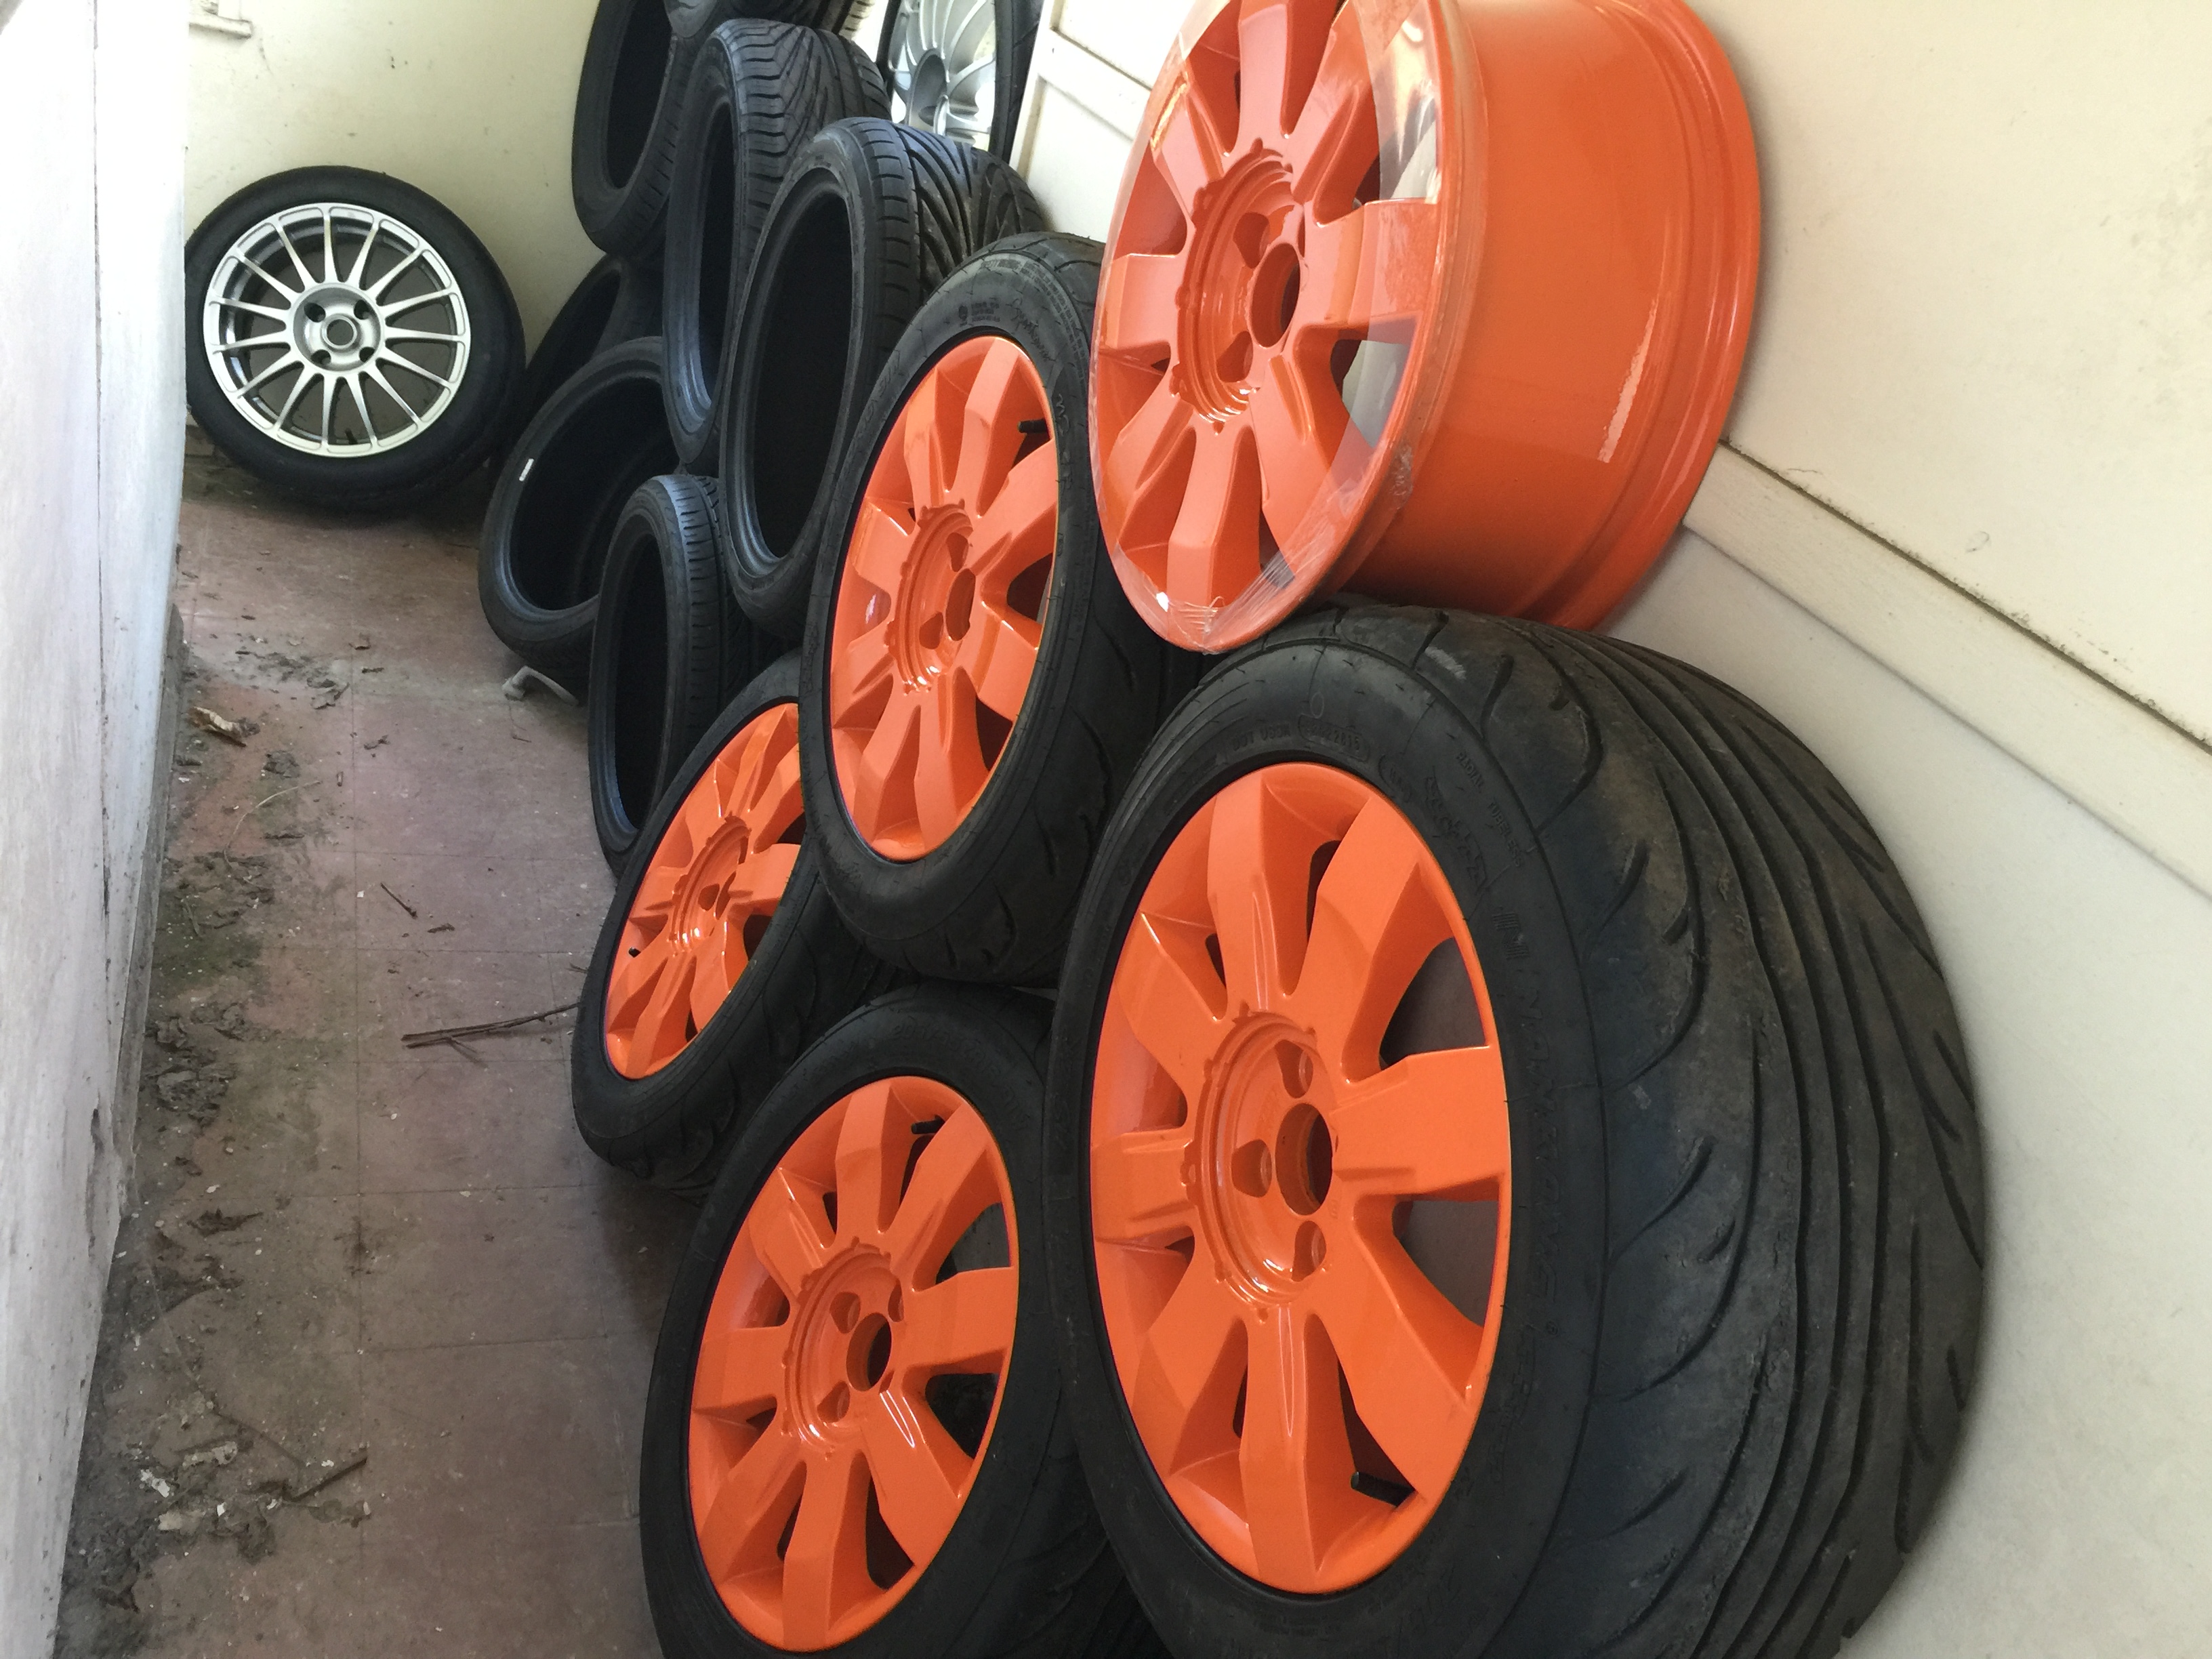
 
So what's the plan?
1. engine and gearbox out.
2. Thorough clean of the engine bay and totally remove the heater box
3. Cam belt and dephaser change and a PMS AC delete kit along with new accessory belt and tensioner.
4. New plugs and leads
5. Remove Headlights and replace with blanks
6. Check and service both driveshafts.
7. New Mtec discs all round along with braided lines and caliper overhaul. DS2500 fronts and some standard rear pads.
8. New radiator and silicone hoses.
9. Off brand aerocatches on the bonnet and boot.
10. 13 row oil cooler with thermostatic sandwich plate.
11. separate oil temperature and pressure gauges.
12. Strip the rear out
And a bloody good clean! including removal of all the wonkey stickers.....
If we can get all that done we will then take it to a trackday at Anglesey we have booked for the 17th of next month.
 
Started work a couple of days ago. Removed front bumper and stripped out all the A/C hoses and the condenser, unfortunately that revealed that the radiator is toast, the slightest movement and it sheds fins. We were tempted to go for an all alloy rad but in the end just ordered an non A/C variant from Euro which came in at a pretty good price as my mate ordered it for us on his trade account.

IMG_4794.png

IMG_4802.png


Don't think the pollen filter has ever been changed!

IMG_4796.png


Also spotted this
IMG_4801.png

So looks like a previous owner may have been a forum member? anyone recognise it?
 
Still stockpiling parts.
Picked these up from City Powder Coaters this morning, £100 for 5 and they have, as usual done a cracking job for the money. Haver fitted some Nankang NS2r's I had lying around. Got another 5 to pick up next week.
After taking a rear hub apart to get the number of ABS teeth we discovered a bit of a nightmare. The rear nearside hub was fitted with an Ali nylock of the wrong thread and the rear washer was missing!!!! The other side seemed fine but were going to completely strip and service so thought it best to be prepared!
 
Last edited:
Managed to get a couple of hours in the workshop tonight after finally getting Nicole in from the yard.


Were ditching the heater, Ac and power steering so quite a lot of this stuff wont go back on.

Finally starting to make progress hopefully we will have a compression test done tomorrow and the engine and box out.
Quick tip, Ikea food storage bags are excellent for storing parts in, good and sturdy and cheap as chips.

Also have these and have to say the quality is ok. £15 a pair off Amazon compared to around £50 to £60 for the real thing.

Another update hopefully tomorrow.
TTFN
 
Good news and bad news..
Our Polybushes have arrived from Strongflex have arrived, this will be the 3rd car we have used them on and so far have been very happy with the quality especially when you consider the prices.
 
Good news and bad news..
Our Polybushes have arrived from Strongflex have arrived, this will be the 3rd car we have used them on and so far have been very happy with the quality especially when you consider the prices.
IMG_4879.png

Bad news is that the torrential rain yesterday resulted in this mess:

IMG_4880.png


Dave did get the front suspension partially stripped yesterday so as long as i can get this loot cleared up i might just be able to pull the engine and box today.
 
Yes Mate, full strip rear cage, half dash, EPAS etc etc. No idea when the cam belt was last done so were pulling the engine and doing a cam belt dephaser, water pump etc and stripping the engine bay at the same time.
 
A word of warning - there have been instances of the cheap Aerocatch replicas failing. Considering failure is likely to result in a repair spend, proportionally higher than the difference between the copies and genuine - I'd give it some thought before you fit them.

Is that workshop susceptible to flooding? Anything ruined or were you lucky?
 
I have original Aero Catches here to compare them with mate and there seems to be very little difference. The material seems to be comparable, i think its a glass reinforced plastic on both. I can see no difference at all between the posts. I know what your saying but we will probably leave the original bonnet latch in place for a bit just for some insurance. the rears im not worried about as the failure mode would result in nothing more than a lot of noise!

Workshop has flooded before but normally just the 2 foot in front of the door, yesterday was the first time its been that bad and we have been here for 5 years now. Luckily my mate Dave was up here so spent most of the afternoon clearing stuff up off the floor so nothing seems to have been damaged.
TTFN
Mac
 
Good day today. I'm slightly hampered as my left shoulder is in a brace but with the judicious use of straps I managed to get the front subframe down single handed!
IMG_4885.png


I did struggle to get at the pinch bolt connecting the rack to the column so in the end detached the rack from the subframe then with the subframe out of the way I was able to get better access and drop the rack out.
IMG_4886.png

Even after getting most of the water out of the unit it wasn't the cleanest or pleasant of working environments!
The front subframe looks to be in overall good fettle but has definitely been off in the past as most of the fasteners showed signs of abuse so will change them all when it goes back on but first the subframe is going to be steam cleaned then off to be powder coated along with the wishbones.
IMG_4887.png


Passenger driveshaft came out no dramas along with the oil from the gearbox but was expecting it so had a catch bucket underneath in prepearation. POil looked amazingly clean to be fair. Drivers side was another story and was a pig but I got it out in the end.

IMG_4888.png


So that's how it was left, just the starter wiring to disconnect then I can sling the engine to the crane remove the engine and gearbox mounts and drop it out. should happen Tuesday night as that's the next time I can get to the workshop.

TTFN
Mac
 
A good night in the workshop last night closely followed by a night in A&E resulting in a cortisone injection in my arthritic shoulder!
Managed to get the engine and box dropped out onto a trolley.
IMG_4893.png


Got the sound deadening removed from the engine bay as well as the closing panel for the heater.

IMG_4898.png


Removed the heater completely from the engine side of the bulkhead.
IMG_4899.png


It will be slow progress whilst my shoulder calms down but am hopefully up the workshop Friday with Dave and Saturday by myself. The plan is to strip the interior then make a start cleaning the engine and pulling the sump in preparation for a new oil pump and a set of ARP big end bolts. Both of these are purely precautionary measures. If time allows I will then make a start on the cambelt, water pump, dephaser etc.
Gearbox and engine mount castings are off to the powder coaters on Friday morning along with the front ARB, Ill be dropping them off and collecting the second set of wheels at the same time.
TTFN
 
Dave spent the day up the workshop yesterday and the end result was:
dj9LgIpNRdYqYUYY2x9bmHF1YLu74R3TbRCPB1sQ_SRMvUx5h1x-xPhtCOPdzO0-eXwfX0_TdQ=w1280-h800-rw-no

At least we now know that a Clio 182 interior less the 2 front seats and the carpets will fit inside a Volvo estate...
SM6f6nPZM8mZvl7L3I8GbNAoDquwU0nX7YcUw-DMDnocZKEbXpdSLBumShgn8U-Owvyk9otbCQ=w1280-h800-rw-no


I'm making a start on the engine today and was initially surprised when i removed the inlet manifold to see this:
P5oHlN3L3Lqya2qKRGK3iRnGxHDYTfYIyy-vOQ9GxuCorSM0CwsgEZGHXxo4AFHVSRHv1RdmOw=w1280-h800-rw-no


A bit more research though showed that this is standard on the 182 inlet ports.
More later today hopefully.
 
Dave spent the day up the workshop yesterday and the end result was:
6Qy9oXEOHnejvCp_MqI1VXk_YJ8SzYPgJsU2mJVHH4mtVC9MtiXjKFSDTZWSYNsHaakaycTlBEMysJJ1SdMNkG-xpnoVOAKTzkKv_FBzCf_i-27L76A5LnpKmH72M35eTfralTrtG7Xbfith-a6iVkCkDMwQgc-29w3DAF_Ze-HW5KBh5KF1VWv7buMLnzjRLwSXLLO4CnYPFUPkx2--K_3-sYH9WqmrWvYEGcebyOw2TQLNqeHB9trBplq5thdevKgEgCEX9CwgjF2Oo2gIkN8APBOqPN_Wbx9pZ_0bMQoRS2wufVb2yft-tcKlSNE2UxN91scr2KPexfAcxVePVdnIB7ekShaCMBiR62rkMKfqebLCGs1m-UvLk1xXAqfTjmKhPhwpUXWDsfs90HKNnmI-2xWcfcpKdzPqyj-WWXQ-uY5x1RnGRIM-R7N1ZkZRnU22vO1Q_wLdCsghrzN8xqoEcnkXQD8q0QJEHQGwT0wY7x5Pf0C345SAvc6uM2NCNKNKb5KOqvxlqepaSh7ZWGoSpjs37w_yFL_yjIVILrMN4xrbGmAk3Iz8GtpN8wcHz0zto2iJK7CHLCFspGw56EdPNdBA-WY=s985-no

Y-nmNVvfjoCD0NpI2cBNJ4pyPytC2v768PXrlWyxnmmd10ilGkaFBJ9H1mU2IexC8A4O8NOM5601OI-DamnENV8MS2P3lSwEkkIESDpHqHozCJ86fFDw9JcOQNQ3HNekK6nEmCT7Ph-29f2SAU1ktgQzJLDnh1r1kIIfYvEQbqHtzVB_MhXZPTQ-g1aDzGmHlP0ynxgN_GGvRnU2p_SfNXg5-2jmOaKEWMGN3JA-9LUVYfi0FzKTjY0SqapcRfF0SSKkk5XBthFZlnlPcwCJsu5xEhuayAng_msCnJXjvacP7V8OIzyjHbagSRw_34U0D03e_D25112-ow5-Rdo8gXN_qcR2RtvW5Zrnm0fpm-B_vRDxXx3zv2E72yuFaTzQzRE7QpvUD6HHPNNdNHH-Exsm5sf1VYDPuUKEBzKSl6kKBIn-KdMMO5yCZOPxaceIMiulBBQkH9YY5ULAEMzQFlxGCCwMdP3ku6PfI_LDLcowFch0in01pHEzjFFoVmk08DEKXx4O6BTdpqzCqqojzxGE_YaXvsVFbUqi5Sd-03ldS4tkfoXTK2difuaf2qJq9katBA38Bf09gMaw3RUUzh7iZSVYero=s985-no

At least we now know that a Clio 182 interior less the 2 front seats and the carpets will fit inside a Volvo estate...
TAnMN1G2UNsgdwqulyO4CrO4f6PR2ci7w4_dyC2vqOslRGNcA7FPGor6IQ1MfuqHKS4d-gdyemeLdAtDlXbqY4_6nIXyRqR6bFoYdEwj2-i5EJAt2gPAUhLk8wxO8gWQlftAXTrUG6rdVMV9oqNx9RYhf4PU_fKGtMBA-83qvzF1CeH68FuFYTg53X_HnTZmp2H_8x_y1-njxAS_h4vv1aJkAUUf8a4TuNLU44pVqlmh8_VDPT4eUgrsC9JZacdRgyAgKMpUqY1zjniz3kEgR9WUrV9GJiFAIoxzzPHiGDIghEgYuA368b00BUzzfwrwUejGc7DBMeld5ktVm2BD2s-VGpzlDgsh4FOAZKiYDJ9BA1Z8tRwmz_cKleZ4J-cteE9QpDuZutqecnePEr-rollTAJ3IeLJ-jAQUrF7zcRkw0YKVMt7xidriEtWRi7yQOMwECKxnT5Js9RnK5fxKHiQmGajXMaEscM51gFHWaO8Mw__4tghhPW14HKRdrS_JnWnnSqdVuQMbuaNa1OFt2JOYBRwlHB6zMFAtYho81DSG-5Ur9DVXBlBW2oDDz4PbqKcSfkee4JrcEPrez8ClOZINcEn5-tE=w1280-h960-no


I'm making a start on the engine today and was initially surprised when i removed the inlet manifold to see this:
AW18ovn5IcAefjYvUtE6ZyvC9fAuIZeDz92WI-07Yezc2CHBBLg61KVYyc1uf8kU3rb-X9AMyXhSMCgzHNMus-zeEkNEvOU24LcqbCQRCCvw5xobukF5ZNS3D87jG1Nh9es3HGHSfthykssE06wcoN_ORZicBFQgClTVjdAaJ0DH2OSnK3jviMixRbEYzORsPNeDuqiwdZjAvd3VELibCi1w7kHteAscseGJLUU0JE8_2KfizNz8I0x9YnRgZVXs6_ZJZu76cH_Du4nqgIbqV2w45NzqzfO2eXlztu3OEkeF2_vtMDVTW-NZns0SdxxP23uKvTQ2S6fdVXFXdFqxWIW1WhcUUswA1GQDvvmQ10cQ8jkVvJDvgB9P8DH6977jET3PhN62hmKrPGQvJEFFzCxu3tiMxeKn-U6Pse2YCkb-ItYfz0g4L2N4P9hI9fW-6uGn-XTYwDIxaFF8AQeREEYPCE-4FAEHN0scQa8GaDRGdrPQBgOrcV9BqeDz2GAk9e3S7xs1MzwdxWDNR18oCAki2G5u682I8oL1CHqWLCpgjsawTC4eVJmYvBi4reImHZxibqA5e5uzO_Eq-hfV0yqZYNMoB8c=s985-no


A bit more research though showed that this is standard on the 182 inlet ports.
More later today hopefully.
 
Apologies for the photo snafu. More progress yesterday. Split the engine and box and the clutch looks fine which is good as we were told it had recently been changed when we bought the car, condition would seem to back this up. Also removed the power steering pump as the EPAs column arrived last week. Made a start on cleaning up the engine and the end result was.
_kCMI-tfvpA0v4-48Zf52sxxS67BFmF-Ekn5ouwxPglPUa2pMWlrwAxzy-hBK6QAzft3S0EKSFOC3isx4mOESToM_GuyDJTbpOJdFaJ2WAW2PPz1gxeZc9to0QUVa1URoHQerfY1zab9ijiF6RM5vCtRE54W18YAK7C-dy4YLlTppW1KMk-wfL31w7RP3UTXlhk1UlL8NVdvYr1eAIwmdQ1ntQcf4AsxeYROujECM36hwXX5Etaeew9JqlAJhQpTefF7RgCN5f82O-YP_J1VjU3SIZhLDBKPIPOD55TW7d967IA7CJLbAFGJBuBm__ZdyTKrIwQi-g0RXgvdNa_TVR7ZmVZRDRaZOw511QpxvqqWyPTUUlovEkv3vt1o2XjsAzmffKejkKPCHJ6HTa2D1IobitFuHygxZRzYpB4uFXU07mIkaiOsQ3-_Ag1Ru5BpzVaqk3yWxeB-V4lY5562GPGAm4ZWr3TklxY30WqDqMZAZ3qsz3ed9jFhXvD98PiwAM9cO1_AeMGEKQLysSWG2bgo9bxhHkTaF4xmZxtSASMyArIpZTcMs4za-3Il9uIePuUjI0JLhXqDJ7qlE8hkSpiFpz4IRKM=s985-no


JQVU-wJFLKIz9GjwunKaIAlQpv6djCPbAWq2pE8__GqBN2HkSLByNxrsDMlSpF0FQfHwP708FZK4BgJTtJR0W21yvroubyJnzzM9atOVMTo-JU_G-Rbum04ncSHqeu0MmluzwtW7ytixp9LpkAk0jk415JjNNsxVnzdluQU3pt8FqU77YlwwD_mTU7_Bza9kzNuUBxdjqVvkvPt4SbnLcA_yKbzGjwWTqHfMjOxUgFuxtfrDi-6b7Ki9nudUGJ6W1OiVHLAiLrWV70SdQ0j6Ebm8u70wzxo7vXF69S_llC1gfDTZ4267vT_xmpMG_yxbztta3Uijqxxw05UXfZ0GRwnQopti3MUFTQdTZ_OJkARkHTYtnuMSyB-JjeNcdr4WjGMZ9nv3ZOxbbJa04WIBYffVvA3TvDudIIuL6fdsl3K3wSsJ56GQ4IzF-5w_VmTcwEEleyUO_mLFIqWsENgb97Pt-X2lyYC6Br5us32uNSeSH1o-Ljqox5ivZc4oFFYR5vj8CAXc8Un68lr70DoiHTtjbsffzjQ992wknIFYQwBN2d2kpbKYTjXxsqAtFlHe6H9VKO1fLnIxuSPss8URBJ9o2iuRBZk=s985-no


Hopefully will get a couple of hours Monday night. Plan to get the engine mounted on the engine stand and start stripping in preparation for a new oil pump, water pump, Cambelt and Dephaser.
 
Another good evening in the workshop. Decided to crack on and get the interior stripped. managed to remove both top and bottom of the Dash followed by the steering column.
582HDrVThizdL0v3Z1pXHgmYw7epdppQqp0nkT2CSfgwtu2GQQ5E02UqnlxM2hKcf48SnQGRQHWjfl8tz5sygqFZlyaknsc7c2sixJ7RibOBusHqeudiFvUzUmYgcjDe8rZK_c9oorc_0F--GMeKQmMnuJkAqO24yL5RO7Z1pcoXem3PsDQHpn6ndjCqT8NoYXddGCgXR_CUt7_-HtsOwVXHrHGaUUFNhUuQ3a-WaKtCdeK-HGRm4_VdeRQm4vlBw6XvH82P2Jkj2rfUQuM3-chHieablMIoaOhAbM1hRfMbh1ArI5GH30B4LkkZo0nbniL48qfLkweEzfZHx4nhGt06VDKuoKPWsW96ayqtcTHr5xi9-qF_NswFB_8fUqF8oKBU_BLliZK2xx6Z-Bou7cP03LxYKo4ZgVEEFHd2QjJlKldbi8aWX-guxIwqiO-TnBl7KpJuinlYCKDKteUJ4OMMULMTJ-ScEU2X4TXvoE1GXJPmNpNLdoIhIOjMPhO8ZZqjzjfYoVH-e-IwEMvk-2m6B3Ji4xe3kuWZV0xcE_ger3sddY_ph1nBPgY_m9tgjUO4ayXNSOQjMSpp91FB1YcXImlhINk=s985-no


Then finished stripping out the front carpets sound deadening etc, to do this I removed the dash support frame.
GJcaD1sY0GWLXuBA4mBQSSxvzZ5BRijAYo6IM7bGxHVdvw4XmznTinC6SKBk-jmXDVXELmMffFKnbxfCDizLV2ZmN3MFZQL8fWBYzMFz5losvMX6w57BDhrVH6U33GX6kwS9x8OlSSPnRIb8UG-qN00SXX_gafZiR9aixbPwXO1YZi2QmQr5WCO2zuLF-eOPL9qy3q12Gtq24ZOf1G-fUI8llr6FVGeVcduv4TtPwgV6a1e9ZoWvrsA_7x_h7qjsXAwvonrD1d5yCUjsiKGkXRP14LzAiGCqCRRquyMGeW_h2ahR6f-US3AqJYSAVI5GFnIi2FsbFwKWTNsOZHckHeTLoOIHjbzvNfYkBe_9oIAaK4ngej9j6q2a6wToTbDpqhcmKnQn4suABFq0DnRaSFsoVl6u3pvMYAFvzR1-qDAtAb4gWwpHh5BOjkxXxQHraMc4gOdg_YqstG69a1B2wb9mRFk9nLcMcNVK4JyVibURn6j_lTzGK2gQXv8gqi4RpNHPFIcC5E8vdEpxv7QJXfbImu_DxlgqHo2cgYEXrcdqacdiS1S3v4Q20GWOe_snZ8hVkOFdNLgXdk8IYI213z_apuQgKuw=s985-no


currently not sure if were going to retain all of the dash support frame but to ensure it didn't get damaged I refitted it along with the top half of the EPAS column.
I9QqpfBZULWVw2LVowYsfYyfKE1GijMYxJgAE40D0LkkRWCqiPQbtX-4Z9f1DKrgeFSp90r2_VSm7ELP55t2RgTn8AfeY0DUNH0y136DFQ3HVTTUnZicYWDkMLgrqsGuDmIYswsXQUxmLQeYkld6RzUI7hEtGuffWgdjwa5mfvyqZY24K2EWw5V29Nuc9-IpXtFZqK0hN2Y89K2wDXCERPRMStXp4-3Ou8VNyCM0PLKc-azq9wb7e0TqpBIHESY81rjmleXBq3dxFBslqwu-6eHZqt0Bn_UI3s4E2c4M5h0nqImu6oIGq8Ex4mJV1I89imMW0Odz__YINX4dAJGTpfxNPLW0lupH4mLQgYBHHxZQUwl6gZEMXsCQknTXq4EovRBzZ_H1r5s9rbT51NT6Lb_gtosl9tmZCwwCjmuo2VXleaLBFnU7erCSQdYYlghu6XRZ_Yu9D6QCaiCa7OdQPamjZMZ_HN5RyVKAcXFr2cRBGI8w2Gzx-prpLIilkrwwdHABKIS38N5bN-lKZtg-GplSm0Arw41oxnegCjFBtRVtNnM_bOoSlPN5F2pXGh08XEFjxL00pqoGHGtNr9yrDAIt8gt6Ir4=s985-no


More parts have arrived this week. A set of rear hubs, one of ours is goosed with an Ali nylock of the wrong size and thread on it!!!!!!!
5aTSO4ks3WhYmxyYSQhVTPDcQOhwn-5GgWqow3V04hxNLIZofpYHVnR2LxGj4j_653pntNf7iRmROziD5HIOTZ9XXZHAPUDnzAKNRyBYlVIwpzdeGYPEF2NQGaaxWqPBKnFyxzh8Ip7PzfmHhvgPkMjJIVo9fF6ngGbKfAtcBNdDZFifIzVWlmkylQlKRN29WccVPI2na2-W5I-g0Pth1XRwNQPJyMi3rs9pUVcKZ8LCAGi5XU7GaSNsyQY21dXS6YjR23D0mjOC2_CulTNhv9auIXyd-fTlGAkddQeGQyoMsajQ-MDGP2g6OwGwCArM3pBj_O0QTrVC8ZaOwuHZKhKf4JNop4buvfkqM6yiGroPSHG2t_5cUr1-b2lw6iDIsz6o-RxcfXt5Ae8glWHfMHA_4-v2ZCFcu9hfnneEc75tJITCZosoEBn8PZ2MbWZKwsTI2QoTlfMzF-EZSO994R5odZgEOzVPPdFZH8QX9kqACXMvq8_kg_zTIRwsrRQ5h6U4SZcQy8vBbtSQF5PFXEGNn0PU_4nF1DlrKVpUa2WOw0PSTmmUB-pUmXkDdaqb48RVZdALVO905RTlviiRsQhMZ687-wg=s985-no


New Studs and nuts from MTEC along with a couple of spares of both studs and nuts for those anal enough to count!
1NGaknEE_Iq-H6opovvu3QItWcZgJpHs0cf8Xv_T_cb7VY5zwM7asRY7bm4nsF0lQHrcrq_-WJeJvgNvrk47QdHNFNAB8UGPXEharFAxyh3CWOlu_FmAoIePkBMgtvXvnJVJo0MNdbaF_KLjtWNtxY-wivHOmb5_mMVaRDEpA9SYfMQCRO9viWKVIi_sltoF_-jS1lPYe4oKC0lMU43ajpano3nAtyy3HKCugrUcsLoUqYCqF2dRoizh4Jv3vT2i0U25pDvWj7Yrkou2y-zR4KYrRq5OT8uJctl6a-noeS35WzFt0ukC6OKSXuv7atR4ehwrvHu_QO66PFcxk9oleJ3LYLOSZNzFUnIiTzPkUXC87dIdIzkTS-Z9QRVcF2qcT-GWgvmkFovzyEUQgEG3yHhn62gpqpsBeBPzToW9XpemldRMRQstuNHefqJctZp-wQWbW8r48SAD8BENLoi8QQookyMEUW741hrCo48QPsaiCR1wEVX4Ps78LNO6eFURMVDl8D4TotttVDxkYi54WaIKhnjsjW5MJGgadvfeuWuasAFyk7TtEzBRm0n2K94khSsEPGA1Fvn8ftqYUvm8CRe89CL0DqU=s985-no

More updates hopefully tomorrow night.
TTFN
Mac
 
Just picked up the first lot of parts from the powder coaters, pants photos taken in the back of the van and didn't want to unwrap them as I still need to get them to the workshop without damaging them but you get the idea :)

zCpxo1_lLnIG91nLDLWrrz40dDp1GGGTysQGwL9S7fwOPje7auL5JXqfPsBQyDoZLgFfUiAjX5Twg6iUzqctzWnHJpVcP0WltfAmKlkYVEIr98zSWBs5wueBeYptsujAUTUVLL5ZdwjwT2yvf9CifSRTl89-i9uMOtb5HM0-_68rXRgWBkGe853HNeKitUGsfqwhrYo85bnaCq5Jb-62YUJ3AifO7oZlmb5FyW5Ia53-VSgZH2-l8ybfKc4_4M8CiWxec7PUhe9oTZLVD_n1ujmws5NmtbVfcH32vlPUAHzBigYge86hHbabu2fsX2NTrm6TvxvqRW0Ul8xju13BMWq6WPHH-FelD5ZjljzUxq9KBFyq7dpU5L-ilDrqaVdtVbMBRt3FKgNmzhbnHehBdg9Q9cqwj-SDm1Fg76vKkGe5m2Vxe5qZhVmOYQj4IWUSGsZjPBWYFaYP6PKLCY2gBMgBUeJyrRDb5vaoEAQtFcSJklMSIdJugIPt-ejt9kmwYK8JAIWwtsT-Qj-mkP5OEXKXXhqwBVlfKvctcyWMexU-RskjsvhhQ_J96NenzJ-P2IFIXsFOCcLcbsk2bd7B4HZTMNOhMZs=s985-no

hzJPzJqQ5buQSqwvdFLAhA1y9JnqKKTf6KwwFfLYjg72KcxQtEGi74iy3QMWR5Mzdx1RYtsgdfgxDDu05TDNf6NRebezs6cJsSLWFm0J8YL9H9T-3JgdtZgSX7GhjwtfQ8XqyTqjpm2JJcgpgQUKdwnxmwcA6gdW5xIR_Nw-pc6np_jwg82jIe0ZKuDOdjgyEnoPK6b07XGMYrwbrbhVRwiE_Yh2T78savrYsLv4crPoNPOu1pB4vA3Gof5NKgjeUiB9iQrzXM0s6HeeYzkOlppB2n3ya4mvQ_FFt4Hv9OJqRi6OxrN_cyLQV7Bjl3YQS0rv1I7gPLu9gLI5upOcqU_659K8mdEhSPDzRk_te1lhW2qxT47Au3tScwZWN83m2jYc7tVEt80820WZCYDs0qj9Zs4gQ5Nn_AZ7YAZ1FS0Pkz4dlTftBKuMhGSTfOR-KSzsrmGdgFhSVkaCHe2-vXhRnEvN0kCDKTSxp644KGcidzvholB096blzYWhsZp633nm1Uj84cQbp7owjKpb9nQJ3ViQ6cs2Iiw5abN4TTOoebb6L0m-5yz6vgveArTM5nemcH3rsWO-YFC05Y22nO_q3a3VqNg=s985-no


Front subframe
l0FcTu1gCPbPsEhaho8W0EQX3_czS8n77urqGbeHXXXnoYEgNUuVBvEaLjk6fonVMOhlc5I673oyRjjvHm68qj02GbBNrDrZYqshFlC7FqsOCE7Up-kPzaymsph_m8qnv0g76H8rxmUdcNPJSkdQ9T2hO8x32Iio5hmQgBIn9JxNtJo3lJvKIKFOjAHmk1pvJ_W96Zx50geNaB-mcdqGkPV02rYeJfXbctgpT4l2LcV2s0cWtihpYd178FoEhDfTECEmNG_hksZ8exkIEgw9QLtrNG41tldmF5Y-Kd0wYSB-dc6rmRqDc476lIE26zLhG6gvVNlGY25lSvnvH9XEr_AYKaa3hHK8O4Vbx3iFMfNr6lQp-hkCr9pUAh1SE4yBMbTDQNoIckzc1L-CUtf-_omQG66mTVsJXciyIh7p092ujJU-avOeYVA5l_3SELBhPRBMKQiRAyi4wj4hCIyvH_9z6jTeEoaDe2yHome1zJAHxmYBfy2gDcNNUERAgjHYjiAk6pzxaIunOWPAEEg2S9sSfm4KGV7GdP8iWakO1nUcmo8kQgQJysOkWXjhlzLwh_0ea0aXnef703gYJ1XCs3isNmZcYZU=s985-no


And a couple of shots showing the surface finish.
Front subframe
9ao-ukN6crBt2A3hlesELr5UsSss6nP2VMZPTBoGCJkfNZlkdv8LKAKbR4AqSg0cp3lgJw3PuKznW0lnpJHM2K8bb9nn3OmnoZ8CD0AdPa_2N_MrKf-zQc4MrQQcQNOdV8dYakivwUl1euou6vQvhfWKfqlqu58mdht-M3ckg7rnkjlaNDALs0uKgPse0byiX8QO-cE1cT-xKBB_XjgGEa73i3-xiSA29mHlqaS4f2WyIh9OyGxXs80xmPPdbNrMkPgRHxLPino4yKq2UuEIVv91er_H61jBmXUOEA7-Wk3dIsYNM8Rov-qPansfNiPsoct9QFpA5vbxj6bvwCVrx8WhtBiszyhl4M72rAsM1juM1sjb0mSKFjegWTq_lKwKPHbMgLXfHUHnonODaF4dfJYNvXlA2mseaAW9Up887MO0Bv8vihtVZt29i5In5FfxH6eovJpshoN_bU7zGEpKdOcPh5QfZ5GgpPNApYgHVZuCJDGxlzsaFKpFxfHzitPqvPe_9hj1UW04x3GZHEMAs88WZQl7VXMw-ABRTWS-FNqV3hUyV8-H8hUHhTshLL0O7zZ8dDfcEBBUjjpWVivuq2kFUAnF3fs=s985-no

gearbox top mount
0GEUcTGKepeZQ-bbFhZivZDRgNbcgpnhGBfV0g0eTBj6b2usD2eqhE-GZ1IlJHGYH7rqk2HnCS4AaWZt2dog8qNWRwAv2_1rVPMKDk6bGIYpdEQJEVYPHUrHrl9bBFnjrVo5V14602UZ4OcZL7RSLgFnb449Cj42DtrBg7V_-TDNxFFzn2V8BTn6Jwru1kFeTnOznk3vlb-Oyv2OvlyMmWG4u9bF4Myuc4SFocrSXLqR8K9GMYsGqLi6Xm8aP3u1CKASlNiCEKLskNdZvugGt8Htwwdjfho-8_j_j6V5PRcS7dQ45t_aHEEPR34cesEDwFchJJi3gGOWQaxYh4zmlSiLJx99ty_Fp6GBeFH8WKmIRNPobSdJL-aG6dtR6goAZyjaQOGAlyX5TDnYXs3tLyPCR7DsXSPuVWN6zyrg4tUTJHxeUQlQa_CvnNh5Fs1HVLOdyxWRp5W2G6LFjcGKiIbe3aoS_T7StaFw30lzm4aLGd0a2U1tEXY75m8iDalmbyoDD9JPj_dXiIMhCS6rcEKQv18zPENNa88nHMsisP4TnF5QQdHXjFjU3AcWmDm1ZpwkWsQhRW4e-jnV3Bj-brT-GkokE-w=s985-no


Ill get some better shots when I get everything unwrapped on Saturday.

TTFN
 
Dave and I spent some time in the Workshop on Saturday and managed to get the engine on the stand and start to take a look. Sump off first and although not spotless I have seen much worse.
sy-iuxa-IvgOtzfiXG3pl5C-W-42ujOVU6O6tUXqW-eTIUMWUGY8WJdtRJvOO08kvnVWhOfKmDePDJV-PA_C7P14=s985-no.png

Xa7WYeDj6G1qCJ7KFckFpT1aaIgzZxZT6vyiOSIS3vqgj1mh_tD4sxHx_Xqxo8YwZylAJNJFbOrW588ffZXobz74=s985-no.png


Fitted a set of ARP gig end bolts whilst we were at it as it seemed rude not to. For now we want to retain the original engine so are just doing some deep maintenance items such as ARP's new oil pump, Cam belt and dephaser and routine items like plugs filters etc. Had a quick jaunt to my local main stealer who relived me of the neck end of £100 and gave me this little lot in return.
Dzgbe29W-yUFIR13oOzT5HCdl2PchSHLB-tFe7u6MbdPbxFkBOxQFUNegXSIBPkDPFk4O48CdYY2krqrZguPGkT4=s985-no.png


Inlet gaskets X2
Exhaust manifold gasket X 1
thermostat housing gasket X1
Cam oil seals and bolt + nut for the cam wheels.
Sump gasket X1
Egg shaped o ring seal for between the inlet and the cam cover.


Made a start on the Cam belt and dephaser
Sj8UbHDMnt0licVgAS2QNeglqSgJUZFOb7aLpfYdZuIeML7CHqRzkOn2A5ZRoGG4ZEFpNK5-pfUkXhxHSLGT0xBc=s985-no.png


New waterpump fitted as well.
Making sure the locking pin for the crank was in the right hole (oooh eeerrrr missus!) was made a lot easier with the sump off, the pin however was about half an inch too long so was introduced to Mr Angry Grinder and fitted perfectly after that. Interestingly the horse shoe wouldn't line up properly and there are paint marks on the cam wheels so am presuming its had a cambelt at some stage but was done without the proper tools. Once the belt was removed we got the cams aligned properly and the horse shoe fitted. Just waiting to borrow the cam wheel locking tool off a mate tomorrow and will hopefully then have another update tomorrow night with the cambelt and dephaser all done.

And finally I did promise some better pictures of the powder coated parts, not great pics but there all I have!
9sLzC4UurBtFYifsz_bfUvB_w1UIlhzjNqOUZBCxrurfA3UM_UMDaNPXdEWDPAIbpuTNwb18OCCZ0EZ84QCKvLLY=s985-no.png

wQeymapYtJgcSSaQIg-PCisbz7N0dpiNnj0AOZAytNtkscrvG0cZLaa3pdEqLSnQS90-GD50_pKiIA8I5tm22M1Q=s985-no.png


TTFN
Mac
 
Made a bit more progress last night. Got the cam wheels off and the rocker cover as it was weeping a bit.
9NT8v2c-n92XawCm6kaqdPKHRFn3yGyS84ssAyR184bxsBHir3K8ht-v6yTa0MAWNSh--iiGg_VXAKuD67o5j5K4=s985-no.png

Took a good hour with gun wash to get it nice and clean then masked it up and gave it a light coat of etch primer.
cecnqetqxh41RQXh9YN2bZ_x44VVF59WzmtrzzTqj4Cxrkgdw830LMO8l9CY2rQLnaAtBND_f1eeR3F-PYFrGgHs=s985-no.png


Then a couple of coats of orange
F_GeTMXuRoVTEEYSBnBkAiHI8ADFJ0tcZyfrubln_ITs4-Hy94zN6J5fmKo0BMRr8eLltDyYecCbnvXL-bMhRiW8=s985-no.png

Fitted new cam front oil seals.
QOkWklIi9p0zDAjguhTqGMuMoevY0bTcNjwvIhbrZSJ9I_y7gBqoF3WU1oipXht_Dgeez62N48l1XfGoi4QMIjAc=s985-no.png


Got the hors shoe back on and the cams aligned.
X3tyIrj_HGZEbLYRZBlIfwcaaSpFGa1Z4XhY7gBlFX-m6n8EUeU1pUq0nDFmSeuZXho1I_EF4bLHOnpULxeG5y3M=s985-no.png

Then loose fitted the cam wheel and a new dephaser along with all new tensioners idlers and a new belt. Cant go much further until the cam locking tool arrives, had to buy one in the end as my mates wasn't the correct tool.
ulFYjgf33zmLo5-gRvxqgNoOvpmsv_G4wdLv2Jv9jbjH1lgMBHt40rn0YWSKpUJoXCjzmOKq1vbGGcrb7uTGCOI0=s985-no.png

Also cleaned up and sprayed the water pump pulley while I was at it and rattled that back on.
8G0p00VXk0fx8O-2vGLbihiFLRtm6NuzJl2v69ud7vXvuI-_YV9JNoUTGHP8hhN5RhmZsxpENwmjd0_HOlxpj3AE=s985-no.png


Biggest bonus of the night though was finding that our rear cage had been delivered, same as that on offer on the group buy at the moment but was already on order.
ZjIz4luSrrth1_3wh-T1VgrziPyKQkq7TcYSIQ92v59hUNNY98fo1ADU6CznQezusyWwdLWQWrZ5jGYElyMhB0Io=s985-no.png

dropped it off at the powder coaters at lunchtime and collected the last few bits of powder coating whilst I was there.

6zUvEajbUuwOQo8p5WBSRNaadj9ihESZ1aJVHYFqcHbpf_-AOct6V2JlnTA9LYQMyKhBBJnMYf6W4zJkgSuyYoOA=s985-no.png

More progress tomorrow night hopefully.
TTFN
Mac
 
Soooooooo have had a couple more sessions on the car, yesterday Dave came over so we made good progress with 2 of us.
The new cam wheel locking tool turned up which meant we could finally get the cam belt finished. We had to reset the first time as after a couple of rev the timing had wandered just a fraction but second time it was spot on after about 10 revolutions so we called it good and buttoned it all up.
Fnm792Rwz9O5YpoWy-ZSQ0e4FxngsP8u95VcPAE4x5XvOJsT35heYBd_87xwFQzJgvl7RQ1iO5SIKGsO8yvowxwo=s985-no.png

As you can see we also fitted the Pure Motorsport delete pulley, we know there are cheaper ways to do this but as Nicole's sole purpose in life will be to be on the track we wanted the maximum belt to water pump pulley contact possible.
Even managed to get the freshly powder coated thermostat housing on and the exhaust manifold as well as the lower section of the inlet.
We did have to rebuild the plastic front cover as when we removed it it was already in bits. Used some of this which I always have knocking around the toolbox, a bit like chemical metal but sets really quickly.
W15UeUSnEjND-MR0F-2-wMeXJiIghbPhmyefMs3yPgp-p3G2rnBFZstmQHjwDrP18pKctvG46oEg3nK9gdC0gdcw=s985-no.png

With the help of a couple of cable ties and some miniature mole grips it was all back together.
hUh9BHo0j7kKunKaLmARv5i_7aINxqy7v3zmxRwaPNlOHyXhGhXY8td2VrRueMVoLsGTOC_AWeJY7XKk-nvJbUvg=s985-no.png


FiUGQK6fqUyWyYFGCUeRhjit4neikWponS_WuFi9qPyX3Ej0YRRISZlzCTPnnjwjALehHJV0I67bflGhHJflpHc0=s985-no.png


Didn't get to fit it buy the micro heater has arrived.
q4uVqI0bLj0KN5QmQtLXCFu7znpv0Y1Rmk50cBZ46d55XCg23Hk43lkFSDGOeLyXnFBRuV0ErovQ7pt2i2utUMdM=s985-no.png

ZXe1U99gy0-Eh1RKIK82zip-WfdBee2LVo9KB9qsfdLbwd29o4NRw88uVmKnLLP2mbUBTuXd92lKZZN2WwjiGIOk=s985-no.png


Also managed to get 10 minutes with the steam cleaner to get the gearbox cleaned up
Mxl3PB8MzoLm-J7DVyevxTneQxygleZom4VSrb8yOsCAolm_UF2z4panarp7qKKnj4srUJPf9EM5kuKRVu2wr9MQ=s985-no.png


In other news.....
I collected the roll cage from the powder coaters Friday on the way back from Salford.
mExdQ6vNwnvo_JD0a-J7E0JljqB6H8O96J_yljMtFQH0Dl2BuBU8YpBKpL2CKseL9EDymS4BbsaaZKRwTivItPjU=s985-no.png


Also had a minute to tidy up the inlet manifold, the powder coater had asked if he could experiment and try to do the raised lettering black, didn't work out so well...
UySo3acV7MamtyUdxlkE7pugkc3_SVW2dTxyO_4yiO6iBiG93iFzYKupnXPkA9a8uGI8uMXe-7f3FAQSp2wqh6rQ=s985-no.png


g-_8sewelb1WVMI0weQ7nJdQqeQkFv8YStLFXFioBGtuiijwec3q-U-L-idhN8VVL-AV2tn3o6nki6Edmt73cwoE=s985-no.png


but 20 minutes with some black enamel and a fine brush saw a vast improvement.
Im_MKyCWLTyCqt-CUdKpbyBE5Fu7iRp82f7XSLqts3_MbEeOnP0-Mb5brv3KmWkK0Koczb2Ti2sv_maFQW9ae9tw=s985-no.png

E9Ahp7QaFjreFNrBcFHorypeT46jUJtA2ph9vWEi69saFE-ReFYa29I5Ql5RAbJlSt5luyllu3Y_CSEt9WxmMB7A=s985-no.png

Still need to go over the lines again but should be fine.
TTFN
Mac
 
Cheers, he's not just a mate he owns 50% of Nicole and our ex race car. He's up the unit all day Tuesday so is going to be removing the sound deadening in preparation for applying the Raptor bed liner to the interior so the next couple of updates should be interior work
 
Another quick update tonight. Decided to have a go at something I have been meaning to try for years electrolysis! Start with this
txRxdnseh7xXot_Rz1AJ4AADk5P5HMy92rAGeIuRXvs20768QeC4poAQQs2sXNVRfEjPOKIlv-jXJynMzNZMiNo=s1346-no.png

Front upright that us to say the least crusty
1upDN97yyEqblJsiktZSsHRBDa_9vvqXatsCvw7-TgW0SmftfSOMfjR1IMiQbzHRd-3FJuvN3NFZFzoXpTqvDko=s1346-no.png


Rigged up a quick electrolysis tank with a decent bench top power supply

tVbHtHIzTUHJUJ8tiCWu5IOmLOO3YsDbV_dRkM3wYfhbJjg_4ff0nRTRrmlXOzgp_JUU92cjl_PuzwEiBG4UKxc=s1346-no.png


Left it Bubbling away nicely and will stop by the unit on the way north in the morning and see how it's done. If I have done it right I should have a rust free upright!
 
Dave spent the day today removing the sound deadening from the interior, a job i was more than happy to let him get on with!
xR6mV49c8KX4ibVmsBo9n7nxKg5gFYoeeft47UvXmL2ZkkoO4Y1NBXkAVY6ASvpvxiDyydw9iy0ukNt6PZ5JPzgc=s675-no.png


e-nZGoCZWIAKedOwTyCiHv_tP1q6Ng7WzaXmZuWn7C0sCgeyoFk2M3bs-DdjOhgu_DBDjYrqqIawHcrkdQMCeyzE=s675-no.png


I arrived late afternoon after finishing work early and managed to get the AC delete kit from PM fitted.
WgJ3s9abQrkcROfKq4e3swemoeYz-7Kv_3Q3u7eyOksHhQOmEytCcMGvzG0iR99Tk5XZkr51hn4NbrPTFVIZnXX8=s675-no.png


Work on the engine is pretty much at a standstill now until the new oil pump and injectors arrive but just to get some of the baggies of bolts emptied i fitted the gear change mechanism mount to the top of the nice clean gearbox.
HcVQ9NGQkSryDrh_gpAYmGcvgjRFxmqg0_ZR2s-x6yTVaTZKZ-9BLibp6j5pVMlLCf_bWpW1ERPa3MxJJOdrqb-M=s675-no.png


Then moved on to filling the holes in the bulkhead left by the removal of the heating system.
_4C9LlNrVTBZJ0_83AyKQzyWHH4E9PkLDJChEfgUdQU74skQ1s5EOZ2_-1Xo-eUfeEUuNbDLhusOtCz3jmdaGdXk=s675-no.png


GB-ecd9AZISsg8Z1kKJuwjVGoSIaI929knmhcp4thbhXJ_Fa4n3zrzGgajYeE2RfW2EMq7YPaKOqSGfMMwoaWFVQ=s675-no.png


zSldgR5xnZmDZZn5fbbqGcf7XaVx7ZWFHUkupNlW46qRY0bbkYU5rmq4ujXTk2eDMWQQei7LzSZRz7taEMAprq-s=s675-no.png


Think i may have got carried away, can anyone confirm that the hole i covered with a small round patch is in fact a drain hole? If so ill just drill a hole in the patch with a step drill.

In the meanwhile i gave the patches which are aluminium applied using PU adhesive (similar to the stuff used to bond in windscreens so tough as nails) a coat of etch primer then gave the whole area a good hoover out and a clean up with gun wash then blew a couple of coats of gloss black over it all to tidy it up.

2ZlX58TynJAW7oB5bRenBycDmbEhOMm6YP9r7qKJYbsnnv_9co3d_h-tK1Aamcny8b-vjw0Ppj8oajOhoL8rCJS4=s675-no.png

KjPHP-AgpqrNBtIfY1Bx-fedf23mKHCyX1sEgF7j4BcHAruNVCi6Z4xyEy8goz-L7fiaDdRnFECzOPB9EYIz4REk=s675-no.png

ul70AnI-EnNn_wazUxg2Ckn3elgZxMCcxoC7Jf3PGBO2kA-iSHn0UTsbu_IK9ejAbZ6Wbg1L99dc4I78axaXFfFg=s675-no.png


Then moved on to other engine bay tidying jobs in preparation to re fitting the engine and box, cant believe how little paint there is in some areas so had a clean up quick scuff up with a coarse scuff pad then primed and finished again with gloss black from a rattle can.
HF1rCn49k6kL3iW7LfXX4qLsSs4wTjnVT1ZxyRZHX1ZetYC7bMqCsdm0zDL6PBvd9WpISjn9s9MoMpGyg2MMZdrA=s675-no.png

0s3jTP5Y-He3ak3A8vruAKD0LpkVdDatf-kgrYWNGiqaAqUe2Y4SGukCoaeE5kP3EnRF_Xpj1c9RHgTU3Xw6NJD8=s675-no.png

3sLNLh8Z6Xfk9xSVxv4AgvVvssZOgd9BF_CNFLqTGA9XjVxLIZNXoEcjyqP7u73D0kxIn5CmbJagpxVJmU3YTuyU=s675-no.png

asAIqfW9dXOtEztXK5WB-CurD1zruEbPHo13edShftgS-6cezqpJrMycPZ6GS0rTMDhjxmlQE19YWIYLV5Kh1yuM=s675-no.png


Next i fitted the closing panel at the rear of the engine bay which has been powder coated.
YxzUz_-EBatHRjnamLxlUuX5hVwjUoywDKbiiFD4ZF0Lote0Mcp6SoGbVk9JOdwVNxVB9Ohk25Hjr2qk4cbXvpIM=s675-no.png

Need to still make a small Ali closing panel for the bottom left hand corner which is where the aircon pipes originally went in.

Last job of the day was to rub down the bonnet slam panel as it was a bit scruffy, couple of coats of primer both sides.
PRWjDzKefrXWJyP93gXEYjhdH1SqsevSOpgR_jcFX_lzE5PG58KYf3OYl85kDMUrZ8f9MWkvnBvglfQfP7CHdvz4=s675-no.png

q4M9JRRDZPWQ-KIm_T30p15-hrurihqFR9wztFSSDGXc8i-nAS9loFLqW47RxiFoY8T1G7yyEveTaT3_D0fJiOmc=s675-no.png


Then got the rear in colour but think i will leave it to go off until the weekend before i do the front face and will probably finish it off with a coat of lacquer.

gRvDCtQr0uktqxLn4o8RLkCh0nseteKkSabSBhQQ4iJwPMMpqBTEUbbc9tH3pZlvZvQHs9TRMhcTPYtcvpCKZJ5E=s675-no.png


TTFN


Top