ClioSport.net

Register a free account today to become a member!
Once signed in, you'll be able to participate on this site by adding your own topics and posts, as well as connect with other members through your own private inbox!

  • When you purchase through links on our site, we may earn an affiliate commission. Read more here.

Big Steve's RB Clio 182 Cup Restoration


Big_Steve_T

ClioSport Club Member
Can and if you chaps confirm where the “fuel return” pipe goes?? I found that the Carbon Canister pipe goes to the Inlet Manifold last night:
BA13E362-2140-4900-A0EC-55F1B507AC22.jpeg

But now I’m wondering where the other one goes??

I’m also wondering where the outlets from the carbon canister go...?

Any help appreciated 😉
 

Mbeau

ClioSport Club Member
  Clio 172
Can and if you chaps confirm where the “fuel return” pipe goes?? I found that the Carbon Canister pipe goes to the Inlet Manifold last night:
View attachment 1458176
But now I’m wondering where the other one goes??

I’m also wondering where the outlets from the carbon canister go...?

Any help appreciated 😉

Back to the fuel tank far as I am aware. It's just a stupid breather system for the tank. I so nearly removed all that pipework, but thought to myself, no one will want that, they all remove it 🤣
 

Big_Steve_T

ClioSport Club Member
Got the car up in the air on Saturday, and removed the front load bearing elements (Which all looked as though they'd been at the bottom of the bloody sea! ⚓) ready for re-work/refurbishment:
Webp.net-gifmaker.gif


Then on Sunday, I re-fitted a few more pieces into the engine bay, including the Alternator Belt (whilst reminding myself what a bloody @rsehole of a job it is!! 🤦‍♂️)
Webp.net-gifmaker2.gif


Engine bay continues to come along:
SAM_0480.jpg


Thanks for reading :)
 

Big_Steve_T

ClioSport Club Member
Got a set of wheels chemically stripped to allow me to get them refurbished.
ED0B6E3F-30B1-4EF8-AF51-225C35681401.jpeg

to ensure they match the OE Centre caps as close as possible, I’m going to spray them, rather than get them powder coated. It’s not as thought they’re ever going to see a rough daily use in winter, so I think the paint will be good enough.

The wheels came up well:
30102041-09C8-4F54-AA6A-BBE815CCB0B1.jpeg

However the old corrosion has set into the back of a couple of them:
849C7A2E-5873-44C1-9C7B-0C77CE8A1C26.jpeg

I think I caught it just in-time before the wheels start to get really bad.

I know the general consensus is that the offset is 44, but this casting mark suggests it’s 45?? 🤷🏼‍♂️
8F0AFF24-61B3-404E-87DB-5021EAB03A1D.jpeg


Thanks for reading 🙂
 

Big_Steve_T

ClioSport Club Member
Got hold of a “spare” rear axle in fairly good condition.
45B43C52-1033-4C3C-B46A-0E9F1072D881.jpeg


I’m going to get this one all cleaned up and powder-coated then I can just swap for the existing one when I’m ready to fit.

I was surprised the Clio 182 rear beam was simpler in construction than my R5/R11 with Just one torsion bar?

0F27BE21-7607-435C-9A36-749D49EDE184.jpeg

I just removed any of the clips & brackets on the beam:
C0C7E744-8903-4F61-82A3-4C9D7CE8CF9D.jpeg

Then screwed a couple of bolts into the rear shock mount holes, (with a bit of threadlock) to protect the threads during the blasting/powder coating process:
CCFE5983-8484-4158-8ADE-566A4F9C1430.jpeg


Thanks for reading 🙂
 

DomP182

ClioSport Club Member
  ph1 172, Arctic182
Got a set of wheels chemically stripped to allow me to get them refurbished.
View attachment 1458818
to ensure they match the OE Centre caps as close as possible, I’m going to spray them, rather than get them powder coated. It’s not as thought they’re ever going to see a rough daily use in winter, so I think the paint will be good enough.

The wheels came up well:
View attachment 1458819
However the old corrosion has set into the back of a couple of them:
View attachment 1458821
I think I caught it just in-time before the wheels start to get really bad.

I know the general consensus is that the offset is 44, but this casting mark suggests it’s 45?? 🤷🏼‍♂️
View attachment 1458820

Thanks for reading 🙂
My 182 was et45
 

Big_Steve_T

ClioSport Club Member
Before the rear axle goes off to be treated, I wanted to remove the rear axle bushes. I gave them a few tentative taps with a mallet but soon realised that they weren’t going to come out unless I had a serious word with them... so I got my serious face on.. 😠

First thing was to get a decent drill bit in a large enough size that you can get down into the space between the two metal bushes... where the rubber is:
9ECC840D-A82A-4239-B212-44D1B7FA7122.jpeg

Next you need to spend an inordinate amount of time drilling the rubber away. I found that getting a good quality sharp drill bit and rocking the drill left/right forwards/backwards soon had lots of rubber particles on the floor:
0F08F71D-38C8-4416-8FD5-EA71EC2ACF9D.jpeg

Drilling alone wasn’t enough to separate the bushes, so eventually I had to get the old mole grips out and give it a twist to finally tear the last strips of rubber:
FC3AD638-B2C9-4EEF-A38B-57849D06F22B.jpeg

Eventually after a bit of grunting, the central bush came out:
9CE2CD84-182E-4E22-9D35-B6FE53B8DDBC.jpeg
Next, I threaded the hacksaw blade thru the remaining outer bush, and gently cut a strip out of the bush:
1C84C475-93F1-4BB6-9CFF-252CC43393E7.jpeg

I didn’t cut all the way thru the outer bush, as I didn’t want to cut the axle:
295D84EA-998D-4201-8856-10AD3829C315.jpeg

Once the “score” was made in the outer bush, I used a hammer and punch to peel the bush back, and tear the metal at the cut. After the tear started I continued it with a sharp flat chisel.
7CD04432-3BE0-4325-87D3-55608A1E4BBC.jpeg

A couple of blows with the hammer and the outer bush starts to come free:
1F7BA608-CE08-4819-A72E-A6B594C106A3.jpeg

Then it was time for the official “give the bush the bird” picture 😂
69B94FE4-A029-4A51-8B09-8D6578347776.jpeg

I then cut the bush into smaller strips and then knocked them back into the axle, to “mask” off the bush faces when I get it powder coated.
2C465651-04DD-4717-BBE3-466C7956ADCE.jpeg

Thanks for reading 🙂
 

robzracing

ClioSport Club Member
I "THINK" I've figured out that the return pipe to the fuel tank, starts at the Carbon Canister....?? If anyone can either confirm or deny that??
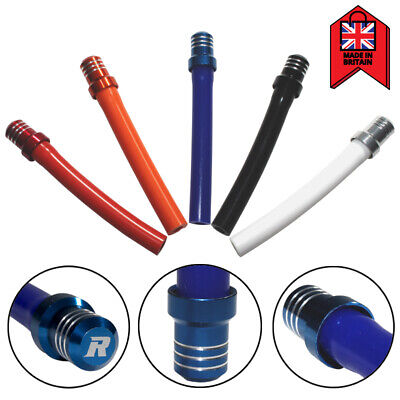
There is no fuel return to the tank on a 182. The pipe you see is a breather from the tank to the carbon canister. You can remove it all the way back to the tank but recommend replacing it with one of these if you do.


Big_Steve_T

ClioSport Club Member
There is no fuel return to the tank on a 182. The pipe you see is a breather from the tank to the carbon canister. You can remove it all the way back to the tank but recommend replacing it with one of these if you do.


Thanks very much for confirming that @robzracing!! I was suspecting it’s where it was connected to.. but wanted the confirmation. 👍
 

DomP182

ClioSport Club Member
  ph1 172, Arctic182
What are the differences between 172, 172 cup and 182 beams? I'd like to pick one up to do the same as you on my ph2
 

Amos91

Honorary Member
ClioSport Club Member
@Big_Steve_T - Just checked mine and it does have the bar, so will be as @YorkshireKyle says. I think I was recalling that some had these rubber mounts in there, but by now they have fallen out!

1584005513878.png


Also when taking off the old rear beam, I'd recommend running the fuel tank low and then removing the bolts for the tank rather than the captive bolts through the bolt floor. Will save you a headache!
 

Big_Steve_T

ClioSport Club Member
@Big_Steve_T - Just checked mine and it does have the bar, so will be as @YorkshireKyle says. I think I was recalling that some had these rubber mounts in there, but by now they have fallen out!

@Amos91 Thanks for confirming that! I crawled under the car this morning and took this photo:
A3A6980F-A270-4E1E-B660-27D7B903E822.jpeg

I noticed that little rubber bush is there on the original Axle, but not on the one I’m getting blasted?? I’d prefer it was there, but I’m not going to worry too much about it.

Also when taking off the old rear beam, I'd recommend running the fuel tank low and then removing the bolts for the tank rather than the captive bolts through the bolt floor. Will save you a headache!

Someone's been there before, so the original captive bolts are already missing and replaced with some dodgy looking coach bolts!! :eek: I'll get it all sorted when I re-fit the blasted axle.

In other news, I got my ECU bracket back from the powder-coaters, and chuffed with how it come out:
00007B0D-72DA-4FF4-9DED-AA18CD96928F.jpeg

00007B0D-72DA-4FF4-9DED-AA18CD96928F.jpeg

complete with 👂!! 😝

Thanks for reading :)
 

Attachments

  • 6B74FD43-FD77-439E-A435-FCD47C7414DE.jpeg
    6B74FD43-FD77-439E-A435-FCD47C7414DE.jpeg
    473.4 KB · Views: 100
Last edited:

Big_Steve_T

ClioSport Club Member
As we're all now dam near confined to our homes thanks to Chinese Flu, I figure I might as well continue to work on the Clio. I mean being confined in my house, or the garage is the same thing right..? 🤷‍♂️

I took the "new" rear axle to be powder-coated, so whilst that's being done, I took the old one off the car by removing the axle with the brackets attached so I didn't have to go removing the petrol tank. I'm going to get those brackets blasted and powder-coated too, so they needed to come off. The bolts were a right @rse to get off, even with my BIG BOY Impact gun.. I know it would have been a struggle on the car.
Webp.net-gifmaker.gif

I got the front hubs back from the powder-coaters, they look great! but they needed a little clean up on the brake caliper mounting flanges, don't want the powder-coat in-between the hub and the caliper to melt if the brakes get hot and then the caliper becomes loose.. :oops:
Webp.net-gifmaker (1).gif

The inlet manifold had picked up a couple of small scratches and damage as it was being moved around my garage, so I thought I would give it a bit of a birthday. First I gave the lettering a polish, with some metal polishing wheels I have, in the drill. (Sorry for the crap photo, but you can just about see the difference it made)
Webp.net-gifmaker (2).gif

Next it was a case of spraying the inlet manifold, and then carefully wiping off the paint that was on the letters, with a rag and some thinners, before it had chance to dry:
Webp.net-gifmaker (3).gif

The finished result looks much better! :cool:
SAM_0564.jpg


Thanks for reading :)
 

Big_Steve_T

ClioSport Club Member
Thought I would have a go at this V-logging malarky whilst we have all have all the time in the world.. :p and thanks to Cliosport, I followed this guide on HOW TO REMOVE YOUR DOOR PANEL and removed the drivers door panel as the drivers door lock doesn't seem to be working.


When I whipped the door panel off I found the solenoid was unplugged so figured that was the only issue and plugged it in, unfortunately there does seem to be more of an issue with the lock, so I whipped it out. Whilst I was messing around with the door, I figured now was the right time to replace the window seal for a new one I came across, that hasn't got any rust or distortion. Hope you enjoy the video! :cool:


I then fitted a set of new rear axle bolts inside the car whilst I had access to the inside:
Webp.net-gifmaker.gif

Then I spent a bit of time figuring out where the coolant hoses go!
SAM_0581.jpg

She's coming along nicely now!!

Thanks for reading/watching! :)
 

Big_Steve_T

ClioSport Club Member
Fitted the front driveshafts, hubs, Brake discs, (BigRedd) refurbished calipers and front Bilstein coilivers today:


Chuffed with how it's all come out. Here's the Offside:
ezgif.com-gif-maker.gif


And Nearside:
IMG_2043.jpg

I wasn't sure how the dark blue on the calipers was going to look, but I really like it now it's on.

Plenty more things to do to keep me going thru the Corona LOCKDOWN!!

Thanks for Reading :)
 

Louis

I Park Like a C**t
ClioSport Club Member


Top