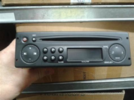
Radio/CD/tape player.
There are all the same realy one realy. You can plug a CD changer inot a tape player or swop a tape player for a CD one (so long as you have the code for it).
Configuring the unit.
To select the zone which the radio is to be used press button 2 and 5 with the power on. then enter the 4 digit security code.
Then select the relevent area
- America
- Japan
- Asia
- Arabia
- Others
Then select the volume control for the appropriate model
0: control inactive
1: Twingo
2: Clio
3: Megan
4: Laguna
5: Top of the range
Then select if the car has rear speakere fitted.
Rear ON/OFF
To enter expert mode
Press and hold the source button for 4 second until a beep is heard.
Then you can scoll through the options
- AF model activation
- Volume control in relation to vehicle speed (5 for maximum chnage, 0 for no change in volume relative to speed)
- Activation of loudness mode
- Activation of Assited radio mode
- Configure number of speakers (2 or 4)
- Selection of manual or dynamic list.
Self test modes
Testing the speakers
Press button 2 and 4 simultaneously. (confirmed by the display)
Testin the reception level (after display of the frequency)
Press button 1 and 6 simltaneously
9 means good signal
3 means poor signal
2 means no stereo
Testing the buttons
Press button 3 and the one off one at the same time. Every time a button is presed it will appear on the display. This exits when every button has been pressed.
Note: Pressing source whilst entering the changes cancels any changes.
Note: If the temperature gets too hot the volume level is reduced without chanaging display volume.
Below are the lists of the connections for the four connectors on the back of the stereo unit.
Black connector (A)
Track 1 Speed signal
Track 2 Not used
Track 3 Voice synthesiser signal (ie mute)
Track 4 Battery supply
Track 5 Aerial amplifier supply
Track 6 Light supply
Track 7 Accessories supply
Track 8 Earth
Brown connection (C)
Track 1 + rear right speakerl
Track 2 - rear right speaker
Track 3 + rear right speakerl
Track 4 - rear right speaker
Track 5 + front left speaker
Track 6 - front left speaker
Track 7 + front left speaker
Track 8 - front left speaker
The CD changer (depends on mode if this is fitted Mk 2 pahse 1 172's should have it as standard but many others had it added from new)
Track 13 on the changer goes to track 2 on the radio
Track 14 on the changer goes to track 3 on the radio
Track 15 on the changer goes to track 1 and 10 on the radio
Track 16 on the changer goes to track 5 on the radio
Track 17 on the changer goes to track 7 on the radio
Track 18 on the changer goes to track 6 on the radio
Tracks 19 and 20 on the changer goes to tracks 4 and 8 on the radio
Yellow connector (B) The wiring for this goes to the remote by the stearing wheel. The remote is fed from a plug in on the underside of the remote control. For information on the plug outs from the remote to the display see part of the post
Track 1 Display connection (track 13 on the display) or if no display present its connected to the remote
Track 2 Display connection (track 14 on the display) or if no display present its connected to the remote
Track 3 Display connection (track 15 on the display) or if no display present its connected to the remote
Track 4 Not used for display. Its used for the remote if no display present.
Track 5 Earth shielding (track 12) or if no display present its connect to the remote
Track 6 Display connection (track 11) or if no display present its connect to the remote
Plug out connectors from the remote control
Track A1 Track 14 on the remote control
Track A2
Track A3
Track B1
Track B2
Track B3
Plug outs from the radio display
15 track grey connector
Track 1 External temperature
Track 2 External temperature
Track 3 Not used
Track 4 Not used
Track 5 Earth
Track 6 Lighting
Track 7 Light supply
Track 8 + supply from accessories
Track 9 + supply from battery
Track 10 External temperature output
Track 11 Earth (radio track 6)
Track 12 Radio on signal (radio track 5)
Track 13 Radio connection (track 1)
Track 14 Radio connection (track 5)
Track 15 Radio connection (track 3)
15 track grey connector
Track 1 Not used
Track 2 Not used
Track 3 Not used
Track 4 Not used
Track 5 Not used
Track 6 Not used
Track 7 Not used
Track 8 Not used
Track 9 Radio control connection (track B1)
Track 10 Radio control connection (track A3)
Track 11 Radio control connection (track B2)
Track 12 Radio control connection (track B3)
Track 13 Radio control connection (track A2)
Track 14 Radio control connection (track A1)
Track 15 Not used
Notes:
The Clio changer won't fit anything else unless you want to fiddle with the cables
Any Mk2 Clios can accept any Clio changer. The plugs at the back are all the same if you don't have the standard Alpine one with the one black cable (part number 8200085591 which is ~£85 (price changes a lot)) then the aftermarket one dealers sell so long as it has the 2 part cables can be used.
Cars sold with the CD changer from the factory are all Alpine ones. Anyone who rodered it as an option on there car it came from a dealer. Dealers have 3 different types the picked the most cost effective either Alpine ones from Renault themselves or from there own sources.