ClioSport.net

This is a sample guest message. Register a free account today to become a member! Once signed in, you'll be able to participate on this site by adding your own topics and posts, as well as connect with other members through your own private inbox!

  • When you purchase through links on our site, we may earn an affiliate commission. Read more here.

Long Term Track Car Project

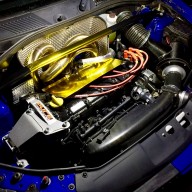
Induction set up looks interesting. Could you not trim the slam panel to make room for it?

I did try and it fits underneath without the standard radiator fan..........
20170609_104951_zpsw1padxzw.webp

20170609_104948_zpskpv7slcc.webp


But with the standard radiator fan it pushes it up higher.............
20170614_165810_zpsqst6r16p.webp

20170614_165930_zpscrmempbp.webp
 
Can you not use a slim line fan? I got one from McGill Motorsport and the amount of free space is great.
 
Thinknit was a 12" from memory. I did contemplate using two smaller fans and having them set so that 1 pushed & 1 pulled.
If you eBay search "slim line radiator fan" there's loads of options. Easy to fit, just needed the Renault plug chopping off and some spade connecters crimping on
 
Loom has been chopped and reduced...... hope it all still works :grimacing::grimacing::grimacing:
20170616_164034_zpswpjabhdl.webp

20170616_164041_zpssnroiwvw.webp

20170626_124103_zps2juxiwji.webp

20170626_124107_zpsxaadebpm.webp


Cut off and ground down some of the disused lugs, will also be removing disused metal bits.
20170627_112131_zpsbntgwffq.webp


Got a new (2nd hand) airfilter :wink::cool::smile:
20170705_205450_zps5lt52bgo.webp

20170705_205455_zpsvxjsfi15.webp


Thanks @16xe_chris (CM Composites) for the Dash Pod :up:
20170705_205530_zps1ieirzxv.webp

20170705_205520_zpsykxnrpc1.webp

Good work! Attach the pod and then get the whole top flocked. looks the nuts then :up:
 
Good decision, it took me forever to wrap the cage up in newspaper when I painted mine. It was also very hard to paint in the footwell/bulkhead area. I'll know for next time!
 
I've gone a little "project management" style and got myself a white board so i can write a list of stuff i need to do. So many times i've gone into my garage, stared at the car thinking "What do i need to do?", and now i can just come in and look at the list and continually add to it :up:
20170816_155747.webp


I've finally wired in a resistor for the carbon canister, 10W 22R. All neatly hidden;
20170815_161309.webp

20170815_161407.webp


Sprayed the grill and Renault badge;
20170815_161515.webp
20170817_141529.webp


Chopped off the key barrel as i won't be needing it and removed the steering column adjuster lever;
20170816_163106.webp


Got some new bits, 4" bass ports for brake ducts, air intake duct for a cold air feed, 4" air ducting hose for the brakes and 3" for the cold air feed. And a DIY LED Shift Light :up:
20170818_152802.webp
20170821_131607.webp
s-l1600 (2).webp


Where the hose is going to route;
20170815_161437.webp


To get the 4" bass ports to fit the standard fog light surrounds i cut little slits which allows it to expand when you push the bass port through. Snug as a bug :up:
20170820_170948.webp
20170820_171005.webp


Decided to do away with the AC blower and controls and got a standard air blower which i will up directly to a On/Off switch.... Simples :smiley:. I will be blocking up the re-circulating hole.
20170817_141645.webp
20170817_145437.webp


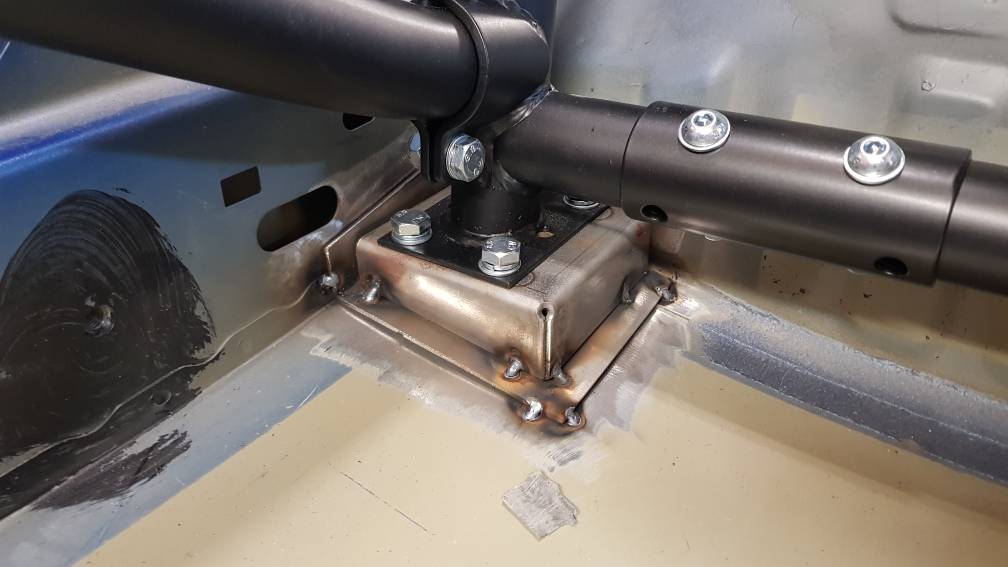
And finally, i'm still working on fitting the roll cage. Had to drill 7 25mm holes for the mounting plates and their welded nuts to fit through the floor. I'm in the process of refitting the cage once again to double check its still all square and fitting correctly. Once it's bolted up, i'll tact weld the mounting plates into place :up:

20170820_161727.webp
20170820_161736.webp
20170821_134129.webp
20170821_134125.webp
20170821_134939.webp
 
Looking awesome bud, would also like to know info on the resistor as thats my next job on mine, have you left the lines to vent to atmosphere or? Also how have you blanked off the inlet? Keep it up bud looking forward to more updates
 
Looking awesome bud, would also like to know info on the resistor as thats my next job on mine, have you left the lines to vent to atmosphere or? Also how have you blanked off the inlet? Keep it up bud looking forward to more updates

Block to inlet, vent to tank.
 
That resistor looks a good option, shall be ordering a couple of those myself.
Congrats on bambino number 2!
 
Love this! Wish I had the skills to do more to mine myself, especially as its off the road for so long each year.
 
Great thread. Watching this with interest.

One thing I noticed was the position of the tensioner for the cambelt. Looks a little high/vertical to me (can't see the markings properly so just going off the adjuster arm).

Really nice to see something like this.
 
Finally an update.... a small one but an update neither the less. With the home extension, Christmas and baby 2's arrival out of the way I've been able to do little bits of work here and there. I've been mainly focused on the interior.

So i've blocked up the re-circ air hole in the scuttle bit....


I've sealed up the airbox....


The rollcage mounting plates are all welded in now so i can now concentrate on the dash and wiring. I've been working on the dash and i've trimmed the clock bit so that the clocks will sit in a more upright position, you can't really see it in the pics but i've taken about an inch/inch and a half off the back. I've also cut the dash so it fits around the rollcage....


I've removed some of the metal from the dash support frame and painted it black. I've also welded on the bracket that holds the EPAS ECU. You might also notice in the the pics below that i've removed some more bits of metal from the body (dash support brackets and foot rest)....


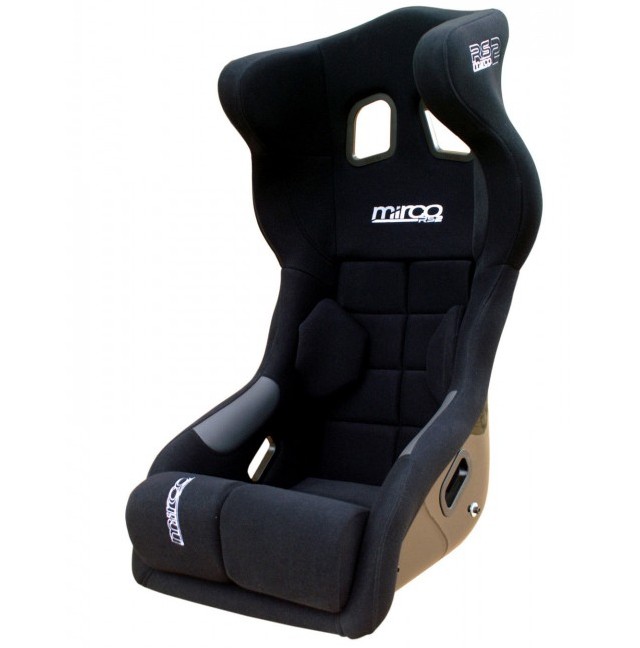
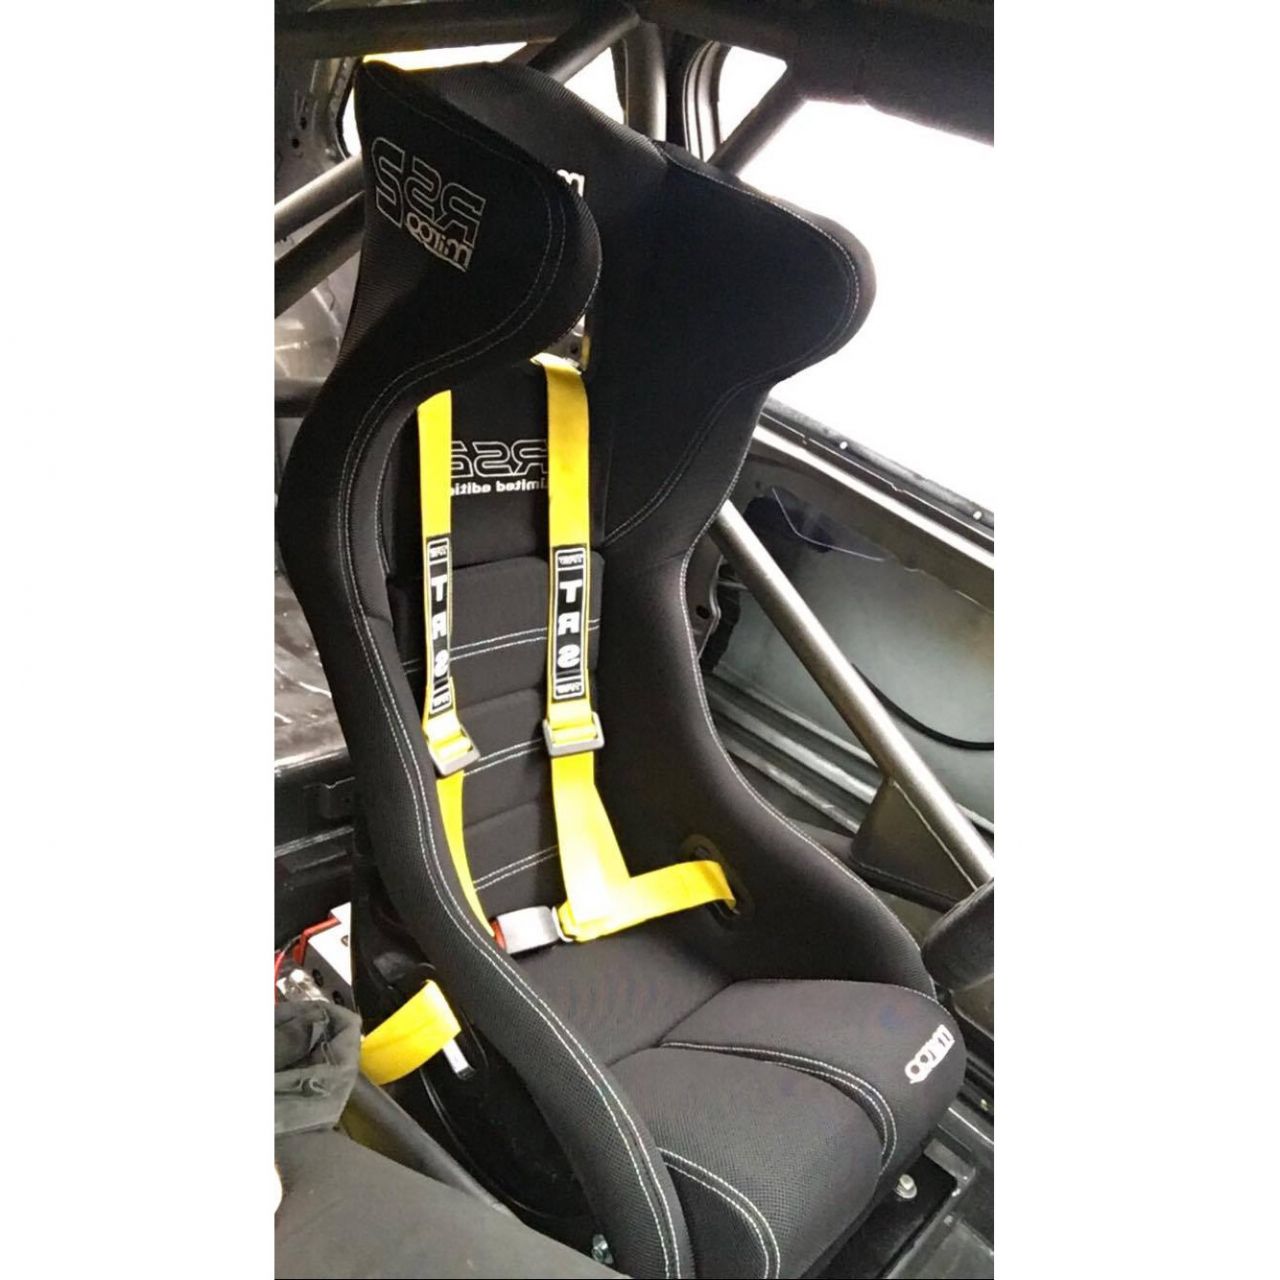
Lastly, i've ordered a seat (not my pics), its a Mirco RS2 seat in black 3D mesh:smile::cool: and thanks to @JKING3008 i've also got a TRS black 3" 4 point harness to go with it....
mirco-rs2-03.jpg

Mirco%20RS2%20Motorsport%20seats%20with%20yellow%20TRS%20harness%201m.jpg
 
Does your dash top fit ok without the bottom or any additional supports mate?
 
Soooooooooooooo.... not much has happened since my last update. Been so busy with a garden project and having a new born to look after BUT....

I got a Jon Fonz low seat subframe to mount the seat....

20180817_163447_zps8lfpjdne.webp

20180817_163510_zpspor7maby.webp


I managed to get a set of Team Dynamic Pro Race 1.2's for a bargain price of £190. They are 15x7 ET40 so i will fit a 5mm spacer all around. They do need refurbishing but at that price i couldn't turn them down....

20180817_104546_zpsvsjlmnsv.webp

20180817_105443_zpsi3hp2uw2.webp

20180817_105509_zpsewlk0upb.webp

20180817_105505_zpsvuyczavo.webp
 
Happy Friday all !!

Soooooooo, been spending a bit of time and cash recently. Got myself a Cartek battery isolator as i didn't like the pull cord jobbie. Got a rear lever bias brake proportioning valve so i can make a start on the rear brake lines. Also been purchasing switches, relays and having parts 3D printed. I'll show the 3D printed part once its fitted.

I'm tempted by one of these..... over the PMS shifter but on the fence at the mo.
30688947_2129955103904880_2670561684845756416_o.webp


On to the dash.... I wasn't happy with it floating around between the rollcage so i've welded on a couple of brackets with a rivnut so i can screw the dash to it securely. I've already changed those silver hex screws for black dome head hex screws.
20180831_110252_zpskgrdmtot.webp

20180831_110500_zpsqwc8mi7b.webp


I've also painted the clock surround black.....
20180901_162955_zpsrxblnwvo.webp


Whilst i was welding the brackets on i decided to weld up the hole where the handbrake was (don't need it anyway)....
20180831_112035_zpsc9p5alsm.webp

20180831_120818_zps3wumrcwb.webp


Pedals are fitted....
20180831_120520_zpsoeaexs4s.webp


And now onto the head scratching part.... Brake cooling ! I've been thinking about the best possible way to get fresh cool air to the brakes. As you can see, its pretty tight on full lock....
20180831_123049_zpszplcfhgn.webp

20180831_123132_zpskirj6560.webp


But there is a good couple of inches and so the search started for ideas and i found one which i think works.....
20180921_160828_zpsuntgj7sg.webp

20180921_161049_zpsmoivqx86.webp

20180921_161127_zpskuqifrwg.webp

20180921_160754_zps1li6e8sc.webp


The routing is pretty perfect and it lines up with the fog light holes. I'm also thinking of a bit of ducting to either the disc or caliper, haven't got that far in the plan yet but just getting the air flow to that area is a massive step !!
 
That shifter looks a bit tasty!
Nice neat job with the handbrake hole. What you doing handbrake wise?
 
Back
Top