ClioSport.net

Register a free account today to become a member!
Once signed in, you'll be able to participate on this site by adding your own topics and posts, as well as connect with other members through your own private inbox!

  • When you purchase through links on our site, we may earn an affiliate commission. Read more here.

My 182ff track car build (so far)


Eddie555

ClioSport Club Member
  Q7 2018 & 172 Cup.
I would say so.. but also i like the fact mine are the same front and rear (90/90) which allows me to go softer on wet days.. Ilya is running 90/110 on his AST 5100s which in the wet his doesnt handle as well as mine..

Sent from my SM-G977B using Tapatalk
 

1985michael182

ClioSport Club Member
So you are saying with a 50/50 balance you can adjust handling by soften/harden or raise/lower suspension to shift weight where its needed, rather than rely solely on spring rate
 

Eddie555

ClioSport Club Member
  Q7 2018 & 172 Cup.
So you are saying with a 50/50 balance you can adjust handling by soften/harden or raise/lower suspension to shift weight where its needed, rather than rely solely on spring rate
Yep that seems to be working for me.. My view is its a trackcar, not a race car.. For trackdays it sorts of limits the ability to adjust, change springs, from an unpredictable weather change on the day.. If i knew for certain the weather was "X" i could prepare my car with "X" springs and go play.. But as it stands we live in England and who knows what conditions we go out in.. As it goes i sometimes take 3 different sets of tyres.. A048 for hot day, R888r for cooler days and RS3 for wets days.. Its a nightmare sometimes.. So for me the 50/50 method allows me to make a few rear adjustments and away i go..

Sent from my SM-G977B using Tapatalk
 

Eddie555

ClioSport Club Member
  Q7 2018 & 172 Cup.
Yea definitely. The R888r are good when its a cool day but on a hot day they over heat and go off easier than the A048's..

Sent from my SM-G977B using Tapatalk
 
@Eddie555 Do you run an arb or beam strengthening? I went for 110 rear and I dont think I could go lower as the roll stiffness is just right, I think I said that when they were set fully soft it was like a boat
 

Eddie555

ClioSport Club Member
  Q7 2018 & 172 Cup.
@Eddie555 Do you run an arb or beam strengthening? I went for 110 rear and I dont think I could go lower as the roll stiffness is just right, I think I said that when they were set fully soft it was like a boat
No mate no arb, no Strengthening plates.. @ZachB are you running a full roll cage in yours? I noticed that even going from a Oreca shitty cage to Fulcrum_motorsport cage that my car felt a load stiffer..

Sent from my SM-G977B using Tapatalk
 

Eddie555

ClioSport Club Member
  Q7 2018 & 172 Cup.
Mmm.. Maybe thats why you're feeling some flex in your car.. mine corners quite flat, with the odd tripod in only the really tight hairpins..

Sent from my SM-G977B using Tapatalk
 

1985michael182

ClioSport Club Member
Evening clio perverts!

So my washer motor is dead I think, it's a double action one for front and rear wash. Can I swap it out for a single wash motor? No wiring issues anywhere?

Next question is where can I get the tool to remove the large plastic ring holding the pump into the fuel tank?
 

1985michael182

ClioSport Club Member
Well I figured I should really up date this.
Its turned into a bit of a coffee morning with the idle chatter so let's try and recap.

I had just finished Croft after all the hard work on the car and it was faultless.

The gripper and the role centre kit from Mark totally changed the handling, aswell as the new rebuilt Gaz and the full slicks.

20200316_174414.jpg

I had just bought a second set of 2118's which would be going black.

Lock down happened, so me and little Hitler washed the fleet
20200415_175546.jpg

20200415_160800.jpg


I then bought the PMS rear axle kit
20200505_144553.jpg


The wheel studs I had on the car when I bought it were far to long.
20200504_150320.jpg


So I ordered all new.

Next i ripped the rear axle off.
20200522_181822.jpg

It was pretty minging, considering the car has only done 47000 miles
20200521_173646.jpg


Before I could weld the new PMS plates on I needed to cut the spring hangars off and the unwanted additional steel.
I also got the axle blasted so I could make a good job of the welding.
20200524_143950.jpg

20200524_144008.jpg
 

1985michael182

ClioSport Club Member
So rear end refurb had commenced.

Everything was brown and horrid and had to be sorted for my own sanity.

20200524_145531.jpg


I had to cut the 6 bolts holding the axle carrier to the chassis and the 2 that pass through the rear bushes to the carrier as they weren't moving just seized solid so the angle grinder came out.
20200524_145538.jpg


The underside of the boot floor and chassis legs was equally as bad. Including under the axle carriers was rusting. This Will be a big problem area one day for these Mk2 clios if left unattended.

20200524_145556.jpg

20200524_145629.jpg


We will come back to the underside at later date. 😆


The 2nd set of 2118 came back perfect.

20200602_084955.jpg


Then before I knew it it was my birthday and the Mrs presented me with these..

20200602_190939.jpg

Happy days. She does listen sometimes.

Clio once again sat looking sorry for itself

20200604_183434.jpg
 

1985michael182

ClioSport Club Member
Ok so back axle

I took it to work to complete the work needed.

First off I am fitting Polybush black series bushes so the old had to come out.

20200606_113257.jpg


If you dont have access to a press or cant be bothered to wrestle with a full axle whilst trying to press them out there is only one way to do it...

FIRE
20200606_111646.jpg


Basically need to heat the centre cylinder of steel so it melts the rubber holding it in and you can then just push it out of the Bush.

20200606_112730.jpg


Next cut off the large collar

20200606_113023.jpg


And then using a hack saw or air saw cut through the outer bush casing making sure you dont cut the axle

20200606_113026.jpg


Then using a chisel or punch bend the Bush back in on itself to release the pressure and it will fall out

20200606_113147.jpg
 

1985michael182

ClioSport Club Member
Next on to the PMS kit.

I cleaned up where I had to weld as I put some etch primer on the bare axle to stop it corroding straight away.

20200606_122520.jpg


I test fitted the triangular gussets and all fitted 95% perfect, couple of little tweeks with the belt sander and I just cracked on and got them welded in.

20200606_132331.jpg

20200606_132345.jpg

20200606_142404.jpg

20200606_142433.jpg

20200606_142445.jpg


Very happy with how that came out I moved onto the new Bush cups which needed knocking into axle. Block of wood and a hammer and they push in with no problems.

20200606_142852.jpg

I had to cut a little slither out of the cup to fit with the gusset also
20200613_140817.jpg


Next was the suspension mount reinforcement.
But after thinking for a minute I decided not to weld this part in yet as I had ordered something shiney and new to replace the rusty Gaz coilovers which were to be delivered in the next couple of days. I wasnt sure if the bottom bushes would be the same width so I decided to wait.
20200606_105531.jpg


Spoiler alert

20200609_100805.jpg


To be continued
 

1985michael182

ClioSport Club Member
So what's in the box

20200609_112853.jpg


Ast 4100 is the answer, from Cooksport on their £1200 deal. I couldnt say no really.

But

20200609_112840.jpg

20200609_101404.jpg

20200609_101412.jpg
20200609_101506.jpg
20200609_101417.jpg


They turned up damaged. Now to a 'normal' person they would spray them with ACF 50 and fit them but my brain wouldnt let me.

So I called Steph at cooksport and emailed some pictures she was extremely helpful and offered a full refund.

But my brain started working again 🤦‍♂️
"How much more for 5100?" I said.

She did me an unbelievable deal and I wouldn't say no so they were ordered and a build slot booked to get me them asap.

So now I was waiting for the 5100's
 

1985michael182

ClioSport Club Member
Fast forward 2 weeks

20200701_095737.jpg


Look at the size off these bloody things!
20200701_170149.jpg


Glad I upgraded now and they came in perfect condition. I 100% recommend Cooksport, very professional and excellent customer support.

So I could now continue welding the axle up so I cover the rear coilover in tape to protect it from welding spatter and bolted it into the axle.

20200613_104933.jpg


From here you can line the other plates up, tack them and then weld the joints up.
20200613_111203.jpg


20200613_115523.jpg
20200613_115534.jpg
20200613_125316.jpg
20200613_140604.jpg


Then welded the handbrake cable brackets back on as close to their original position as possible.
20200613_140835.jpg

20200613_140839.jpg


So, that's the axle Fab complete, needs sending for powder coating next
 

1985michael182

ClioSport Club Member
Stub axles next

Sandblasted them, then used the bench grinder whire wheel
20200606_153300.jpg


Now the plan was to get them done in Zinc but this was post lockdown and the lead time was now 2 months!!!

So they would be powder coated, bagged them ready so they wouldnt brown straight up.

20200606_153323.jpg


So here's one I made earlier

20200618_135048.jpg


Something that had totally slipped my mind was suspension bolts
20200618_171225.jpg

20200618_171237.jpg


Renault wanted £180 for the bolts to refit my axle!!!!

F that, so I spoke to Scott from ProAM on where he gets fastners from and he put me onto Orbital fastners. I got every thing in 12.9 grade for £9!!!!!!

So that's my new favourite website.
 

1985michael182

ClioSport Club Member
Awesome progress.
Whats the difference between the 4100 and 5100 AST's?

Well the rears are identical but the front are totally different. Look at the size of the pistons!! Think 4100 is 22mm piston and 5100 44mm piston. 5100 is upside down shock aswell what ever that means 🤷‍♂️.

Tech guys will know more on here. Or read on cooksport site.
 

1985michael182

ClioSport Club Member
So the axle was ready, but now I needed to make its home clean and rust free so I began by stripping the fuel tank out, exhaust off and skirts.
(Note to self drain the tank prior to removing the bolts, its heavy when it lands on your chest and then pisses fuel all over you)

20200621_163545.jpg

20200621_163626.jpg


Pretty rough under there for only 47000 miles
20200621_163629.jpg

20200621_163634.jpg


The rear arches and around the filler flap also rusting.
Plan is to do everything at once.
20200621_183709.jpg

20200621_183712.jpg
20200621_183715.jpg

20200621_183717.jpg


I had to grind the nut off the rear arch liner so that will need rivnutting or just a nut and bolt.
20200628_121306.jpg


Both strut top mounts where also starting so big job ahead

20200628_121310.jpg
 

1985michael182

ClioSport Club Member
Ok so the rust needs addressing, I used the wire wheel on the grinder, wire wheels in the drill. All different attachments to get into all the the hard to reach places. I also used them lightly on the rest of the areas to key them for paint.
I also used the grinder to remove any unused threads for fixings in the ever lasting search for weight saving.

20200711_161508.jpg

20200711_161524.jpg

20200711_161529.jpg

20200711_161532.jpg

20200711_161619.jpg


Where the main hoop feet of the cage was welded in it had burnt the paint off the inside of fuel tank recess. God know how they didnt set it on fire 🤷‍♂️🤦‍♂️
So that was also to clean up.

20200711_161541.jpg

20200711_161546.jpg


The rear arches are another issue on their own. The inner and outer 1/4 panels are bonded together around the whole wheel arch and then it is single skinned on the very edge where it roles back in on itself like a U shape.
This is a perfect ledge to catch all the crap in hence why they rust so I decided I was going to grind 50% of the lip off to create a L shape. I would then wire wheel behind it as I could get in properly and I could then role the arch correctly with a hammer and dolly to seal the edge eventually

20200711_095828.jpg
20200711_161512.jpg
 

Attachments

  • 20200711_161541.jpg
    20200711_161541.jpg
    777 KB · Views: 256

1985michael182

ClioSport Club Member
Once I had removed as much corrosion as I could possibly get to and keyed all the areas up, I gave it all a good blow off with the air gun and panel wipe off.

I brushed Jenolite rust converter onto the bare metal areas and then a zinc rich primer.
20200711_161629.jpg

20200711_161651.jpg

20200711_161702.jpg

I also primed the full underside and the arches before I rolled the lips over
20200712_143513.jpg

20200711_161640.jpg


Once the primer had dried I re-seam sealed where it was required.
20200712_154213.jpg

20200712_154220.jpg

20200712_154228.jpg

Theres alot more pictures of it all but you get the idea.
Any holes that were not used any more I covered in aluminium tape.
20200712_171354.jpg

20200712_171359.jpg

Now we are all set to finish off with top coat
 

1985michael182

ClioSport Club Member
Ok topcoat.

Many of you will be shocked to hear this but I will be brush painting the topcoat.

I'm using hammerite hammered silver. Brushes on easy, covers very well and extremely durable and at £10/£20 for a tin extremely cheap!
It will clean it right up and make it easy to stay on top of and touch in when needed.

Let's face it if anyone but yourself has seen the underside of your vehicle it's all gone wrong on track 🤣

So picture time, enjoy.

20200712_191749.jpg
20200712_191805.jpg
20200712_191814.jpg
20200712_191820.jpg
20200712_191827.jpg
20200712_191840.jpg


So as you can see it has come out well. I hope I never have to do it again. I spent 3 days straight under the Fing thing. Back next and shoulders in bit, but happy I decided to do it.

I could have just schultz or undersealed it all but it wouldnt have looked as good as this.

Little parcel turned up aswell

20200717_163946.jpg
 

1985michael182

ClioSport Club Member
I think we can all agree the brush job was actually really good! I wax oiled inside the panels and down the chassis legs areas for extra protection.

I got the rear axle, AST,s and bits taken home and started building the axle up.

I greased the black polybushes up with the supplied lube and pushed them in to place, I then blocked off the ends of the axle with aluminium tape.

20200717_194109.jpg
20200717_194112.jpg


I tried to fit the axle on my own but I was going to scratch it so roped in a glamorous assistant to help which made it alot easier. I was using my brand new 12.9 grade nuts and bolts with correct sized washers from Orbital Fastners with lashing of ACF50 for corrosion protection.

20200717_200611.jpg

20200717_200619.jpg


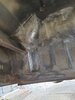
Looking good, it's at this point I noticed I had forgotten to drill out and tap the fuel tank bolts I had snapped when removing it. But I called it a night to leave for the next day.

The offending bolts..
IMG-20200719-WA0019.jpeg
IMG-20200719-WA0021.jpeg


I started by centre punching the studs, used a 3mm drill bit with plenty of lubricant and a slow/medium drill speed so I didnt burn the bit out. Once drilled through I moved up to 4mm, 5mm, 5.5mm then taped the treads out. Simples

IMG-20200719-WA0024.jpeg


Next, I had the waxoil gun sat in the sun whilst I drill the studs out this was to warm it up and make it nice and runny so I could really spray it liberally on to the inside of the axle arms using the 360° spray nozzle.

IMG-20200719-WA0026.jpeg


Again trying to stop corrosion.

I then inboxed the beautiful AST 5100's ready to fit. I stripped them down in terms of removing the springs and top cup. This is so I could get to the strut body and coat them in ACF50 properly making sure I moved the platform nuts to be able to get all the treads coated.
Built them back up and mounted them to the axle with my nice new bolts.

20200719_131517.jpg


Again I used aluminium tape to block the axle hole off. Looking very professional now, the springs are very close to the chassis but I'm sure AST know what they are doing.

On to the top mounts, I've got black series bushes to fit but I found out I had a slight problem. The standard top mount washer is smaller than the Polubush one. For a normal clio this isnt a problem but for a weld in cage clio linked to the suspension top mount where the Bush sits inside the cage the washer and Bush was too big to fit inside the cage tubing.

20200719_125127.jpg


So to over come this I used a Stanley knife to cut the excess off the polybush then used a belt sander to finish it off nice, smooth and even. I used the original washer which fits inside the top cup of the cage and hey presto it now fits. But.... at this point I realised AST dont supply a top nut for the rear struts. It's also a funny size at 9mmx1mm thread. Quick ebay search brought up some push bike nuts the right size so ordered them. Came the next day fitted them and torqued up all the bolts so far.
 

1985michael182

ClioSport Club Member
The front AST was next, safer on the car rather than kicking around.

Again I dismantled them so I could get ACF50 into all the threads before putting them back together and fitting them to the car.

IMG-20200719-WA0038.jpeg


Now as good as they are at making suspension components they are shocking at supplying fixings to actually attach them to your car 🤦‍♂️

20200719_164952.jpg


OCD would not allow this so out the tape measure came.

20200719_164854.jpg
20200719_164901.jpg


Not perfect but alot better!
20200721_210433.jpg


The 9mm nuts for the rear struts turned up aswell.
20200721_192202.jpg


So with the new suspension all mounted I decided to remove the stupidly long wheel studs. I ordered the Bimmec set which I was still waiting for.
IMG-20200719-WA0041.jpeg


Then whilst looking around the car I removed the old tow hook, decided I should order new exhaust bushes and clean up the Gaz suspension I had removed to sell.

20200719_164051.jpg
20200719_165512.jpg
20200719_164103.jpg
 

1985michael182

ClioSport Club Member
PMS rear stub axle bolt kit arrived which meant I could fit the stub axles at last.

When they were powder coated despite me saying please can you mask the mating surfaces out they didnt bother 🤦‍♂️

20200719_131504.jpg


So I took the DA sander home with some 80grit, 180 and 240.

20200720_183441.jpg
20200720_183444.jpg


ACF50 on all bare metal surfaces and torqued her up to spec. I also measured the rear struts at 100mm from the spring nut to the top thread as a base setting. Might be too high ot to low we will soon find out.
20200720_192626.jpg
20200720_192631.jpg
20200720_192639.jpg


I cant fit my rear calipers as they are at Biggred getting rebuilt and silver stove enamelled. Cant fit my tank because I need to paint the fuel filler neck area/rear 1/4's so all I can do is fit the wheels, call my mate, and trailer the car to work to start the bodywork.
20200723_202629.jpg

20200724_211122.jpg

Lower than your nans t1ts
20200724_211646.jpg

Loaded and en-route to work
20200725_100804.jpg


Top