ClioSport.net

This is a sample guest message. Register a free account today to become a member! Once signed in, you'll be able to participate on this site by adding your own topics and posts, as well as connect with other members through your own private inbox!

  • When you purchase through links on our site, we may earn an affiliate commission. Read more here.

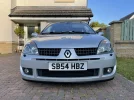
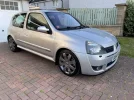
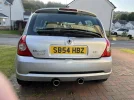
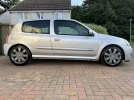
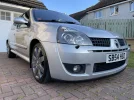
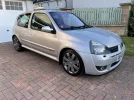
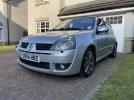
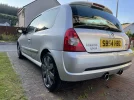
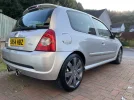
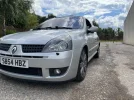
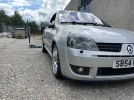
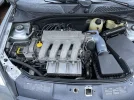
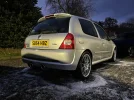
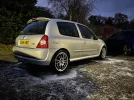
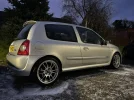
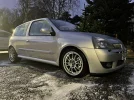
My Titanium silver 182

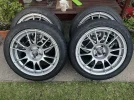
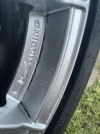
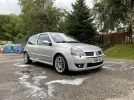
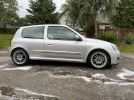
Top is what i have on now but still have the Turinis.Have also had a set of silver TD's lower photo.They do drive a bit better on 15's but nothing to major,many change for tyre reasons costs in 15's.

Middle pic is my favourite setup, looks so fresh. Again, absolutely no bias on my part!
 
Update on the clio… had both sides of the car resprayed along with the bonnet. Added small mud guards to avoid gravel rash. Gave it a wash and wax and cleaned the front seats for the first time.
 

Attachments

  • 5571DDDA-29E6-4725-A228-A7DCA742522F.webp
    5571DDDA-29E6-4725-A228-A7DCA742522F.webp
    1.7 MB · Views: 177
  • CBF617F0-7B31-478E-808D-31396C87D585.webp
    CBF617F0-7B31-478E-808D-31396C87D585.webp
    2.2 MB · Views: 184
  • AFD5988D-6953-4A92-986B-09572B26F988.webp
    AFD5988D-6953-4A92-986B-09572B26F988.webp
    1.5 MB · Views: 172
  • 2C71A9C0-89CF-40C9-A060-9D24A219A826.webp
    2C71A9C0-89CF-40C9-A060-9D24A219A826.webp
    2 MB · Views: 191
  • 84700FA9-50FE-48E8-B5E7-671A12C52BF3.webp
    84700FA9-50FE-48E8-B5E7-671A12C52BF3.webp
    1.7 MB · Views: 190
  • 25429CA6-0CEA-4F47-A695-358BBA0B1FBC.webp
    25429CA6-0CEA-4F47-A695-358BBA0B1FBC.webp
    2.2 MB · Views: 179
  • 7B04E95B-AACB-4D51-9B31-EA0F6BAB8D72.webp
    7B04E95B-AACB-4D51-9B31-EA0F6BAB8D72.webp
    2.2 MB · Views: 177
  • 84F88717-F251-4A78-AEC9-5A8460CAE326.webp
    84F88717-F251-4A78-AEC9-5A8460CAE326.webp
    1.6 MB · Views: 189
  • BBFE02AC-3A26-4E61-B2AF-578166F79259.webp
    BBFE02AC-3A26-4E61-B2AF-578166F79259.webp
    1.6 MB · Views: 172
  • EC3EC48A-C745-4BF6-9A72-98BADEFD88B8.webp
    EC3EC48A-C745-4BF6-9A72-98BADEFD88B8.webp
    1.5 MB · Views: 189
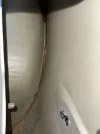
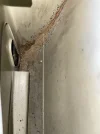
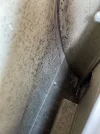
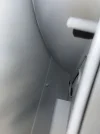
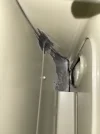
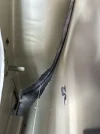
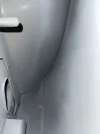
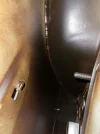
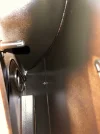
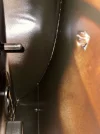
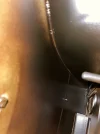
I removed the rear quarter panel interior cards to have a look at the inside of the arches for corrosion and this is what I came across. The drivers side has no corrosion but passenger side has some which I will attempt to remove with a dremel this week. I’ve already given it a wire brush but definitely need the dremel to get into the cracks and hard to reach areas…

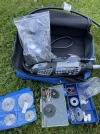
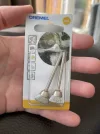
Can someone recommend which attachments would be best for this job to use along with my dremel (pictured below) please?

Cheers.
 

Attachments

  • 9D302A77-325D-41C5-92FA-178100945659.webp
    9D302A77-325D-41C5-92FA-178100945659.webp
    455.4 KB · Views: 178
  • 3FD86A29-ADDE-4510-9174-564593A9F3E1.webp
    3FD86A29-ADDE-4510-9174-564593A9F3E1.webp
    737.3 KB · Views: 199
  • 7F5AA539-8253-43A6-A4CA-3417F126DE99.webp
    7F5AA539-8253-43A6-A4CA-3417F126DE99.webp
    650.7 KB · Views: 190
  • 090D2EE2-1F1A-42D7-9ECC-429F1181275A.webp
    090D2EE2-1F1A-42D7-9ECC-429F1181275A.webp
    2.3 MB · Views: 218
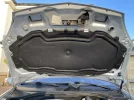
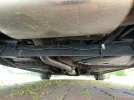
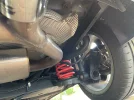
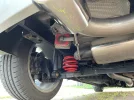
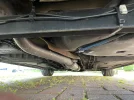
A few more photos of the underside and interior for the record… need to tidy up a few bits and pieces but it’s a daily and not a garage queen!
 

Attachments

  • 13CC9B7B-6CF4-4E3F-9F1B-C57B4150EA89.webp
    13CC9B7B-6CF4-4E3F-9F1B-C57B4150EA89.webp
    1.8 MB · Views: 195
  • B704CD34-DD3E-4DFC-896A-C33BF8B19A43.webp
    B704CD34-DD3E-4DFC-896A-C33BF8B19A43.webp
    1.1 MB · Views: 179
  • 24ABA379-81BE-4EA3-BA35-B88ECA0A4719.webp
    24ABA379-81BE-4EA3-BA35-B88ECA0A4719.webp
    994.9 KB · Views: 203
  • A14DA625-DCD1-4BF4-BA80-19CFB47D9979.webp
    A14DA625-DCD1-4BF4-BA80-19CFB47D9979.webp
    936.1 KB · Views: 179
  • 86D656F8-F8AD-4A6E-B7ED-890B054A5610.webp
    86D656F8-F8AD-4A6E-B7ED-890B054A5610.webp
    1.7 MB · Views: 199
Looking really tidy mate!

Good work on the rear door cards, mine were pretty clean but i found the attachment highlighted below to be pretty good at getting to the hard to reach areas. You can get miniature dremel versions aswell
1627385735002.webp
 
Looking really tidy mate!

Good work on the rear door cards, mine were pretty clean but i found the attachment highlighted below to be pretty good at getting to the hard to reach areas. You can get miniature dremel versions aswell
View attachment 1550263
That’s great thanks. I went into the RS website and found a kit which should do the job nicely:


or in B&Q they have this but I’m not sure it’ll get into the cracks:


cheers!!
 
Last edited:
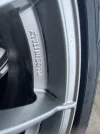
Ended up getting these from b&q. Will see how it goes.
 

Attachments

  • image.webp
    image.webp
    931.6 KB · Views: 166
Great updates.

So many Clio owners appear to be on the path of protecting the inner arches, myself included.

Do you mind me asking how much you paid for the paint work?
 
Great updates.

So many Clio owners appear to be on the path of protecting the inner arches, myself included.

Do you mind me asking how much you paid for the paint work?
900 for bonnet, both sides of car, side skirts. Included inside petrol cap, sills, removing rear bumper and removing and painting side bump strips.

I wouldn’t have gotten all that done because it just wasn’t needed, however I decided to try and paint it myself to start with and I couldn’t blend well so I decided to do the full rear quarters on both sides. That didn’t go to plan since the clear coat turned a milky colour and there was a vane like pattern all over the rear quarters. That’s where I gave up and handed it over to a professional!!
 
Purchased an old set of OZ Ultraleggeras off eBay size 16”. They are in good nick apart from some welded on brake dust/deposits. Anyone got any ideas on how to remove this stuff?

I was thinking tardis wheel cleaner or dry ice blasting. What do you guys think?!
 

Attachments

  • 4884D2B9-1D27-4EC9-B503-1886749CA03C.webp
    4884D2B9-1D27-4EC9-B503-1886749CA03C.webp
    2.4 MB · Views: 180
  • 150C5BDA-E0C2-4B87-A69B-9FDDD4155F0A.webp
    150C5BDA-E0C2-4B87-A69B-9FDDD4155F0A.webp
    822.2 KB · Views: 180
  • 19F481F2-27AD-4C46-AAB7-C2836C99BB5D.webp
    19F481F2-27AD-4C46-AAB7-C2836C99BB5D.webp
    994.3 KB · Views: 187
Wheels cleaned to as best as I could get with the products I had. Need something stronger to get the baked on brake dust off. They need a polish to get a bit of shine back too.
This is them fitted. I really like the design, lightness and the fact they allow a lot more cooling for the brakes. Excuse the lack of air in the tyres when some of these photos were taken! The tyres also need some tyre dressing too…
 

Attachments

  • B544F027-9CEF-464D-829C-2C8981B1D1EB.webp
    B544F027-9CEF-464D-829C-2C8981B1D1EB.webp
    3 MB · Views: 211
  • E6EF7744-FB6F-4827-B9E3-387136DB3B82.webp
    E6EF7744-FB6F-4827-B9E3-387136DB3B82.webp
    2.6 MB · Views: 214
  • 1D73F6BA-3265-4191-ABAD-8D7E6524686C.webp
    1D73F6BA-3265-4191-ABAD-8D7E6524686C.webp
    1.9 MB · Views: 191
  • EA9AD0F0-D92F-44EE-9A61-84FE06BC36DA.webp
    EA9AD0F0-D92F-44EE-9A61-84FE06BC36DA.webp
    2.2 MB · Views: 205
It looks really well on those wheels! Guessing 16’s as I think the 15 version looks rubbish. This just looks right!
 
It looks really well on those wheels! Guessing 16’s as I think the 15 version looks rubbish. This just looks right!
Yeah these are 16’s. Eibach red lowering springs on standard cup shocks. Would look better lower but it’s my daily plus I’m getting older so don’t want to look like a boy racer 😝
 
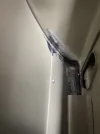
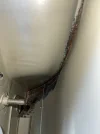
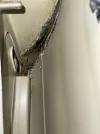
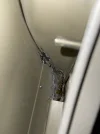
Started tidying up inside the rear quarters today with a steel wire brush on a dremel. Then smeared some bilt hamber deox gel over the area to get rid of the remaining corrosion. First 2 pics without gel, second 2 where gel is starting to react with the rust.
 

Attachments

  • 190A3E99-08D6-48A1-AEC9-D54ED0C4056A.webp
    190A3E99-08D6-48A1-AEC9-D54ED0C4056A.webp
    481.8 KB · Views: 195
  • F1B485EF-B5EB-40DA-9B51-D6084944DDBF.webp
    F1B485EF-B5EB-40DA-9B51-D6084944DDBF.webp
    522 KB · Views: 208
  • 1863BB05-844A-4158-9643-064B3E351488.webp
    1863BB05-844A-4158-9643-064B3E351488.webp
    463.7 KB · Views: 199
  • 116AA38C-0732-45B9-8604-76C7F711C8EB.webp
    116AA38C-0732-45B9-8604-76C7F711C8EB.webp
    569.1 KB · Views: 193
Have others used bilt hamber electrox on the bare metal followed by the bilt hamber S50 anti corrosion cavity spray wax?
 
Last edited:
Drivers side inner rear quarter surface rust completely removed and bilt hamber electrox zinc primer sprayed.

Will be finishing off the passenger side tomorrow which had more corrosion but I’ve managed to take care of it all thank goodness! Will share photos of that too.

Once the Electrox zinc primer dries, I’ll spray some bilt hamber S50 cavity wax inside both rear quarters and hopefully that’ll keep the Clio going strong for another few years!
 

Attachments

  • 8F635EB3-C5FF-42C1-94A3-9B035CF20C9B.webp
    8F635EB3-C5FF-42C1-94A3-9B035CF20C9B.webp
    431.8 KB · Views: 180
  • 91E6A93F-42DE-4E3F-8239-D61F5EAB3D9F.webp
    91E6A93F-42DE-4E3F-8239-D61F5EAB3D9F.webp
    402.5 KB · Views: 187
  • 1E3D2C11-977A-41F9-ABEB-48F082E44754.webp
    1E3D2C11-977A-41F9-ABEB-48F082E44754.webp
    330.9 KB · Views: 184
Passenger side after surface corrosion removed using a little brush on a dremel + a fair amount of bilt hamber deox gel. Good result I think considering how it started off (see above for before photos). Will wait until this is completely dry and then spray some bilt hamber zinc primer (electrox) and bilt hamber S50 cavity wax over the top to ensure a corrosion free environment going forward.
 

Attachments

  • 42EDC8C4-A4B8-417D-9335-F425112F5E95.webp
    42EDC8C4-A4B8-417D-9335-F425112F5E95.webp
    382.1 KB · Views: 156
Passenger side after surface corrosion removed using a little brush on a dremel + a fair amount of bilt hamber deox gel. Good result I think considering how it started off (see above for before photos). Will wait until this is completely dry and then spray some bilt hamber zinc primer (electrox) and bilt hamber S50 cavity wax over the top to ensure a corrosion free environment going forward.
…and sprayed with 2 coats of bilt hamber electrox…
 

Attachments

  • DCC53DF0-82B9-4644-9210-E997CF9A2EA3.webp
    DCC53DF0-82B9-4644-9210-E997CF9A2EA3.webp
    616.7 KB · Views: 169
Sprayed the bilt hamber S50 wax inside both rear quarters today…
 

Attachments

  • 50E29501-A609-44C8-84B3-C4163C8746D3.webp
    50E29501-A609-44C8-84B3-C4163C8746D3.webp
    1.4 MB · Views: 197
  • 22834110-E115-4C71-B3A2-CA4B0710EAE0.webp
    22834110-E115-4C71-B3A2-CA4B0710EAE0.webp
    785.2 KB · Views: 179
  • 6B8571F5-B292-498D-889A-95C7F7BC990A.webp
    6B8571F5-B292-498D-889A-95C7F7BC990A.webp
    985.7 KB · Views: 159
  • 73AB3D33-3FEF-4670-B1BD-BCB478BC3BFB.webp
    73AB3D33-3FEF-4670-B1BD-BCB478BC3BFB.webp
    523.7 KB · Views: 184
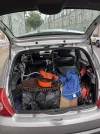
Making full use of the clios impressive storage capacity 😝
 

Attachments

  • B5B865D2-B21B-4D16-A388-1E374FCD50C9.webp
    B5B865D2-B21B-4D16-A388-1E374FCD50C9.webp
    1.3 MB · Views: 178
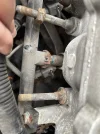
Anyone know of the best way to remove the right hand side stud which is there to hold on the alloy injector cover? Anything I need to be careful/aware of when removing?

(As you can see, some nugget has over tightened the nut and it has snapped the end of the stud off. I’ve ordered a new one to replace since the cover was starting to rattle due to not being fixed on properly.)
 

Attachments

  • 6F135566-37A0-4248-9553-DD6642993EC7.webp
    6F135566-37A0-4248-9553-DD6642993EC7.webp
    1.2 MB · Views: 145
  • C59DD159-6BA6-4D43-A074-620FE7CE3F12.webp
    C59DD159-6BA6-4D43-A074-620FE7CE3F12.webp
    1.2 MB · Views: 157
Anyone know of the best way to remove the right hand side stud which is there to hold on the alloy injector cover? Anything I need to be careful/aware of when removing?

(As you can see, some nugget has over tightened the nut and it has snapped the end of the stud off. I’ve ordered a new one to replace since the cover was starting to rattle due to not being fixed on properly.)
Managed to get a 10mm spanner on there from below and backed it off without any issue. Will replace with new from Renault when it arrives. Might get the cover vapour blasted to tidy the engine bay up a little.
 
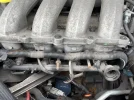
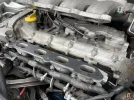
Made some progress on fitting the following:

- New NGK spark plugs
- New inlet manifold gasket
- New studs and nuts for fixing the injector cover on

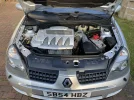
Problem is that now everything is back together, it is misfiring as if running on 3 cylinders… Ps I have confirmed that the HT leads are connected in the correct order. Will have to investigate tomorrow and see.

I suspect that the leads for the plugs are not fully seated down on top of all 4 the plugs? Any ideas? Ps photos below were taken during and after the new plugs were installed.
 

Attachments

  • B6F757E6-0BC2-4E5C-A310-0E6AB07883E1.webp
    B6F757E6-0BC2-4E5C-A310-0E6AB07883E1.webp
    1.9 MB · Views: 168
  • E26880DF-F784-4E1B-83A8-370354C7CE19.webp
    E26880DF-F784-4E1B-83A8-370354C7CE19.webp
    1.8 MB · Views: 179
Last edited:
It turns out that the brand new 2nd plug in from the drivers side is completely black… probably since when I first connected the HT leads to the plugs, they were connected in the wrong order and when I started the car it ran rough and there was a pop from the exhaust - obviously I switched off the engine quickly and found out what was wrong.

I connected the leads (actually different ones (OEM Renault) this time) in the correct order, making sure they seated properly with a positive click.

Connected everything up again and still have the issue of the car sounding like it’s running on 3 cylinders…

Will this be because I haven’t replaced the black spark plug? I did try to clean off as much of the carbon as possible before reinstalling with some kitchen roll which did remove some of the black carbon but not all (this is because I didn’t have spark plug cleaner or anything similar available.

Do you think the plug is now the issue or could I have damaged something else?
 
I found out (with lots of help from the forum members!!) that it was one of the injectors which had stopped working. Ordered up x4 new OEM injectors from Renparts and installed today. Car running great and much smoother idle with them and the proper NGK plugs installed.

Had a dog bone mount fitted with the purple power flex bushes. Gear change feels a lot more positive and less sloppy.

Car failed MOT on handbrake so the rear passenger brake calliper was replaced for a new one. Problem solved and car passed MOT.

Next things to address are:
- Exhaust heat shield tidy up.
- Weld my piper stainless steel exhaust mount which has snapped.
- Remove and clean up sticky interior plastics surrounding front electric window switches.
- Fit brass bushing for gear selector to tighten up the gear change.
 
A few photos of the Clio after a quick wash this afternoon.
 

Attachments

  • 2002E18B-C7FF-498D-9610-FE221A3F770B.webp
    2002E18B-C7FF-498D-9610-FE221A3F770B.webp
    1.3 MB · Views: 177
  • F4DC657E-B7C7-40E8-9A13-71A6C95DD560.webp
    F4DC657E-B7C7-40E8-9A13-71A6C95DD560.webp
    1.3 MB · Views: 180
  • 1D6139D7-8E6D-4003-8C71-FDD8C35F216C.webp
    1D6139D7-8E6D-4003-8C71-FDD8C35F216C.webp
    1.1 MB · Views: 162
  • 94BE8F8C-A65C-47F3-9883-EB62CCB9CDF0.webp
    94BE8F8C-A65C-47F3-9883-EB62CCB9CDF0.webp
    1.9 MB · Views: 180
Back
Top