ClioSport.net

This is a sample guest message. Register a free account today to become a member! Once signed in, you'll be able to participate on this site by adding your own topics and posts, as well as connect with other members through your own private inbox!

  • When you purchase through links on our site, we may earn an affiliate commission. Read more here.

Mark 1 Track Car - Trophy Red 172 Project

New addition to pop on soon, big thanks to Ant at ACS for hooking me up with some shiny shiny sexy sexy kit!
So add this, get the geo done (me half pissed with some string probably) and once the welding is done I can get a trackday booked!
oh and fuel lines to sort this weekend hopefully!
cheers
Ben

IMG-20170507-WA0026_zpspaqa0qrp.jpg


DSC_2080_zps58oi8y43.jpg


DSC_2087_zpszc9vbxxw.jpg
 
where can i get this from? With "ACS Motorsport" i found racing headsets systems only. I know this kind of parts from pure Motorsport. but the dont have it anymore.
 
More updates :smile: love summer, crack on and get stuff done!

changed the positive terminal cover on the odyssey so thought would be wise add one to the track car too, as the terminal is now sideways mounted its easily shortable when working on the flywheel end of the engine, safety first!

DSC_2146_zpsbfmi2me9.jpg


DSC_2147_zpsnlujlblk.jpg


then replaced the cam sensor seal as it was pissing oil out all over

DSC_2148_zpsenuqnohy.jpg


soggy old one

DSC_2149_zpsmdmfjajt.jpg


bagged up new one

DSC_2150_zpsjp7glaxq.jpg


Cat hiding trying to help in a random one!

DSC_2151_zpsviqjhoqe.jpg


marks on the casting from a presumably messed up previous attempt, hope new one seal!

IMG-20170520-WA0038_zpsppuhrdyi.jpg


new seal fitted

DSC_2153_zpshw2wequk.jpg


sensor refitted

DSC_2154_zpsf6gfmjji.jpg


Breather plate as standard

DSC_2178_zpsji8takgr.jpg


then chopped down and refitted

_20170521_163530_zpsvmd1zf2r.jpg


air filter swap to fit behind headlight better without pressing on the foam of the pipercross

DSC_2179_zpsjqmri79v.jpg


green one sounds meaner as well even just static revving on the drive

DSC_2182_zps4t5tndrw.jpg


pikie respray of cam cover next, couple coats of primer then teknik grey alloy wheel paint, hopefully hold up okay but we'll see as zero proper prep as I'm super lazy!

DSC_2183_zpscdtr62vo.jpg


DSC_2185_zpsbnwvnu04.jpg


and finished result with new magnecor leads fitted (controversial I know but they were kicking about so figured why not to continue the random colour theme!

DSC_2187_zpsmidxdpes.jpg


DSC_2188_zpsscftn385.jpg


cheers

Ben
 
So fuel system this weekend, ever since I've had the car its been on a lash up of mk1 and 172 lines.

Bodged together, hardline into flexi directly, etc. Fuel filter last changed in god know when, so something needed to be done.

Plan is to remove all the old stuff, replace with internally routed braided lines and just clip connectors onto original fixings at rail end and pump end. No need for fanboy top fuel drag racing spec connectors and hoses, its just a cheap track car!lol!

So step one, rip the old s**t off the car, ensure remember which goes where to what :)

DSC_2253_zpstjt2hhfr.jpg


DSC_2259_zpsyjix8kko.jpg


usual start off well, end up in mess work area!lol.

DSC_2254_zpsdfce24d8.jpg


Passenger seat out to get at line routing

DSC_2255_zpswn6pgvrc.jpg


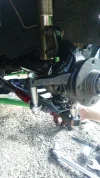
Pita to work with braided line, so I drilled two holes into the rear of the car to make a direct line to the in tank sender unit. One for feed one for return, first line in to mock up vague routing from back to front of cabin and through bulkhead to engine bay.

DSC_2256_zps9ikqr03l.jpg


DSC_2257_zpszmppys79.jpg


DSC_2258_zpsp8tdog2f.jpg


Then in all honesty just cracked on as it was taking a while cutting, routing, trimming and swearing at the damn things!!lol!

Done, it'll do for me, checked and had one leak at tank end as I forgot to do up a clip, nipped it and sorted fired up first go.

Used pipe spacers to keep the lines neat, all I need now is to grab some P clips to fix them down to the chassis.

DSC_2262_zps087eq94h.jpg


DSC_2260_zps2cgxb86a.jpg


DSC_2261_zpsk51h5yay.jpg


DSC_2263_zpsjnvbkhxc.jpg


DSC_2264_zpszfigcitb.jpg


cheers

Ben
 
Well, MOT failed as expected on welding, two more patches needed and the sill on the drivers side which I knew about.
Only other issue in 13 months of being laid up is the wiper motor decided to seize so need to source a new one of those too.

So should hopefully have her back and on the road in next week or so :-) properly excited now to drive the thing, been too long!
 
Quick update, got an MOT on her and sorted the welding to get it. Buying some red tomorrow to rattle can it cuz trackcar

Also wrote a list of stuff to do before Cadwell on the 13th of next month :-)

DSC_2324.webp
DSC_2326.webp
 
Paint in hand

DSC_2347.webp


rattle can job like a boss! zero f***s given ;-)

DSC_2350.webp


DSC_2352.webp


Mess all over the place as ever, working neat is not in my nature! despite initial best intentions, the excruciating heat didn't help matters in all honesty!

DSC_2358.webp


painted the scuttle for about the 23rd time, need to strip back the old paint and do it right one day, but i'm impatient!

DSC_2361.webp


and pads that I thought were on their last legs......not so much! CL RC6's and appear to be like new still, lol! bonus!

DSC_2353.webp


Cadwell is all official now too, booked day off work and booked the trackday itself as well! miiiiiiint!

cheers

Ben
 
So

with Cadwell booked for 13th July and the MOT passed, figured it was time to sort the roll centre kit and fit that.

First job was to remove the hubs for cleaning and painting, I love working on this car these days, everything has been off and anti seized and Powdercoated etc so relatively clean and quick to work on with very few 'nasty' surprises :)

Also decided to drain the box oil and remove the shafts to refurb them as well, may as well go all out!

in bits:
DSC_2390_zps12uzkgmw.webp


some bits
DSC_2391_zpsm3l3tjdb.webp


hubs

DSC_2396_zpsvnogxodn.webp


bit of a tickle from the wire wheel on the drill later

DSC_2398_zpshdkbtuom.webp


lick of hammerite hammered black paint

DSC_2400_zpsn5qaaky5.webp


both done

DSC_2406_zpsodsc83oh.webp


similar treatment for the shafts

DSC_2433_zpsp6xdfqmc.webp


and end of post, lol! got to split it up now as adding pics direct which is max 10 so I'll break it up into logical sections. Damn you photobucket!!!
 
So onto the fun bit......roll kit install!

first and foremost, its lovely looking bit of gear, very rare for me to splash out on new stuff in all honesty as i'm basically tight!

unboxing is fun and Ant has included some great instructions which make fitting the kit a doddle on the drive with basic tools. best part being no modding the hubs, this is a straight swap for the o/e kit, so if the old stuff comes off, the new goes on! didn't even need tech support from @ACS_Motorsport ;-)

only slight thing to note is the Williams rack on the mk1 I have is a female inner tie rod fitment, so I had to swap the inners for some mk2 clio ones with the male inners. Had to be earlier sport of poverty spec model too as the 182 cup inners are wider and I had set of those and set of phase 1 172 kicking about and for my application the 182 were too long.

so, bit of Loctite, bit of anti seize and a few clicks on the torque wrench as she was fitted! pics!!

kit as boxed

DSC_2432_zpspriq0l5h.webp


tools

DSC_2436_zpsbfvoxljh.webp


lower ball joint mounted to hub

DSC_2437_zps2opoym0e.webp


DSC_2439_zpsigrhwzed.webp


and mounted to car, it was very quick and easy to do and I just used a jack to jack up under the bottom joint to lift it against the arb tension to the wishbone

DSC_2440_zpsq1cc1uay.webp


DSC_2443_zpswqvnabnv.webp


DSC_2446_zpsyjtz9ct9.webp


after that, I decided to just smash all the camber I could on for a giggle as I need to geo the car properly anyway once I have some new tie rods which @ACS_Motorsport is also supplying for me :)

DSC_2451_zpsymdfj2ot.webp


DSC_2453_zpsmwy7ckee.webp
 

Attachments

  • DSC_2441_zps3zn4rfts.webp
    DSC_2441_zps3zn4rfts.webp
    78.6 KB · Views: 156
Next I refilled the box oil and as the car had had an engine oil change recently also, decided to treat it to new header tank and some coolant too :)

tank fitted

DSC_2403_zpshj2ukgse.webp


I then flushed the system, removing most of the pipework to get rid of as much of the old coolant as I could. then filled with nice new type D

DSC_2405_zpsqfc6wnei.webp


DSC_2408_zpsxpxomxn5.webp


and the engine bay as it stands now

DSC_2409_zpslfjkysn0.webp


Had some R888's kicking about, few track days left in them so slung them on some willy wheels I have

DSC_2389_zpsdhrrrdak.webp


and then weighed all 3 sets of wheels, just noticed one weight didn't show but all recorded below!

DSC_2447_zpsslpbpzk6.webp


DSC_2450_zpszkbl96ew.webp


DSC_0077_zpsctgobxvb.webp


1: 15" Speedline Maracanã, Nankang NS2-R Tyres (195/50 R15) - 17.3Kg
2: 15" Speedline Williams, Toyo R888 Tyres (205/50 R15) - 15.8kg
3: 15" OZ Superleggera, Michelin Slicks (205/50 ish equivalent) - 11.3Kg

so 6kg per corner saved with the slicks, 24kg total! big big unsprung weight save there!
 
so, car back together, waaaaay to much camber on and tracked by eye on a wonky drive, I grabbed my phone, taxed the sucker and blasted off out into Derbyshire!!!

what a motor!!! drove awful, pulling all over the place and tramlining like a right git, so no review of the ACS kit yet as I badly need to geo the car, get it to 2.5 deg neg camber and 10 mins toe out and then I'll review for @ACS_Motorsport . There was glimpses though on my little jaunt out, the turn in felt incredible, so much so I nearly stuck it into a wall on the inside of a very tight corner on the little test route I use, it just turned the second I touched the wheel.....so I'm very very excited to see how it goes once geo'd and on slicks at Cadwell.......ooooooooo!!

So couple of pics, first one is from when I first got the car out of storage and then the rest are from Sunday evening as she stands now, 3 years or so on!

cheers

Ben

DSC_4688_zpsfocxqmop.webp


DSC_2454_zpsfjrzotlr.webp


DSC_2457_zpsvlpslzkq.webp


DSC_2458_zps7zae7t1e.webp


DSC_2463_zpsyfwlrljk.webp


DSC_2464_zpsju2k8pik.webp


DSC_2465_zpso9dj9kst.webp
 
Really got me tempted by an ACS RC Kit now, looked really well made, almost a shame to fit it and screw those dirty dirty rods into!

You booked Cadwell yet matey, can come for a passenger lap and see how it's fairing :-)
 
Loving this, everytime I come and have a look at this thread makes me go and have a look at 16v's and Williams for sale :smile:
 
Back
Top