ClioSport.net

Register a free account today to become a member!
Once signed in, you'll be able to participate on this site by adding your own topics and posts, as well as connect with other members through your own private inbox!

  • When you purchase through links on our site, we may earn an affiliate commission. Read more here.

Niall's BG 182


plees

ClioSport Club Member
  S/C Iceberg 172 Cup
Fuckin hell mate you'll be sub 2 minutes, need a passenger ride in that thing. When are you next at Oulton?

Hopefully mate! Yeh your welcome to jump in if your about. I've not got anything booked at Oulton yet but i will be doing soon. Im at Croft on the 22nd August @JamesBryan
 

Niall

ClioSport Club Member
Another update.

With the trackday on 23rd August booked, it was time to do a few bits to make sure the car was ready. Mostly in the brake area.

  • Brake Callipers rebuilt with Bigg Red Seal kit, painted with high temp silver Aluminium paint
  • Motul RBF 660 brake fluid added
  • Brake ducting added
  • Top brake light replaced
  • Replacement Toyo R888 track tyres bought and fitted to track wheels
  • Full car DA polished

So first on the list was the brake rebuild. This was sparked by one of my rear callipers being either ceased or just not as effective as it should have been, but the rest of them had seen better days (still worked well enough, but not as good as they could have been as I found out) so it's always a good thing to do. The plan was to take them apart, clean them up inside and out, clean the pistons and bores up, grease the pistons/sliders etc, replace the seals, and paint with HT silver paint for a fresh OEM look.
36074823133_17d3c9d64d_z.jpg
BG 182
by Niall97, on Flickr

Here were the callipers as they were, then we got them all off the car.
36721492612_61eb50846f_z.jpg
BG 182
by Niall97, on Flickr
36074825853_a342b4b5b0_z.jpg
BG 182
by Niall97, on Flickr
36486984770_a798e2fd67_z.jpg
BG 182
by Niall97, on Flickr
36708479542_b4d58fd8b0_z.jpg
BG 182
by Niall97, on Flickr
And one of the rears with Piston screwed out, not many people do the rears so I thought it might be interesting to see.
36881270745_c1fd52b755_z.jpg
BG 182
by Niall97, on Flickr

After using a drill bit wire brush and some manual brushing, we set about spraying them with the old seals in place so it didn't matter if we sprayed them. They were sprayed with the Halfords Aluminium Silver HT paint, rated to 500 degrees C, so would stand up to track temps better than Hammerite or similar.
36071040233_ec4d035400_z.jpg
BG 182
by Niall97, on Flickr
36708495302_3bdaf3e7a5_z.jpg
BG 182
by Niall97, on Flickr

Quick pic of one of the rears all painted and the new seals in place, along with my stainless bleed nipples. Looking good!
36879474765_472430c2e1_z.jpg
BG 182
by Niall97, on Flickr

Rears on the car.
36741420811_03cbcff0ab_z.jpg
BG 182
by Niall97, on Flickr

And fronts on.
36071039013_4032218a04_z.jpg
BG 182
by Niall97, on Flickr

Lots of shiny new parts under here now!
36071042133_7e2564ea06_z.jpg
BG 182
by Niall97, on Flickr
36743729691_4178e7ff23_z.jpg
BG 182
by Niall97, on Flickr

Then a before and after of the fronts, looking a lot fresher!
36509772190_22e049444c_z.jpg
BG 182
by Niall97, on Flickr

Then time to flush the old ATE Type 200 out, and in with the Motul RBF660. Should stand up to track work!
36883564655_a9d8456f74_z.jpg
BG 182
by Niall97, on Flickr

And with that all done, I took the car for a drive the next day and what an improvement. Pedal felt lovely and solid, braking force was very very strong, clearly the lack of resistance with everything being free and working as it should made all the difference. I didn't think they were bad before, but they're certainly noticeably stronger now. Pedal is really nice with the new fluid too, true test was going to be the track day of course.


Next up was changing the top brake light. I noticed mine had stopped working from a video I had of the car, it was working a while back though because I had another video where it was, so it was time to change. So I ordered a new one since you can't really change the LEDs, another nice new fresh part anyway so it's not all bad.
36741424111_a8ff2cc7be_z.jpg
BG 182
by Niall97, on Flickr
You can see how faded the old one (bottom) was over time, with moisture and dirt getting into it it looks slightly darker than the new one. Much fresher now.
36487042750_be72f81a15_z.jpg
BG 182
by Niall97, on Flickr


Next job was the brake ducting, something I'd wanted to do for a while for track. Added bonus is the front end looks much more aggressive with the ducts too, love it.

Bought the modified trims and bass ports from a guy I know not far from me, with his old ducting in place. However, it was orange inside and would look a bit garish on my car, so this was replaced with some black stuff from Deemon Tweeks, still 102mm as before, flexible stuff too to make it easier to route.

Trims, ports and ducting as I bought it.
36879463205_ec6c72767d_z.jpg
BG 182
by Niall97, on Flickr
New ducting on.
36072726253_1337a960c3_z.jpg
BG 182
by Niall97, on Flickr

After modify the bumper to make it fit through (brackets behind the trim for the fog lights removed), next up was moving the horn. I managed to swivel it round on the bracket, and then switch the horns round so it'd fit. A pretty neat solution to completely moving them! (Excuse the blurry picture, almost forgot and took it quickly)
36483156660_14e2ea2b24_z.jpg
BG 182
by Niall97, on Flickr

Then with the ducting through, holes were cut in the arch liners on the side edge (for airflow into the wheel and through the disks), and the ducting cable tied through them. Again, a pretty neat solution to taking the arch liners out, which I really wanted to avoid being a road car with all sorts of crap getting where it shouldn't otherwise.
36883514565_555cc5883e_z.jpg
BG 182
by Niall97, on Flickr

Then how it now looks at the front.
36739683141_99f183f3e7_z.jpg
BG 182
by Niall97, on Flickr
36710344502_9ebfbe2742_z.jpg
BG 182
by Niall97, on Flickr


The next day I washed my arches out, I'd been to Leeds Festival the weekend before and had to drive on a muddy car park in a field. Looks so good in there with all the new bits all clean!
36741415441_445956a0aa_z.jpg
BG 182
by Niall97, on Flickr

Took the car back home, and thought the car looked quite nice, so took a few random photos.
36708491232_66dda490cf_z.jpg
BG 182
by Niall97, on Flickr
36710343912_a7164a5fee_z.jpg
BG 182
by Niall97, on Flickr


That week, I'd bought some more R888s off here to replace my old hilariously worn ones, these are worn but they'll last 2 track days maybe, bought for £40 so definitely worth the money for the time being. Got these fitted on the track wheels ready for Oulton on the 23rd.
36049538544_efb7ee4d91_z.jpg
BG 182
by Niall97, on Flickr


So with everything done, the 23rd rolled around and it was off to Oulton. The car felt great, SO much better than the last time in the dry before all of the suspension work. The turn in, grip, adjustability, stiffness etc was just far better as you would expect, felt like a different car, I could just push so much harder and take more liberties with it with the car being much more stable both in the corners and on the brakes. The brakes also felt great, pedal hardness and the braking force was massively improved, just gave me the confidence to brake later and harder because you knew they were there and could really lean on them. With the new fluid too it kept the pedal harder for longer, I did eventually find the limit but I probably stayed out a bit too long and pushed hard the whole time, but I also think maybe I've found the limit of the DS2500s, I think it's time for DS1.11s for track perhaps. But either way a huge improvement which I was relieved to find given the time and money invested!

As you will see in the second video, being the first time it was properly pushed in the dry on track on the coilovers, we had some rubbing issues at the height it was at on the front. So for the first session is was rubbing like hell, and I hadn't noticed quite how much it was smoking until I looked in my mirror about 10 minutes into the session. We went in to inspect and it had chewed the outside of the tyre on the bumper bracket, so out came the hammer to bend it up like everyone does, we hadn't got round to doing it before then. We also raised the front 5mm just incase, and when we went back out it was perfect, not a single rub again all day, happy days! I guess you can always expect to make a few changes with the first time really testing something.

36739676931_8dc5dbf272_z.jpg
BG 182
by Niall97, on Flickr
One with @Jonff's Meg.
36881277485_d432c11ed7_z.jpg
BG 182
by Niall97, on Flickr

Video from one of the sessions when it was clearer later in the day (the car was already warm btw, we'd been out for about 2 laps before a red flag, this was when we went back out 5 minutes later).


And one of @JamesBryan following me in the first session (hence the tyre smoke I mentioned lol).


And some photos.
36708482782_0b5e53e5e7_z.jpg
BG 182
by Niall97, on Flickr
36045390004_b20ca9a26b_z.jpg
BG 182
by Niall97, on Flickr
36883515735_a43217f2af_z.jpg
BG 182
by Niall97, on Flickr
36739683781_bf895da4ed_z.jpg
BG 182
by Niall97, on Flickr
36743703311_b131e88e62_z.jpg
BG 182
by Niall97, on Flickr
36721492852_9db660b952_z.jpg
BG 182
by Niall97, on Flickr


And lastly, this weekend @Christopher came round to give the car a going over with the DA. It's needed it since I bought it with the previous owners' swirls etc annoying me, and having got into this detailing malarkey slowly since owning this car I wanted to make it look mint again ready for some new products I've just bought. Massive thanks to Chris again for this, it looks so deep and glossy now, it wasn't too bad before but this just brought out that full BG gloss and depth that everyone loves, and you can see so much more of the flake in the paint now. Also gave the headlights a quick pass to take some of the yellowness away, but these will be done properly again at some point and lacquered properly.

36822809486_84911229b6_z.jpg
BG 182
by Niall97, on Flickr
37011378985_814808abdd_z.jpg
BG 182
by Niall97, on Flickr
36870407011_76d36ea54a_z.jpg
BG 182
by Niall97, on Flickr
36202790083_92da0f311c_z.jpg
BG 182
by Niall97, on Flickr
And a classic beading photo from this morning.
36839958462_d5de4601f3_z.jpg
BG 182
by Niall97, on Flickr


Aaand that it...until this week when my Whiteline RARB turns up lol, which I can't wait for, it should complement the rest of the handling mods really well. Car's coming on really nicely now, made a quick before and after the other day from the day I bought it to now (actually not DA'd in the after photos, so even better now) and it's quite cool to see what a bit of TLC can do!
36721491252_276058ac0c_z.jpg
BG 182
by Niall97, on Flickr
 

Christopher

ClioSport Club Member
  Z4M
Was it Meguiars compound then Amigo, then Fusso?
Yep. Really good results with the MF system on Renault paint, it seems to like it. I did bring a yellow pad with me too, but they micro-mar on mine and you end up having to follow up with refining afterwards. The MF ones just work really well.
 

JamesBryan

ClioSport Club Member
Yep. Really good results with the MF system on Renault paint, it seems to like it. I did bring a yellow pad with me too, but they micro-mar on mine and you end up having to follow up with refining afterwards. The MF ones just work really well.

The bonnet came up ok when i gave it a quick pass with the Rupes a few months back.

I bet it looks good now with the whole car done.
 

Louis

I Park Like a C**t
ClioSport Club Member
Another update.

With the trackday on 23rd August booked, it was time to do a few bits to make sure the car was ready. Mostly in the brake area.

  • Brake Callipers rebuilt with Bigg Red Seal kit, painted with high temp silver Aluminium paint
  • Motul RBF 660 brake fluid added
  • Brake ducting added
  • Top brake light replaced
  • Replacement Toyo R888 track tyres bought and fitted to track wheels
  • Full car DA polished

So first on the list was the brake rebuild. This was sparked by one of my rear callipers being either ceased or just not as effective as it should have been, but the rest of them had seen better days (still worked well enough, but not as good as they could have been as I found out) so it's always a good thing to do. The plan was to take them apart, clean them up inside and out, clean the pistons and bores up, grease the pistons/sliders etc, replace the seals, and paint with HT silver paint for a fresh OEM look.
View attachment 1333406
BG 182 by Niall97, on Flickr

Here were the callipers as they were, then we got them all off the car.
View attachment 1333407
BG 182 by Niall97, on Flickr
View attachment 1333408
BG 182 by Niall97, on Flickr
View attachment 1333409
BG 182 by Niall97, on Flickr
View attachment 1333410
BG 182 by Niall97, on Flickr
And one of the rears with Piston screwed out, not many people do the rears so I thought it might be interesting to see.
View attachment 1333411
BG 182 by Niall97, on Flickr

After using a drill bit wire brush and some manual brushing, we set about spraying them with the old seals in place so it didn't matter if we sprayed them. They were sprayed with the Halfords Aluminium Silver HT paint, rated to 500 degrees C, so would stand up to track temps better than Hammerite or similar.
View attachment 1333412
BG 182 by Niall97, on Flickr
View attachment 1333413
BG 182 by Niall97, on Flickr

Quick pic of one of the rears all painted and the new seals in place, along with my stainless bleed nipples. Looking good!
View attachment 1333414
BG 182 by Niall97, on Flickr

Rears on the car.
View attachment 1333415
BG 182 by Niall97, on Flickr

And fronts on.
View attachment 1333416
BG 182 by Niall97, on Flickr

Lots of shiny new parts under here now!
View attachment 1333417
BG 182 by Niall97, on Flickr
View attachment 1333418
BG 182 by Niall97, on Flickr

Then a before and after of the fronts, looking a lot fresher!
View attachment 1333419
BG 182 by Niall97, on Flickr

Then time to flush the old ATE Type 200 out, and in with the Motul RBF660. Should stand up to track work!
View attachment 1333420
BG 182 by Niall97, on Flickr

And with that all done, I took the car for a drive the next day and what an improvement. Pedal felt lovely and solid, braking force was very very strong, clearly the lack of resistance with everything being free and working as it should made all the difference. I didn't think they were bad before, but they're certainly noticeably stronger now. Pedal is really nice with the new fluid too, true test was going to be the track day of course.


Next up was changing the top brake light. I noticed mine had stopped working from a video I had of the car, it was working a while back though because I had another video where it was, so it was time to change. So I ordered a new one since you can't really change the LEDs, another nice new fresh part anyway so it's not all bad.
View attachment 1333421
BG 182 by Niall97, on Flickr
You can see how faded the old one (bottom) was over time, with moisture and dirt getting into it it looks slightly darker than the new one. Much fresher now.
View attachment 1333422
BG 182 by Niall97, on Flickr


Next job was the brake ducting, something I'd wanted to do for a while for track. Added bonus is the front end looks much more aggressive with the ducts too, love it.

Bought the modified trims and bass ports from a guy I know not far from me, with his old ducting in place. However, it was orange inside and would look a bit garish on my car, so this was replaced with some black stuff from Deemon Tweeks, still 102mm as before, flexible stuff too to make it easier to route.

Trims, ports and ducting as I bought it.
View attachment 1333423
BG 182 by Niall97, on Flickr
New ducting on.
View attachment 1333424
BG 182 by Niall97, on Flickr

After modify the bumper to make it fit through (brackets behind the trim for the fog lights removed), next up was moving the horn. I managed to swivel it round on the bracket, and then switch the horns round so it'd fit. A pretty neat solution to completely moving them! (Excuse the blurry picture, almost forgot and took it quickly)
View attachment 1333425
BG 182 by Niall97, on Flickr

Then with the ducting through, holes were cut in the arch liners on the side edge (for airflow into the wheel and through the disks), and the ducting cable tied through them. Again, a pretty neat solution to taking the arch liners out, which I really wanted to avoid being a road car with all sorts of crap getting where it shouldn't otherwise.
View attachment 1333426
BG 182 by Niall97, on Flickr

Then how it now looks at the front.
View attachment 1333427
BG 182 by Niall97, on Flickr
View attachment 1333428
BG 182 by Niall97, on Flickr


The next day I washed my arches out, I'd been to Leeds Festival the weekend before and had to drive on a muddy car park in a field. Looks so good in there with all the new bits all clean!
View attachment 1333429
BG 182 by Niall97, on Flickr

Took the car back home, and thought the car looked quite nice, so took a few random photos.
View attachment 1333430
BG 182 by Niall97, on Flickr
View attachment 1333431
BG 182 by Niall97, on Flickr


That week, I'd bought some more R888s off here to replace my old hilariously worn ones, these are worn but they'll last 2 track days maybe, bought for £40 so definitely worth the money for the time being. Got these fitted on the track wheels ready for Oulton on the 23rd.
View attachment 1333432
BG 182 by Niall97, on Flickr


So with everything done, the 23rd rolled around and it was off to Oulton. The car felt great, SO much better than the last time in the dry before all of the suspension work. The turn in, grip, adjustability, stiffness etc was just far better as you would expect, felt like a different car, I could just push so much harder and take more liberties with it with the car being much more stable both in the corners and on the brakes. The brakes also felt great, pedal hardness and the braking force was massively improved, just gave me the confidence to brake later and harder because you knew they were there and could really lean on them. With the new fluid too it kept the pedal harder for longer, I did eventually find the limit but I probably stayed out a bit too long and pushed hard the whole time, but I also think maybe I've found the limit of the DS2500s, I think it's time for DS1.11s for track perhaps. But either way a huge improvement which I was relieved to find given the time and money invested!

As you will see in the second video, being the first time it was properly pushed in the dry on track on the coilovers, we had some rubbing issues at the height it was at on the front. So for the first session is was rubbing like hell, and I hadn't noticed quite how much it was smoking until I looked in my mirror about 10 minutes into the session. We went in to inspect and it had chewed the outside of the tyre on the bumper bracket, so out came the hammer to bend it up like everyone does, we hadn't got round to doing it before then. We also raised the front 5mm just incase, and when we went back out it was perfect, not a single rub again all day, happy days! I guess you can always expect to make a few changes with the first time really testing something.

View attachment 1333433
BG 182 by Niall97, on Flickr
One with @Jonff's Meg.
View attachment 1333434
BG 182 by Niall97, on Flickr

Video from one of the sessions when it was clearer later in the day (the car was already warm btw, we'd been out for about 2 laps before a red flag, this was when we went back out 5 minutes later).


And one of @JamesBryan following me in the first session (hence the tyre smoke I mentioned lol).


And some photos.
View attachment 1333435
BG 182 by Niall97, on Flickr
View attachment 1333436
BG 182 by Niall97, on Flickr
View attachment 1333437
BG 182 by Niall97, on Flickr
View attachment 1333438
BG 182 by Niall97, on Flickr
View attachment 1333439
BG 182 by Niall97, on Flickr
View attachment 1333440
BG 182 by Niall97, on Flickr


And lastly, this weekend @Christopher came round to give the car a going over with the DA. It's needed it since I bought it with the previous owners' swirls etc annoying me, and having got into this detailing malarkey slowly since owning this car I wanted to make it look mint again ready for some new products I've just bought. Massive thanks to Chris again for this, it looks so deep and glossy now, it wasn't too bad before but this just brought out that full BG gloss and depth that everyone loves, and you can see so much more of the flake in the paint now. Also gave the headlights a quick pass to take some of the yellowness away, but these will be done properly again at some point and lacquered properly.

View attachment 1333441
BG 182 by Niall97, on Flickr
View attachment 1333442
BG 182 by Niall97, on Flickr
View attachment 1333443
BG 182 by Niall97, on Flickr
View attachment 1333444
BG 182 by Niall97, on Flickr
And a classic beading photo from this morning.
View attachment 1333445
BG 182 by Niall97, on Flickr


Aaand that it...until this week when my Whiteline RARB turns up lol, which I can't wait for, it should complement the rest of the handling mods really well. Car's coming on really nicely now, made a quick before and after the other day from the day I bought it to now (actually not DA'd in the after photos, so even better now) and it's quite cool to see what a bit of TLC can do!
View attachment 1333446
BG 182 by Niall97, on Flickr

Brilliant update mate, and the car looks the nuts! Be good to see this properly in daylight. I might have to give mine a full machine before then though :)

You need to get some cree sidelights fitted though, the yellow really stands out with the headlights on haha. Enjoying the driving videos, cant beat a trackday vid.
 

Niall

ClioSport Club Member
Brilliant update mate, and the car looks the nuts! Be good to see this properly in daylight. I might have to give mine a full machine before then though :smile:

You need to get some cree sidelights fitted though, the yellow really stands out with the headlights on haha. Enjoying the driving videos, cant beat a trackday vid.
Cheers mate! I'm actually in Leeds as we speak haha. Definitely have to get photos of the two together.

Yeah I've been thinking that for a while, but I don't want full on LED because they can look a bit chavtastic, want something quite dim and discreet, nothing blue, something the same colour as the Xenons.
 

Clio_fool

ClioSport Club Member
Looks amazing that mate. It looks very low in the last pics too! Do the BC's have damping adjustment? If so did you play around with them when in track or is there a sweet spot that works on road and track? I fancy some decent coilovers for mine at some point but it's like a can of worms when you casually look at what's available.
I need to pull my finger out and get some jobs ticked off on mine before the weather turns but spannering has not been on my list of things I want to do for a while!
 

Niall

ClioSport Club Member
Looks amazing that mate. It looks very low in the last pics too! Do the BC's have damping adjustment? If so did you play around with them when in track or is there a sweet spot that works on road and track? I fancy some decent coilovers for mine at some point but it's like a can of worms when you casually look at what's available.
I need to pull my finger out and get some jobs ticked off on mine before the weather turns but spannering has not been on my list of things I want to do for a while!
Yep! 30 settings. This time on track I just ran them on full hard because the surface is smooth and I'm running R888s so you can run it harder, in retrospect I should maybe have played around a bit more but the car felt great like that and I was too busy enjoying it to come in and start changing it. I think next time I'll have a play with the front to rear balance.

On the road I've played with the settings though and for daily use they're on 1 from softest, and they're comfortable. Then I've had them on 5 and 10 if I want something a bit firmer for driving spiritedly. Full hard on the road is just silly as Chris found out when I took him out to show him. But I reckon as a good road track balance if you wanted one setting maybe 15? But it'd be best of no worlds tbh. Best off either soft or hard.

Couldn't recommend the BCs enough though, all the comfort you could want on soft, then like a race car on full hard. Well made, adjusters are at the top so accessible in the engine bay and the boot, can spec with solid top mounts like mine that are Camber/caster adjustable, and free custom spring rates. Winner!
 

Christopher

ClioSport Club Member
  Z4M
30 clicks on the road is pretty funny. Like being a VAGfag on bags.
Great kit for the money though. I'd be tempted if they made a Mk3 setup.
 
I'm so tempted by the Bc's but I just don't know if I can justify them for a car I drive 5-6 times a year. I know they'll be great but it's just money sat there doing nothing 98% of the time for me.

@Niall how much quicker was you over OE dampers and lowering springs at Oulton?
 

Niall

ClioSport Club Member
I'm so tempted by the Bc's but I just don't know if I can justify them for a car I drive 5-6 times a year. I know they'll be great but it's just money sat there doing nothing 98% of the time for me.

@Niall how much quicker was you over OE dampers and lowering springs at Oulton?
I don't know exactly because I haven't timed as such, at a guess I'd say 2/3 seconds, too many variables from last time though, but it felt a million miles better. If not for times it's just more fun, way more confidence in it because it feels more planted and stuff. Really does depend if you can justify that to yourself as you say. If it's any consolation, you could still sell them on for decent ish money if you got rid of the car so it's not all lost.
 

Niall

ClioSport Club Member
It's been a while! Many updates since the last one.

New updates are:

  • Whiteline Rear Anti-roll bar
  • LED side lights
  • Bumper quick release catches
  • Bumper splash guard/undertray added
  • Team Dynamics Pro Race 1.2s
  • Yokohama AD08Rs
  • Pure Motorsport Stud Conversion
  • Pure Motorsport 15mm hub centric front spacers
  • Sunstrip


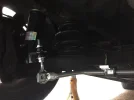
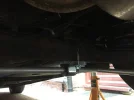
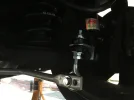
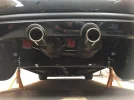
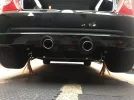
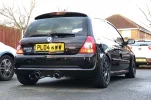
So, first of all way back in September, I received my Whiteline RARB. Always heard of these as being one of the best handling mods for the money, and having experienced one on @JamesBryan's car, it was a must buy, especially for £170. Always loved the purposeful look of these from behind too as silly as it sounds, makes the rear end look a bit more 'racecar'.

Lovely and easy to fit, only took 30 mins (and yes, I've since sorted my exhaust position out).
23821017068_88d0683f6a_z.jpg
BG 182
by Niall97, on Flickr
37641384172_be2679a784_z.jpg
BG 182
by Niall97, on Flickr
37416091470_d89978aabd_z.jpg
BG 182
by Niall97, on Flickr
37624977396_9cd995f602_z.jpg
BG 182
by Niall97, on Flickr
23821013938_aac8905fdd_z.jpg
BG 182
by Niall97, on Flickr
37641383712_7674f17b1c_z.jpg
BG 182
by Niall97, on Flickr

What a difference it made, felt more immediate to turn in, and once turned in it just holds on and on, the back starts to rotate too which is nice and still nice and progressive. Definitely a must buy for a keen driver, I can see how the more mardy drivers could be put on edge by the back end movement but I personally love it to keep the car turning on the limit rather than horrible understeer. Very impressed with it, this was set at the hard setting also.


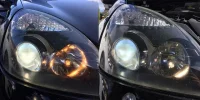
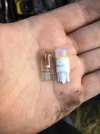
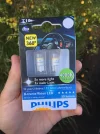
Next up, a little boring job to freshen up the lights. I went for some Phillips 4000k LED side lights, listed as warm white and 4000k so were a good match for the standard Xenons, I wanted to avoid the chavvy LED look with some bluer ones, these look nice and OEM. Quality product being Phillips as an OEM supplier too.
37624943476_84e21ab0b5_z.jpg
BG 182
by Niall97, on Flickr
37674325831_63a8739279_z.jpg
BG 182
by Niall97, on Flickr
Before and after.
37003302073_24bba5348d_z.jpg
BG 182
by Niall97, on Flickr


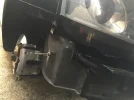
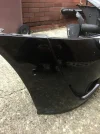
Shortly after this, there was a group buy on here for some quick release bumper catches. They're believed to be made by the same place as Pitking ones, but at a reduced price. My bumper had always been a pain to get off with the nut and bolt setup at standard, as well as my bumper bracket rubbing on the wheels under load now the car was lower, so these are a great solution. I love the purposeful look of these too as a bonus, as geeky as that is.
37003254283_9e45e2fa70_z.jpg
BG 182
by Niall97, on Flickr
37624938046_0b8613226b_z.jpg
BG 182
by Niall97, on Flickr
36963603074_26b2043052_z.jpg
BG 182
by Niall97, on Flickr
37416058000_f1694392e2_z.jpg
BG 182
by Niall97, on Flickr
Quite discreet being black on a black car!
37416063950_8d62822066_z.jpg
BG 182
by Niall97, on Flickr
36963597584_abbbd25508_z.jpg
BG 182
by Niall97, on Flickr
37416059860_d2ebe7cbd3_z.jpg
BG 182
by Niall97, on Flickr

While the bumper was off, I had bought the under bumper splash guard/undertray that was missing for some reason, was annoying me that it wasn't there, and having learned my lesson with the other splash guard being missing leading to my alternator failing earlier in the year, I wanted to make sure it was as it should be. So bought one from a breaker on Facebook, and quickly put that on while I was fitting the catches.
37624932626_12177c0a2e_z.jpg
BG 182
by Niall97, on Flickr


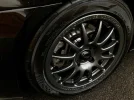
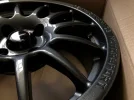
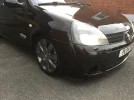
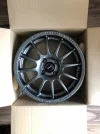
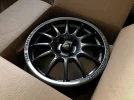
After this, the car was left as it was for a while until Mid November when I purchased the wheels. I'd been looking forward to doing this since I bought the car for a few reasons. Main one was to get some AD08Rs back on my car, had them on my 1.2 (lol) and they were awesome, and I'd always been underwhelmed by the tyres I'd used since, especially on a more powerful car and one that demanded some better rubber. Secondly, Clios are supposed to drive better on 15" wheels, this would later prove to be true. Third was aesthetically, I much prefer 15" wheels on Clios, especially for a more purposeful looking car, suits the car perfectly once lowered. My standard 182 wheels were quite shabby too, a lot of scratching on the face, lacking gloss in the finish and had just generally seen better days, so these would be brand new and mint so I could look after them properly, and really freshen the look of car up. Now that the paintwork of the car was looking good, these would do the rest of the car justice rather than being let down by the shabby condition of the standard wheels.

I went for the Team Dynamics Pro Race 1.2, 15", ET35, 7J, 60.1 bore in gloss anthracite. These had always been my favourite wheels for Clios, and in the gloss anthracite would look great keeping the standard colour scheme of the car, didn't fancy gloss black as I'd originally thought, really grown out of the idea of black on black, looks terribly chavvy to me these days. I'd seen these wheels on the KTEC 182 Championship cars, as well as of course BTCC cars for years, known for their lightness and strength, as well as looking great and being available in custom spec just ticked every box for me. Bought them from Rimstock, who had them in the warehouse in my exact spec (amazingly) and had them to me the very next day!
39121304941_44a27c0cc3_z.jpg
BG 182
by Niall97, on Flickr
39121313871_29f52a8186_z.jpg
BG 182
by Niall97, on Flickr
38411469414_9baac56175_z.jpg
BG 182
by Niall97, on Flickr

I then coated them in Gyeon Rim, a ceramic coating that should keep them looking perfect, especially in winter and with the dust from the DS2500s. Being brand new it's great to be able to do this so that they're kept mint from day one.

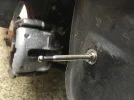
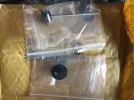
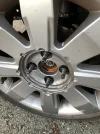
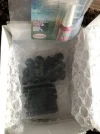
My Pure Motorsport stud conversion also arrived with next day delivery. I'd been wanting a stud conversion for a while, but the standard hub caps on the 182 wheels don't allow for it unless you run without caps, so I'd held off until these wheels. Plus, I knew I'd be adding spacers, and with the offset of these wheels, it made sense to have the flexibility of the studs for shaping and changing spacers, wheels etc. Generally just makes life easier for taking wheels on and off, as well as the great bullet tip design of these PMS ones meaning that it's impossible to cross thread the nuts onto the threads, so just another thing made easier! Again, liking the more purposeful look of the studs too over standard bolts.
39090376202_30b5e59dc5_z.jpg
BG 182
by Niall97, on Flickr
Had these put in, with the supplied Loctite, before heading to get the new wheels and tyres.
24260897177_74df1cbd18_z.jpg
BG 182
by Niall97, on Flickr

Then, it was off to Kwikfit, where the previous day I'd been down to with an invoice from a friend for a price match on some AD08Rs and thankfully they had matched the price. So I ended up getting them for £275 fitted, which is a bloody good price. £240 for the tyres alone is considered good, but fitted for £275 is a bargain considering even your most pikey garages will fit 4 tyres for £40, making these £235, and with the convenience of being delivered to and fitted by a local Kwikfit.

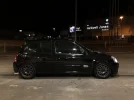
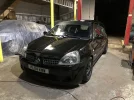
Didn't manage to get photos there, but went to go and have a first look at the new wheels at the petrol station. Very happy indeed.
25254583208_8ddc4ebfe5_z.jpg
BG 182
by Niall97, on Flickr
25254579778_2190bc479e_z.jpg
BG 182
by Niall97, on Flickr
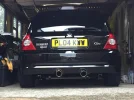
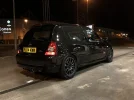
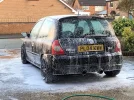
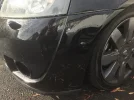
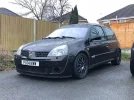
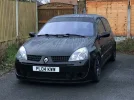
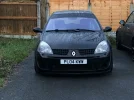
And one from the next morning, looks so purposeful now rather than the OEM+ look previously, as well as being 10mm wider all round to fill those arches much better than the skinny look of the standard offset.
38239583515_323b100a10_z.jpg
BG 182
by Niall97, on Flickr
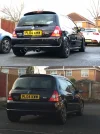
And another before and after, but from when I first bought the car in the relatively sorry state it was in. Looks like a different car!
24260899507_18210e3005_z.jpg
BG 182
by Niall97, on Flickr

The car feels so much better for these new tyres, grip is immense as I expected, stiffer sidewalls feeling more responsive, lovely and progressive on the limit as I remembered, just great. What I didn't expect was how good these are in the rain, I never remember them being this good on the 1.2, but these things put the S-Drive's to shame in the wet which is somewhat surprising despite what people would have you believe about these tyres in wet conditions. Frankly, if you're losing grip with these in the wet on the road you're driving like a bit of a tit, because there's no shortage of grip from where I'm sitting. Braking feels a lot better, which is welcomed since I've not got ABS at the moment thanks to a dodgy ABS sensor. Never fails to amaze me the difference good tyres makes to a car, as widely known as it is.

The car was also feeling better on the 15" wheels, quite negligible yes, but I thought that the steering felt nicer, just a nicer weight and feel to it somehow. The overall handling just felt nicer, sorry to be incredibly vague, but I can't really put my finger on what is different, but definitely improved incrementally in every way.


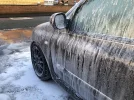
Next up was some Pure Motorsport 15mm hubcentric spacers for the front. I was loving the ET35 of the new wheels on the back, but the front still needed pushing out a tad without going mental and compromising the handling, so I opted for some 15mm spacers. I did want 10mm really but sadly they're not hub centric and so the load of the wheel won't be properly on the hub centre which isn't safe, and can give wheel wobbles etc, 5mm wasn't enough, so 15mm it was. Sadly didn't get any before and after pics, but here's one of them looking shiny, and one from when I washed the car that shows the new width.
39090947542_bf19e808bc_z.jpg
BG 182
by Niall97, on Flickr
25254574238_999aec5f32_z.jpg
BG 182
by Niall97, on Flickr
39121314081_985e5a1f4c_z.jpg
BG 182
by Niall97, on Flickr

Sits sooo nicely. Handling feels the same as it did before, which I was worried about with talk of the scrub radius etc, but no noticeable difference as far as I can tell.


Lastly, I got a matte black sun strip. With buckets coming in the new year, and the winter sun being a pain even in standard seats being a short arse, this was a small thing to help with that. Plus, it looks good, looks more aggressive and 'racecar' especially along side the other new additions. A nice discreet finishing touch I think!
39121311891_334e45723e_z.jpg
BG 182
by Niall97, on Flickr

Looking good the next day.
25254564348_f13f8fce32_z.jpg
BG 182
by Niall97, on Flickr
25254560358_c1e85b4af7_z.jpg
BG 182
by Niall97, on Flickr
38411461164_30439c776e_z.jpg
BG 182
by Niall97, on Flickr


So there we go, all up to date. I've done other little housekeeping bits within this like servicing and suchlike, but I thought I'd spare everyone the details and keep it to the mods. Next, in the new year, it's time for buckets & harnesses, a half cage, steering wheel and shifter. As well as many other things and general tidying up. A year down the line and it's taking shape really nicely now from how I wanted it to be at the beginning. After some more additions in the new year it'll be looking really really good, and ready for some more track days and generally enjoying in the better weather once winter is out of the way!
 

Attachments

  • 36963603074_26b2043052_z.jpg
    36963603074_26b2043052_z.jpg
    72.3 KB · Views: 106
  • 37624938046_0b8613226b_z.jpg
    37624938046_0b8613226b_z.jpg
    76.8 KB · Views: 100
  • 37003254283_9e45e2fa70_z.jpg
    37003254283_9e45e2fa70_z.jpg
    59.9 KB · Views: 111
  • 37003302073_24bba5348d_z.jpg
    37003302073_24bba5348d_z.jpg
    95.9 KB · Views: 105
  • 37674325831_63a8739279_z.jpg
    37674325831_63a8739279_z.jpg
    67.6 KB · Views: 109
  • 37624943476_84e21ab0b5_z.jpg
    37624943476_84e21ab0b5_z.jpg
    87.7 KB · Views: 101
  • 37641383712_7674f17b1c_z.jpg
    37641383712_7674f17b1c_z.jpg
    87.3 KB · Views: 125
  • 23821013938_aac8905fdd_z.jpg
    23821013938_aac8905fdd_z.jpg
    83.9 KB · Views: 113
  • 37624977396_9cd995f602_z.jpg
    37624977396_9cd995f602_z.jpg
    50.7 KB · Views: 103
  • 37416091470_d89978aabd_z.jpg
    37416091470_d89978aabd_z.jpg
    60.8 KB · Views: 98
  • 37641384172_be2679a784_z.jpg
    37641384172_be2679a784_z.jpg
    66.7 KB · Views: 96
  • 23821017068_88d0683f6a_z.jpg
    23821017068_88d0683f6a_z.jpg
    78.2 KB · Views: 120
  • 25254583208_8ddc4ebfe5_z.jpg
    25254583208_8ddc4ebfe5_z.jpg
    103 KB · Views: 99
  • 25254579778_2190bc479e_z.jpg
    25254579778_2190bc479e_z.jpg
    75.1 KB · Views: 99
  • 38239583515_323b100a10_z.jpg
    38239583515_323b100a10_z.jpg
    126.9 KB · Views: 98
  • 24260899507_18210e3005_z.jpg
    24260899507_18210e3005_z.jpg
    105.7 KB · Views: 108
  • 39090947542_bf19e808bc_z.jpg
    39090947542_bf19e808bc_z.jpg
    92.4 KB · Views: 114
  • 25254574238_999aec5f32_z.jpg
    25254574238_999aec5f32_z.jpg
    130 KB · Views: 105
  • 39121314081_985e5a1f4c_z.jpg
    39121314081_985e5a1f4c_z.jpg
    125.3 KB · Views: 136
  • 24260897177_74df1cbd18_z.jpg
    24260897177_74df1cbd18_z.jpg
    81.4 KB · Views: 100
  • 39090376202_30b5e59dc5_z.jpg
    39090376202_30b5e59dc5_z.jpg
    56.4 KB · Views: 105
  • 38411469414_9baac56175_z.jpg
    38411469414_9baac56175_z.jpg
    78.8 KB · Views: 101
  • 37416058000_f1694392e2_z.jpg
    37416058000_f1694392e2_z.jpg
    101.3 KB · Views: 104
  • 37416063950_8d62822066_z.jpg
    37416063950_8d62822066_z.jpg
    95 KB · Views: 105
  • 36963597584_abbbd25508_z.jpg
    36963597584_abbbd25508_z.jpg
    91.4 KB · Views: 94
  • 37416059860_d2ebe7cbd3_z.jpg
    37416059860_d2ebe7cbd3_z.jpg
    101.5 KB · Views: 97
  • 37624932626_12177c0a2e_z.jpg
    37624932626_12177c0a2e_z.jpg
    90.9 KB · Views: 105
  • 39121304941_44a27c0cc3_z.jpg
    39121304941_44a27c0cc3_z.jpg
    100.6 KB · Views: 105
  • 39121313871_29f52a8186_z.jpg
    39121313871_29f52a8186_z.jpg
    75.9 KB · Views: 101
  • 38411461164_30439c776e_z.jpg
    38411461164_30439c776e_z.jpg
    139.5 KB · Views: 113
  • 25254560358_c1e85b4af7_z.jpg
    25254560358_c1e85b4af7_z.jpg
    99.6 KB · Views: 105
  • 25254564348_f13f8fce32_z.jpg
    25254564348_f13f8fce32_z.jpg
    99.5 KB · Views: 111
  • 39121311891_334e45723e_z.jpg
    39121311891_334e45723e_z.jpg
    128.5 KB · Views: 123

Louis

I Park Like a C**t
ClioSport Club Member
Transformation from before to after is insane! Proper love this car especially on the 1.2s. Think you went right on the colour 100%.

The sunstrips a nice edition too. I had one before but think I went too large which put me off. Yours looks just right!
 
Looks bloody fantastic mate!
All the mods work really well together and as you say, it makes it look like a different and much nicer car than before.
 
Looking good Niall, maybe a little too good for the abuse it receives on track, lol. Got a link for those bumper catches mate as mine isn't held on by anything ATM and I nearly lost it at Oulton last month after coming of after Cascades.
 

Niall

ClioSport Club Member
Transformation from before to after is insane! Proper love this car especially on the 1.2s. Think you went right on the colour 100%.

The sunstrips a nice edition too. I had one before but think I went too large which put me off. Yours looks just right!
Cheers mate! Definitely agree, plus the finish of these wheels with all the flake in the paint as you can see in the photos is amazing, look stunning when clean, so glossy.

Yeah sunstrip is perfect, we will see what it’s like once the buckets are in but I think it should still be the right size really, definitely the right size purely for looks on the outside.
Looks bloody fantastic mate!
All the mods work really well together and as you say, it makes it look like a different and much nicer car than before.
Cheers mate! Good to be getting some bigger bits done after all the tidying up and fixing I’ve done this year so it was all good before this stuff.
Looking good Niall, maybe a little too good for the abuse it receives on track, lol. Got a link for those bumper catches mate as mine isn't held on by anything ATM and I nearly lost it at Oulton last month after coming of after Cascades.
Haha! It’ll be getting its head kicked in as usual at the first opportunity next year. Can’t wait!
 

Niall

ClioSport Club Member
Great update, that looks properly good. Just needs black xenons.
Cheers! I prefer the grey ones personally, then again I am the guy who prefers the standard RS badges too so haha.
Damn that looks good. It's sitting lovely now, even on those horrible wheels [emoji16]. You not going chasing power now?
Cheers :wink: On the power front, will probably be going for some 197 cams, ported inlets etc next year, should hopefully see mid 190s and 170ft-lbs then, heard good things from @JB21 now his is running that setup. Want to keep it NA for sure.
 
Defo go with the 197 cams mate, Carl has the timing down to a tee. Made all the difference at Oulton last time out in the slow corners as the extra torque sets you up nicely for the longer straights. I was 4-5mph quicker down the straight before Island bend compared to standard.
 

Jekyll

ClioSport Club Member
Yeah but you work with a camera so there's no excuse really ;)

The wheels and colour choice agaisnt the BG with the lows/spacers make it look really good.

I always wanted to do the pitking poppers but never got round to it.

Well played mate.
 

Niall

ClioSport Club Member
Yeah but you work with a camera so there's no excuse really :wink:

The wheels and colour choice agaisnt the BG with the lows/spacers make it look really good.

I always wanted to do the pitking poppers but never got round to it.

Well played mate.
Haha pretty much. It’s that classic situation like how Barbers always have a s**t haircut, Photographers never have any photos of their own stuff lol!

Yeah really glad I stuck with the OEM colour scheme with the Anthracite, the colour of them is much nicer than the standard colour without being too dark, and look lovey when clean with the flake and glossy finish. As I say super happy with how it turned out!

Yeah the Pitking poppers make it a breeze getting the bumper off, which is always handy.
Love that!
Cheers dude!


Top