Clio 182
Welcome to my 2005 Black Gold 182 track car I've owned since mid 2021. Some people see these cars as cheap disposable track toys, but I haven't been able to own/run a fun car before, so this little 182 has become my pride and joy. And then I found the rust... 
This winter I've replaced the rear end of both sills, but they were nothing compared to the O/S front jacking point. I reeaally should have picked up on this when viewing the car before purchase, as the sills were clearly mashed up, but the side skirt did mask some of the horror:

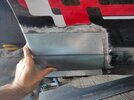
It's not easy to see from the pic above, but that whole chassis box section was caved in thanks to people assuming it was solid enough to jack the car on - wrong. Bending the metal in like that had allowed the underseal to come unstuck, leaving a void behind and a moisture trap, leading to this:

At this point a wiser man would have probably thought: F* it - re-shell time. But I've already invested a lot of time sorting out this shell, so I didn't want to give up on it. Let's find out how far the rust had spread...

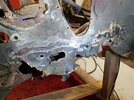
Balls. The main problem here is all the rot extending from the sill pinch weld up into the shell, across several layers of metal - a right arse to reconstruct. The rot you can see in the floorpan above was also deeper than surface rust - it failed the screwdriver test and had to go too.
So after gradually chopping out more and more rotten metal, I decided to call it a day at this point, before I had no car left:


Any remaining rust was surface rust, cleaned back and treated with Hydrate 80. Then it was time to get fabricating and welding. Full disclosure - before tackling these sills, I'd never welded anything before, so I know my attempts are shabby. But I imagine the cost to get a professional to do this job would be huge, so I didn't have much choice but to give it a go myself.

First layer of the metal sandwich ^^

Then another layer stacks in front, plus that curving section that extends up out of sight towards the bulkhead. This seems to be the strongest part of the jacking point, so I reinforced the repair with a small plate across the joint.

Now tackling the inner side. A tapering section of metal was needed to link the box section on the right of the above photo to the almost flat panel on the left. I drilled a couple of drain holes in this just in case water ever gets into that area.

More to follow - I didn't just leave it as a Flintstones car....
This winter I've replaced the rear end of both sills, but they were nothing compared to the O/S front jacking point. I reeaally should have picked up on this when viewing the car before purchase, as the sills were clearly mashed up, but the side skirt did mask some of the horror:
It's not easy to see from the pic above, but that whole chassis box section was caved in thanks to people assuming it was solid enough to jack the car on - wrong. Bending the metal in like that had allowed the underseal to come unstuck, leaving a void behind and a moisture trap, leading to this:
At this point a wiser man would have probably thought: F* it - re-shell time. But I've already invested a lot of time sorting out this shell, so I didn't want to give up on it. Let's find out how far the rust had spread...
Balls. The main problem here is all the rot extending from the sill pinch weld up into the shell, across several layers of metal - a right arse to reconstruct. The rot you can see in the floorpan above was also deeper than surface rust - it failed the screwdriver test and had to go too.
So after gradually chopping out more and more rotten metal, I decided to call it a day at this point, before I had no car left:
Any remaining rust was surface rust, cleaned back and treated with Hydrate 80. Then it was time to get fabricating and welding. Full disclosure - before tackling these sills, I'd never welded anything before, so I know my attempts are shabby. But I imagine the cost to get a professional to do this job would be huge, so I didn't have much choice but to give it a go myself.
First layer of the metal sandwich ^^
Then another layer stacks in front, plus that curving section that extends up out of sight towards the bulkhead. This seems to be the strongest part of the jacking point, so I reinforced the repair with a small plate across the joint.
Now tackling the inner side. A tapering section of metal was needed to link the box section on the right of the above photo to the almost flat panel on the left. I drilled a couple of drain holes in this just in case water ever gets into that area.
More to follow - I didn't just leave it as a Flintstones car....


