ClioSport.net

This is a sample guest message. Register a free account today to become a member! Once signed in, you'll be able to participate on this site by adding your own topics and posts, as well as connect with other members through your own private inbox!

  • When you purchase through links on our site, we may earn an affiliate commission. Read more here.

Pearl Black 172 PH1

Well, time for a big update :)

Decided to open the wallet and buy some upgrades for the Clio. The shocks of the car had been replaced a couple years ago (about 3000 km) with new Renault items, but the Bushes were still the original. The car was not knocking and passed the MOT with flying colors but i knew that i should replace them :) . So in order to address it i bought this :

Clio Cup Wishbones

1MADeO4.webp


Original anti roll bar bushes. I have read many times the poor fitment of the Powerflex ones and could not be bothered about it. You may also notice the Exhaust gasket set.

QHayPKt.webp


New coolant tank and Renault antifreeze

1Y4nEXR.webp


Regarding the lower engine mount, decided for the Powerflex since the reviews are all good and will provide a minimum increase in NHV.

0criiNX.webp


And with all this parts will install my 182 exhaust manifold and 182 Cat to be fully legal.

kz8vrG9.webp


M7aOETE.webp


To be continued :)
 
- 182 Exhaust Manifold in place
- 182 Cat installed
- Cup Wishbones
- Anti Roll Bar bushes
- Tie Rods
- Powerflex lower engine mount

c2FOV5t.webp

UUI5J89.webp


And now i am facing this problem :(

7K27BrA.webp


The 182 manifold/cat is too long to attach to the original cat back exhaust. Also notice how bad my center muffler is. Someone was there before and made a mess of it.

Will update during the week as the work continues :)
 
And the car is back on the road :)

The engine bay with new coolant tank and fresh coolant.

CS1.webp
CS2.webp


And the 182 Manifold and cat together with the Std ph1 rear muffler. Quite happy with the 182 manifold. It seems to have some more torque down low.


CS4.webp


Today I am going to give it a good outside clean and then will post some pictures .
 
Well, went to give it a good clean and noticed the car behaving a little weird. It seemed to be low on power and with a lumpy idle (Worse than the usual) . Decided to change a few things.

- 2 X Lambda sensor
- Coil Pack
- Spark Plugs

Before starting the operation
Foto 1.webp


Foto 2.webp


Plastic cover off

Foto 3.webp


The correct spark plugs

Foto 4.webp

Foto 5.webp
 
The old coilpack. I believe it´s still the original. So 20 years. The wires have only a couple of years. I have a receipt for them from Renault.

Foto 6.webp


Intake off

Foto 8.webp


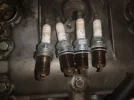
The old spark plugs


Foto 9.webp


And the new ones

Foto 11.webp


Torque to spec

Foto 12.webp


The new coilpack

Foto 13.webp


In place

Foto 14.webp
 

Attachments

  • Foto 10.webp
    Foto 10.webp
    104.2 KB · Views: 150
And then was time to replace the o2 sensors. Glad i sprayed wd40 in the previous days. They come out really well !

New vs old.

Foto 16.webp


In place :)

Foto 17.webp


The pre cat one

Foto 18.webp


Foto 19.webp


All done regarding the o2 sensors :)

And the underside is looking good despite being filthy !

Foto 20.webp

Foto 21.webp


Went for a drive and the car is definitely smoother.

Foto 23.webp
 
And time for another update . Decided to start cleaning the underside of the Clio. I always try to perform this on my cars for several reasons. First i can see if it the car needs something in short order (Leaks, Split rubbers etc) and besides that, it´s satisfying :D . Specially in cars like this that lived the whole life in southern Europe where there is no snow or salt on the road .

So, let´s start.

Left hand side rear arch

IMG_20210607_184040.webp


A closer look

Foto 2.webp


Foto 3.webp


Very dirty from 20 years of driving :)
 
The work continues :)

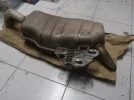
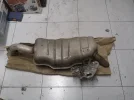
Removed the muffler


In very good condition considering it´s age.

How the underside was looking


IMG_20210610_112459.webp
 

Attachments

  • IMG_20210610_105352.webp
    IMG_20210610_105352.webp
    1.5 MB · Views: 164
  • IMG_20210610_105358.webp
    IMG_20210610_105358.webp
    1.1 MB · Views: 142
  • IMG_20210610_105415.webp
    IMG_20210610_105415.webp
    467.6 KB · Views: 154
  • IMG_20210610_112443.webp
    IMG_20210610_112443.webp
    411 KB · Views: 153
  • IMG_20210610_112447.webp
    IMG_20210610_112447.webp
    369.9 KB · Views: 156
Gave the exhaust a good clean and after that high temperature silver paint. Turned out very good in the end.

IMG_20210610_165521.webp


Decided to repeat the process in the center section. It was looking a bit sorry for itself

IMG_20210612_203404.webp


After a few coats

IMG_20210612_204328.webp
 
And the front of the car is almost done. When removing the plastic liners found a lot of dirt behind it and the bolts securing the liner were rusty. Removed all the dirt , washed and gave it cavity wax on those areas, despite having 0 rust. Thank god.

Some pictures:

The amount of dirt behind the plastic liner

Foto 1.jpeg

Foto 2.jpeg


And the cavity wax that i have used

Foto 3.jpg


And now how the front is after a good clean.

Foto 4.jpg

IMG_20210629_184539.jpg

IMG_20210629_184602.jpg
 
IMG_20210629_184827.jpg

IMG_20210629_184837.jpg

IMG_20210629_184846.jpg


Not perfect but considering it´s age, it´s ok.

I was thinking about changing the rear brake and front´s since i was there, but the brake pads on the front and rear are almost brand new. Will run them until the end and then will replace everything.

Next step is finishing cleaning the underside of the engine and gearbox (It leaks...as all of them) .

Thanks for reading :)
 
Time for another update :)

The front end cleaning is done.

Foto 1.jpg

Foto 2.jpg


Noticed my rear lights had seen better days, decided to attack them with some polish compound. In the end ceramic coated them.

Before

Foto 3.jpg


And after

Foto 5.jpg
 
One of these noticed that a bolt was missing from the plastic engine cover.


Foto 6.jpg

Foto 7.jpg


After this the car was ready do drive again. So decided to visit a small local exhaust shop to solve the exhaust leak that i had near the cat and backbox .

Foto 9.jpg


This gave me the opportunity to check the underside and take a few pictures.

Foto 10.jpg


Foto 11.jpg
 
Back
Top