ClioSport.net

Register a free account today to become a member!
Once signed in, you'll be able to participate on this site by adding your own topics and posts, as well as connect with other members through your own private inbox!

  • When you purchase through links on our site, we may earn an affiliate commission. Read more here.

RM04 MOR - Arctic Blue 182


HaveaCuppa

ClioSport Club Member
Thanks for the thanks mate, but someone else (I forget who) highlighted the bargain to me! So I can’t take the credit! Still not fitted mine, but dropped the beam off this week so won’t be long
Well either way, I think a few of us have read your build and jumped onto DriftWorks recently (y)
Looking forward to seeing the progress on the beam though , that's the one job I'm dreading!
 

HaveaCuppa

ClioSport Club Member
Managed to tidy the passenger side up tonight and give it a good clean.
I also attacked the driver side as much as possible and it’s turned out ok. The dremel didn’t quite have the reach to get into all the areas that need cleaned. I’ll have a quick blast with the drill tomorrow.

E70993D2-D7BB-4AC6-9782-16042E441E7D.jpeg

Passengers side after a clean. Pretty much all rust/putting has been removed.

C0231380-BB17-4AEB-88F8-D79A2F4B5D23.jpeg
The drivers side after a quick clean

9244E428-51A0-414A-92BB-130461136EBE.jpeg

During...

F3181AB8-70EE-45F7-A2BB-4D59107C074D.jpeg

After.

Far better. Not 100% happy with it however, I’ll be giving it a liberal coating of Bilt Hamber Deox Gel tomorrow/Saturday to kill the rest of the pitting.
After that it’ll be covered in Hydrate 80, Bonda Zinc Primer and a good coat of Dynax UB.
 

HaveaCuppa

ClioSport Club Member
Well today was an interesting one.

Got the sills covered in Deox Gel to remove the rest of the pitting that I couldn’t get with the dremel. I’m really impressed by this stuff, will be using it again for sure.
80A81B43-36D5-45CE-BB0C-19D3167E57A8.jpeg

4699A004-A839-4CF8-A932-93614DA90522.jpeg

Covered with Clingfilm to stop it drying out. I left this for a few hours and then removed the cling film and gave it A clean.

Passenger side.
1B2A999B-61FC-4F09-9CF4-6986C967703F.jpeg


Drivers side.
F3800E68-7FAC-4903-BFDC-3313FEDFA9ED.jpeg


I then coated both sides with Hydrate 80 and will leave this to cure tomorrow before hitting it with primer.
26562949-1FA8-469F-831C-79C4F37B909A.jpeg

67A23CAA-5636-4B14-B50B-09AEB8BAF2C1.jpeg


In between all this, I thought I’d move the car to the other side of the drive to get it on jack stands and start on the engine mounts. It fired up and about 15 seconds later, I could smell burning. There was a fair bit of white smoke from under the bonnet. Turned it off, disconnected the battery and the alternator cooked itself. F*ck (n)

I’d had been reading a few threads on here about the alternators going up in smoke recently, hence why I fitted a fire extinguisher the other week.
luckily it didn’t catch but I just about sh*t myself haha.

So, it’s a new alternator on order from RPD. Anyone got a guide on fitting it?

The front end will be coming off tomorrow and I’ll start stripping down the front of the car for the alternator/rad/cooling system refresh. Here’s how it’s sitting just now. Thought I’d tidy up the ECU bracket. Tried for half an hour to remove the top cover and gave up. What a b*****d!
A4332113-823C-4927-A658-81700256DF48.jpeg
 

Pegasaurus Rex

Bon Jovi Officianado
ClioSport Club Member
Nice job on the rust buddy, I need to drop the rear cards off mine at some point soon! 😵

it must be alternator season or something? I keep expecting mine to give up the ghost at some point!
 

HaveaCuppa

ClioSport Club Member
Nice job on the rust buddy, I need to drop the rear cards off mine at some point soon! 😵

it must be alternator season or something? I keep expecting mine to give up the ghost at some point!
Thanks :) It'll be a piece of cake after your rear beam refresh. Not much room for working in mind!

Yeah, there seems to be a few that have gone recently. RPD have alternators on offer just now too, which is handy...
 

HaveaCuppa

ClioSport Club Member
The hydrate 80 was still drying for most of today, so I thought it’d be best to leave it until tomorrow to primer the arches.

Jon kindly sorted me with some lowered seat adapters, so I got cracking with fitting those today. Cheers @JON FOZ

Both seats removed to reveal grime, filth and some badly wrapped wiring for the airbags.
0644E623-6C9D-4B09-A76B-B704CABEB794.jpeg


A quick hoover and far too long tidying the wiring up, and it was looking good.
BBB7F33D-51C5-4FE0-A0A0-AA6021CAE89E.jpeg

D48FEB24-620A-47F2-988F-11219CBC5AFC.jpeg


I got the PureTrack fire extinguisher mount fitted too. Made sense while the seats were out.
08AF53D8-7CE0-4A0F-B22F-7169DEFBDF3F.jpeg


The passenger seat went in a doddle after I realised it’s easier to fit the runners to the seat and then bolt them into the car as one. Trying to bolt the seat with the runners still in the car was an arse of a job.
9C00DF01-B9CC-4F41-914C-FE2B568DA90B.jpeg


First impressions are very good (y)
You definitely sit lower, which will hopefully address the awful standard seating position. Both seats were bolted in and then I realised I couldn’t slide the seats forwards or back.

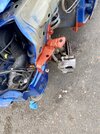
I think when pulling the seats off the rails, I snapped the plastic clip for the cable that lets you slide the seat. I couldn’t get the thing to stay seated for love nor money.
It’s not the biggest issue as once my seats are set, they don’t move, but it’s a niggle that would annoy me.
Tried various washers and clips to try and hold the cable, but nowt worked. Last resort was Gorilla Glue. Not a pretty fix but it’s hidden so it’s good enough.
5D67F1CF-693F-42F0-8568-2D16AE127195.jpeg

The cable tie is there to hold it over night while it dries in position.

So, here’s how the inside currently looks.
207B4EB7-4891-486C-ADEC-0C915B8D8820.jpeg

Once the Gorilla Glue is set tomorrow, I’ll bolt the seats in and primer the inner rear arches.

Patiently waiting for my alternator, rad and coolant pipes to turn up now so I can get out ASAP. (y)
 

HaveaCuppa

ClioSport Club Member
Got the seats bolted in properly today. I wish I had taken some before and after pics as it feels like you sit so much lower, however the pics don’t do it justice.

The seats now sit a few mm above the sill compared to a few cm with the standard Recaro mounts

B51A42C6-8982-406B-9021-3353BEB92C17.jpeg
9AAB34AA-FADD-4B46-9F77-6181041C2551.jpeg

D8C3E290-5E6E-4108-A8C4-2B65F10759DC.jpeg

128DDFAE-5342-4F7B-958E-2BCC7E6ADC9C.jpeg


With that job ticked off, I’ll be slowly stripping the car this week from the dashboard forwards for the Heater matrix change, new rad, coolant pipes and alternator. Oh and finish the inner arches. These are now covered in zinc primer. I’ll snap some pics when I Dynax UB it.
 

HaveaCuppa

ClioSport Club Member
Time for an update.

I’ve not been able to get another coat of primer on the rear arches yet, but as they are sealed, I’m not too bothered at the moment. The weather has been shocking recently so I’ll finish the arches next weekend. They only need another coat of primer, a topcoat and then Dynax’d.

I had the afternoon free after overtime today so started on the job I was dreading. Stripping the car ready for the heater matrix swap. Spent longer than I’d like to admit trying to get the bloody clips off the airbag on the steering wheel...
Top of the dash came off a doddle though.
5A29E384-D125-4B55-9C53-4246E2D61598.jpeg


The bottom wasn’t too bad either to pull apart.
D364F308-82FA-4B53-A0FA-1A8C1D911859.jpeg


I’ll spend a bit of time tomorrow sorting the wiring and tidying it up. There are a fair few wires that seem to have been added by a previous owner that I need to trace and hopefully get rid of. I hate random bits of cable and wire, it’s a total pet hate.

I left the heater matrix in for tonight as it was getting dark and I wanted to get the rad off.
4EC2CD5F-8F38-4446-B90F-D6EFAE9979C7.jpeg

Those 2x13mm bolts behind the slam panel are hideous to get at. After much swearing later, the coolant was dropped (most of it missed the bucket) and the slam panel was off. Out came the rad and AC stuff.
The AC condenser is f*cked. Literally hanging off. So I’ll be ordering a new on tonight.
B33A15E3-EA94-4CB4-95F0-857538155DCA.jpeg

89D53614-255F-484C-A0CE-C4A8692A5A75.jpeg


Tomorrows task will be to remove the heater matrix, fit the new one and get started on putting the new MTC silicone coolant pipes on. I’ve got a new thermostat to go in for piece of mind too.
I’ll wait to get the new rad in until the new AC condenser gets here.

Should hopefully be able to start on the Alternator too, weather dependant.
0ECF4FB4-E479-4471-98FB-C51C27906F3B.jpeg


So here’s how it’s sitting just now. Glad to finally get started on this job as it really did need a refresh.
 

HaveaCuppa

ClioSport Club Member
Managed to get the heater matrix sorted today. What an absolute hideous job.
I had to shoot Frayz a message to work out how to get the new unit back in place in the dash. Cheers for the help @frayz


These are the two clips that connect to the heater matrix from the coolant pipes. Push the buttons either side and pull. I cut mine off as it’s easier and I’m fitting new coolant hoses anyway. These will be refitted to the new hoses.
572D7B13-45CE-4115-85E9-BBA705A2B7A0.jpeg


Next up was removing even more of the dash.
1D537046-BBDF-4D66-AADE-A75ECE8FDD6C.jpeg


In order to get the blower and heater matrix out/in, you need to unbolt the crash bar and pull it forward. I needed a little more room and so unbolted the steering column and dropped it down.
8FD84C05-B3CF-40C3-9BC4-D89373291A86.jpeg


Everytging came out pretty easy after that. Just remember to watch for any wires. It needs to come out the passenger side as there is a brace in the way on the driver side. Most of the wiring loom will catch on it so be careful.
EC6914DB-C2D8-44D1-B22A-CD8C14FA7A15.jpeg


It’s out! I took it inside to check the damage.
004D8E9E-D978-4125-B497-4C7C7C662165.jpeg

You can see where the coolant has been leaking here. The bottom of the plastic housing was covered in coolant residue too.
F5947304-F93C-4397-91D4-2A3E1943D6C2.jpeg


I gave this a clean and a Hoover before fitting the new heater matrix. Dead simple this bit. There are 3 clips that need to be pulled and the metric just lifts out.
78BDB551-76B0-4028-8D5A-505879C8D113.jpeg

F162B547-3380-48D6-9866-59946AC95BFB.jpeg


I refreshed the foam seals with some weather strip foam too. The original seals were beat and hanging off.
2CF3F7D1-1D3D-4350-8A64-6B1C9B2B1771.jpeg

0471B915-F298-4C26-BB45-B92E94A4D5D0.jpeg


Thats it done. Refitting is the reverse on removal.
 

HaveaCuppa

ClioSport Club Member
B5AA3C40-3FD0-4574-A5E7-C0AE8258807E.jpeg

The matrix is now it and fitted. Bottom of the dash is back on too. I seem to have a load of random wires tucked by my gear stick. These are spliced into the main loom and one runs into the a pillars and presumably to some sort of alarm, and the other runs to a red light mounted by the gearstick, but the light doesn’t work.
A06AEF6A-CB8D-47F2-B7BC-69FB6DDEC1C7.jpeg


A third wire is also spliced with the loom, one end runs to the gearstick and has just been taped up and not in use.
65ACC215-DC9F-4121-A448-A7AC53E9E439.jpeg
while the other it attached to a connector that’s cable tied under the glove box.

There’s a second connector under the glovebox and I think this is something I need, but I can’t see anywhere for it to plug in?! Anyone recognise it?
BF889777-7709-4002-9588-6F20203C3327.jpeg

DEDEDBFF-072D-40BE-B11F-8BEADFF22077.jpeg


837B5835-F08B-4632-9D20-EBCB9F75F5C1.jpeg

This one is by the gear stick and as far as I know, never been plugged in as I’ve noticed it before.
There is a dyno print out and an R S Tuner sticker with the cars paper work. Does anyone have R S tuner and tell me if any of these cables/connectors are for the box to be plugged into? I want to remove as much of these dead end wires as possible.
Any ideas?

Should get the dash back on tomorrow and then I can crack on with the coolant pipes and new rad/condenser
 

HaveaCuppa

ClioSport Club Member
Got a fair amount done today, seeing as the weather was ace.

9CA31D06-3DB0-4F9D-B977-663AEA2AC215.jpeg
The culprit for the plooms of white smoke the other week. Thanks to various folk on here who mention the jubilee clip method for changing the alternator, it worked a treat.

6E173260-1CC8-4BAC-B307-C21F2C54310A.jpeg

100mm Jubilee clip bent into a ‘sausage’ shape and then slide it over the tensioner. Tighten it up and you’re good to go.

6A9986D2-DE74-4B04-B9B2-D453A207B371.jpeg

Old alternator out.

86020E89-8E7B-44AF-AD42-D256FB90F98F.jpeg

New one ready to go.
A1AC7ECD-72E7-41BE-8B7B-BD77DE77BCC0.jpeg

After a bit of a battle, it’s in. I nipped it up for this pic without the bracket the holds the alternator to the block as this needed a clean. This was fitted later though.

2B6285B2-0D67-42C4-86E2-299EDBD24B2D.jpeg
Next up was getting the ported manifolds and new engine mounts in. Big thanks to MS custom Engineering for these. I’m not sure if Max is on here but he’s a top chap who helped me out loads whilst sorting my manifolds for me.
Jack under the car, with a bit of wood to spread the load and took the weight of the sump. Engine mount bolts loosened and engine jacked up.
I pulled the injectors hoping to replace the o-rings but bought the wrong sized, so if anyone knows the correct size, that would be handy!

F1411028-9C5E-4F80-838B-3611456495F0.jpeg

Started the strip down. Bit of an oil leak on the cam cover, but I’ll get this sorted once the belts are done next year. The two rear upper manifold bolts that hold the coil pack are are threaded too, so I’ll have to helicoil these once I have the correct size helicoils as I don’t have any M6 sizes at the moment. Not a huge deal though.

3389FD92-E964-4D2A-AA77-99174A84275E.jpeg

Upper and lower manifold off as well as the timing belt cover and the upper engine mount.

Image limit hit, second post incoming.
 

HaveaCuppa

ClioSport Club Member
AD36DEBA-9732-4E2F-AAAA-0CF6ED9B7020.jpeg
New gaskets for both the upper and lower manifolds. The lower is a git to align while holding the actual manifold. I found working from left to right when bolting things back up worked best.

069B6F77-4991-4A36-AE57-EC4692571DD0.jpeg

Lower manifold on. I had to sand a very small amount off the furtherst bolt hole on the bottom of the manifold in order for it to fit. Other then that, it was grand.

0F8E1481-D5CA-4EF3-858E-DF7448C56965.jpeg

New upper engine mount with a powerflex insert.

7F744EC5-4789-468E-B39D-6C760960F67E.jpeg

Fitted this fairly easily and torqued up to the correct specs once the mount found its natural position.
Once done, lowered the jack and everything sat flush. Bit of a heart on mouth moment though as the timber I used to spread the load was crap and split...
I’ve still got the upper gearbox mount to fit but it was getting dark at this point, so that’ll be a job for tomorrow or this weekend.

D6AAE7BF-ED92-47B5-99C6-59571629D5C0.jpeg

New rubber gasket on the upper manifold just to keep things fresh. Again, I ran out of daylight so this was fitted in the dark. I’ll get pics tomorrow in the daylight, but everything is back on and torqued up.
I dropped the coil pack and took a chunk out of it so fingers crossed that still works. We shall find out soon...

6A6BAD3E-F8C2-4DBE-B166-B946FBB73371.jpeg


The DPD man dropped this off today too. The roads around her are s**t, so I’m switching to adjustable dampers in the hope that I can run them soft for knocking around and then stiffen them up for the weekend runs.
I can’t be arsed with the hassle of coilovers just now so it’s Koni Adjustables all round.
I’ll get these done in the summer after I’ve sorted the rear beam out. It’s a never ending list haha!
E2280167-CA11-4458-86B0-603913FB5341.jpeg
 

HaveaCuppa

ClioSport Club Member
Doing a cracking job on this mate :)
Cheers! It’s satisfying getting all these parts sorted after having them sitting for so long over winter

I’m sure I remember reading in your build thread about painting the cam cover. Is there a seal kit for it for is it just that sealer in a tube type stuff?
 

HaveaCuppa

ClioSport Club Member
I made some good progress today. Almost finished now, the end is finally in sight, until I put the new Koni’s on in the Summer :cool:

6AA215D4-16EA-474B-B644-C2A2A21D4B3C.jpeg

Ive not a clue what this switch was on the control panel by the steering column. I pressed it a million times prior to my alternator blowing up and it did nothing. I traced the wires from the back of the switch, through the scuttle and to the battery. So they were pulled out. A new standard panel was then put in to tidy things up.
5D06EEAC-A9F9-49FA-8C2D-D12FBCDB4ABD.jpeg


80428CBC-5AC1-43BC-9BDF-180466E52381.jpeg

A few months ago, the car went into limp mode. It wouldn’t Rev past 3k and felt like it was down on power by a hell of a lot. A restart fixed it but I figured that while I was in the engine bay, I’d clean that white fuse up with a bit of contact cleaner and Emery paper. This, along with the refurbed throttle body should sort the issue.

1A39794D-E6FA-40BD-B0B8-8C3DF6DCA2E9.jpeg

I spent what felt like half the morning wrapping pretty much every wire in the engine bay in Tesa Loom tape. This is the oil and heat resistant stuff, so should be good for a wee while and it smartens things up a bit. Whoever wrapped the old wires with electrical tape must’ve been blind and armless as it was hanging.

DD319605-AC49-4EAE-9498-AB5A40C400EE.jpeg

I decided I’d clean up my old bonnet catch as well as rad mounts. New bonnet catches are £60 and I can’t justify that, nor do I want a cheap eBay special. So a bit of Bilt Hamber Deox, a wire brush and some grinding and these all were stripped back to bare metal.
I’ll prime and paint these over the next few days and save myself a few quid.
12715B1A-FCDC-40FC-9430-BDCD376DB96C.jpeg


Ive also removed the radio controls from the steering column, which left a big hole by the ignition barrel. RPD sell a blanking plate cheap enough and it’s a fairly tidy cover up.
99062ACE-7620-405D-9BB3-A823D3CB0F89.jpeg

Before

72EECF89-9BA6-417C-8D0D-21DB1D50575A.jpeg

After

I think I mentioned in my last post that I smashed my coil pack when I dropped it. The damage was only to the connector but I replaced it anyway as it’s quick and simple. Again, RPD stocked new valeo units so it was changed out and the old one kept as a ‘just in case’ Coil pack.

F3949577-11A3-43B9-87C9-9290D18CB46D.jpeg

Old. Fairly battered.

24A7D617-A991-4D90-AB17-41EBCC04E3BF.jpeg

New. Fair play to RPD as this was delivered with 24h. Seriously quick (y)

Ran out of images so second post to follow.
 

HaveaCuppa

ClioSport Club Member
After the few smaller jobs in the morning, it was time to sort the new rad, AC condenser and coolant pipes. I did order a new AC dryer, but it’s not turned up yet, so I’ll fit that as and when it arrives.

Brand new genuine rad and a Nissens AC Condenser. The rad was spot on but one of the top brackets on the condnesor was smashed off in transit, so I spent an hour or so hunting through the garage for a rivet gun and the dremel.
22142D86-3E6C-4B4F-8B7B-985F6C50C89E.jpeg

A5CBF7C9-21DD-4D4D-9241-AE2AC06CE827.jpeg


The old fan was cleaned and reused as there’s naff all wrong with it. The below pic shows the issue with the condenser.

FDF5D538-F164-45AD-8C2A-00D4B82A5868.jpeg

The upper bracket on the left had snapped off in transit meaning the condenser sat all wrong when mounted. There’s a fair bit of twist on that too.

5C38F340-0963-4185-8873-1C4BA35EA4ED.jpeg

93801F38-5269-42D5-9937-72C98058896A.jpeg

Attacked it with the dremel and rivet gun. Sorted the bracket and we are sitting flush and correct again. Bit of a pain in the arse though. My old rad only had the same issue, with only one bracket mount on the top. Strange!

F342F6DE-2928-4991-8C97-1413A771F376.jpeg

A big box of MTC silicone coolant pipes. I’m really impressed with them for the price. I picked up some decent HiGrip stainless jubilee clips too to clamp them all together.

0D710C09-EEAA-429E-909E-2EB2EE51A33E.jpeg

I did have to cut down two of the pipes as the spacing for the heater matrix wasn’t great and they wouldn’t fit. But it’s a 2 second job to cut them so I can’t moan at all. You only need to trim around 20mm off, so nothing too major.

7C991969-2DC2-49A7-865E-1EAF806277F4.jpeg

Connecting the heater matrix was a bit of a dark art. In the end I pulled the original fitting off the new hoses and clipped them in on their own, and then connected the new silicone hoses.

AD58FF8D-271C-4F6A-BFEA-48BF64ED1B30.jpeg


All connected, clips tightened and sitting flush. It was at this point I remembered that I’ve a new thermostat sitting in the garage. So, that’s a job for tomorrow then!
513AB828-F63A-48B0-B129-C20E2D9952C7.jpeg
 

HaveaCuppa

ClioSport Club Member
So here’s how it’s sitting at the end of today.
B1374680-60E3-4726-BBB1-A6707F8BC3F8.jpeg

C2D9D618-AFAB-44B2-B568-238717AE055F.jpeg

F5915136-2B4E-4F85-BFCE-E5F1067575F0.jpeg


I’ve chucked the slam panel on as I need to adjust the bonnet tomorrow too as it’s ever so slightly squint. Not noticeable until you look at the front lights. It’s touching the drivers side light but the gap on the passenger side is huge.

Should get round to bleeding the coolant system tomorrow and finishing the rear arches too, so they can be dynax’d this coming week.
 

Louis

I Park Like a C**t
ClioSport Club Member
Been proper cracking on with this!
View attachment 1527010
The matrix is now it and fitted. Bottom of the dash is back on too. I seem to have a load of random wires tucked by my gear stick. These are spliced into the main loom and one runs into the a pillars and presumably to some sort of alarm, and the other runs to a red light mounted by the gearstick, but the light doesn’t work.
View attachment 1527013

A third wire is also spliced with the loom, one end runs to the gearstick and has just been taped up and not in use.
View attachment 1527014while the other it attached to a connector that’s cable tied under the glove box.

There’s a second connector under the glovebox and I think this is something I need, but I can’t see anywhere for it to plug in?! Anyone recognise it?
View attachment 1527015
View attachment 1527016

View attachment 1527017
This one is by the gear stick and as far as I know, never been plugged in as I’ve noticed it before.
There is a dyno print out and an R S Tuner sticker with the cars paper work. Does anyone have R S tuner and tell me if any of these cables/connectors are for the box to be plugged into? I want to remove as much of these dead end wires as possible.
Any ideas?

Should get the dash back on tomorrow and then I can crack on with the coolant pipes and new rad/condenser
Going back to this post, the first photo is of your alarm system. If you cut open the bundle youll find a connector inside where it joins to the LED. I've unplugged mine and trimmed it down, laziness from the alarm fitters!

The connector under glovebox doesnt plug into anything but theres a retaining clip where it can be pushed in to keep it secure iirc. The last one is then the cigarette lighter connector 👍
 

HaveaCuppa

ClioSport Club Member
Been proper cracking on with this!

Going back to this post, the first photo is of your alarm system. If you cut open the bundle youll find a connector inside where it joins to the LED. I've unplugged mine and trimmed it down, laziness from the alarm fitters!

The connector under glovebox doesnt plug into anything but theres a retaining clip where it can be pushed in to keep it secure iirc. The last one is then the cigarette lighter connector 👍
Cheers for clearing that up. I’ve pulled the connectors from the alarm and tidied it up.
My cigarette lighter has also never worked when trying to charge stuff, so that explains it as that connector has never been plugged in!

Thanks though chaps, I’m itching to get back in it and driving now the weather seems to be improving.
 

HaveaCuppa

ClioSport Club Member
Managed to get a few more bits done today.

Changed the thermostat first and foremost. There was nothing wrong with the old one but it made sense to swap it out as all other parts of the cooling system were new.
224AF5E3-0C89-4ED4-BE12-836F579AF2A0.jpeg

F03E87E7-5F87-4A96-96F2-12F33680226D.jpeg


I was going to change the upper gearbox mount but I didn’t have a deep 18mm socket to attack the main nut. I’ll get Rentec to do this when it goes in for its service this summer. In fairness, the old mount didn’t look too bad, so it’ll do for now.

I managed to source a set of radiator mounts that looked a little worse for wear. 10 minutes with the grinder, a load of Hydrate 80 and a few (rough) coats of paint and they look alright. Not that you’ll see them anyway, but after snapping the originals that were on the car, I’m keen to keep these things in decent nick.
A29B16F7-A67C-4190-A566-DF0A7E93ABB0.jpeg


Filled the coolant and bled everything through. Used the bleed screw whilst everything was cold to get a nice steady stream of type D flowing through with no air bubbles. Tightened everything up and chucked the battery on. The car wouldn’t crank.

Totally s**t myself at this point :oops:

Jumped it off a new battery I had in the garage and it fired up in a couple of cranks. Never have I been so relieved when working on a car. I kept it ticking over for around 15 minutes with the cap off the coolant bottle and the coolant level started to rise. The rad fan rarely kicks in on this thing though so I’m thinking I’ll need to re-bleed the system this week as I only managed to get around 6L of coolant in the system. Apparently they take roughly 7L?

Any tips for bleeding these? Is it just a case of cap off, heater on, and squeeze the top rad hose until the fan kicks in?
I’m normally used to VAG stuff which is a total pain in the arse.
F86A4CDA-79C6-4AAA-862D-5F59BB8513BE.jpeg


0FB68492-A437-45FE-BF10-3894773E994D.jpeg


For reference, this where the coolant sat after getting up to temp and letting everything cool for 40 minutes or so.
0AE4CC01-96BC-4FA6-8FC7-110DE684271A.jpeg


Managed to get the final coat of zinc primer on the arches today too.
CE0524D1-961D-44F4-BCD6-6EB9B39867A7.jpeg

E46DFA17-1896-46C1-920C-7487E18D9A5E.jpeg


As I am a major t**t, I’ve left my handbrake on in the car for the past x amount of weeks I’ve been working on it. The rear pads have a terrible habit of welding themselves to the discs. I’ll be giving them a light tap with a large hammer at some point soon to try and free them, but I’m under no illusion that a calliper refurb kit may be on the horizon :unsure:
 

HaveaCuppa

ClioSport Club Member
Work on the Clio halted for a week or so since my last update due to work. But as it’s Easter this week, it’s a long weekend, so I’m aiming to finish it and get it out for a run on Sunday/Monday.

Got the bulk of the last little jobs done today.
BA88F607-A877-4D83-B2DB-0AB999605C70.jpeg
I got the foam back in underneath the carpet and gave everything and good Hoover etc. Went to put the dead pedal on and the thread for the screw was shockingly bad. Re drilled it and popped an M6 rivnut in it. Job done.


90DE5F0F-EB34-416A-9420-2AF088349B89.jpeg


8D6E3C21-CC5F-4A85-8735-59F2BA6B78FF.jpeg


The rest of the dash and centre console was re fitted too. The side of the centre console seems to be pretty loose though, so I’ll have a look at that tomorrow. If you look at the above pic, it’s about 10mm out. It just doesn’t want to Clip in.

32E48914-B5C9-4645-9234-B346F05F7A80.jpeg

AB8A0003-BE19-4014-9623-14F90B57FCA0.jpeg

The silver fixings for the fire extinguisher were replaced for black. That’s it mounted now and secure. It looks like it’s in the way, but it’s low enough to be out the way when you’re sitting in the passenger seat.

96F53600-9068-4E84-9424-A1B3EC91AB3D.jpeg
Next up was to finish giving the arches a few coats of satin black now that the primer had fully dried. Bin bags were put over the Trendlines after seeing how much a pair recently sold for on eBay:oops:

CB69AB0C-73DE-4D0C-BA6D-85EB18FA661C.jpeg

3927F352-7EFA-4212-90CC-D16E93B56D20.jpeg

I masked the upper arches very roughly with some bubble wrap as it was all I could find. Who buys papers anymore?!
Over the course of the day, 4 coats went down until all the orange primer was covered.

DBB8F024-ADC3-437E-92C2-2D841AFBE7D8.jpeg

CAA781FD-A5BF-4885-A44E-F5C6EEDDF7A5.jpeg

That’s the arches now 99% done. The weather looks good for the weekend so I should be able to get a coat of Dynax down on sunday.
 

HaveaCuppa

ClioSport Club Member
With the arches drying and the car looking fairly tidy inside, it was back around to the engine to tidy a few things.

I replace the rubber o rings on the MAF sensor as mine were awful. I also fitted the new AC dryer and refreshed all the AC o rings I could see at the front of the car.

0AA9DD44-83D7-404C-B654-2AA09E4BC7B3.jpeg

I bought a couple of goodies from CFAB to keep things tidy. The above is the MAF bracket. Mine was a little wobbly and this keeps it nice and secure.

4319E53F-5F01-491E-A611-B583BD05C40B.jpeg

I also picked up the alternator shield to keep this one nice and fresh. I need to adjust this slightly as it is a touch too close to the AC pipe, but I’ll sort that tomorrow. It’s a great bit of kit and a bit of a shame to keep it hidden as it’s finished really nicely.

2C59425E-4871-4EA9-BA32-4DD0288B815B.jpeg
The bonnet catch was that sprayed and re fitted. It came out ok tbh. Better than a new catch at £60.
This is what I struggle with in the world of Renault. A genuine damper can be had for £70 but a bonnet catch is £60, or a clear indicator is £30 per side. Madness haha.

F7E2F7DD-B0A9-4A6D-AC0E-D4247277C510.jpeg


00EE6017-DD1B-4C33-BA2C-7C1DF3884947.jpeg

The old K&N air filter was HUGE. I had to remove the filter and pipe in order to get the battery out. So a smaller offset Ram Air filter was fitted. Far better! The induction kit can stay now stay fitted and the battery can still be removed etc. I do still need to oil this however. A silicone intake pipe was also fitted to remove the original plastic one.

07DBED90-F5F2-4EAD-BCD4-DA34462A71B0.jpeg

A while back I nabbed a set of the 3D printed washer blanks from BTT. Pretty impressed! I still need to file the moulding marks on the back a little more to get them to sit flush on the bumper.
My bumper did however take a beating in the recent wind though. See the below pic (n)

243006A3-C4C1-40A8-A3E9-C3A4B58C5B4B.jpeg

The car is going in for a bit of body work this summer, so I’m weighing up a front end respray too. The bonnet could ideally be done as there are a few big chunks out the paint and the bumper now has some serious grazing.

Must resist sending it for a full respray...:unsure:

So that’s me up to date. Should get it jacked up tomorrow to free the rear brakes and then refit the bumper, wash it and hopefully get it out on the road for the first time in weeks.

Can’t bloody wait!
 

HaveaCuppa

ClioSport Club Member
I had a slight change of plans today. Originally I wanted to get the bumper fitted, free off the brakes and go for a drive.
Instead, I put the front on jack stands and pulled it all apart :unsure:

I started on the passenger side first. I’ll get round the the drivers side tomorrow.

4AEC41B8-2F08-4976-A14F-7B77507DAF53.jpeg

The sideskirt was drilled off. These needed to be removed anyway as I’m heading up to Edinburgh next month for a few body shop quotes - and I need the sills straightened out as both are crunched from past knuckleheads jacking it up wrong.

1AA18AAF-0766-4F6F-887E-193B8B189553.jpeg
The side skirt was a little bent at the bottom but is assuming this will sort itself out with a bit of heat?

01BB9DF5-4BB7-47DC-BE28-DBC06B7406C7.jpeg
With the wing off, it was time to attack the front bumper mounts. Mine have certainly seen better days, but were still solid.

8C95FE30-6CFE-44F7-B873-FF24BE894B95.jpeg


Attacked it with a wire brush, dremel and a grinding stone.
078C5864-B9D4-4772-97E0-F82421B21728.jpeg


A coat of Deox Gel to remove the pits that I couldn’t get.
924407EE-D814-415D-AE82-497ADC9E3CA2.jpeg


I let the Deox do it’s thing for a couple of hours. It took out a good amount of rust pits, but it’s not perfect.
2CFFAE5D-E83D-4B80-9BC4-8CEC766E985F.jpeg


This was then hit with Hydrate 80 to convert the remaining rust.
FEBC89A2-DA51-43B8-A00A-EFB84753ACED.jpeg


The same was also done for the start of the sill. I managed to re shape this part but the rest was too far gone for my skills, so I’ve not treated it as the body shop can sort that.

Before
295ED2AF-F8FD-4492-8415-5522389C3F5A.jpeg


During
3CDEF3C1-CDC5-4D2F-9DBD-E454ED08437D.jpeg
 

HaveaCuppa

ClioSport Club Member
Forgot to take an after pic, but here’s it is with Hydrate 80 on.
AA55C405-8F07-47A2-8A8D-0E6E7A08D8CC.jpeg


You can see the state of the sill in this pic. I’m full expecting this to be cut and a new panel welded in whilst its in the body shop.
C45DCF87-40DA-4F4D-809F-2C72A3FFA455.jpeg


So tomorrow I’ll get the bumper mount primered, ready for a coat of satin black paint on Monday. I’ll also start the other side too.

I also decided to rivnut my arch liners on as I want to keep things clean. The grime in the above pics is after roughly 2000 miles on mainly dry roads, so I’ll be dropping the liners regularly to clean.
I’ve used cheap EBay rivnuts in the passed, so splashed out of some decent ones from Accu. f**k me, the eBay ones are a doddle to use as the fold up with a tiny amount of pressure. These Accu ones however, you need to be a gym rat to even get them to crimp. Took me 15 minutes to rivnut my passenger arch!

EA0FEE3D-FB06-49DC-A6B0-CB0492E895DD.jpeg

D099E0F2-A473-4633-A9DB-E20595224FC7.jpeg


I popped the Xenons back in And here’s how we are sitting at the end of the day.
451E80AC-5306-4601-A5C4-13AE843E9B8C.jpeg


I’ll be ordering some new suspension bolts this week from RPD as it’d be rude not to get the Koni’s on ASAP. As long as the weather holds.
 

HaveaCuppa

ClioSport Club Member
So the Dremel was on its last legs, so it was time to buy a grinder. Picked up a cheapo one from B&Q and started again after seeing the results from it :rolleyes:

Passengers side.
51CE9AE9-7901-459D-8BBA-BC94D2B6013C.jpeg


Pretty much all the surface rust came off and after another quick hit of Deox gel, it was ready for Hydrate 80 again.
E88BC94C-FEE9-4AE2-B3E3-37DDC90F8891.jpeg


I did the bottom of the front arch again too. I’m not too bothered about the finish of this bit as the body shop will be sorting this in the summer. I just wanted to get a coat of protection on it now to minimise rust.
554C223B-F92B-4F8A-8B54-B67C118506E9.jpeg


Left this overnight to cure and then got the first layer of rust primer down.
923F491A-210F-449B-8E77-6948AC980D67.jpeg

3644865C-768B-42A4-9F61-4BD33FC06520.jpeg


The same process was then repeated on the Drivers side.
FB7C1DE2-9ECB-45B8-8497-04CA72237611.jpeg

38662FCA-DB77-4112-BFB3-989D923A6242.jpeg


Hydrate 80 applied.
DCEA8D10-F23F-449D-9199-67E49F34F39B.jpeg

B92131FD-B3BD-403E-911F-50B10031FBCD.jpeg


And then the first coat of Bonda rust primer.
577045CF-BF86-4226-A87D-749032C84E95.jpeg
 

HaveaCuppa

ClioSport Club Member
4D983465-4C3E-465E-B5F4-4E9549287687.jpeg


I also hit the front crash bar with some hydrate 80 to seal the various dings and scrapes.
20B3D7E7-7FF8-42B5-B241-188D1D32ED97.jpeg

40DE5222-3DE4-4171-9B9C-24BD7AD91B2C.jpeg


A quick question for the folk that follow this build thread. What are your bumper/wing mounts like?
My drivers side headlight was never fully secured as the bracket that I’ve been treating was bent. I know people bend these to run coilovers etc to stop scrubbing.


Should both brackets be the same? If you look at mine, the driver side is fairly flat, where as the passenger side is bent upwards. To my eyes, both mounts look like they came from the factory like that. Is this correct or should both mounts be the same?

Passenger mount
24B08ADE-2F3E-4869-A164-8CFF64827168.jpeg


Driver Side mount
6E09EFD4-8A3C-4D7C-B7BB-30990DD904BF.jpeg
 

Attachments

  • DB01A88F-7A7F-4D83-AEBB-83B691A1B6EB.jpeg
    DB01A88F-7A7F-4D83-AEBB-83B691A1B6EB.jpeg
    498.5 KB · Views: 62
  • 53AA7E00-1DB4-4D22-945C-143C0479A4E6.jpeg
    53AA7E00-1DB4-4D22-945C-143C0479A4E6.jpeg
    545.6 KB · Views: 66

Superwoman90

ClioSport Club Member
  Peugeot 207
Just read this thread, admire your bottle to tackle such a wide variety of tasks and I’ve learned so much from sharing your journey with the car. Keep updating your progress, I’m finding it fascinating and thoroughly enjoyable. Thank you.
 

HaveaCuppa

ClioSport Club Member
In between the snow and rain, we have had a few ok days so I got a few coats of satin black down over the primer.
Managed to bend the passenger bumper bracket back into shape too.


33835B07-3E4F-4660-A94F-5525CF9AE393.jpeg

0D0AA1E4-92F9-4549-92EF-309E694C8699.jpeg


EFF66C60-4031-41C2-82BF-EE0E77ADC349.jpeg

D365AB54-499D-4014-96F3-B9F2C60EA15B.jpeg

I’ve also managed to get myself a set of cheap Megane 225 brembo’s. They need a refurb but I’d rather get a set that needs work over a new set as it’s half the fun right?

So I now need to decide on whether to run 280mm discs or 300mm discs on the front. I don’t think I’ll be running 15’s, although a set of 2118’s is very tempting.
From what I’ve read, 300mm discs are a very tight fit? Which is swaying me to a 280mm set up.

I also saw this in the local scrappers. Looks like it’s still got the rear beam (which I need as I want to refurb mine). Shape to scrap an RB!
A566E33F-F451-4FC5-8603-13BBAF0706A7.jpeg
 

HaveaCuppa

ClioSport Club Member
Just a quick update.

Got the bumper mounts coated with a couple of coats of Bilt Hamber Dynax UB in between work breaks.
6BCC3A72-ABF9-4648-9891-0DCB4DB9428E.jpeg

C1407643-64D9-4C33-AE28-61D747E24645.jpeg


I gave the headlights a quick buff and seal with Gtech C4. I will need to re do these again in the summer, but for the time being, they will do.
3EA1F13E-E7D2-4A64-ABF1-DCBB70A4DE2F.jpeg


Managed to get the Powerflex dog bone bushes fitted too.
I need to torque these up tomorrow so this is to remind me of that!
17C7FE2E-7837-4204-A6B1-350ECA5960F9.jpeg

Bushes pressed/cut out of the old dogbone.

FB05550F-3088-4096-A94B-C9383A8F8B0E.jpeg

Powerflex bits fitted.

75AE3896-4556-418B-A5CA-40699F5E37B5.jpeg
And back on the car (y)
 

HaveaCuppa

ClioSport Club Member
Making a tidy job of this Sam. I'd stay with 280mm discs as it gives you options further down the line :)
Thanks Frayz(y)

Yeah, that’s what I’m currently leaning to if I’m honest. The 300mm set up looks good and it’s an easy set up to do right out the box as you don’t have to machine the calipers. It’s a tight fit though with millimetres to spare and you’ve got the pain of having to move wheel weights, which I know will cause a headache.

The 280mm set up is the sweet spot I think. Like you say, you have the options to run 15’s with it but I just need to sort out the machining of the calipers. I’ll put out a post on here and see where others have had their caliper machined.
I know PMS do it on their kits and possibly Max and MS Custom.
 

HaveaCuppa

ClioSport Club Member
Managed to get the lights, wings and bonnet aligned after work today.
What a ballache that bonnet is to aligned! It’s not 100% but it’s far better than it was.
Excuse the terrible photo.
30A07402-8AA4-43FB-9DC9-388FAAC19017.jpeg


The postie dropped a few bits off today too.
EB74D79C-F9EF-4FB8-BE19-96CAEFFA45E8.jpeg

I’ll be getting stuck into cleaning the brembos this weekend I think. New pistons, seals etc will be going in them at some point soon and then they’ll be powder coated silver.

There’s a set of camber bolts in there too as I fancy giving them a try and a pair of Febi top mounts. After a bit of research regarding the modified Renault top mounts with the spacer nut, i can’t be arsed messing around with a crap design, so these should be a straight fit.

With the weather looking good, hopefully the new front shocks will be on this weekend and the car in a drivable state so I can iron out any issues before making the trip to Edinburgh for the body shop.


Top