ClioSport.net

This is a sample guest message. Register a free account today to become a member! Once signed in, you'll be able to participate on this site by adding your own topics and posts, as well as connect with other members through your own private inbox!

  • When you purchase through links on our site, we may earn an affiliate commission. Read more here.

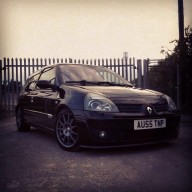
Austin's OEM+ BG 182

Nice work, spraying the inlet a fresh silver would finish that off nicely. I used BBQ spray paint from B&Q when i done mine.


Thanks azza, i had thought about that but i don't normally like the look it gives, i really just like to keep it standard but clean. I had previously though about going a matt black/grey, but like i said, keeping it standard is what I'm all for.
 
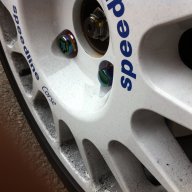
My Trophy Turinis need new tyres so I currently have the 182 wheels on. They are sat in the garage in need of a desperate clean, i want to get them as clean as i possibly can ready for when i put new tures on. As its currently snowing and too cold to clean them i decided I would get the centre caps off and make a start on those.

Im not a detailer, so dont have a load of different products at hand. I have dealt with these using a bucket of shampoo, followed with degreaser and a good scrub with an old tooth brush. This worked wonders on my engine bay so thought i would see how well i could get these to look.

Before;
35AC02F2-5C35-4414-BA84-D4EAC1464E86-258-000000279C0D61C1.webp

5D018875-58A2-4E60-8E99-1067ACF908A7-258-000000240DBA87C5.webp

08E3E5E8-6A16-47A6-B22D-A2FC07D544AE-258-0000002417C21214.webp


During Cleaning;
604C3AEF-63DA-46F2-9A89-64D9DEC16656-258-0000002425CBC25C.webp


after cleaning them as well as i could with the products i had, i decided to give them a polish using SRP, followed with a coat of dodo juice, then finally a spray and rub using some QD spray i had.
878AAC28-C429-4146-8745-609B14CD484A-258-000000243FF51300.webp


After;
They have cleaned up pretty well, remember they will soon be coming up to 8 years old.
E2F9671D-0F01-475E-A2C2-04974D13D61D-258-0000002434CCCC10.webp

C28962FA-2C4F-4A3B-95F0-2BB1E585982E-258-000000247A6C88F9.webp

F57A2564-7E86-4C12-9C4C-8066A6C91109-258-0000002468AEC6BA.webp

E1A42F68-6B5B-4F3E-9B47-5B9A5B7E3C01-258-000000244DBD35E9.webp


Wheels are next!
 
Can't see the pics mate and not sure if you've done this but you can remove the diamonds easy enough, I did them with my old turini's and they looked really good after a few coats of polish.

I'm going to buy a few bottles of IRON-X for my trophy turini's and give them a propper good clean up inside and out then apply loads of coats of sealent so they're easy to clean in future
 
Can't see the pics mate and not sure if you've done this but you can remove the diamonds easy enough, I did them with my old turini's and they looked really good after a few coats of polish.

I'm going to buy a few bottles of IRON-X for my trophy turini's and give them a propper good clean up inside and out then apply loads of coats of sealent so they're easy to clean in future

I thought you could but didnt want to risk it incase any clips broke. I plan on doing the same, Ive heard the ironX is the best stuff to use to get them clean as posible, and also an EZ brush, what you think about that? They seem pretty pricey for a brush so not sure if there are any alternatives.

I think for tyres i might go 205 40, as the 195 40's wear to quickly on the edges.
 
I thought you could but didnt want to risk it incase any clips broke. I plan on doing the same, Ive heard the ironX is the best stuff to use to get them clean as posible, and also an EZ brush, what you think about that? They seem pretty pricey for a brush so not sure if there are any alternatives.

I think for tyres i might go 205 40, as the 195 40's wear to quickly on the edges.

I'd get 205/40/16's mate they'll be better and it should handle a little better as well.

The clips are easy to take out, just get a pointy pair of crips, gently squeeze the clips together then push them out one by one.

The EZ detail brushes are for when the wheels are on the car so it's easier to clean the insides of the wheels. I used Iron-X on them when you first got them if you remember
 
I'd get 205/40/16's mate they'll be better and it should handle a little better as well.

The clips are easy to take out, just get a pointy pair of crips, gently squeeze the clips together then push them out one by one.

The EZ detail brushes are for when the wheels are on the car so it's easier to clean the insides of the wheels. I used Iron-X on them when you first got them if you remember


Yea i remember but we rushed it because i was excited to get them on the car haha, need to be cleaned and then sealed before they go on again.

yes will probably be what i go for next time.
 
Yea i remember but we rushed it because i was excited to get them on the car haha, need to be cleaned and then sealed before they go on again.

yes will probably be what i go for next time.
If you want to get a big bottle of it I'll go halfs with you mate
 
How much is a big bottle? Might just be easier getting the small one as il have to buy a bottle to use it in also.

I've got plenty of bottles mate, I'm not sure, have a look.

Either look for Wolfs Chemicals de-ironiser, IRON-X and I think auto finesse do something called IRON out, they're on here so might be worth asking them
 
I made a start on the Turin's using what I had available, car shampoo and a small sample of de-greaser I had. They were in a state on the inside and have came up a load better than the were. Im getting some IronX and a few other products to get them to a better standard and will then keep them stored away until I next get tyres.

A313BBAE-7873-40B2-B80E-2938B01BD6D1-1321-00000152A87D2F42.webp

421FC132-92F8-4CC5-88D4-AF3B8F51A6DB-1321-00000152E4B5B8C1.webp

71236ECA-A4B3-4FD6-9A68-2DE6D9EAA4F2-1321-00000152F0623C87.webp

A10C22E7-840A-4A6D-8DB2-0FECBCD33AA5-833-000000E996C13822_zps4bbbab36.webp


I also ordered the service parts,
Air filter
Pollen filter
Oil filter
A82A5C77-1314-439D-91A9-315E929A0D5C-833-000000E6A8DC6B80_zpsbaf70132.webp


Im waiting on the oil arriving from opie oils and will then take it to the garage for the oil change.

Around 2 weeks ago the heaters stopped working, after a look around on here i read the resistor pack is the most probable cause. I sourced a new resistor pack and replaced it tonight, a quick test and the heaters work again.
While doing this i thought i would put the new pollen filter in, the difference is unbelievable compared to the old one.
E412BE8A-3176-4AF6-8999-B3AC36467E5A-833-000000E228B215D8_zps14d1a4fd.webp

FC63B362-51C2-4C3D-8071-6097D68B8852-833-000000E6A31F8A56_zps2fe86e13.webp


Thanks,
Austin
 
I remember my pollen filter was the same.

Horrid to think that air had been passing through that muck into your car!
 
The oil and filters were done a couple weeks back now, as soon as the oil arrived i booked it in at the garage for them to do the service.

I have started to collect together some cleaning products for when the weather is a little warmer as i plan on spending a full day getting it up to standard again after the winter weather.
F3638D50-C516-4326-90D9-0E06DB8D8549-722-00000124979E3E3E_zps08fc15ad.webp


And tonight it ticked over to 67k.
D88AF8FC-3E18-46EF-8640-DA8E982480BE-722-0000012481E5390B_zps81660e4c.webp
 
A small update to make, Unfortunately nothing exciting as its more of a problem correction.

First up is the handbrake, literally. I pulled the handbrake up and it did a full 90 degree, after a search on here i soon realised it is best practise to replace both of the cables so ordered from the usual on here, Wests Renault. I have booked in at the local garage i always use for them to replace the cables for me.

EF2B9AAF-60C8-46FF-B451-58AB4A886093-865-000000EF47B0C42D_zps7b975551.webp


next up, a cracked windscreen. I noticed a small crack, by the next day after only traveling to and from work, the crack was 3x the size. I had this replaces straight away.

BBC05F74-8987-4E09-83BF-29C9A370338F-5033-000004F12852EB6E_zps91186feb.webp

E0F431AC-B313-4B1B-B566-4706A85F41DB-865-000000EF618B83C7_zps8375bcf5.webp

082C7F6F-7F15-43EE-81E7-2D508D9B5F90-865-000000EF6CBC8974_zps1d3eddce.webp


And finally, I made up an Alcantara gear insert.

113450BC-A12D-42AA-9638-4A9DDCFBB85C-2892-000002B458595D8B_zps9beb302f.webp

E6272B3F-6387-4D05-AA88-88F090364286-865-000000EF5825D1D6_zps90c8372e.webp
 
Just read through all of this. The best BG on this site hands down.

Its all that alcantara that finishes it off so well and makes it so oem.

Fantastic work you done!
 
Looks spot on with both sets of wheels, but look a tiny bit better with the turini's.

How low is it?
 
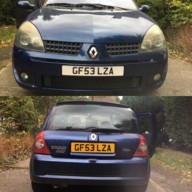
After wanting a private plate for years, i finally managed to find one that resembles my name within reason that reflects the price paid.

null_zps84297d66.webp
 
My carbon splitter has been on years and the condition of it now is appauling, when i bought it, it was glossy and the weave looked perfect. Over time, it has faded and gone a white colour whoch has really spoilt the look of the whole front end. I have wanted to freshen it up for a while now, so today i purchased some wet and dry 1000 grade paper, some masking tape and a can of clear lacquer.

Before pictures;

null_zps34f2907f.webp

null_zpsa2a28577.webp

null_zpsdf452169.webp


I know some may of taken the bumper off to remove the splitter but i didnt feel it was necesery to do it that way. I used the masking tape and some A4 sheets of paper to mask off the bottom half of the bumper.

null_zps6bf51c3b.webp


Ive never sprayed anything before so a complete amature at this, its far from perfect but is a million times better than it was.

null_zps53fe8027.webp

null_zpsfb334020.webp

null_zpsbb110da3.webp


​Austin
 
nice work, really need to do this to the mk1's spoiler, that things gone really grey with age and I want my carbon back!lol!
 
Todays update;

For years my seatbelts have looked dirty, i remember when i bought it back in 2008 they didnt look very clean then either and always wanted to clean them but didnt really know how to go about it. I have heard of hanging them out the door and jet washing, but tbh i didnt fancy doing this. A while back i came across a thread on a different forum from a guy in France who cleaned his and they came up immaculate.

Anyone who knows me, know that i keep my interior immaculate at all times and the belts have really been letting the whole interior down.

Its quite a simple process, please read each step below;

Here you can see just how dirty they were, quite disgusting really and I'm not sure how they have got that bad in the first place but i suppose 8 years of use and being silver they show up everything.

null_zps69ee7265.webp

null_zpsa2de8076.webp

null_zps1127cbd9.webp

null_zps4843328c.webp

null_zps64f11276.webp

null_zpsec63adf5.webp


You need to remove the bolt holding the seat bely in first of all, access it from the rear of the car.

null_zps881d7e71.webp

null_zps906b842b.webp

null_zpse774f38a.webp


When removed you need to get a bucket, a small nail brush and some soap powder.

null_zpse1a988e8.webp


pull the belt as much as it will allow you, then use 2 normal pegs to prevent it from re tensioning back in.

null_zpsf78cc357.webp


You could use a towel, but i didn't have one so used 2 bin bags to cover the seat.

null_zps4bd52f28.webp


Mix a small amount of soap powder with warm water in the bucket and place it on the seat, them put the belt in the bucket. Allow to soak for 10-15 mins and then use the brush to agitate the powder into the belt and you will see the dirt breaking down.

null_zpse8fd3fde.webp

null_zps92c503f6.webp

null_zps0777f80b.webp


When cleaned, i wiped the full belt with a microfibre to get rid of the water and as its a warm day, i left them hanging out the door to dry out. I kept wiping them throughout to soak up any water on them to speed up the natural drying process.

null_zpsb040f49b.webp


When dry, fit back and admire how clean they look.

null_zps44ba3004.webp

null_zps7f3ef54a.webp

null_zpsf1e96ae6.webp

null_zps19312496.webp

null_zps39e54e5f.webp

null_zpsdba3d605.webp

null_zpsd6ab26d5.webp

null_zps07b30acf.webp


Austin
 
Back
Top