ClioSport.net

This is a sample guest message. Register a free account today to become a member! Once signed in, you'll be able to participate on this site by adding your own topics and posts, as well as connect with other members through your own private inbox!

  • When you purchase through links on our site, we may earn an affiliate commission. Read more here.

Clio 172 Phase 1 - Barn find

Evening all.
Tearing things further apart over the last few days. Taking all the suspension off in preparation for a refresh, tie rod is due to come off, clever me forgot to crack the end off so am waiting until the engine is out to remove it.
20210123_183612.webp

With the front shocks out the turrets have received the same dinitrol treatment the rest of the car has, the remaining few patches I can't get too will be understated once the engine is out.
Minty fresh now, wasn't any rust there to start with but nice to know it's now protected.
20210123_184037.webp
20210123_183944.webp

Rear axle blasted and painted by yours truly. Sort of wish I had the beam powder coated but I'm still happy with the result.
Got a few friends to help me put the axle back on. Replaced the beam bolts with m10 x 120 caphead bolts with a 12.9 tensile. Used oversized washers on the top and spring washers and nylock nuts on the bottom.
20210123_181101.webp

Fresh rear suspension all in place, went with cup shocks.
20210123_190851.webp

Not that I don't trust Renault's fine rustproofing, but I don't. So gave the suspension a dusting of vht matt black. Did the same with the exhaust mounts.
20210123_182640.webp

20210123_194448.webp

Also did the wiper linkage because it was in front of me, I don't have a problem I swear....
IMG-20210123-WA0011.webp

I used the "no nonsense" brand of vht spray paint in case anyone wanted to know
 
Looks minty pal

If you've not seen them already read these threads to see what all the other pervs have been doing, for a bit of inspiration on where to clean next😂

 
Looks minty pal

If you've not seen them already read these threads to see what all the morons have been doing, for a bit of inspiration on where to clean next😂


Fixed it.
 
Looks minty pal

If you've not seen them already read these threads to see what all the other pervs have been doing, for a bit of inspiration on where to clean next😂

You can't be sending me stuff like that, my bank balance has already got enough agro reading alastair and big serves threads 🤣
 
Evening all.
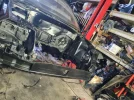
Quick update, got the motor out. Bloody well awkward to pull the thing, due to the way the lift is spaced I've had to pull it from the drivers wing side rather than the front so made things further awkward!
Is there and easier way to put this back in? As when it goes back in the bay will be painted minty mint.
20210126_175217.webp

20210126_175745.webp
20210126_175228.webp
 

Attachments

  • 20210126_175217.webp
    20210126_175217.webp
    1.3 MB · Views: 229
  • 20210126_175217.webp
    20210126_175217.webp
    1.3 MB · Views: 236
Remove the subframe and install from the bottom!
That was originally the plan! However I decided against it as I'm worried about snapping/spinning the captive nuts inside the chassis. The front ones don't look impossible to retrieve if they did but the rears look like you would have to cut into the chassis 😬
 
Swan neck spanner gets onto the rear subframe bolts just fine. I bought new bolts and binned the clips
 
Take the subframe off they said, I would be easy they said....
It was not!
Bolts had by the looks of it had been sitting at the bottom of the sea and were all crispy circles. All of the clips snapped immediately! Three came out with some persuasion from a proper dodgy pole, the last one required some gentle assistance from a slitting disc.

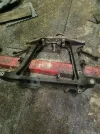
20210128_211732.webp

All came off in the end though, only took a few hours.
The steering rack came off comically easy in comparison!
20210128_220136.webp

Bay is pretty close to stripped just a few more little bits to remove.
Hopefully this weekend can get it all degreased, de-rust scabbed and lay down some paint.
I think I'm going to paint to the top edge of the wing and the other side I will do in dinitrol. Plenty of little bits of box section and cubby holes in the engine bay that need filling up with the Dinitrol 1000 ear cavity wax.
20210128_221024.webp
 

Attachments

  • 20210128_211732.webp
    20210128_211732.webp
    1 MB · Views: 194
  • 20210128_211732.webp
    20210128_211732.webp
    1 MB · Views: 188
  • 20210128_220136.webp
    20210128_220136.webp
    1.9 MB · Views: 227
😂 Put a flat head screwdriver into the clip and ugga dugga the bolt. The clip pings out and then you can easily get a swan neck onto the nut.
 
(I didn't remove my subframe because I thought the clips would be annoying too...... but I don't have a ramp :) )

Least you can get the subframe all nice now and the engine should be a doddle to get back in.

Also the high temp dinitrol seems to be pretty good for the hot areas towards the back of the bay.
 
😂 Put a flat head screwdriver into the clip and ugga dugga the bolt. The clip pings out and then you can easily get a swan neck onto the nut.
I hate to admit it but with a garage full of tools, I don't have a swan neck spanner set 🤣 I managed to get a shallow socket onto the front ones and a normal ring end spanner on the rears. The only one that was a problem was the drivers side front, seemed like the nut was already rounded off, not sure if someone else had had a go before 🤷‍♀️
 
Moan much.
Lots. Karl pilkington is my spirit guide 😁
(I didn't remove my subframe because I thought the clips would be annoying too...... but I don't have a ramp :) )

Least you can get the subframe all nice now and the engine should be a doddle to get back in.

Also the high temp dinitrol seems to be pretty good for the hot areas towards the back of the bay.
To be fair despite my little moan it wasn't all that bad of a job. I would imagine it would be easier for most folk with mine being sat in a barn for a few years 🤣

With a bit if luck the subframe, calipers and a few other little ancillaries will be fired off for blasting today. Got a galvanising silver paint I'm going to try out on the subframe.

Never seen the high temp stuff, shall have to have a look!
 
Evening all.
Doing little bits when I get chance now I'm that busy with work at the moment.
Got some parts back from blasting, used a zinc galvansing high temp paint for the subframe, in my mind this protects it more than normal high temp paint, gave it a good 5 coats a side, just to be sure!
Decided on silver vht paint for the calipers and graphite on the carriers, that's the theme I'm going for on the engine so thought I would do the same for the brakes.
20210209_192839.webp

Still rocking the original calipers, I feel they have cleaned up well, some pitting but hey ho. Got a full big red rebuild kit for fronts and rears ready to go on next.
20210209_192845.webp


On a side note, does anyone know the fittings needed for the clio hard brake lines? I need to take the abs module and master cylinder out and the flare nuts are like cheese and welded in! Might be an easier life to chop the lines and get a socket on them and re-do the lines?
 
Evening all.
Stripped the brake booster and abs pump from the body to finally leave a bare bay. Lots of little scabs of rust dotted about the bay, nothing significant luckily just surface.
Ground everything out with a wire cup and disc on a drill as to try and retain as clean a look as possible when painted, I can see a flap wheel on a grinder making a right royal mess.

20210215_131224.webp

. Spent hooouurrrrrsss standing inside the engine bay wire wheeling everything back, seems to take a down side longer that way but I'm happier with the results
After many hours of wire wheeling, sanding and rust converting followed by 3 coats of 676 black and 2 coats of clear this was the result -
20210215_164328.webp

20210215_164411.webp

Also finished off the remainder of the undersealing that I couldn't do with the engine and downpipe in place.
Also, probably me just being slightly over cautious but once the paint was dry I sprayed some of the Dinitrol on the underside of the chassis legs and all over the subframe mounting points.
20210215_161620.webp
20210215_161709.webp

Also worth noting the pictures are sort of back to front, I sprayed the under seal in the exhaust tunnel first, then painted the bay, then decided to spray the chassis rails and subframe mounts.
 

Attachments

  • 20210215_164344.webp
    20210215_164344.webp
    1.1 MB · Views: 207
  • 20210215_161709.webp
    20210215_161709.webp
    1.1 MB · Views: 185
  • 20210215_161709.webp
    20210215_161709.webp
    1.1 MB · Views: 183
Evening all.
Arts and crafts with Jack today 😁
Painted the engine, ignore the engine mount part, that's being painted graphite when morepaint arrives tomorrow.
20210213_152133.webp

Cracked the sump off and gave it a good dose of gunk followed by a steam clean, dry and paint. Refitted with a new gasket and painstakingly followed the bolt pattern torque procedure.
20210216_145404.webp

Then proceeded to start doing anal stuff like taking my power steering pump apart and re-painting it 🤭
20210211_185407.webp
20210212_185827.webp


In the meantime I broke the alternator, I also broke the starter motor, and then I finished the day off with a pearler and snapped the stud for the cam belt tensioner, grade A plum.

Anyone want to come and help me finish this off? Cars at a bare shell and I need to finish it by this coming Monday so it's off the ramp ready for the the boss' race car. Money and plenty of tea will be provided 😁
 
Afternoon all.
Quick, but ultimately pointless progress made over the past few days.

Loosely fitted;
Subframe,
Wish bones,
Front struts,
Hubs with shafts.
Done some cable tie origami to tie up the shafts as the hub nut is as near as makes no difference welded on and I forgot to crack it before the initial strip down so unable to get any leverage on it I've left it be!
Removed and painted the abs pump and housing and the master cylinder and brake booster have also received a good starting back and a repaint.

20210217_222452.webp

All of the above was done on Wednesday night in order to get it to the state you see below. We were able to roll it out and put it back into it's dry storage where it will more than likely remain for a while.
At the moment I'm working far to many hours with little time to myself, never mind the car, made the decision on Wednesday to put the tools down on all the projects by the end of the day and have some time to myself.
20210217_222502.webp
 
definitely best approach mate as discussed, risk of loosing faith and burning out with the hours you were putting in on the car

come back fresh later in the year :)
 
definitely best approach mate as discussed, risk of loosing faith and burning out with the hours you were putting in on the car

come back fresh later in the year :)
100%, will probably continue in the summer when I can mess around with it on the portable scissor lift outside 😁
Other than steering rack and the engine, everything is brand new, or from your shed, ready to be bolted back on!
 
Evening all.

No update really, just had a move around in the garage so she came put too see the light of day so had to take a picture.
Found someone to come and help me finish it off, so next months or so fingers crossed it shall be completely for some summer hooning 🤞

20210227_172339.webp
 

Attachments

  • 20210227_172339.webp
    20210227_172339.webp
    1.8 MB · Views: 192
Anyone still following this thread? No, ok 🤭
Evening all, made some more progress this evening, interior is back in, looking dusty and dirty, but it's in.
20210604_190009.webp

One handed progress is slow, but it's progress!
20210604_204747.webp

Didn't do many pictures of the bay but I've spent a few evenings piecing back together, got subframe fixed in now and torqued up, roll bars and new bushes are in, brake booster and master cylinder are in and steering rack is in. Oh and the scuttle and all it's bits are back in.
Everything else is just loose in at the moment.
Still can't crack the hub nuts, they need to come out anyway they look fresh off the seabed.
In other news the engine bay paint has reacted and is fooked, leaving it alone for now, I'm just putting it back together and on the road now.
20210604_182300.webp


In other other news I can safely say it is not wise to try and put your bonnet in place on your lonesome, had a good crack at it on my own though......ill see myself out.
 
So then, 2 days before I return to work, am I spending my time wisely? Relaxing perhaps, feet up in the garden? No.
Instead I decided to sit cross legged in my engine bay with a little brush and painted my steering rack 🤭
20210611_172057.webp

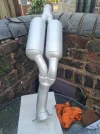
I also decided to polish my zorst because I obviously hadn't wasted enough time already 🤗
20210611_170700.webp

20210611_171857.webp

Putting the engine back together in the next few weeks once my headset arrives.
On a side note if anyone fancies a paid days work, or knows anyone who does, giving me a hand one weekend feel free to give me a PM 🤪
 
Afternoon all,
Car is still in my possession, been doing bits and bobs in my free moments and have slightly neglected updating the thread.
Will be posting a few updates over the next few days as there is more bits I have done, but here's the first instalment.
Blocks been leveled and checked, bores have been checked also.
20210822_142101.webp

Moving onto the head, it has been skimmed and chemically cleaned in the machine shops 'spinny steam cleaning machine thing', head wasn't warped but at £30 it was daft not to whilst the head was off. Rocker cover and breather were chucked in the cleaner too.
Checked all the valves were true, which they were. Gave them a little brush over with a wire wheel to get any excess carbon of and lapped back in.
20210822_124122.webp
20210822_130311.webp

New Renault stem seals were fitted, original springs and collets refitted. Collets were a fooking nightmare to get back on, but dab of grease and a pick made life easier. Head bolts were febi items as at the time I was struggling to find Renault one's.
20210823_144240.webp
20210822_141924.webp

Attacked the sump next which resulted in a battle with a rather stubborn bolt...
20210728_120538.webp

After a fair bit of swearing it came out, new sump gasket put on, sump steam cleaned out with some gunk also.
 

Attachments

  • 20210822_142101.webp
    20210822_142101.webp
    401.9 KB · Views: 155
  • 20210822_124122.webp
    20210822_124122.webp
    750.1 KB · Views: 168
  • 20210822_124122.webp
    20210822_124122.webp
    750.1 KB · Views: 154
  • 20210723_184820.webp
    20210723_184820.webp
    749.5 KB · Views: 181
Evening all, or morning seems as im posting this at 10 past midnight 😳

Some updates to add!
Had the car bead blasted and have painted in in silver manifold paint, so fingers crossed it won't peel for the foreseeable future.
,

20210916_171416.jpg
20210917_181250.jpg
20210916_191256.jpg

Fished the gearbox out of the sea, was in a right sorry state! Many many hours were spent wire wheeling the box and degreasing, didn't take any pictures as I got bloody covered in all sorts of gearbox juices and particles. But the end result I think was pretty tidy, used the same manifold super high temp paint, lapped on a fair few coats in the thinking it will be long lasting. Also took the gearbox mount apart and did that in the same format but brushed the paint on instead, with the battery being on top of it I figured the finish wouldn't matter AS much.
20210813_181921.jpg

Paint on my front support and places in the bay seems to have reacted with something and gone dull so it's got to be sprayed again 👎👎
20210902_194603.jpg

Got the subframe fastened in for the final time and properly torqued up with new hardware. Thanks to a forum member on here I got some new to me (used) wishbones with some power flex black bushes in bloody good nick. New ball joint attached also. Everything was put on to get it rolling as it's on the move again to my new garage.
Still got to do hubs and drive shafts, got new clips and bolts waiting but I dont want to put my shiny bits on until it's ready for final assembly as sad as that sounds.
20211020_181754.webp

Here's the old dear at present day. At the new garage, in good company though! Can anyone guess the res back end in front of the clio?
Plan is to get it finished before Christmas but im in no rush, just ordering final parts now, new air con pump, condensor, alternator, sending the abs pump for refurbishment. After that I can safely confirm that other than rebuilding the bottom of the engine, I have replaced/refurbished every part on this car 😁 Or considering it's now half past midnight I could just be talking utter crap and there's something I've missed lol

Hope everyone's doing well if anyones still following the thread, more updates to come in due course but am that busy with other things it may be spaced. Determined to get her at least moving under it's own steam before Christmas.
 

Attachments

  • 20210917_181242.webp
    20210917_181242.webp
    1.6 MB · Views: 171
If you're looking for a way of getting the seats looking decent, I remember on my old 182 I used an old razor and carefully shaved the nobbles off and it worked really well. Then just used some upholstery cleaner to clean them up.
 
Evening all,

Some movement on the old dear, finally!
Flywheel has been skimmed and bolted back on along with a 3 piece Luk clutch kit.
Also purchased a new rear main oil seal as one of those whilst your in there type of things, wasn't leaking but for £20 it may as well be done.
20211113_164544.jpg

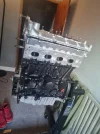
Gearbox bolted back in with the mount along with the exhaust manifold. New hardware used for themanifold. New water pump and gasket fitted along with a smear of the Renault sealant stuff for good measure!
20211126_151435.webp
20211126_151445.webp

Really not happy with the endcap on the gearbox, in person it looks sh*te so that may be whipped off in favour of a new one or some serious tidying is in order!

Hopefully, there will be more movement this week coming, aiming to get it done before Christmas, but I said this last Christmas lol

Jack.
 
Been a busy individual this weekend.

Sat down and smashed on, didn't take many pictures unfortunately. Head torqued, lifters re set and bathed in oil since Thursday and put back in, cams in with plenty of assembly lube. Bolted all anciliaries back on and painted and cleaned as I went. Picked up a reconditioned genuine alternator from eBay for £70 so I can't really complain!

Wish I had painted the crank pulley but I'm buying a new one at some point in the future so bugger it left it rusty as a sort of lazy homage to it's rusty barn beginnings 😄
20220205_162609.webp

20220205_181345.webp

Moving on i painted my calipers again, this time in a high temperature enamel paint so should last some heavy braking. Rebuilt all the calipers and sliders with a bigredd kit. Rather happy with my Saturdays worth of progress.
20220205_175139.webp
 

Attachments

  • 20220205_181345.webp
    20220205_181345.webp
    864.5 KB · Views: 148
Evening all.

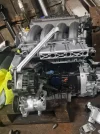
Engine all timed up and auxiliary belt fitted. Engine mounts and covers refitted.
20220212_140801.webp

Abs pump and new brake lines put in, engine carpet put back in. Forgot to order an engine mount so for now, crispy engine mount!
20220214_162018.webp


Engine up in the air, torque settings checked and engine spun over again just to be sure.
20220214_162026.webp

Engines innnnnnnnnnnnnn 😌😌
20220214_170417.webp

Going to get on with plumbing in tomorrow, should hopefully be finished up by the weekend. Handbrake turns and yobbery inbound 👌
 
Back
Top