
ClioSport.net
-
When you purchase through links on our site, we may earn an affiliate commission. Read more here.
You are using an out of date browser. It may not display this or other websites correctly.
You should upgrade or use an alternative browser.
You should upgrade or use an alternative browser.
Covid182 the longest clutch change ever
- Thread starter Touring_Rob
- Start date
Touring_Rob
ClioSport Club Member
great thread, love the approach to, clean and sort stuff but leave functional so first time it rains you won't decide to not use the car.
Cheers mate, yes thats the plan

Touring_Rob
ClioSport Club Member
Sadly a bit low on pictures for the next bit.
Laid under the car for a whole day with the wire brush and grinder. Every bit of surface rust was removed, jetwashed, scrubbed. Cleaned again with solvents before Epoxy 121 painting everything. Some decent looking rust in the little cavities in front of the top spring pads but fortunately none of it has penetrated. This area was treated before applying the Epoxy.
For anyone who doesn't want to get into this, but wants to protect their car I would 100% jetwash and waxoil these cavities around the spring pads.
Anyway, onto pics - after the epoxy I liberally coated everything in more Dinitrol. Boot floor, chassis rails, inner wings and behind arches. The fuel cap was also removed and any crust sorted - thankfully not much at all.
Got the rear beam hung in place too


New Cooksports coated in clear Dinitrol wax. The issue with powder coating things like springs is that a tiny crack seems to focus the corrosion on a tiny area so often they fail prematurely.

Original spring pads weren't too bad after a good scrubbing. The finish on the beam is far from perfect but perfect for this application if that makes sense.

Shocks cleaned up and clear waxed


Cheers!
Rob,
Laid under the car for a whole day with the wire brush and grinder. Every bit of surface rust was removed, jetwashed, scrubbed. Cleaned again with solvents before Epoxy 121 painting everything. Some decent looking rust in the little cavities in front of the top spring pads but fortunately none of it has penetrated. This area was treated before applying the Epoxy.
For anyone who doesn't want to get into this, but wants to protect their car I would 100% jetwash and waxoil these cavities around the spring pads.
Anyway, onto pics - after the epoxy I liberally coated everything in more Dinitrol. Boot floor, chassis rails, inner wings and behind arches. The fuel cap was also removed and any crust sorted - thankfully not much at all.
Got the rear beam hung in place too
New Cooksports coated in clear Dinitrol wax. The issue with powder coating things like springs is that a tiny crack seems to focus the corrosion on a tiny area so often they fail prematurely.
Original spring pads weren't too bad after a good scrubbing. The finish on the beam is far from perfect but perfect for this application if that makes sense.
Shocks cleaned up and clear waxed
Cheers!
Rob,
And again.. I love this thread.. This kind of content is golden to me.
Also can't wait to do this on mine")
Also can't wait to do this on mine
Touring_Rob
ClioSport Club Member
Probably seems perverted that I cant wait to tackle this job on mineThe finish is just too satisfying!
And again.. I love this thread.. This kind of content is golden to me.
Also can't wait to do this on mine
Thanks lads. Its fun looking back but not that much fun doing it - bloody filthy and soaking wet for most of it! But I think the epoxy + Dinitrol will keep is protected for a good few years.
Touring_Rob
ClioSport Club Member
Did you use the 90deg die grinder on everything?
Yes it's brilliant with the right pads. I don't have a battery angle grinder but would have found one very handy, quicker than the die grinder but the little grinder gets in all the tight spaces.
Ive used the little grinder more than any other tool since I got it.
Im 100% going to get one, it will be quite a lot because Ill need battery and charger, I dont know if theres any other tools Ill use to add to the line up to make buying another brand more sensible though. Maybe angle grinder but tbf Id just go makita for a portable one.Yes it's brilliant with the right pads. I don't have a battery angle grinder but would have found one very handy, quicker than the die grinder but the little grinder gets in all the tight spaces.
Ive used the little grinder more than any other tool since I got it.
Archtronics
ClioSport Club Member
Clio 182
Im 100% going to get one, it will be quite a lot because Ill need battery and charger, I dont know if theres any other tools Ill use to add to the line up to make buying another brand more sensible though. Maybe angle grinder but tbf Id just go makita for a portable one.
I’m not brand loyal at all but the M12 stuff is really handy because it’s small and compact.
A ratchet and stubby impact aren’t vast amounts of money once you’ve got the batteries and are really good at getting into tight spaces.
I’ve also got the heated hoody on order for winter which is the thing I’m probably most excited about..

Touring_Rob
ClioSport Club Member
I’m not brand loyal at all but the M12 stuff is really handy because it’s small and compact.
A ratchet and stubby impact aren’t vast amounts of money once you’ve got the batteries and are really good at getting into tight spaces.
I’ve also got the heated hoody on order for winter which is the thing I’m probably most excited about..
Yea same, I'm not Mr Milwaukee now, I will use them for their M12 range but wouldn't buy a Milwaukee angle grinder which is their M18 (so different battery) if I already had a larger battery tool from another company. I nearly view different battery ranges as being different manufacturers anyway as you have to start over charger and tool wise.
Having said that I am dead impressed so far with the two red tools I have.
Archtronics
ClioSport Club Member
Clio 182
Yea same, I'm not Mr Milwaukee now, I will use them for their M12 range but wouldn't buy a Milwaukee angle grinder which is their M18 (so different battery) if I already had a larger battery tool from another company. I nearly view different battery ranges as being different manufacturers anyway as you have to start over charger and tool wise.
Having said that I am dead impressed so far with the two red tools I have.
Tbh the Milwaukee M18 stuff I’ve tried is no better or worse than the other big brands.
M12 is pretty unique so far tho, only similar I’ve seen is the Sealey stuff at the cheaper end.
Touring_Rob
ClioSport Club Member
Amazing finish! So satisfying! I’m about to start this kind of mission on my Discovery 3.
can you expand on what you used? What is the epoxy? Primer?
Keep up the good work!
Hi there, thanks very much.
For small plates etc I will just citric acid dip/sand/grind to bare metal then I use FE-123 to treat and left over crust, normally at this point its just rust in pits. From there I spray with an acid etch primer and then rattle can satin black. The parts then get a good dose of Dinitrol 447 which is a black, zinc loaded resin based stone chip. It leaves a fairly nice satin black finish which to me looks fairly oem - especially if applied over a smooth surface. The FE-123 seems to work well, it cures to a hard surface which you can (and should) paint over however it is latex based so I have concerns over its long term stability so wouldn't use it on the body its self just small items which I can keep an eye on.
For larger items (and smaller brackets if I have some mixed) I prep and then paint with Epoxy Mastic 121. This is either a primer or finish and cures over approximately 12 hours to a b*****d tough finish. I came across it on a landrover forum funnily enough and many people use it to paint chassis with. Its ace card is that it bonds to the surface really well (assuming you've cleaned it nicely). I prefer this functionally to powder coating as its less likely to chip however the finish will never be as smooth and nice as powder coat.
On some parts I've sprayed them first with a high zinc primer. But always finish off with Dinitrol 447. For some areas (cavities etc) after the 447 I will use Dinitrol 4941 which cures to a flexible bitumen based layer (a bit like waxoil)
But what ever you use, if you can seal the entire surface you will be doing a good thing. A small un protected patch will corrode far more quickly (if the rest of the surface is sealed) and the corrosion will creep under what ever you have done and spoil your work over several years - I am hoping to have protected this car for 5-10 years.
The biggest bit of advice that I can give you is to remove everything and send it to be blasted. It will save you sooooo much time and they will do a better job than you could with a wire brush on an angle grinder. I did the latter because all the local blasters were closed during lock down and although fun at first was such a chore by the end. On a larger car I would have just given up until the blasters re-opened.
In the bay, or on coloured parts I use 4010 which is a clear high temp wax
In cavities I will use Supertrol as its thin and gets into seams nicely. Alternatively I might use Dinitrol ML which is a penetrating wax however have not used it yet so can't review.
Basically my goal is to improve every part I take off or touch. Even if I don't do a great job if I've improved it then I've improved the car. It is time consuming though and I'm sad to say on a car like the Clio it doesn't make much financial sense. I just got carried away because I like the car and was getting bored over lock down.
Good luck!
I like Frost and Rust Buster because they carry good stock and a wide range plus ship super fast.
Epoxy Mastic Rust Proofing Paint - Rustbuster
EM121 Epoxy Rust Proofing Paint provides durable, long-lasting corrosion protection for automotive and metal restoration projects. Ideal for professional use.
 www.rust.co.uk
FE-123 RUST CONVERTER - Rustbuster
FE-123 Rust Converter offers powerful rust neutralization and protection for automotive restoration. Trusted by professionals for long-lasting, paint-ready results.
www.rust.co.uk
DINITROL 4941 UNDERBODY COATING BLACK AEROSOL 500ML - Rustbuster
Dinitrol 4941 Underbody Coating Black Aerosol Dinitrol 4941 is a black underbody underseal product. It dries to the touch but remains as a flexible rust proofing for several years. Apply to a clean grease-free surface: remove any loose rust or dirt prior to application. Dinitrol 4941 is widely...
www.rust.co.uk

DINITROL 447 STONECHIP BLACK AEROSOL - Rustbuster
Dinitrol 447 Stonechip Black 500ml Aerosol Dinitrol 447 Protect Super is a fast-drying, rubber and resin based stonechip. It is ideal for application to areas most likely to be damaged by stones and other objects impacting while driving, including the vehicle’s underside, wheel arches etc. Body...
www.rust.co.uk

1LTR DINITROL 4010 CORROHEAT CLEAR RUST PROOFING - Rustbuster
Protect engine bays and high-temp areas with DINITROL 4010 Corroheat—clear, heat-resistant wax for rustproofing metal, rubber, and plastic up to 200 °C.
www.rust.co.uk
https://www.amazon.co.uk/dp/B0043ZWCN6/?tag=cliospnet01-21
Touring_Rob
ClioSport Club Member
Did my underside restoration this summer including powdercoating the beam, on a 172 though it's pretty difficult to get to the lip on the chassis because the spare wheel well gets in the way.
Good work! Got any pictures or a build thread?
Touring_Rob
ClioSport Club Member
Nice work mate, good job! Are you going to keep the clio after the job done?
Thank you very much. I don't know what my plans are yet to be honest. At the end I'll total up what I've spent and have a think. However I am selling my daily bus soon so will likely use the Clio for a while as its fun and Im still WFH etc. Then I've got some work to do on the house before starting on another project car (I've for another 5 car/bike projects lined up after this one
 )
)DomP182
ClioSport Club Member
ph1 172, Arctic182
I should have started a build thread, I might have had the advice to bin it and get a tidier exampleGood work! Got any pictures or a build thread?

I've got photos though, shall I bombard your thread with them?
Thank you very much. I don't know what my plans are yet to be honest. At the end I'll total up what I've spent and have a think. However I am selling my daily bus soon so will likely use the Clio for a while as its fun and Im still WFH etc. Then I've got some work to do on the house before starting on another project car (I've for another 5 car/bike projects lined up after this one
Well I thought you going to keep it for a while lots of work in it, after all it is going to be a satisfying feeling to drive her. Well done enjoy your little daily and have fun!
Touring_Rob
ClioSport Club Member
I should have started a build thread, I might have had the advice to bin it and get a tidier example
I've got photos though, shall I bombard your thread with them?
Hahaha - feel free mate I'm not precious!
Touring_Rob
ClioSport Club Member
Cheers dude - certainly for a few months minimum. But these are such good little all rounders I can see me hanging onto it as a second car for a while - Its actually really nice having a spare fully working car for when your stupid daily wreck breaks down.Well I thought you going to keep it for a while lots of work in it, after all it is going to be a satisfying feeling to drive her. Well done enjoy your little daily and have fun!
Cheers dude - certainly for a few months minimum. But these are such good little all rounders I can see me hanging onto it as a second car for a while - Its actually really nice having a spare fully working car for when your stupid daily wreck breaks down.
Yeahh I know this feeling
I'm about to getting a second car...Touring_Rob
ClioSport Club Member
Few more bits cleaned up and painted


Like a moron I left a few parts under a plastic cover in the rain, new (few thousand miles old) look a right state. Took a dusty hour with the grinder to get them back to 'ok'

Gently dusting over, paint will be taken off the disk face before pads go in

Back in place, still need to torque up the hub nut (self reminder!)

Like a moron I left a few parts under a plastic cover in the rain, new (few thousand miles old) look a right state. Took a dusty hour with the grinder to get them back to 'ok'
Gently dusting over, paint will be taken off the disk face before pads go in
Back in place, still need to torque up the hub nut (self reminder!)
Touring_Rob
ClioSport Club Member
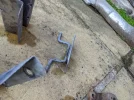
The headlight level senor/brake line bracket is a right state, no heads left on the sensor bolts etc

Ground the head off one of the bolts, enough to let me rotate the sensor and loosen the other bolt enough to unscrew it with pliers. With the Sensor off it looks fine will need to clean up and re lube the ball joints


Gave all the easy bits a quick go with the grinder

Not even giving that a go yet


Into the citric acid for a night

Ground the head off one of the bolts, enough to let me rotate the sensor and loosen the other bolt enough to unscrew it with pliers. With the Sensor off it looks fine will need to clean up and re lube the ball joints
Gave all the easy bits a quick go with the grinder
Not even giving that a go yet
Into the citric acid for a night
Touring_Rob
ClioSport Club Member
Citric acid did its job but the bracket is badly pitted, I doubt these are available from Renault so I'll crack on with it and if a nicer one comes up for sale ever I'll nab it.

Got happy with the grinder

Half done

Mostly done

FE-123 doing its thing. When its all done the white is all black and very hard. Hoping that this will sort any rust left in pitting. I find it easiest for small parts to wear rubber gloves, pour a bit of juice in one palm and just rub it all over the part by hand - plus im too lazy to find and then clean a brush.

I can't be fecked to mix up any epoxy for these as its a bit tough to mix such small quantities. I'll acid etch, satin black spray and then load them up with Dinitrol which should keep them intact longer than they would have been without
Got happy with the grinder
Half done
Mostly done
FE-123 doing its thing. When its all done the white is all black and very hard. Hoping that this will sort any rust left in pitting. I find it easiest for small parts to wear rubber gloves, pour a bit of juice in one palm and just rub it all over the part by hand - plus im too lazy to find and then clean a brush.
I can't be fecked to mix up any epoxy for these as its a bit tough to mix such small quantities. I'll acid etch, satin black spray and then load them up with Dinitrol which should keep them intact longer than they would have been without
Touring_Rob
ClioSport Club Member
I like those bulk head fittings! Look very smart.
I just thought having one flexi to the calipers from that point makes more sense, well also I couldnt be bothered to make up the hardlines at the timeI like those bulk head fittings! Look very smart.
was when the garage was a mess!Touring_Rob
ClioSport Club Member
One of the rear exhaust brackets had a snapped off bolt in it so popped over to my dads as he has recently bought an tiny tiny MIG to replace the family Clark which was such a pile. I bought a big bottle of Argon CO2 mix a few weeks back and it seems to be a good little thing. Old bolt welded to snapped off bolt and just screwed it out.


Then off to my lock up, ive got an old shitty blasting cab with some crap media, after an hour it had done an 'alright' job on a few parts


With that done the brackets were all epoxy painted with a good dose of Dinitrol to finish - did this at the same time as the rear beam

Also etch primed, satin black and Dinitroled the headlight height sensor bracket, could really have done with being done in epoxy too but I couldn't be bothered to mix up such a small amount. Look heavily pitted still but will do.

Then off to my lock up, ive got an old shitty blasting cab with some crap media, after an hour it had done an 'alright' job on a few parts
With that done the brackets were all epoxy painted with a good dose of Dinitrol to finish - did this at the same time as the rear beam
Also etch primed, satin black and Dinitroled the headlight height sensor bracket, could really have done with being done in epoxy too but I couldn't be bothered to mix up such a small amount. Look heavily pitted still but will do.
Attachments
Touring_Rob
ClioSport Club Member
I had fitted new (eBay) rear calipers to the car about a year ago but all the rubbers had perished!


Also one of the rear pads which only had a 1000 miles or so on it had failed weirdly, chunk of pad material had just broken off? Brembo pads too.

So started the usual die grinder clean up of caliper parts

Then began to strip down the calipers

Obviously spilling brake fluid everywhere


Also one of the rear pads which only had a 1000 miles or so on it had failed weirdly, chunk of pad material had just broken off? Brembo pads too.
So started the usual die grinder clean up of caliper parts
Then began to strip down the calipers
Obviously spilling brake fluid everywhere
Touring_Rob
ClioSport Club Member
Bit of elbow grease (I safe on this one as I have her convinced I don't know where the cleaning gear is kept)

Sort out some bolt heads (why am I doing this?)


Mask anything important before acid etch and paint


Sort out some bolt heads (why am I doing this?)
Mask anything important before acid etch and paint
Touring_Rob
ClioSport Club Member
New seal kit arrived from Bigg Red - looks good quality and at £20 cheaper than all the eBay listings of Chinese pap.

These were such an unbelievable c**t to get in

Some stainless nipples

All done, I'n not 1000% on these as I think they were Chinese calipers and slide seal fit was way too tight, will keep an eye on them and might build up a set of used but genuine rears in the future. Little low on pictures due to re greasing the hand brake mech (indoors lol) and trying hard to not touch anything. She was being quite good about it but would have had a melt down had she discovered grease all over the place.

Rear line kit from @BRT Motorsport arrived and looks great. This replaces the hard lines on the rear beam and I think *hope also the flexi lines between beam and body. This is one of those parts that is reasonably priced and just makes sense to do while the rest is out. I bought them from eBay, not sure if they are available direct. Clio 172 182 Rear Axle Braided Brake Hose's


Thats us all caught up to date. This weekend is rear caliper fitting, ABS sensor and brake lines. At which point I'm just waiting for more parts to arrive!
Still need to figure out an exhaust and repair/find some front rad brackets before the bumper can go back on but fingers crossed the car will be drive-able soon. First road trip will be to get alignment and tracking sorted after all the work before going back up on stands to have wheels refurbished and some new tyres fitted.
Until the weekend!
These were such an unbelievable c**t to get in
Some stainless nipples
All done, I'n not 1000% on these as I think they were Chinese calipers and slide seal fit was way too tight, will keep an eye on them and might build up a set of used but genuine rears in the future. Little low on pictures due to re greasing the hand brake mech (indoors lol) and trying hard to not touch anything. She was being quite good about it but would have had a melt down had she discovered grease all over the place.
Rear line kit from @BRT Motorsport arrived and looks great. This replaces the hard lines on the rear beam and I think *hope also the flexi lines between beam and body. This is one of those parts that is reasonably priced and just makes sense to do while the rest is out. I bought them from eBay, not sure if they are available direct. Clio 172 182 Rear Axle Braided Brake Hose's
Thats us all caught up to date. This weekend is rear caliper fitting, ABS sensor and brake lines. At which point I'm just waiting for more parts to arrive!
Still need to figure out an exhaust and repair/find some front rad brackets before the bumper can go back on but fingers crossed the car will be drive-able soon. First road trip will be to get alignment and tracking sorted after all the work before going back up on stands to have wheels refurbished and some new tyres fitted.
Until the weekend!
Touring_Rob
ClioSport Club Member
Does the bigger boot over the handbrake mechanics has some kind of marking on it? Like a brand or so in the opposite of the handbrake lever
Not that I can remember. The old boot and new boot from Bigg Red don't have any marking on however the new ones seem much higher quality!
Bigg Red
Brake Repair, Reconditioning, Remanufacturing. Painted Brake Calipers and Caliper Components like Pistons, Seals and complete Repair Kits. All your Brake Caliper needs
Rob
Absolutely fabulous thread. Way more patience than me for cleaning up parts!
I also know your pain of owning multiple cars as I also own 6 cars (7 until very recently!) and have the constant battle of keeping them all on the road. Doesn't help 3 of mine are pre-80s, so neediness was built in.
Looking forward to seeing this back on the road.
I also know your pain of owning multiple cars as I also own 6 cars (7 until very recently!) and have the constant battle of keeping them all on the road. Doesn't help 3 of mine are pre-80s, so neediness was built in.
Looking forward to seeing this back on the road.
gambit
ClioSport Club Member
182 Trophy
Great stuff. Are the new rear brake line to replace just the rear beam hard lines and terminate at the bracket with flexi still in place or do they also replace the flexi as well?
Agree with how difficult installing the dust boots on the rear caliper piston is. I found the trick was to install the boot on the piston, then insert the piston into the caliper and wind it into position then push the boot onto the caliper lip.
Agree with how difficult installing the dust boots on the rear caliper piston is. I found the trick was to install the boot on the piston, then insert the piston into the caliper and wind it into position then push the boot onto the caliper lip.
Last edited:
Yes will replace the flexis, otherwise would be 2 male endsGreat stuff. Are the new rear brake line to replace just the rear beam hard lines and terminate at the bracket with flexi still in place or do they also replace the flexi as well?
Similar threads
- Replies
- 4
- Views
- 942
- Replies
- 1
- Views
- 1K