ClioSport.net

Register a free account today to become a member!
Once signed in, you'll be able to participate on this site by adding your own topics and posts, as well as connect with other members through your own private inbox!

  • When you purchase through links on our site, we may earn an affiliate commission. Read more here.

Inferno track car build


Next part of the update. I was beginning to feel like theyre was a bit too much going on with the livery on the car so decided to tone it down a bit. I also fitted a new rain light on the rear as the one i was running shorted and half the l.e.ds stopped working.

20210411_130416_HDR.jpg

20210411_135143.jpg

20210411_135213_HDR.jpg

20210411_135153_HDR.jpg


I also stuck one of the bucket seats back in the car. Love how its looking with the white backs now.

20210411_130729_HDR.jpg
 
Got round to drilling out the seat mounts for the the harness lap belts. Replaced the inner rear bolts for eyelet anchor bolts for the harnesses to hook onto. Feel as if this is a much safer solution to what i was running before.

IMG_20210413_205537_990.jpg


At the same time I also set about tidying up more of the wiring under the dash and just a general tidy up. Still haven't got round to sorting the cage out yet so thats been put too the side.

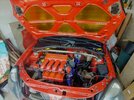
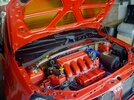
So i have turned my attention to the engine bay. You may also notice I have removed my foglight surrounds and ducts... More on that later 🙊🙊

IMG_20210418_182710_261.jpg

IMG_20210418_182710_244.jpg


The bay Its self is in dire need of some tidying up so at the moment I have removed the inlet and fuel rail cover for spraying.

Pretty happy with hpw these have turned out.

IMG_20210419_165921_087.jpg

IMG_20210419_183126_345.jpg

IMG_20210419_183126_382.jpg
IMG_20210419_183126_388.jpg


Next will be respray the rocker cover (not looking forward to this, gotna feeling it will be a nightmare to mask up) also going to be painting the engine mount, engine mount bracket, throttle body, alternator bracket and the engine lifting eyelet.
 
Took advantage of the good weather tonight after work and got a few more bits painted.

Engine lifting bracket, engine mount and engine mount bracket.

Next on the list is the rocker cover and alternator bracket.

IMG_20210421_192825_490.jpg
 
Well was expecting a delivery for the clio yesterday after work so headed round and set about doing a few bits. De greased the bay and got most of the crap off the rocker cover. Got all the painted engine bits refitted, unfortunatly not the best pictures due to the glare of the sun but ill get some better ones tomorrow no doubt.

20210422_201140.jpg

20210423_160146_HDR.jpg
IMG_20210423_172555_898.jpg


Next to tackle is this, a Varley redtop battery and cage with a relocation kit and cut off switch to be fitted also

Screenshot_20210313-165435.png


Then.... That should be the bay done once i change my induction set up from a 90 degree to a 45 degree behind the headlight
 
Got a couple more pics of the bay today whilst removing the battery and ecu housing.

Attempted to lay my ecu flat on top of the gearbox mount but there seemed to be loads of tension on the cables 🤷 Any suggestions?

20210425_105445_HDR~2.jpg

20210425_113331_HDR~2.jpg


Then set about removing the cage, brace and seats and given the rear another fresh lick of paint!

20210425_163553_HDR~2.jpg
 

Attachments

  • 20210425_113331_HDR~2.jpg
    20210425_113331_HDR~2.jpg
    2.1 MB · Views: 124
  • 20210425_105445_HDR~2.jpg
    20210425_105445_HDR~2.jpg
    2.3 MB · Views: 112
With the rear end painted i set about getting front painted also along with the roof. Just need to get the cage sorted out and that will be the interior done and ready to bolt everything back in!

20210427_140329.jpg


To tidy things up a bit, I had bought some rubber edging. So fitted this to the edge round the gutted bootlid, the edge round the aero catches and on the edge on the front crewmember. For something so simple its made a nice subtle improvement.

20210427_122334~2.jpg

20210427_123437~2.jpg

20210427_123422_HDR~2.jpg
 
Got round to doing the front numberplate as well so it was also quick removal.

£5 strip of aluminum from B&Q, some strong as f*** glue and some vinyl on the bumper.

3 magnets on the back of the plate and voila!
 
Delivery day today.

Got home to 2 packages after work.

1st of which...
BAF Motorsport K brace.
20210428_185535~2.jpg

And a quick mock up
20210428_185912_HDR~2.jpg

I would have fitted it there and then but.... I seem to have misplaced the isofix bolts that i took out a couple of year back. Have other somewhere so will be bolted in at the weekend.

2nd parcel. Was buzzing for this one!

20210428_191752~2.jpg


Cup racer brake ducts and deflector plates! I know i could have atleast cleaned the dust off them before taking photos 😂 but yeah will need to get the dremel out and get these fitted at the weekend also

20210428_192113_HDR~2.jpg
 
Sunday progress time!

The bootlid got the finishing touches today. With the addition of the locking aero catches. Glad i went for these as due to the car possibly being taken to work some days its always good to have that bit of safety.

Really chuffed with how these have turned out.

20210502_154330_HDR~2.jpg


Now onto the front, Gave the cup racer brake ducts a good clean and started to cut awaybat the bumper to get them fitted. Then screwed them in place with some black screws to keep it subtle.

Imo these look brilliant!

20210502_154949_HDR~2.jpg

20210502_154942_HDR~2.jpg


Then also took delivery of some michelin pilot sport 3s so they will be fitted to one of the sets of wheels.

20210502_110035_HDR.jpg
 
Got the clio out the garage for just now so i can use the garage as a temporary "spray booth"

20210505_200432_HDR~2.jpg


So changing the colour of the cage to match the rest of the interior colour scheme. In 2 minds to get the wheels done white too match as well 🤔

20210506_143058.jpg

20210506_143015_HDR.jpg


Cage needs another wet sand and another coat then lacquer. Then once I decide where im mounting the battery in the car I can get everything in and bolted down.
 

haimsey

ClioSport Club Member
  ph2 172
I need a set of cup racer ducts!
Might be worth pulling that rear loom out before the cage goes in. Then you can feed it back through behind the bodywork and hide it away. I did mine, took a couple hours but was worth it in the end. (Tied string to the plugs before pulling them out so it was easier to get them back through, especially across the boot lid)

They certainly look the part mate! Really chuffed with them.

Yeaah i have been meaning to do that for a good while now. I done the driver side when i painted the car the first time about a year ago. And yeah still not got round to do the passenger side 😂 It is on the list to do though! 😂
 
Well thats the cage painted now. All white and ready to be fitted. Took it out the garage to see how it looks in the day light.

Happy with the outcome.

20210510_155336_HDR~2.jpg

20210510_155322~2.jpg


Was time to get it in the car.

Luckily enough the paint i used was a decent match to the powdercoat used on the baf motorsport k brace.

20210510_160547_HDR~2.jpg


Then with that sitting in i bolted it up and then placed my seats in situ. Just to get an idea of how the interior will look with all the white accents fitted. Absolutely loving the orange white colour scheme and contrast now.

20210510_170855_HDR~2.jpg


Just a few more bite here and there and the interior will be complete!

And may aswell throw in a rear end shot too.

20210510_170957_HDR~2.jpg
 
Wee bit of an update. Got round to re tapping the holes in the floor from the old isofix bar resulting in finally getting my rear brace fitted properly. Also got round to lowering the rear of the car to match the front and got the driver seat bolted in and harness fitted.

20210516_143908.jpg


Before fitting the passenger seat i still need to work out where im sticking the battery.

Torn between where it is in the pic or behind the passenger seat. Behind the passenger seat seems to be the flattest place for it but when it rains I tend to get puddles there coming from someplace. So thats putting me off. 🤷
 
  HK52 VLW 172 Cup
Amazin forum this. Here I am just having a browse and randomly come across your front brace from Ktek. I've got one which I found under the boot carpet when I took the seats out, and now I know what make it is and how to fit it. (I was wondering if the bolts would foul the suspension leg, but I see you have simply put the nut on the top. Genius. So I'll put that on the weekend.

What nut and bolt size/spec did you buy? and did the bar make any noticeable difference to the handling? I'm going to put it on now anyway as it was effectively free, being that I didn't know I had one.

Buestiful cars here and plenty of inspiration too.
Thats the exact same thought i had. Was too worried incase the bolts would foul but when fitted upside down it is totally fine.

As for the bolts they were just ones i had lying around the garage. If anything there far too long 😂 I think they may be M6 but im not 100% sure i would have to measure them for you. It may make a small difference to driving but i think pms front braces give the best results with the solid top mounts. The ktec one is definitely a nice addition to the bay though! I love the look of mines.
 

haimsey

ClioSport Club Member
  ph2 172
Wee bit of an update. Got round to re tapping the holes in the floor from the old isofix bar resulting in finally getting my rear brace fitted properly. Also got round to lowering the rear of the car to match the front and got the driver seat bolted in and harness fitted.

View attachment 1538851

Before fitting the passenger seat i still need to work out where im sticking the battery.

Torn between where it is in the pic or behind the passenger seat. Behind the passenger seat seems to be the flattest place for it but when it rains I tend to get puddles there coming from someplace. So thats putting me off. 🤷
I get the same puddle, I've been chasing it for years 😂.
I was going to go for the vertical face behind the passenger seat tbh, but never got round to buying a lightweight battery
 
I get the same puddle, I've been chasing it for years 😂.
I was going to go for the vertical face behind the passenger seat tbh, but never got round to buying a lightweight battery
I know your pain mate! I noticed when i had the dash out that a grommet was hanging out the bulkhead. So im going to guess that's where the water is coming in. I was thinking of having it on the verticle but its just mounting it.
 
  HK52 VLW 172 Cup
Thats the exact same thought i had. Was too worried incase the bolts would foul but when fitted upside down it is totally fine.

As for the bolts they were just ones i had lying around the garage. If anything there far too long 😂 I think they may be M6 but im not 100% sure i would have to measure them for you. It may make a small difference to driving but i think pms front braces give the best results with the solid top mounts. The ktec one is definitely a nice addition to the bay though! I love the look of mines.
Don't worry about measurements, I can get the size from the holes drilled in the brace mounts. Im going to buy the strongest I can get as I think ultimetly the bolts are the point of failure. I'm just happy that for the price of a few decent bolts I've got some free Ktek bling to put on the car that may or may not improve the handling in some way. The car already handles better than I can drive anyway:D
 

haimsey

ClioSport Club Member
  ph2 172
I know your pain mate! I noticed when i had the dash out that a grommet was hanging out the bulkhead. So im going to guess that's where the water is coming in. I was thinking of having it on the verticle but its just mounting it.
Rivnuts will sort the mounting out
 
So the clio finally seen the road today! 1st time in about 6 months.

Got the calipers bled all round with the new fluid bled through and also tested the team dynamics back on to check for scrubbing issues. The road from my house to the nearest petrol station is full of twists, turns, bumps and dips was only really bedding the car in but at 60 there was no issues what so ever which is a relief!

As for the brakes, The feel brilliant! Noisy. To begin with the 1st to junctions i came too but after that they were fine. Alot more sensitive compared to standard but definitely stop the car!

Full tank of Vpower later and then back home, All fluids are fine and no noises to worry about.

Now a waiting game for next Monday when the Clio will have its first outing of the year at Knockhill!

Now i never got any pictures when it was out as it was raining but did get a couple before i left. Inc one with the mrs Cup

IMG_20210525_140354_304.jpg

IMG_20210525_140354_341.jpg

IMG_20210525_140354_349.jpg

20210525_112921_HDR~2.jpg
 
So with not much time to do anything before track time at Knockhill on monday evening. I have fitted a new action camera mount to my rollcage to hopefully get better footage.

20210528_132858.jpg


And also been toying with a different headlight intake design for my track day blanks.

Endless searching of different styles and looks I came accross one on instagram that someone else had made. So i take no credit for this idea but i have to say i do really like the look!

So basically i got an old absolutely knackered headlight off a scrap 1.2. The headlight had been left outside the car upside down and the inside of it was like a swamp. So cleaned it out a bit and got the Dremel out and cut out the headlight and main beam shape.

20210528_141944.jpg


Its a little rough round the edges etc so i sanded it all back and got it as smooth as I can. I then started to gut the back of the headlight and removed everything possible but kept the black insert inside to act as a sort of deflector.

20210528_145227.jpg


With that done I then gave it a coat of paint

20210528_150516_HDR.jpg


Then onto a trial fit. Now unfortuantly the paint reacted like God knows what but I'm not fussed cause I'll probable just wrap it like my other ones.

So heres the result. Im happy with the look of the blank. Im not happy with whole outcome though.

20210528_185527_HDR.jpg
20210528_185537_HDR.jpg


As you can see you can see far too much through the blank and it looks a bit naff.

I do belive that once the filters behind there it will look better but im trying to work out a sort of plastic welded duct to the back so all you see is a black duct directing the air directly to the filter once I refit my 45 degree elbow and have the filter facing towards the passenger headlight.
 
So Mondays track night, This was the 1st Outing for the clio this year and after getting the new brake set up fitted and the car to the standard that i want, buzzing to get out on track was an under statement!

20210531_184842~2.jpg


Eager as anything I ended up showing up nearly an hour and a half early but that gave me plenty of time to get the car all sorted out before the session started.

I have a couple of videos of the car out on track but apparently the files are too big ill need to try find another way of uploading them on here.


The car was performing brilliantly the whole night and was feeling more confident using all the track provided and letting the car run wide onto the kerbs unlike my usual trying to stay centre of the track all the time. The new brake set up made a huge difference, able to brake later and no signs of fade at all and at the end of the session the pads still have loads of life.

The car was gripping brilliantly and was gradually getting more comfortable with higher speeds.

(All until a slight driver error)

Last lap of the night was feeling abit too confident and decided to enter Duffus dip a bit faster than im usually comfortable with and lets say a slight twitchy arse moment when the car let loose at the rear after hitting the kerb and sent me sideways, luckily I managed to correct it with just a slight bit of offroading but like i say driver error 🙈

Anyways on to the next one!
 
Gave the brakes a check over today. Fronts and rear are still like new.

So whilst i was there I decided to do a spot of tidying up.

Painted the inner arches for a bit of protection and since the carriers were off I have given them a coat of inferno orange whilst i was at it. Didn't have red but they do match the front HiSpecs really well.

20210604_132650_HDR.jpg

20210604_132729.jpg

20210604_140521.jpg


Now to patiently wait for next Wednesdays track night 🏁
 
Had the clio back out at knockhill racing circuit on Wednesday night for a reverse direction track night! What a blast knockhill is in reverse!

Once again the car was performing great!

Heres a couple of pictures and videos. More will come soon im sure!

IMG_20210610_121839_859.jpg
FB_IMG_1623343959281.jpg

FB_IMG_1623343967795.jpg


Not much to talk about on the clio recently.

Got my hands on yet another headlight duct as a mate kindly given me this.

USER_SCOPED_TEMP_DATA_MSGR_PHOTO_FOR_UPLOAD_1623528670126_6809572795225879432.jpeg


This one does have working indicators but its not really a sort of look I like, so working on a little something for that at the moment.

So whilst mucking about with the wiring for it I decided to give it a respray. Looks much better now.

20210612_221023.jpg

20210612_221030.jpg
 
Got round to test fitting the new headlight blanks. Just need to get the battery relocated for the ducting to work and be effective.

20210702_215802.jpg

20210702_214336_HDR.jpg


Chuffed with how these have turned out. Be good to get these on on track.
 
So the team dynamics on the car have been looking... Well, terrible to be honest as they were in desperate need of a refurb!

So thats exactly what i got done 👌 just back from the powdercoaters

Fresh coat of white to match the colour scheme in going with.

received_326509065815777.jpeg

received_519645199351828.jpeg


Since mine were getting done I got the girlfriends new wheels done for her car aswell

received_552391299118297.jpeg
received_330294755305312.jpeg


Set of fresh silver turinis for the cup.


Top