
ClioSport.net
-
When you purchase through links on our site, we may earn an affiliate commission. Read more here.
You are using an out of date browser. It may not display this or other websites correctly.
You should upgrade or use an alternative browser.
You should upgrade or use an alternative browser.
My 182ff track car build (so far)
- Thread starter 1985michael182
- Start date
JamesBryan
ClioSport Club Member
I have those trailer wheel straps too. They work a treat.
Keep up the good work. Love the OCD.
I may have missed it or I may have forgotten. What does your gauge show? I saw some flickering numbers which looked to be as high as 140/150??
Looks like it's jumping around a bit, although that could just be a frame rate/LED illusion but i'd say it was a wideband AFR.
1985michael182
ClioSport Club Member
Yea it's a wide wideband Ait/fuel ratio gauge. It ideally wants to be sat at 14.2 at all times. It looks like its flickering because of the cheap camera I have with low refresh rates. No point spending loads on a camera if the car don't perform well, rather spend it on what's needed first.
JamesBryan
ClioSport Club Member
Always get flickering with cameras for LED stuff.
Isn't 14.2 lean as f**k? Especially at WOT.
I'd have thought 12's would have been about right for NA.
Isn't 14.2 lean as f**k? Especially at WOT.
I'd have thought 12's would have been about right for NA.
1985michael182
ClioSport Club Member
Not according to chris down Efi
JamesBryan
ClioSport Club Member
Yeah he knows his stuff, just sounded high.
1985michael182
ClioSport Club Member
He set it at 14.2 and recently I had the bodies to bits to service them and put them back on and couldnt remember if it was 13.2 or 14.2 so he said 14.2 on a hot engine then adjust the idle until I get 14.2 on the gauge. Obviously balance the bodies first reset the TPS again and Bob's your uncle
1985michael182
ClioSport Club Member
With the wideband afr, when you come off the throttle it jumps up to 17.9 or off the scale and then you get a load of pops and backfires so I'm guessing the higher the number the more fuel is present. Obviously with the sender being in the exhaust it is delayed slightly. I would rather it over fuel than run lean anyway.
1985michael182
ClioSport Club Member
This gives a bit of insight
JamesBryan
ClioSport Club Member
Aye I knew about the afr numbers.
At 14ish which is stoich, you wouldn't want to be at that all the time as you wouldn't make power. Ideal for idle though.
Mine is in the 12's at mid to high rpm, also dyno'd at efi.
At 14ish which is stoich, you wouldn't want to be at that all the time as you wouldn't make power. Ideal for idle though.
Mine is in the 12's at mid to high rpm, also dyno'd at efi.
1985michael182
ClioSport Club Member
When I went to see him I started telling him what's on it and he said it doesnt matter, the car will tell him what it needs and I believe him. Great bloke
1985michael182
ClioSport Club Member
I am thinking of going back though as I had the wrong exhaust gasket on, it was too small
JamesBryan
ClioSport Club Member
Have you got a print out of your graph with an afr graph too?
1985michael182
ClioSport Club Member
 I dont think so no
1985michael182
ClioSport Club Member
I'll have a look at the gauge next time on full throttle
JamesBryan
ClioSport Club Member
It did look to be in the 12's from what I could tell with it flickering.
172, Fiesta S1600
At some point I do have another bonnet and a set of bonnet vents to fit, but that's not really at the top of my list. Body work always comes after mechanical soundness.
So whilst it was sat at work and all of my tools within reaching distance I figured I should sort some bits inside that were bugging me. Starting with the dogsh1t battery setup. I hated it!
So I gave the floor a good lean up and fitted the OBP cage that I had bought which was 100% better!
I was waiting for the propper terminal attachment so had to use some panel bond EMC screws until the turned up.
View attachment 1436274
Then I vacuumed and blew the passenger seat off to get and dust and dirt off it and put it back in, loads better.
Next was the drivers and passenger footrests.
Which I would encourage anyone to do as it's so much more comfortable than your heels arguing with the strengthening brace on the stripped out floor.
N.B. dont ever take that strengthening brace out, it's there for a reason. Stops your ankles being trapped/smashed to bits in a head on collision
I should have taken that grip tape off before fitting the drivers side really
I'd be very tempted to check all of those seat rails... That looks like pigeon s**t! Hope the cage is better!
Great work on the rest of it though!
1985michael182
ClioSport Club Member
Yea I've just zoomed in on the video where we go off track and yea it's in the 12's most of the time
1985michael182
ClioSport Club Member
I've had a good look at them m8 and the cage. Cage was installed by a guy who builds spaceframed grass track cars, he made the full cage and installed it. I trust that 100%.I'd be very tempted to check all of those seat rails... That looks like pigeon s**t! Hope the cage is better!
Great work on the rest of it though!
Seat rails I know look kind of crappy, I've had a pry bar between them and given them a heave hook and not moved or made any sounds to make me think otherwise. At some point I will run a belt sander over them and run a nice weld or start again with them, but at the minute it's not a priorty
JamesBryan
ClioSport Club Member
The seat only holds you in place anyway, the harnesses are the bit that restrain you in a crash 
1985michael182
ClioSport Club Member
Right, from this point forward everything got out of control and one thing lead to another, and another, and another etc
I'm going to try and break it down into segments for each part coming up to keep things making sense.
So after cadwell I found second gear to be crunching and the bearings were whining quite alot.
I needed to get the box out and send it to Mark (aka NorthLoop) for a recon.
Whilst it's out and the subframe is off I figured it would be a good opportunity to do the whole polybush ritual, swap to EPAS, and fit some PMS bottom arm strengtheners.
Before I started the strip down I ordered the parts so I was ready to crack on.


So full poly Bush kit courtesy of RTR
Rack link pipe from PMS
Bottom arm plates from PMS
And the obligatory ebay EPAS controller
So now I had some parts to refresh the suspension with and stiffen the chassis up I cracked on with the big strip down.
Obviously the hubs are already removed and currently being bastardised by Mark so that was one less thing to remove.
So I started with the easy bits

Bumper off

Splitter off

For clarity what brackets I made

Then I removed the struts and PMS top mounts with strut brace. The mounts are seized and corroded, the brace is starting to spider under the powder coating and the struts look like they were found on the Titanic!

After arguing with the usual fucked captive nuts holding the subframe on I managed to get it off. I just cut the PAS pipes off rather that fight with them because I knew I was changing to EPAS. Skool boy error on my part though, I forgot to support the near side drive shaft and it popped out of the CV boot and pissed oil everywhere whilst I had the tub under the PAS draining the oil

Steering rack aswell as the subframe was minging so would need some TLC

And that was me for the day, good afternoons works in the Autumn sun. Banged the bumper back on and cleaned my bomb site up

I'm going to try and break it down into segments for each part coming up to keep things making sense.
So after cadwell I found second gear to be crunching and the bearings were whining quite alot.
I needed to get the box out and send it to Mark (aka NorthLoop) for a recon.
Whilst it's out and the subframe is off I figured it would be a good opportunity to do the whole polybush ritual, swap to EPAS, and fit some PMS bottom arm strengtheners.
Before I started the strip down I ordered the parts so I was ready to crack on.
So full poly Bush kit courtesy of RTR
Rack link pipe from PMS
Bottom arm plates from PMS
And the obligatory ebay EPAS controller
So now I had some parts to refresh the suspension with and stiffen the chassis up I cracked on with the big strip down.
Obviously the hubs are already removed and currently being bastardised by Mark so that was one less thing to remove.
So I started with the easy bits
Bumper off
Splitter off
For clarity what brackets I made
Then I removed the struts and PMS top mounts with strut brace. The mounts are seized and corroded, the brace is starting to spider under the powder coating and the struts look like they were found on the Titanic!
After arguing with the usual fucked captive nuts holding the subframe on I managed to get it off. I just cut the PAS pipes off rather that fight with them because I knew I was changing to EPAS. Skool boy error on my part though, I forgot to support the near side drive shaft and it popped out of the CV boot and pissed oil everywhere whilst I had the tub under the PAS draining the oil
Steering rack aswell as the subframe was minging so would need some TLC
And that was me for the day, good afternoons works in the Autumn sun. Banged the bumper back on and cleaned my bomb site up
1985michael182
ClioSport Club Member
I was still waiting on the role centre kit so I took my subframe to work. Steam cleaned it all off and brought it into my lair to see what was what.

The bushes on the ARB were goosed with a heavy amount of rust around the outer bushes also. The bottom arms appeared to be relatively new though.
I took pictures of every nut and bolt so I knew where they went back in when it came to building it back up and I offered up the PMS stiffening kit to see how they sat.


Then I stripped the lot off

Set fire to the bottom arms with my little blow torch to remove the old rubber bushes and the used my airsaw to split the outer casing so I could get them out

Then whilst looking at the subframe I though.. I'm stiffening up the bottom arms, stiffening up the bushes with black race series, the next weak points are the bottom arm subframe mounts. So I cleaned up the metal around the brackets to seam weld them. It didn't work, theres far too much zinc/galv on the steel for the mig to even think about welding to it. So I figured why not mig braze it, it wont react with the galv and it doesnt technically fuse the 2 parts together it just technically glues them. It wont crack because its supple unlike welding either. So, I mig brazed the brackets.

It's not a neat joining method by any means but when we do our welding tests they have to test our mig braze to destruction and it holds 10tons of pulling force and tears the steel rather than the joint.

Next, on the the bottom arms. Plates welded on and cups for the bushes aswell

That was it for the day regarding actual work so I boxed the struts up to send to GAS for refurb, I asked for 550lbs springs and matched dampers. I also asked them to re zinc the bodies aswell
The bushes on the ARB were goosed with a heavy amount of rust around the outer bushes also. The bottom arms appeared to be relatively new though.
I took pictures of every nut and bolt so I knew where they went back in when it came to building it back up and I offered up the PMS stiffening kit to see how they sat.
Then I stripped the lot off
Set fire to the bottom arms with my little blow torch to remove the old rubber bushes and the used my airsaw to split the outer casing so I could get them out
Then whilst looking at the subframe I though.. I'm stiffening up the bottom arms, stiffening up the bushes with black race series, the next weak points are the bottom arm subframe mounts. So I cleaned up the metal around the brackets to seam weld them. It didn't work, theres far too much zinc/galv on the steel for the mig to even think about welding to it. So I figured why not mig braze it, it wont react with the galv and it doesnt technically fuse the 2 parts together it just technically glues them. It wont crack because its supple unlike welding either. So, I mig brazed the brackets.
It's not a neat joining method by any means but when we do our welding tests they have to test our mig braze to destruction and it holds 10tons of pulling force and tears the steel rather than the joint.
Next, on the the bottom arms. Plates welded on and cups for the bushes aswell
That was it for the day regarding actual work so I boxed the struts up to send to GAS for refurb, I asked for 550lbs springs and matched dampers. I also asked them to re zinc the bodies aswell
1985michael182
ClioSport Club Member
The next week at work a nice little surprise came in the post, again I couldnt remember what I had ordered but my hubs were back!

With a very pretty role centre/bump steer kit attached!
Now I know most people would probably brush a bit of paint into the hubs and have done with it but I'm not most people... so even though the instructions say do not remove the bottom ball joint from the hub it is now to be thought of as part of the hub.

I didnt listen... I stuck my panel hammer in the pinch area because it was the only thing I had wide enough, covered the ball joint in heavy weave ducktape and removed the joint very carefully as not to damage the zinc coating or bearing mating surface with my grips.
My reasoning behind this was I couldnt have something as well made and finished as that kit attached to a rusty old hub. So I fully sand blasted the hubs and the flanges


Making sure I masked off the smooth machined areas where the bearing sits, I also wire wheeled the ARB.
I had decided that since I had gone this far I might aswell get the subframe, ARB and bottom arms powder coated and send the hubs,flanges and nuts and bolts to be re zinc plated in gold. So off they went!!

Subframe to York Powder Coating, lead time 2 weeks. They sand blast all part first then coat them.
Zinc bits to Allenchrome at Pocklington industrial estate with a lead time of 6weeks, so plenty of time to get some more work done. They also blast everything and acid dip prior to plateing.
I also sent the PMS top mounts and all the nuts and bolt from the suspension, brakes and anything else I figured I should throw into the mix for re plating aswell
With a very pretty role centre/bump steer kit attached!
Now I know most people would probably brush a bit of paint into the hubs and have done with it but I'm not most people... so even though the instructions say do not remove the bottom ball joint from the hub it is now to be thought of as part of the hub.
I didnt listen... I stuck my panel hammer in the pinch area because it was the only thing I had wide enough, covered the ball joint in heavy weave ducktape and removed the joint very carefully as not to damage the zinc coating or bearing mating surface with my grips.
My reasoning behind this was I couldnt have something as well made and finished as that kit attached to a rusty old hub. So I fully sand blasted the hubs and the flanges
Making sure I masked off the smooth machined areas where the bearing sits, I also wire wheeled the ARB.
I had decided that since I had gone this far I might aswell get the subframe, ARB and bottom arms powder coated and send the hubs,flanges and nuts and bolts to be re zinc plated in gold. So off they went!!
Subframe to York Powder Coating, lead time 2 weeks. They sand blast all part first then coat them.
Zinc bits to Allenchrome at Pocklington industrial estate with a lead time of 6weeks, so plenty of time to get some more work done. They also blast everything and acid dip prior to plateing.
I also sent the PMS top mounts and all the nuts and bolt from the suspension, brakes and anything else I figured I should throw into the mix for re plating aswell
172, Fiesta S1600
The seat only holds you in place anyway, the harnesses are the bit that restrain you in a crash
You wanna see some scary evidence to the contrary?
JamesBryan
ClioSport Club Member
You wanna see some scary evidence to the contrary?
It was a bit of a joke
A side or rear impact could cause the seat to break away, a head on front impact you aren't technically attached to the seat rather the individual mounting points of the harness.
Have seen loads of crashes where the seat has failed.
1985michael182
ClioSport Club Member
Mine wont fail... I wont crash
172, Fiesta S1600
It was a bit of a joke
A side or rear impact could cause the seat to break away, a head on front impact you aren't technically attached to the seat rather the individual mounting points of the harness.
Have seen loads of crashes where the seat has failed.
Mine wont fail... I wont crash
That's what I thought...
1985michael182
ClioSport Club Member
That's what I thought...
Stop, drop, and role !!
1985michael182
ClioSport Club Member
I like the way the steering wheel ends up touching the ground at the end. What car "was" that? Looks like and 80's dashboard
1985michael182
ClioSport Club Member
Ford?
1985michael182
ClioSport Club Member
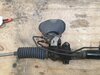
Next job was the steering rack.


As you can see it's pretty minging, so I fitted the blanking plugs and steam cleaned it off soaking it in wheel acid

I sand blasted the rack body and the rusty pipe ports, the aluminium brackets and painted it all up. I cant remember when I did but I had previously fitted new tie rods so I painted them aswell so smarten them up. Fitted the loop pipe and then my new fancy track rod ends.


So the rack was finished, but I needed the column and ecu still so had a quick browse through the for sale section and there was one for sale at £40 within 20 miles so met the guy, talked clios and then headed home with it all

Than was another job done ready to fit
As you can see it's pretty minging, so I fitted the blanking plugs and steam cleaned it off soaking it in wheel acid
I sand blasted the rack body and the rusty pipe ports, the aluminium brackets and painted it all up. I cant remember when I did but I had previously fitted new tie rods so I painted them aswell so smarten them up. Fitted the loop pipe and then my new fancy track rod ends.
So the rack was finished, but I needed the column and ecu still so had a quick browse through the for sale section and there was one for sale at £40 within 20 miles so met the guy, talked clios and then headed home with it all
Than was another job done ready to fit
Attachments
1985michael182
ClioSport Club Member
After this I lifted the bonnet on the car to see what I needed to do next to get the gearbox out and noticed this!!


I mean, its brand new and only done 1 trackday!! Costs just under £400 and its cracked! I was pretty pissed off to be fair so emailed Nick with pictures. He told me to send it back and he will see what he can do. I wouldnt mind if it was a cheap Ebay special but I paid extra for the proper job
I mean, its brand new and only done 1 trackday!! Costs just under £400 and its cracked! I was pretty pissed off to be fair so emailed Nick with pictures. He told me to send it back and he will see what he can do. I wouldnt mind if it was a cheap Ebay special but I paid extra for the proper job
1985michael182
ClioSport Club Member
I managed to source another 182 gearbox that supposedly was in good working order which wasnt far from Mark, so I bought it and had it delivered to him for the refurb.
We had spoken a few times about Diff's and I had said I'll wait until I have had some use out of the car but Mark had other ideas and persuaded me to just do it all in one go.
We ended up building a gripper diff gearbox
So now he was on with building it I figured I better get the other one out to take for part payment.
I got the boys round to give me a hand and we soon had the engine and box out


I sat the engine in the shed looking at how to run the belt without the PAS pump

And then noticed it had a lightened flywheel fitted already fitted!


So that was a bonus I didnt know about.
The more I looked at how grubby the engine was the more I wanted to mint it up. This will come later though.
Also on a side note my front struts had come back refurbished

We had spoken a few times about Diff's and I had said I'll wait until I have had some use out of the car but Mark had other ideas and persuaded me to just do it all in one go.
We ended up building a gripper diff gearbox
So now he was on with building it I figured I better get the other one out to take for part payment.
I got the boys round to give me a hand and we soon had the engine and box out
I sat the engine in the shed looking at how to run the belt without the PAS pump
And then noticed it had a lightened flywheel fitted already fitted!
So that was a bonus I didnt know about.
The more I looked at how grubby the engine was the more I wanted to mint it up. This will come later though.
Also on a side note my front struts had come back refurbished
1985michael182
ClioSport Club Member
Thanks Dwj
1985michael182
ClioSport Club Member
Djw Dave
1985michael182
ClioSport Club Member
Yes that's the one
1985michael182
ClioSport Club Member
Eventually @NorthloopCup stopped dragging his heels and got my gearbox rebuilt with gripper diff fitted. Set up for trackdays so I dont have to service it so much. He instructed me to buy some Redline MT 90 75w90 GL4 gearbox oil to fill it with.
So I set off to collect it on a sunny sunday morning, taking my old gearbox down to swap as part payment also.
The lazy bugger didnt even clean the new one for me
So when I got it back home I put a drive shaft in on the wet side to keep water out and steam cleaned it off.


I found that the end cap was porous so ordered a new one. Then put it to a side for the minute.
So I set off to collect it on a sunny sunday morning, taking my old gearbox down to swap as part payment also.
The lazy bugger didnt even clean the new one for me
So when I got it back home I put a drive shaft in on the wet side to keep water out and steam cleaned it off.
I found that the end cap was porous so ordered a new one. Then put it to a side for the minute.
1985michael182
ClioSport Club Member
So its come to my attention via a WhatsApp message that I'm not portraying the ClioSport gearbox building God very well with my tongue in cheek humorous remarks about him, so I must let you all know the truth about him...
Hes bloody useless !!!
!!!
Anyone who knows Mark knows his work is second to none and he doesnt mess you around he gets cracked on and gives a fair price.
The following weekend I had a good look in the engine bay, checking wires and connectors to make sure they were all good.
I found that the servo was massively corroded and had no idea how the master cylinder was still sealing to it. Soooooo out it came.


Now that needed changing for a better condition one, you cant buy new ones anymore so I had to source one from a breaker in much better condition. Think it was £35.
It came the next day!
So I stripped it down masked and blocked up the holes and sand blasted it.

Then I primed it with etch followed buy a build primer and finished in matt black.


Next I moved on to removing the ABS crap in favour of using a cup Master cylinder with 4 ports.
So I removed the ABS unit and split the ECU off it, to keep, as you need this for your speedo to work on a ABS speed driven speedo.

ECU on the right
I removed all of the existing brake pipes all the way to the back axle.
Hes bloody useless
!!!Anyone who knows Mark knows his work is second to none and he doesnt mess you around he gets cracked on and gives a fair price.
The following weekend I had a good look in the engine bay, checking wires and connectors to make sure they were all good.
I found that the servo was massively corroded and had no idea how the master cylinder was still sealing to it. Soooooo out it came.
Now that needed changing for a better condition one, you cant buy new ones anymore so I had to source one from a breaker in much better condition. Think it was £35.
It came the next day!
So I stripped it down masked and blocked up the holes and sand blasted it.
Then I primed it with etch followed buy a build primer and finished in matt black.
Next I moved on to removing the ABS crap in favour of using a cup Master cylinder with 4 ports.
So I removed the ABS unit and split the ECU off it, to keep, as you need this for your speedo to work on a ABS speed driven speedo.
ECU on the right
I removed all of the existing brake pipes all the way to the back axle.