Tomotek
ClioSport Club Member
Well its certainly been a busy few months!.. finding the time to update this has been none existent really!..
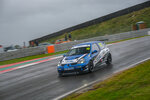
After our last race of the 2019 season we sat down and discussed our plan for 2020.. We decided we would stick with class C again in the MSV Trackday Championship, we now know how it works and have good data on the setup and tyres for each round. We also discussed looking to upgrade some bits on the car in hopes to make the car quicker and to use the tyres better.
So we decided on the main winter upgrades being focused on Aero, easier setup, and car balance.
- Rear Wing
- Front Splitter
- Rear ARB
- Adjustable Camber top mounts / strut brace
- Brake Ducting
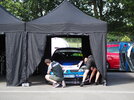
We wanted to get everything ready for our pre season test at Donington which was on the 2nd of March
I'll do some posts on the updates as and when I can. Starting with:
REAR WING:
So we started on the aero and specifically the rear wing (I planned on adding a big front splitter to hep with front grip but knew we'd need a rear wing to balance it)
To keep within the MSA regulations J5.2.7 it needs to be, no wider than the maximum width of the car, below the maximum height of the roof, and not extend further than 100mm rearwards of the rear bumper.
I started by working out the area the wing could go, so used a flat bar and an inclinometer and positioned it to work out the max roof height.. Quick sketch of the airflow that you would get from the cup spoiler, showing the flick up at the rear and the area of turbulence.

Instantly it didn't look great for fitting a wing. the air pitched up to much at the rear, meaning that the ideal wing position would be too high and not meet the regulations.. You want nice fast air traveling under the wing, which wouldn't be achievable... We could move the wing really far back into more clean air but I didn't want to increase the moment arm working on the wing, as I believed this would provide too much rearward balance.

I then remembered the std rear boot spoilers don't have as much of a kick up at the back so sourced one in the same colour to fit.. This would allow the wing to be low enough and still get nice airflow to the leading edge.

£15 later and 1.2kg lighter I had a std spoiler fitted. You can see how much more it follows the contours of the roof.

For the wing element there was no point me spending a fortune to make a one off version, so I sourced a BYC 1400x175 wing element, of which I was going to make my own mount brackets to position the wing where I wanted. On delivery of the element i began the technical exercise of hanging it from the garage roof rafters roughly in the position of where I wanted it so I could start to mock up the wing pylons, connecting it to the car.

With the rough position worked out and a basic template made I turned to CAD to refine the design.
I wanted to keep the bracket weight down and have a sleek simple design.
I incorporated 5 adjustment holes which angled the wing up to 14degrees from nominal airflow, all within a semi swan neck mounting strategy.

Before I committed to getting the parts water jet cut I made some cardboard templates to check all the dimensions.

Once I was happy I ordered all the components and got it fitted up!
Really happy with the outcome, looks good and works well.


After our last race of the 2019 season we sat down and discussed our plan for 2020.. We decided we would stick with class C again in the MSV Trackday Championship, we now know how it works and have good data on the setup and tyres for each round. We also discussed looking to upgrade some bits on the car in hopes to make the car quicker and to use the tyres better.
So we decided on the main winter upgrades being focused on Aero, easier setup, and car balance.
- Rear Wing
- Front Splitter
- Rear ARB
- Adjustable Camber top mounts / strut brace
- Brake Ducting
We wanted to get everything ready for our pre season test at Donington which was on the 2nd of March
I'll do some posts on the updates as and when I can. Starting with:
REAR WING:
So we started on the aero and specifically the rear wing (I planned on adding a big front splitter to hep with front grip but knew we'd need a rear wing to balance it)
To keep within the MSA regulations J5.2.7 it needs to be, no wider than the maximum width of the car, below the maximum height of the roof, and not extend further than 100mm rearwards of the rear bumper.
I started by working out the area the wing could go, so used a flat bar and an inclinometer and positioned it to work out the max roof height.. Quick sketch of the airflow that you would get from the cup spoiler, showing the flick up at the rear and the area of turbulence.
Instantly it didn't look great for fitting a wing. the air pitched up to much at the rear, meaning that the ideal wing position would be too high and not meet the regulations.. You want nice fast air traveling under the wing, which wouldn't be achievable... We could move the wing really far back into more clean air but I didn't want to increase the moment arm working on the wing, as I believed this would provide too much rearward balance.
I then remembered the std rear boot spoilers don't have as much of a kick up at the back so sourced one in the same colour to fit.. This would allow the wing to be low enough and still get nice airflow to the leading edge.
£15 later and 1.2kg lighter I had a std spoiler fitted. You can see how much more it follows the contours of the roof.
For the wing element there was no point me spending a fortune to make a one off version, so I sourced a BYC 1400x175 wing element, of which I was going to make my own mount brackets to position the wing where I wanted. On delivery of the element i began the technical exercise of hanging it from the garage roof rafters roughly in the position of where I wanted it so I could start to mock up the wing pylons, connecting it to the car.
With the rough position worked out and a basic template made I turned to CAD to refine the design.
I wanted to keep the bracket weight down and have a sleek simple design.
I incorporated 5 adjustment holes which angled the wing up to 14degrees from nominal airflow, all within a semi swan neck mounting strategy.
Before I committed to getting the parts water jet cut I made some cardboard templates to check all the dimensions.
Once I was happy I ordered all the components and got it fitted up!
Really happy with the outcome, looks good and works well.


