ClioSport.net

This is a sample guest message. Register a free account today to become a member! Once signed in, you'll be able to participate on this site by adding your own topics and posts, as well as connect with other members through your own private inbox!

  • When you purchase through links on our site, we may earn an affiliate commission. Read more here.

Project #56; Clio Trophy

I've been meaning to put this up for a few weeks now but just not had time. As many of you have read previously the passenger side front damper was knocking again, after only 4k/6 Months. So they were both sent back to BG Motorsport. Upon stripping and Inspection the gas seal had crack, causing the chamber to de-pressurise. BG Motorsport offered to replace the seals on BOTH dampers FOC and carry out dyno test on both of them to make sure they were correctly balanced to match each other. While they were off the car I made good use of the opportunity and decided to give them a proper clear, OCD starts here.

There's a heap of pictures here detailing what I did. My cameras been playing up, so I've just taking them on my iPhone. :o

First up the suspension hats cleaned with G101 1:4
IMG_0810.webp


Much better:
IMG_0811.webp


Rinsed with warm soapy water and left to dry:
IMG_0812.webp

IMG_0813.webp


As part of my protection phase, I'd opted for Bilt Hamber Hyrdate 80. This stuff is properly fantastic and really does break down rust and give a protective layer on any item. Only the thinest amount is needed to coat the surface, this is all I used for the EVERYTHING.
IMG_0815.webp


Coat one:
IMG_0816.webp

IMG_0820.webp


Left to dry for 15minutes:

IMG_0822.webp

IMG_0824.webp


Coat 2:
IMG_0825.webp

IMG_0829.webp


Left to dry for 24hours:
IMG_0830.webp

IMG_0831.webp

IMG_0832.webp


Cleaning was simply not enough, I wanted to try and protect them further and get them to match the lower sections, So Hammerite Smooth Silver to the rescue.

IMG_0834.webp


Coat 1:
IMG_0835.webp

IMG_0836.webp


Coat 2:
IMG_0837.webp

IMG_0838.webp


Left to dry for 24Hours:
IMG_0856.webp

IMG_0857.webp

IMG_0858.webp

IMG_0860.webp

IMG_0861.webp


These were they coated in 3 Layers of FK1000p
IMG_0862.webp


Next up is the rubbers that protect the piston road, this were looking a bit dirty so used G101 to clean them up then washed them with warm soapy water.
Before:
IMG_0839.webp

IMG_0840.webp

IMG_0841.webp


Done:
IMG_0845.webp


Other little bits cleaned with G101 (not the bearing):
IMG_0843.webp


Next up were the standard Eibach Trophy springs, These were cleaned with G101, De-rusted with a wire brush and then wiped down.

IMG_0849.webp

IMG_0850.webp


Bilt Hamber was used again to treat the rusty areas;

IMG_0852.webp


Left to dry for 24Hours, then a coat of Hammerite Smooth Yellow was applied to the rust effected areas.
IMG_0864.webp


Left for 24Hours and here were the results:
IMG_0865.webp

IMG_0866.webp


Dampers had arrived back with me looking worse for wear;
IMG_0887.webp

IMG_0888.webp


New gas seals:
IMG_0889.webp


My original SACHS stickers were looking worse for wear and due to the plans I had with protecting the dampers, they had to come off.

IMG_0891.webp

IMG_0893.webp

IMG_0895.webp

IMG_0898.webp


I managed to save one:
IMG_0897.webp


Piston rods and external chambers wrapped up to protect from the next stages;
IMG_0900.webp


Dampers were then cleaned with G101 and de-rusted with a wire brush. They were then coated twice in Bilt Hamber.
IMG_0902.webp

IMG_0903.webp

IMG_0904.webp

IMG_0905.webp

IMG_0906.webp


Left to dry for 24hours:
IMG_0907.webp

IMG_0908.webp


I then set up my spray booth to get these looking fresh again:
IMG_0909.webp


Both dampers were spray with Hammerite Smooth Silver, I didn't want to use a brush to paint these as I didn't want brush strokes.
IMG_0910.webp

IMG_0911.webp

IMG_0912.webp


All done and unwrapped:
IMG_0916.webp

IMG_0918.webp

IMG_0920.webp


I then used FK1000p to seal them, 2 coats applied.
IMG_0923.webp

IMG_0924.webp


Time to get them built up again:
IMG_0927.webp

IMG_0929.webp

IMG_0931.webp

IMG_0932.webp


Arches were cleaned with G101, the protected with FK1000p and Dodo Juice Red Mist Tropical to aid beading (No good pictures of this stage)

All fitted:
IMG_0933.webp

IMG_0934.webp

IMG_0942.webp

IMG_0948.webp


All back together and a short drive to make sure everything is OK.
IMG_0951.webp


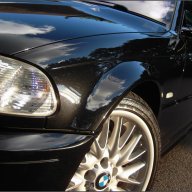
I also picked up a lambda sensor and lambda cover in anodised red, as mine has been playing up due to having a de-cat. So I also got that fitted today as well.

IMG_1003.webp
 
Great work there, those top hats were slippy as fook once you'd smoothed them down, painted and FK'd them!!

Does make me want to get under mine and start cleaning things up!
 
Ordered a few bits in the week to keep me busy over the bank holiday weekend.

  • Carbon Canister
  • Rear Number Plate Light
  • 2x Lemforder Ball Joints
  • Upper Gearbox Mount
  • Brembo HC's

I've also ordered a few other bits that havn't arrived as of yet :(

  • Ferodo DS2500 Pads (565H version) - Fronts
  • Inner and Outer Powerflex ARB bushes
  • Custom engraved Trophy tax disc holder :o
  • Replacement 'Trophy 056/500' Sticker for the bootlid

Had a half day at work yesterday and as the weather didn't look promising I decided to get cracking and get stuff fitted ASAP.

Goodies to go on:
IMG_1059.webp


First job, Carbon Canister replacement. Mine had been ticking since having the top-end rebuilt. I knew it was this as Ed (TheKid) had the same issue. When I took the old one out, you can hear the insides moving around and it was actually leaking some liquid.

New vs Old:
IMG_1060.webp


While the headlight was out thought I'd clean that corner up a little bit, Also found another piece of my AUX belt here :o
Before:
IMG_1061.webp


After:
IMG_1064.webp


Changed the numberplate light holder too as the original was discoloured. I changed this on my 1.2 as well, really freshened the car up.

Before:
IMG_1065.webp


New piece (with bulb!):
IMG_1066.webp


Bulbs changed over, New vs Old:
IMG_1067.webp


Cleaned up and in:
IMG_1069.webp


Next up I got Jon (jonff) to give me a hand swapping my upper gearbox mount as I had a feeling this was shot, Turns out its exploded at some point:
IMG_1070.webp

IMG_1071.webp


Got the ball joints replaced as well, I thought they might resolve a knocking at low speeds/over bumps but turns out they've made no difference. At least I know they're done and wont need doing for a long time.

Old ones:
IMG_1073.webp


Hopefully the other bits will be hear next week so I can get them fitted next weekend.
 
How much was the new rear light?! I may have to invest ;).

Good shed project btw!! Out of interest, are you near to Buxton? I hear that is close to Manchester.

£7.21 + VAT + Postage from Tom. Surprisingly cheap for Renault.

About half an hours drive from there, not too far out of the way though, howcome?
 
Looking back, I said I'd be looking to do a few things. So updated that list below:

Right so thought I'd make a list of what I plan to do to the car over the next year or so.

  • RS192 Exhuast - Done
  • Polybush ARB - Done
  • Polybush Wishbones
  • Refurbish the wheels and include speedline decals to them
  • 3 or 4 point harnesses
  • Smaller steering wheel
  • Michelin PS3's all round
  • 1*2 Xenons - Been Done and Removed
  • Whiteline Rear ARB
  • Mark Fish or Eibach Springs
  • Rear SACH dampers or Koni's from Mark Fish
  • Brembo HC's and DS2500's + OEM Rear Setup Done
  • PAS Pump replaced Done
  • Major service (cambelt, aux, dephaser) Done

I'll do the bits as they need doing etc. First things on my list are the exhaust (which i've bought) and the polybush's which I'll get later in the month.
 
If you'd spend less time taking photos and more time working we may have got those ball joints before it had gone dark. Only kidding :P


Just skimmed through your thread, never realised how much time and effort you'd spent cleaning the dampers and top hats up. :O
 
Doing a good job with this. Dedication painting the suspension parts up :)

Cheers!

If you'd spend less time taking photos and more time working we may have got those ball joints before it had gone dark. Only kidding :P


Just skimmed through your thread, never realised how much time and effort you'd spent cleaning the dampers and top hats up. :O

Aha, I didn't take any pictures while you were actually round!

Aye, Spent every evening for 7 days doing them :o

We need a #56 and #177 photo meet after I've cleaned it ;)

Mine needs a clean as well, hoping the weather stays decent today so I can do it.
 
My toxic fume warning light came back on Friday night as well :(

Funny enough, thats after I had changed the carbon canister. Could be a coincidence but since its been off since just before I changed the lambda sensor I cant see what else it would be. I'm going to get a basic code reader to see what the actual error is.

On another note, I've been sick of my parcel shelf rattling about for ages so I bought some double sided foam tape. I ideally only wanted single sided and 15mm wide, but I could only find double sided 12mm.

This is what I bought from Maplin:
IMG_1074.webp


Cleaned the runner with G101 and put two stripes down either side to create a damper in effect.

IMG_1075.webp


Still quite thin so the parcel shelf sits fine, Should be easy to remove this stuff as well with a bit of heat when the time comes.

IMG_1076.webp


So far it works a treat. Now to try sort out the rest of the rattles ;)
 
Picking up from last time, the Toxic Gas light has gone out again without the aid of me doing anything. I've also put more tape on the parcel shelf to try stop it tapping, so I'll see how that also goes.

My Trophy tax disc holder came through last week as well so got that sorted out as I've not had my tax disc in the window far a month.

IMG_1089.webp

IMG_1088.webp


Finally my Brembo HC's and DS2500's (565H version) came though so I was able to get those fitted.
IMG_1102.webp

IMG_1104.webp

IMG_1106.webp


Euro car parts had discount on wipers so I thought I'd get some new aero ones as I had them on my 1.2 and lasted well over 2 years. The standard bosch ones I bought last year just don't cut it. Also got 100 cable ties as you can never have too many of them!

IMG_1109.webp


Lastly, I had two new Michelin Piliot Sport 3's fitted yesterday on the rear.

Still waiting on my ARB bushes to come though. Tax and MOT are due at the end of next month!
 
Not really bedded them in properly yet. However they do feel better than the prev pads and discs that didn't have any branding on them at all.

Aye, I did notice that it's a but pink lol.
 
I thought it was just the picture, even better if it's pink in person lol, and yeah I'd imagine they need a bit of bedding in tbh.

Out of curiosity how much did you pay for the PS3's fitted and did you buy them and take them to someone to fit or get them to order them in? I need to buy some fronts on pay day and I'm stuck between PS3's and PE2's. (I know yours are 16's but at least it will give me an idea)

Just text me if you don't want to post it.
 
Back
Top